October 28: Research & Planning
Table of Contents
NAME: Emogene Cataldo & Julianna Visco
DATE AND TIME: 10/28/14 12:30pm
LOCATION: Chandler Lab
SUBJECT: Discussion, plans for annotation experiments
PRELIMINARY SCHEDULE
5 Weeks until the end of classes. (Last class = Dec. 5)
Week 1: Oct. 27-Nov. 2
Priorities:
- Finish drafting experiment protocol, due 10/31
- Textual research
- Finish field notes
- Begin sourcing materials
- Set dates for working days in NJ or in lab
Julianna
- Add pics from today, reorganize pictures in Wiki
- Kiln contacts
- find Piemontese, start searching
Emogene
- Add video to field notes and author
- kiln contacts
- Hugh Platt
- Start to look at French transcriptions
Week 2: Nov. 3-9 (No Class Nov. 3, 4)
Priorities:
- Source all materials
- Begin preliminary work for casting
- Wax experiments in lab on Friday?
- Calcinate oyster shells
Notes:
Check to see if we will have enough box molds?
Sand: Home Depot
Wine: Trader Joe’s
Elm Root: Amazon
Tripoli — do we need this?
Pattern to mold: large coin?
Tammy cloth: restaurant supply store?
Eggs
Week 3: Nov. 10-16
Priorities:
- Make sand molds (in NJ or lab)
- Finish wax experiments (in lab)
Butter
Turpentine
Resin?
Week 4: Nov. 17-23
Priorities:
- Casting (in plaster or in tin with creme brulee torch, pot, in NJ)
Week 5: Nov. 24-30
THANKSGIVING (Emogene is out of town Wed-Sun)
Writing up lab notes, writing up annotations
Week 6: Dec. 1-5
Finish annotations
NOTES
Action Steps.
Julianna
- Add pics from today, refigure pictures
- Kiln contacts
- find Piemontese, start searching
Emogene
- Add video
- Add author to field notes
- kiln contacts
- Hugh Platt
- Start to get French together
Both
- Keep a look out for possible patterns for molding
- Continue to source materials
- Quantities
- Buy: sand, wine, elm root
- Reserve box frames
- potential date for mixing (a whole day at J’s house?)
Phase 1
Gathering ingredients
Sand??? Type and quantity? See 68 and see what is possible to get.
- “The sand near you is fine” says the manuscript
- NJ?
- or get some from other places
- home depot — mix our own sand
- http://www.backyardmetalcasting.com/greensand.html
box molds
what to mold (find a pattern)
Calcinate oyster shells (Donna will get the oyster shells and kiln contact?)
Find kiln to calcinate shells
- Donna’s contact
- Julie’s contact
- Amsterdam studio,
- Julia Walther
A pattern to mold (smaller than tylenol bottle)
Research
- Experimentation w/sand vs. experimentation w/ additives
- Too much to do both. So, focus on binders w/neutral (local) sand.
- sand exploration is opportunity for spring semester participants
- Piemontese - clay, sand, binders, tallow, wax
- Hugh Platt - same list
- Original French - Em. will do that
- Reference dictionaries session (schedule)
November 3 Manuscript Annotations: Preparing Infusions
location: Springfield, NJactivities: ingredient procurement
Elm root powder is food/medicinal grade.
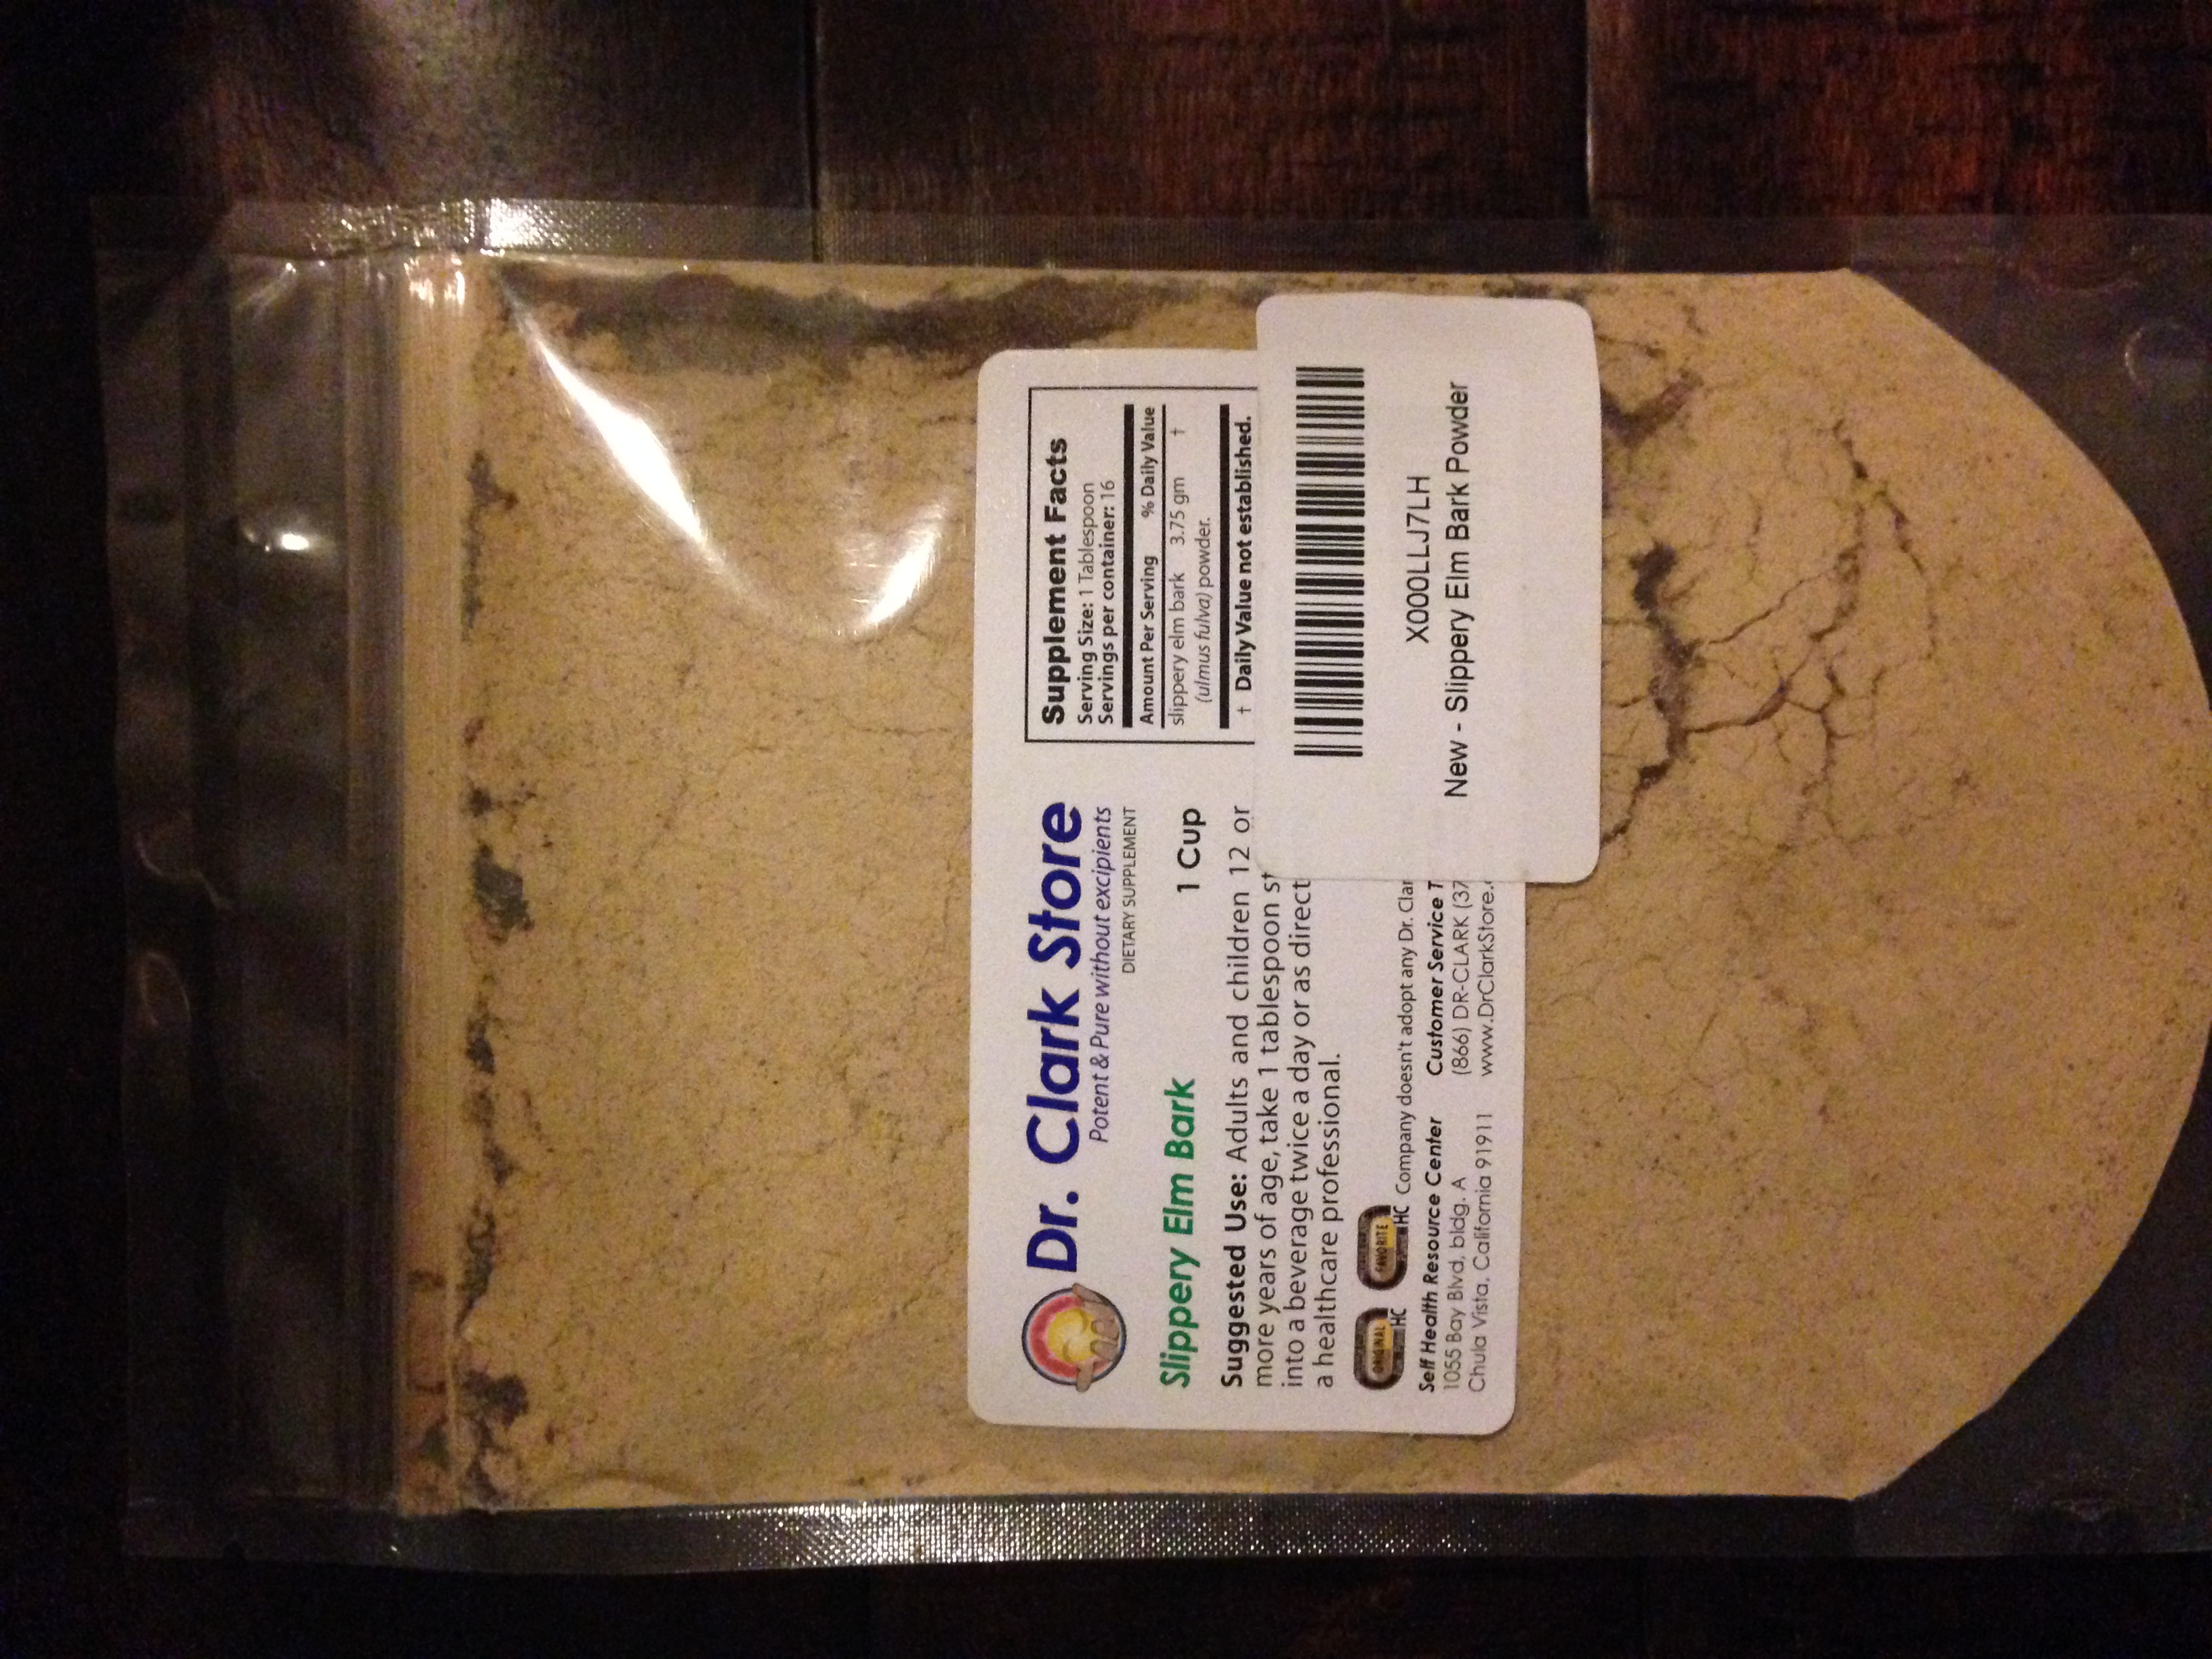
Regarding slippery elm bark as powder as substitute for actual elm root see info below from Joel Klein.
"In short, while it would be nice to get our hands on an actual elm root, as that is what is described in the manuscript, the inner bark will probably work in a pinch as it contains the important chemicals that give it its effects (e.g. in medicine and presumably our magistry).
These chemicals are primarily certain types of tannins - i.e. astringent polyphenolic (that means it has multiple benzene rings) compounds that chemically bind to and also precipitate proteins as well as amino acids and certain alkaloids.
In trees, tannins are found primarily in leaf, bud, seed, root, and stem tissues. In a full-grown tree, they are also found in the inner bark, and more particularly, usually between the cortex and epidermis. Elm inner bark also contains certain mucilaginous carbohydrates that have been used in medicine. It does not appear that elm root and elm inner bark contain different chemicals, but the roots might have a higher concentration of tannins (although I haven't been able to find information on this point).
The author of our manuscript calls for elm root to be boiled in wine in order to create a magistry. Tannins are highly soluble in mixtures of water and ethanol and boiling the bark will undoubtedly leave the water full of the wood tannins. As you all are probably aware, the tannins in wine are not only from the grapes, but are also leeched from the oak barrels in which they are stored. "
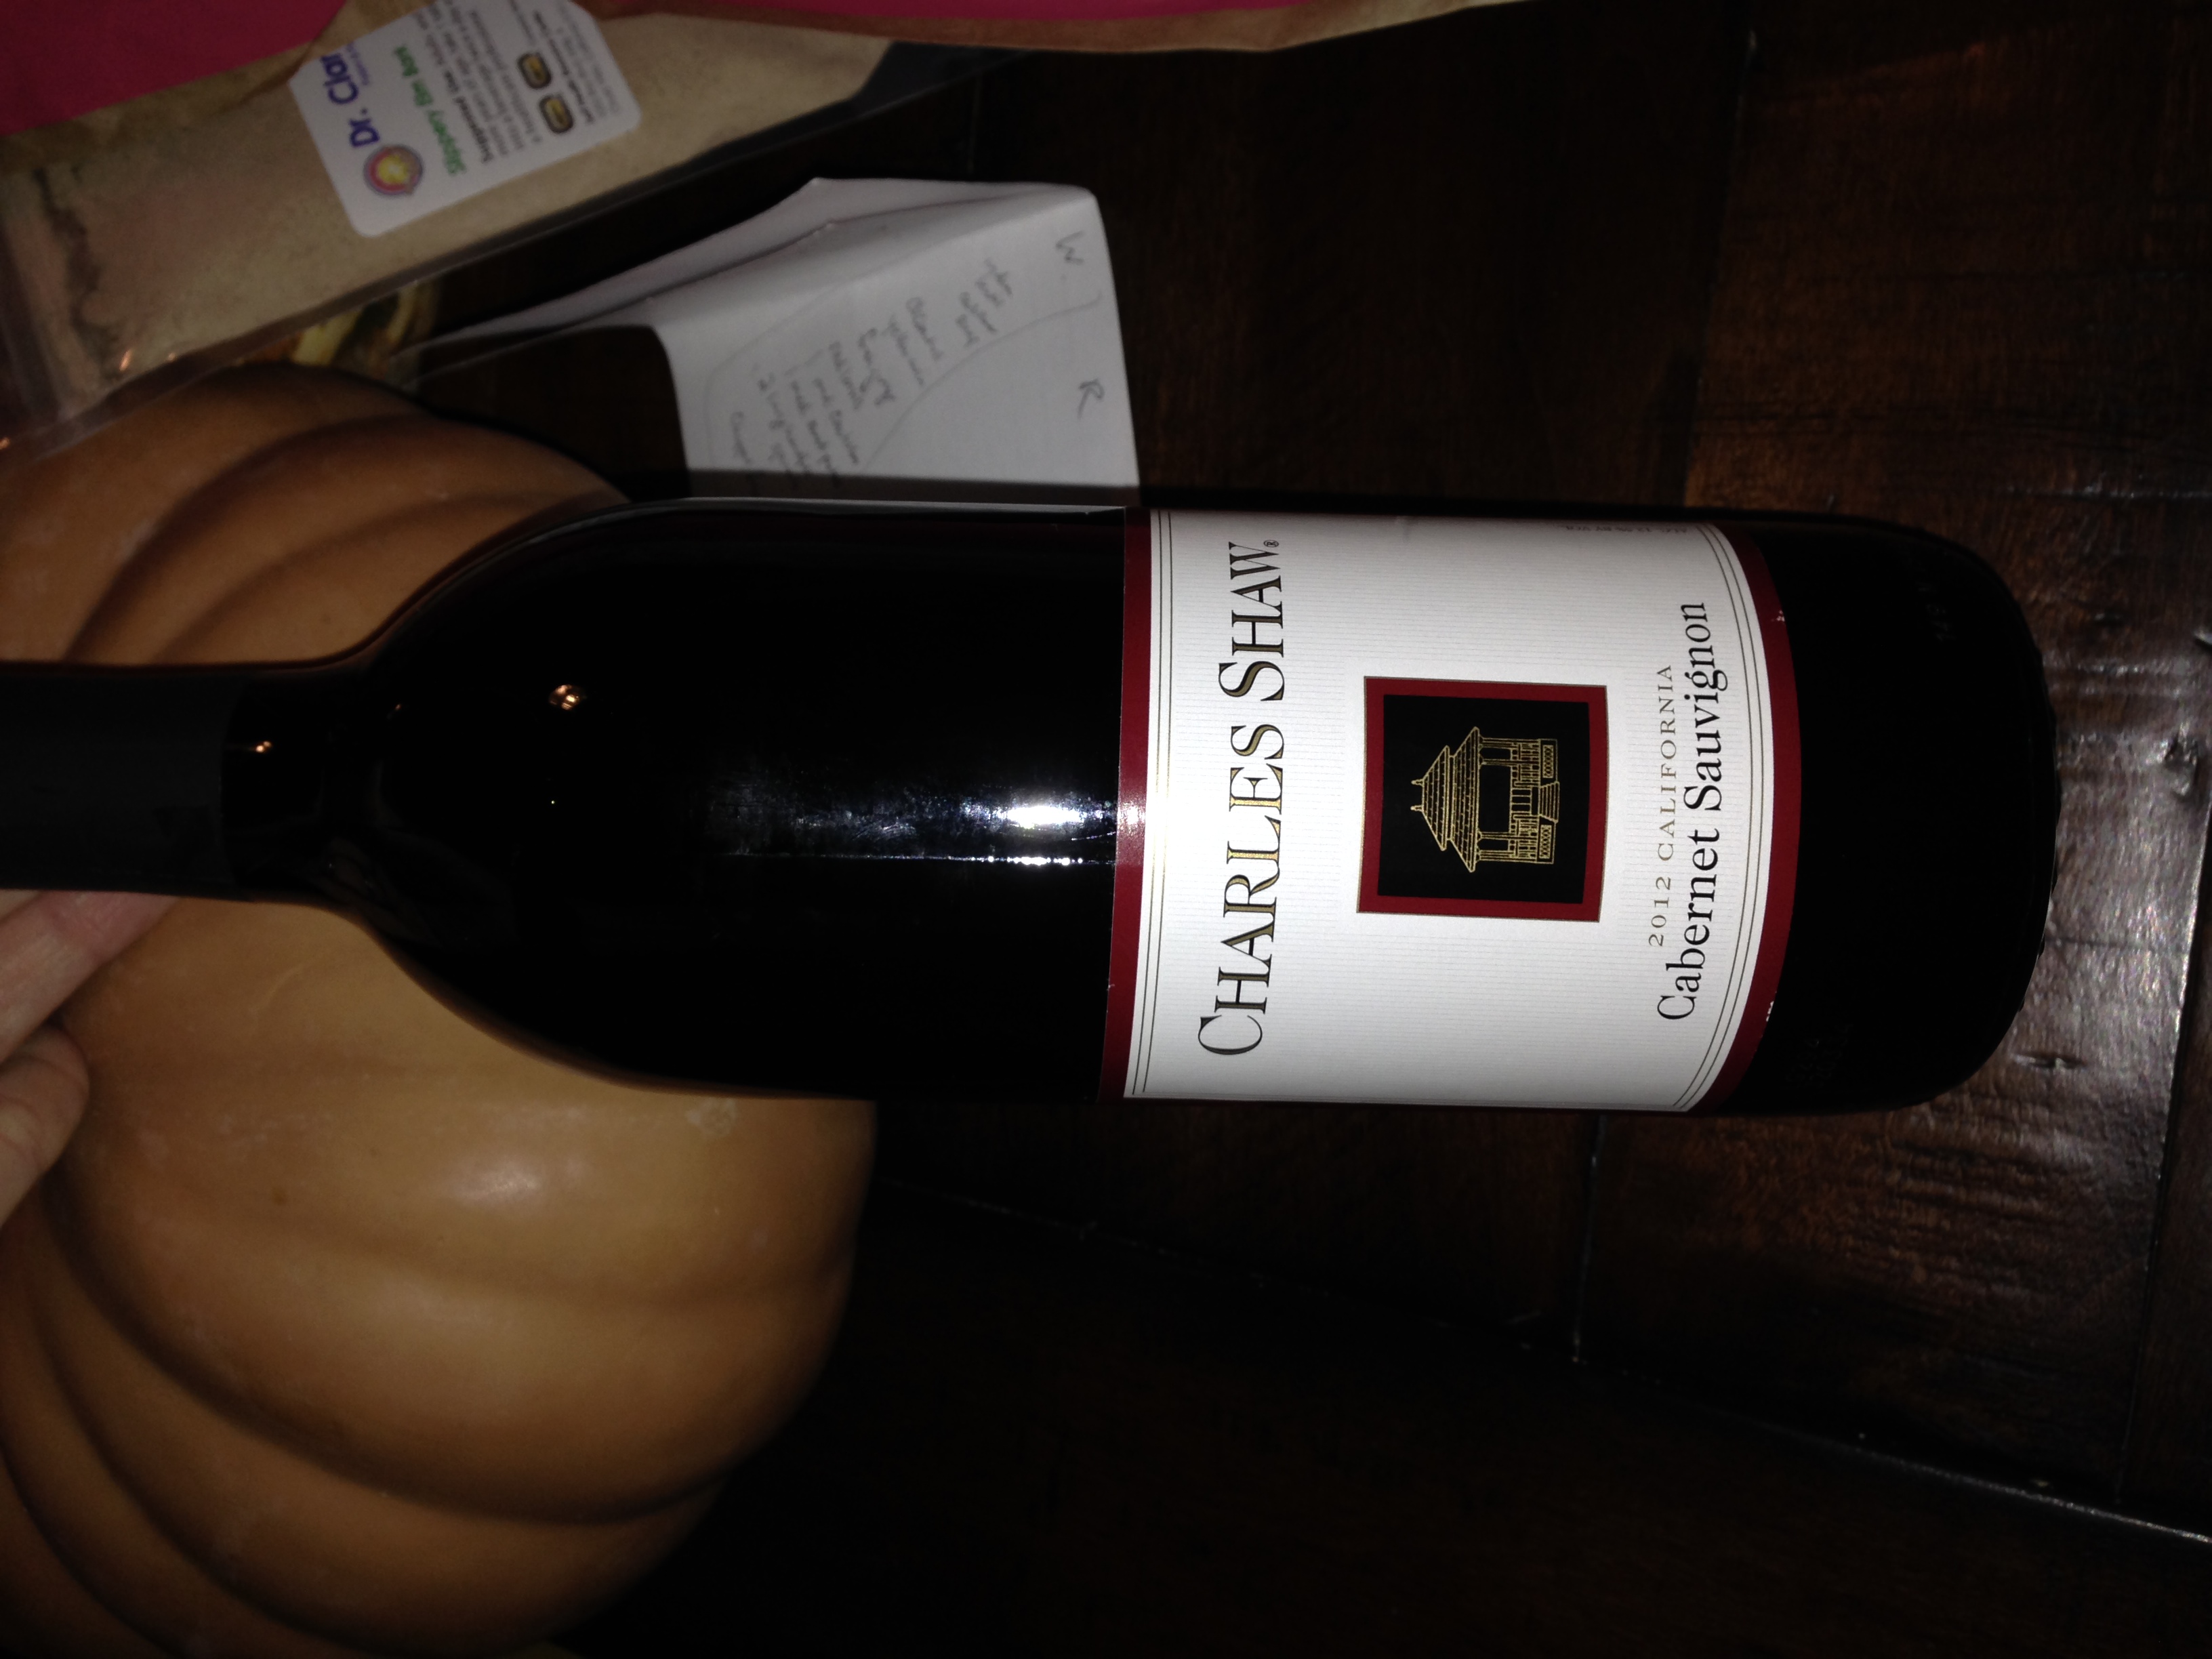
Wine selected by following criteria:
-grape (Cabernet Sauvignon is varietal grown in Southern France - although these particular grapes are from California)
-price ($2.99 bottle)
-quality (manuscript author mentions vinegar as possible substitute)
-availability (for repeat tests if necessary; Trader Joe's staple )
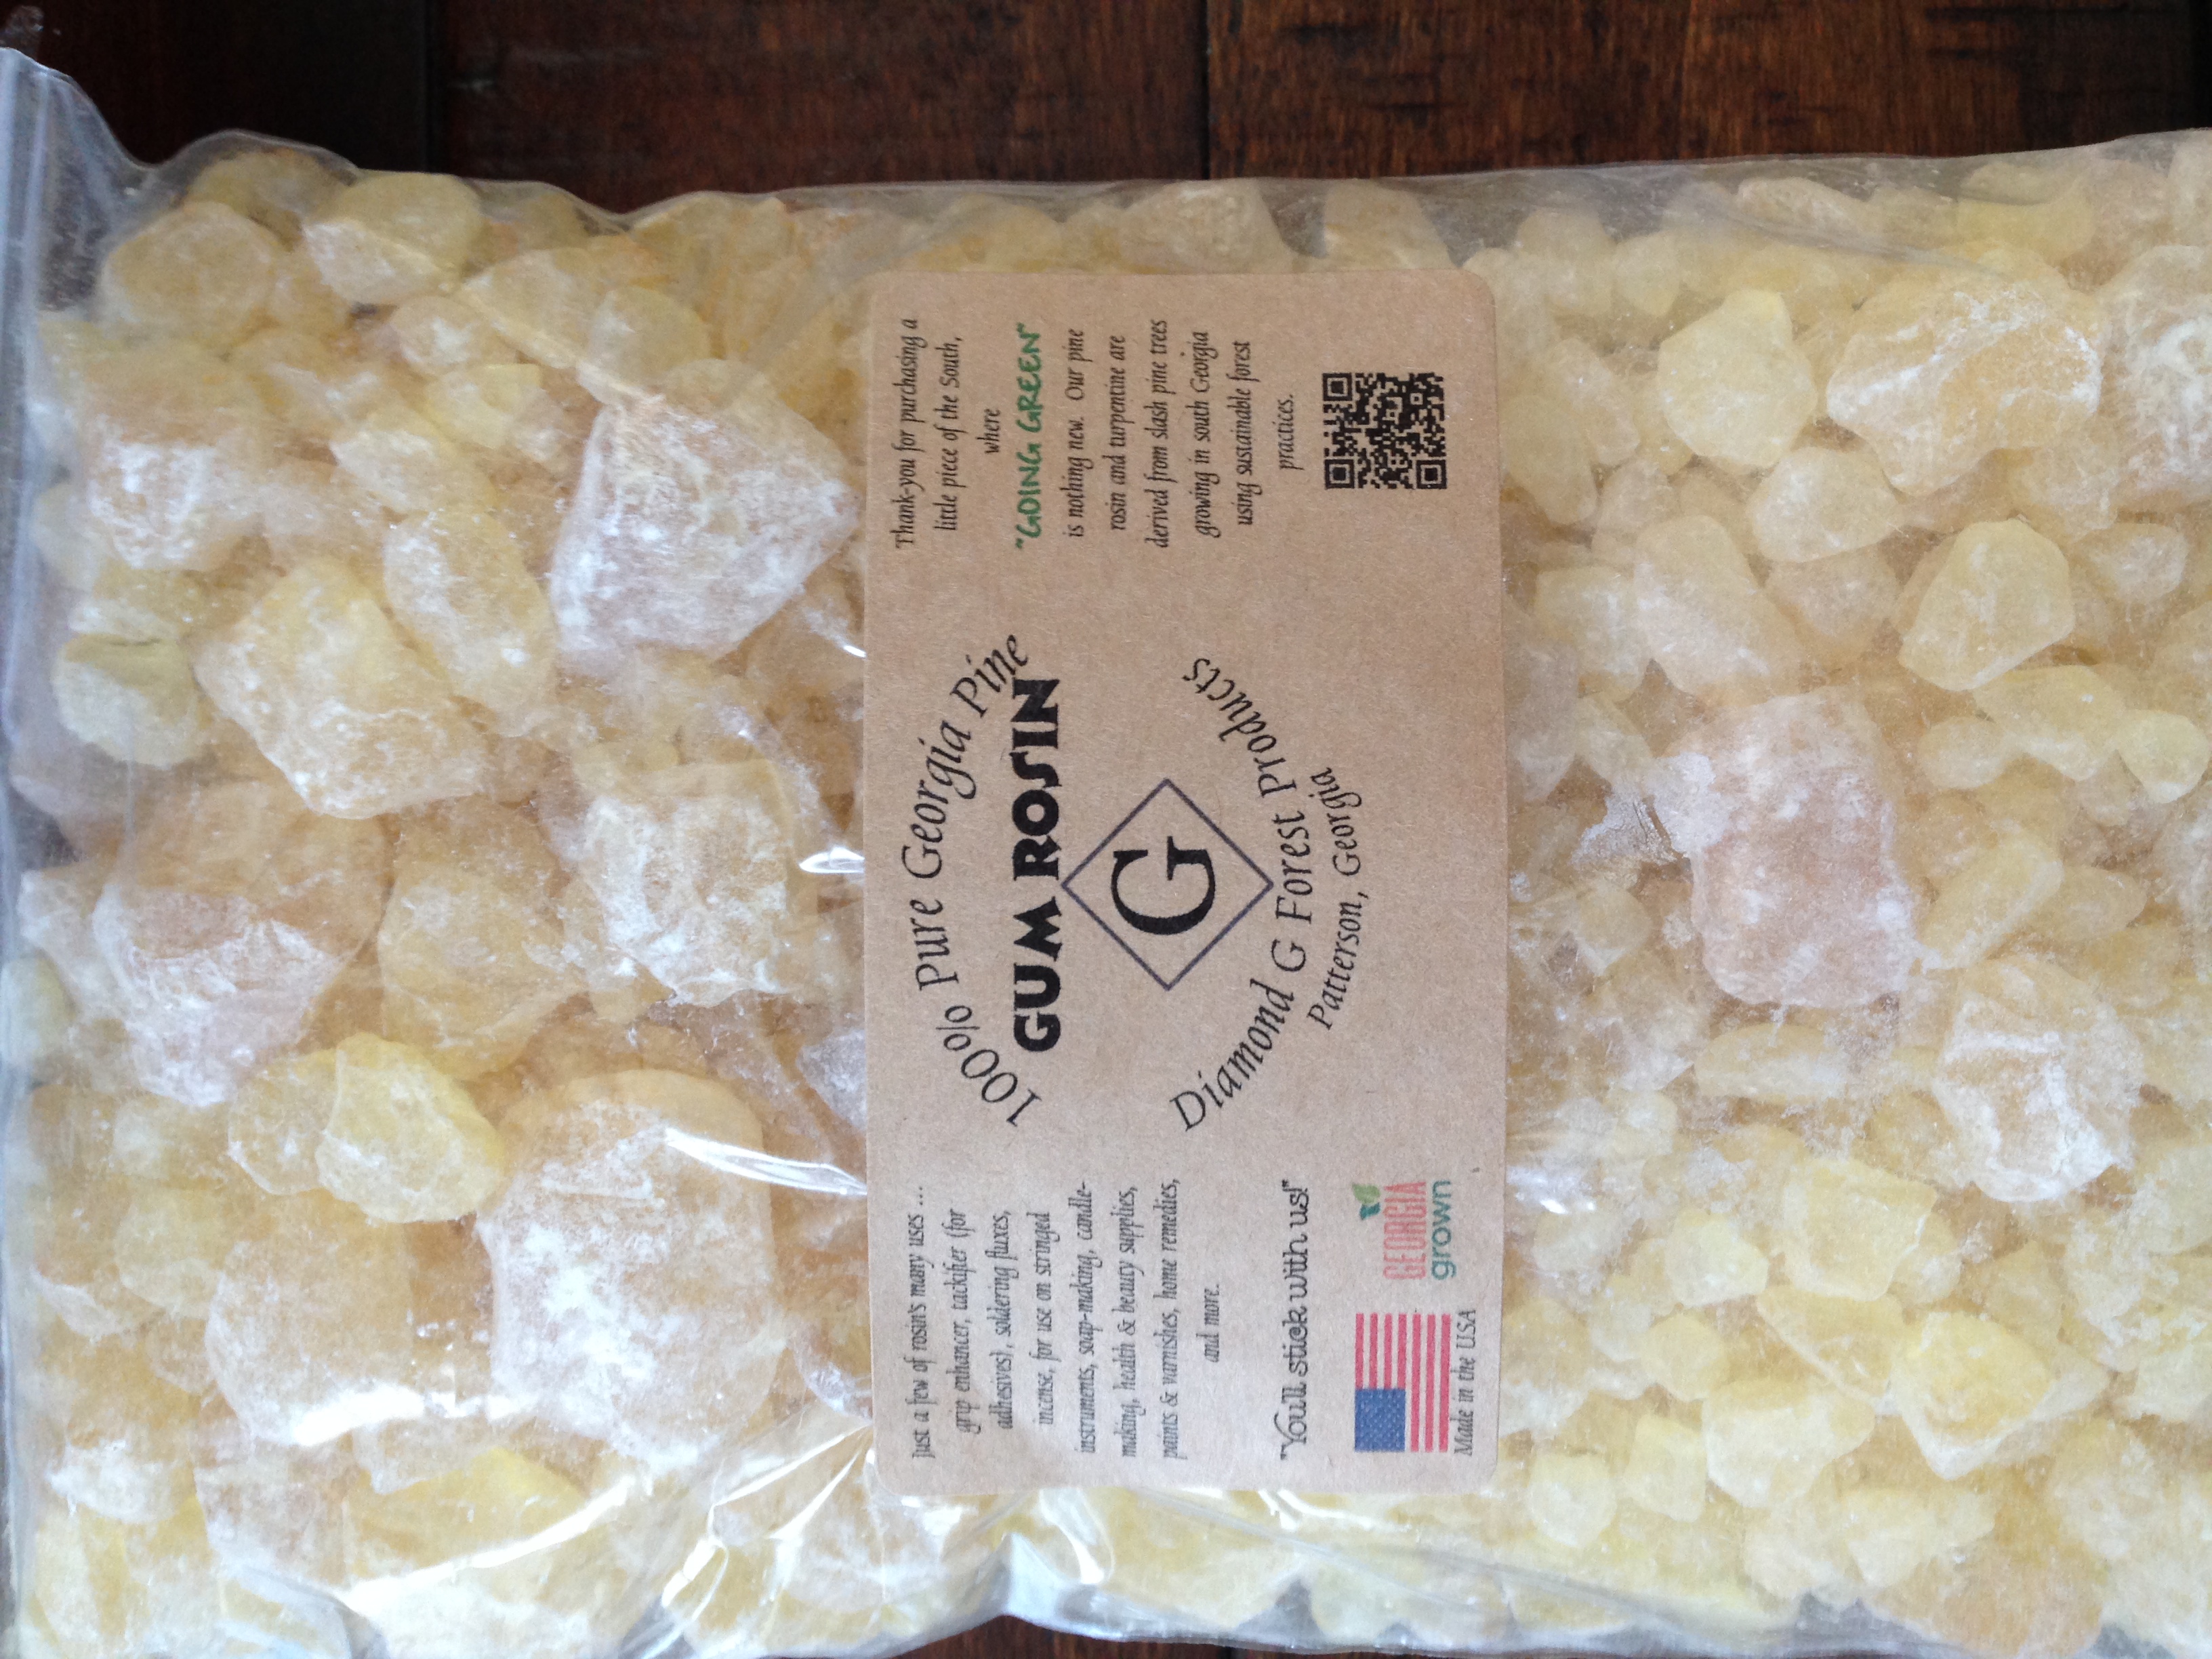
100% Pure Georgia Pin Gum Rosin
November 5 Manuscript Annotations: Calcinating Oyster Shells Trial Run
location:Jewelry Arts Institute22 Est 49th Street, 4th Floor
NYC
activity: calcinating oyster shells in kiln
author: Julianna Visco
**updated 11/11/14 by Emogene
- Oysters obtained from Noka at the Oyster Bar at Grand Central Station. Both West coast and East coast oysters.
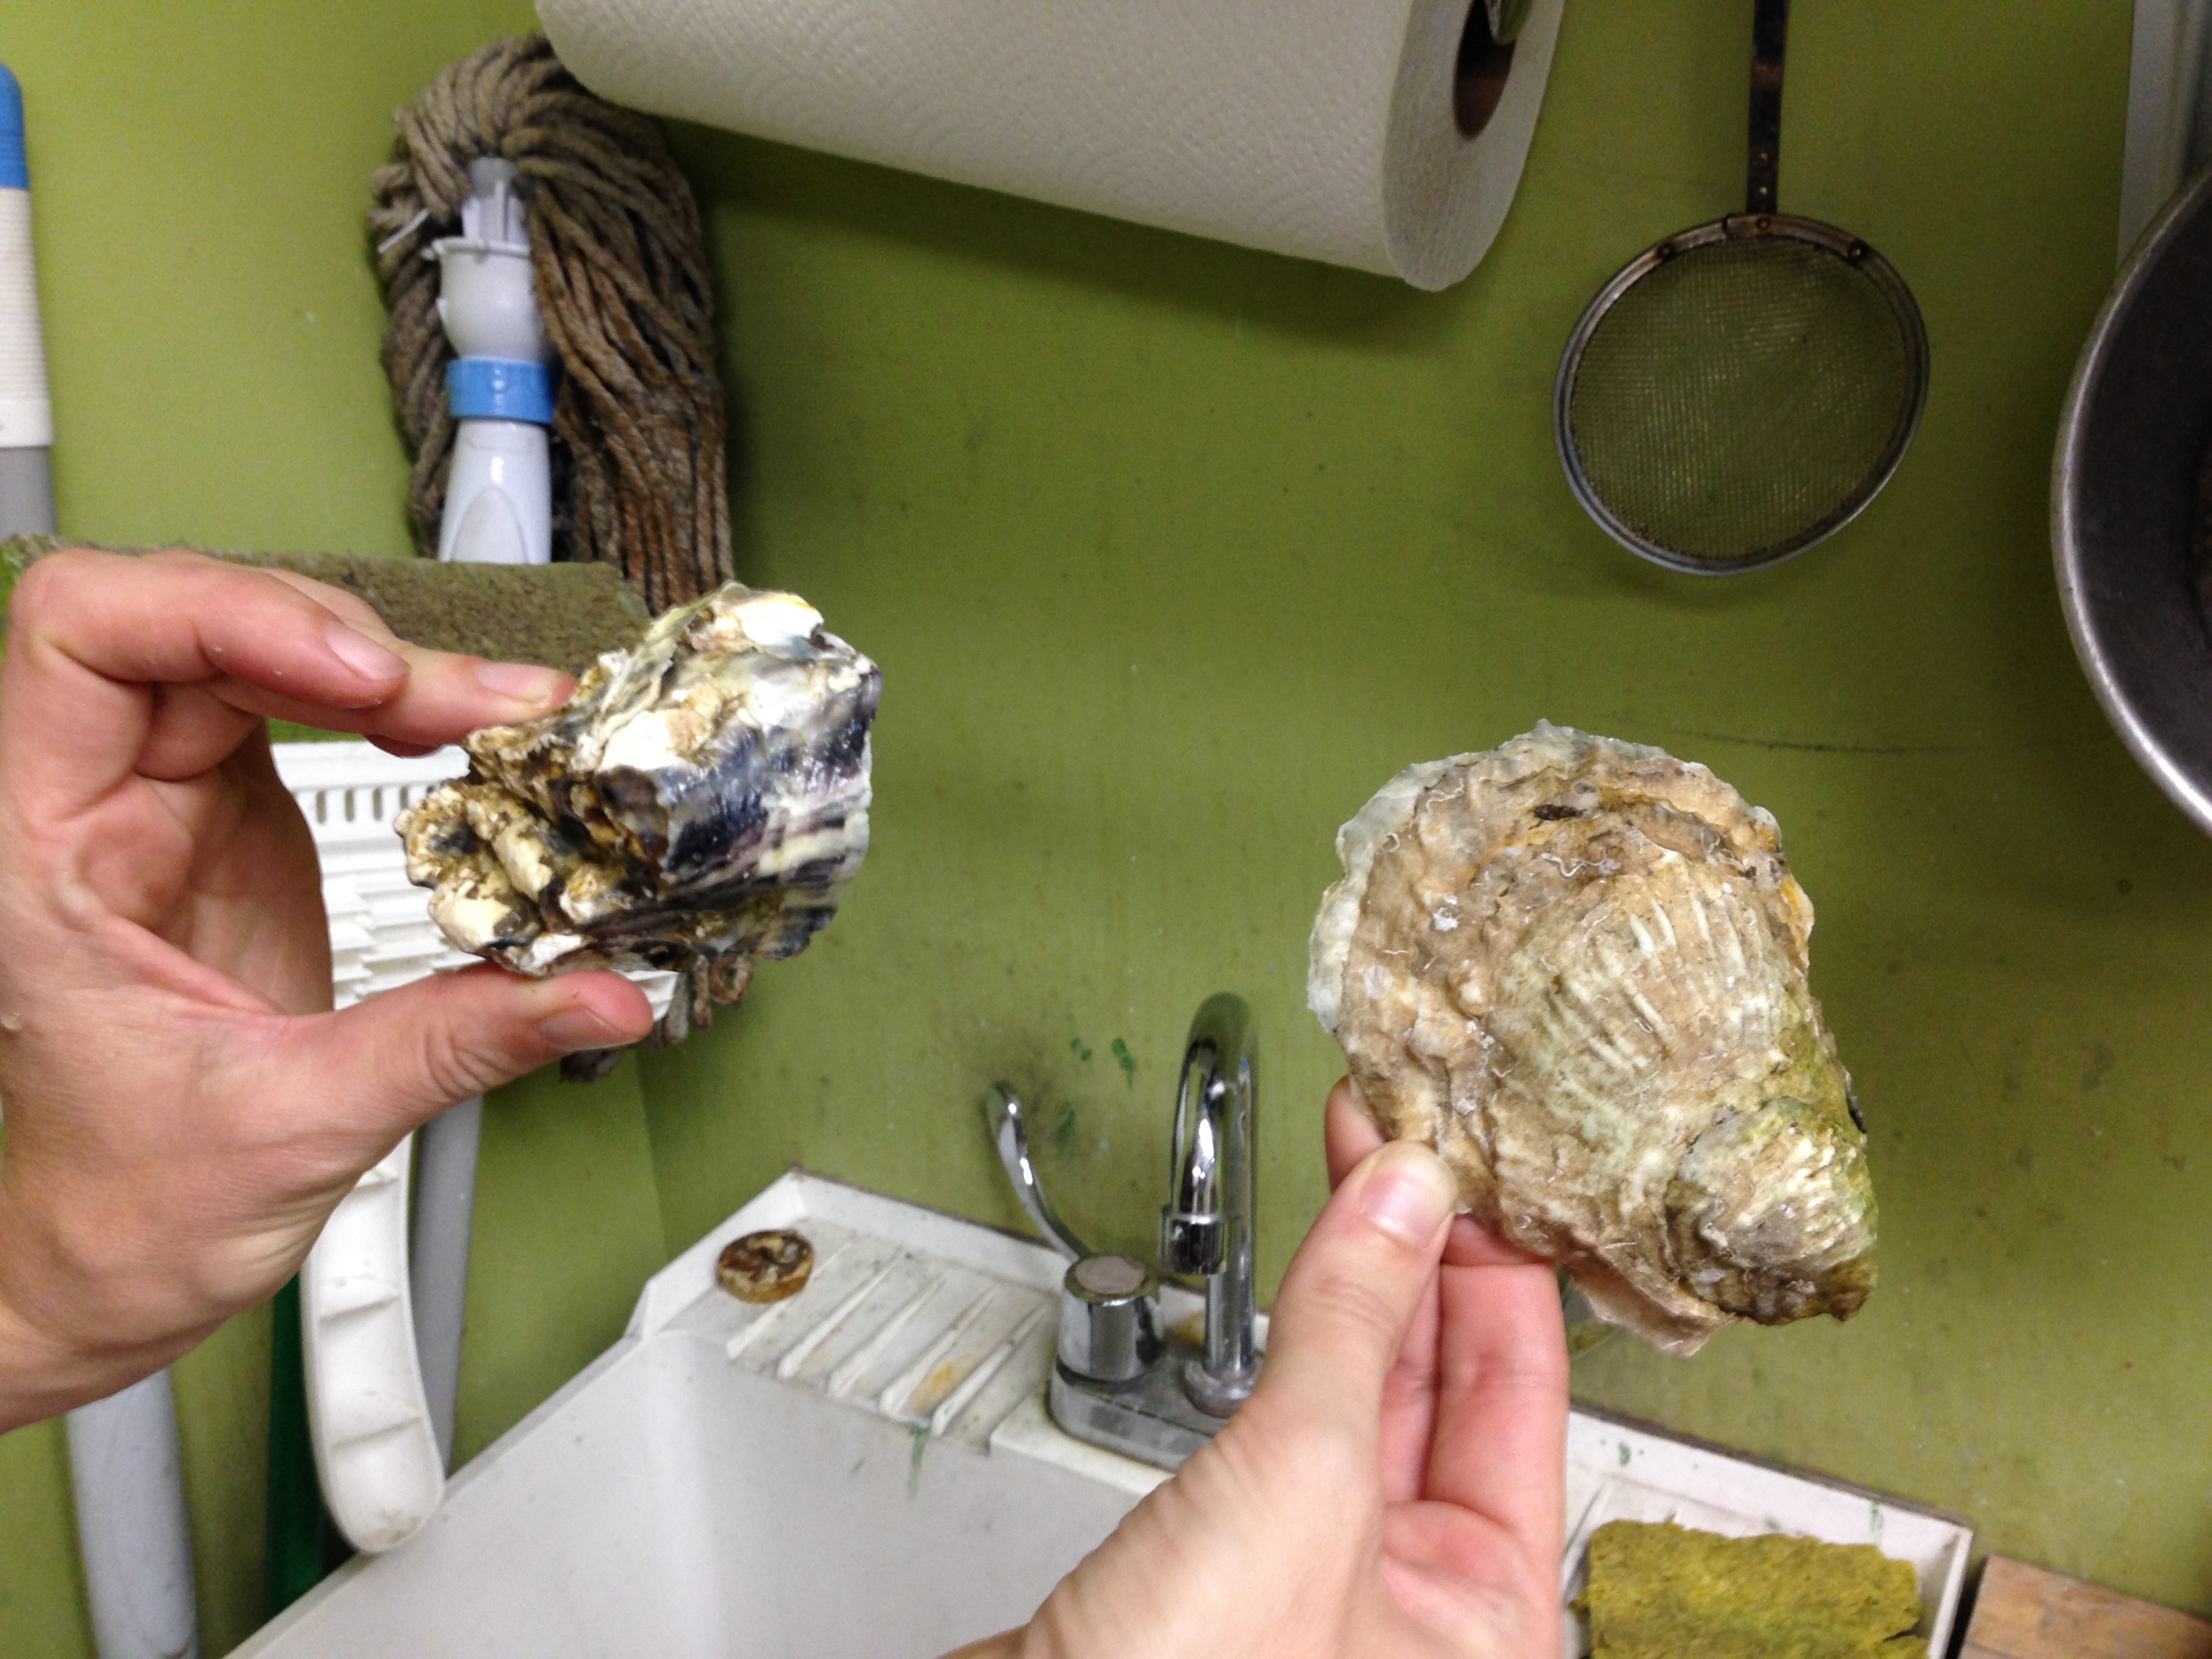
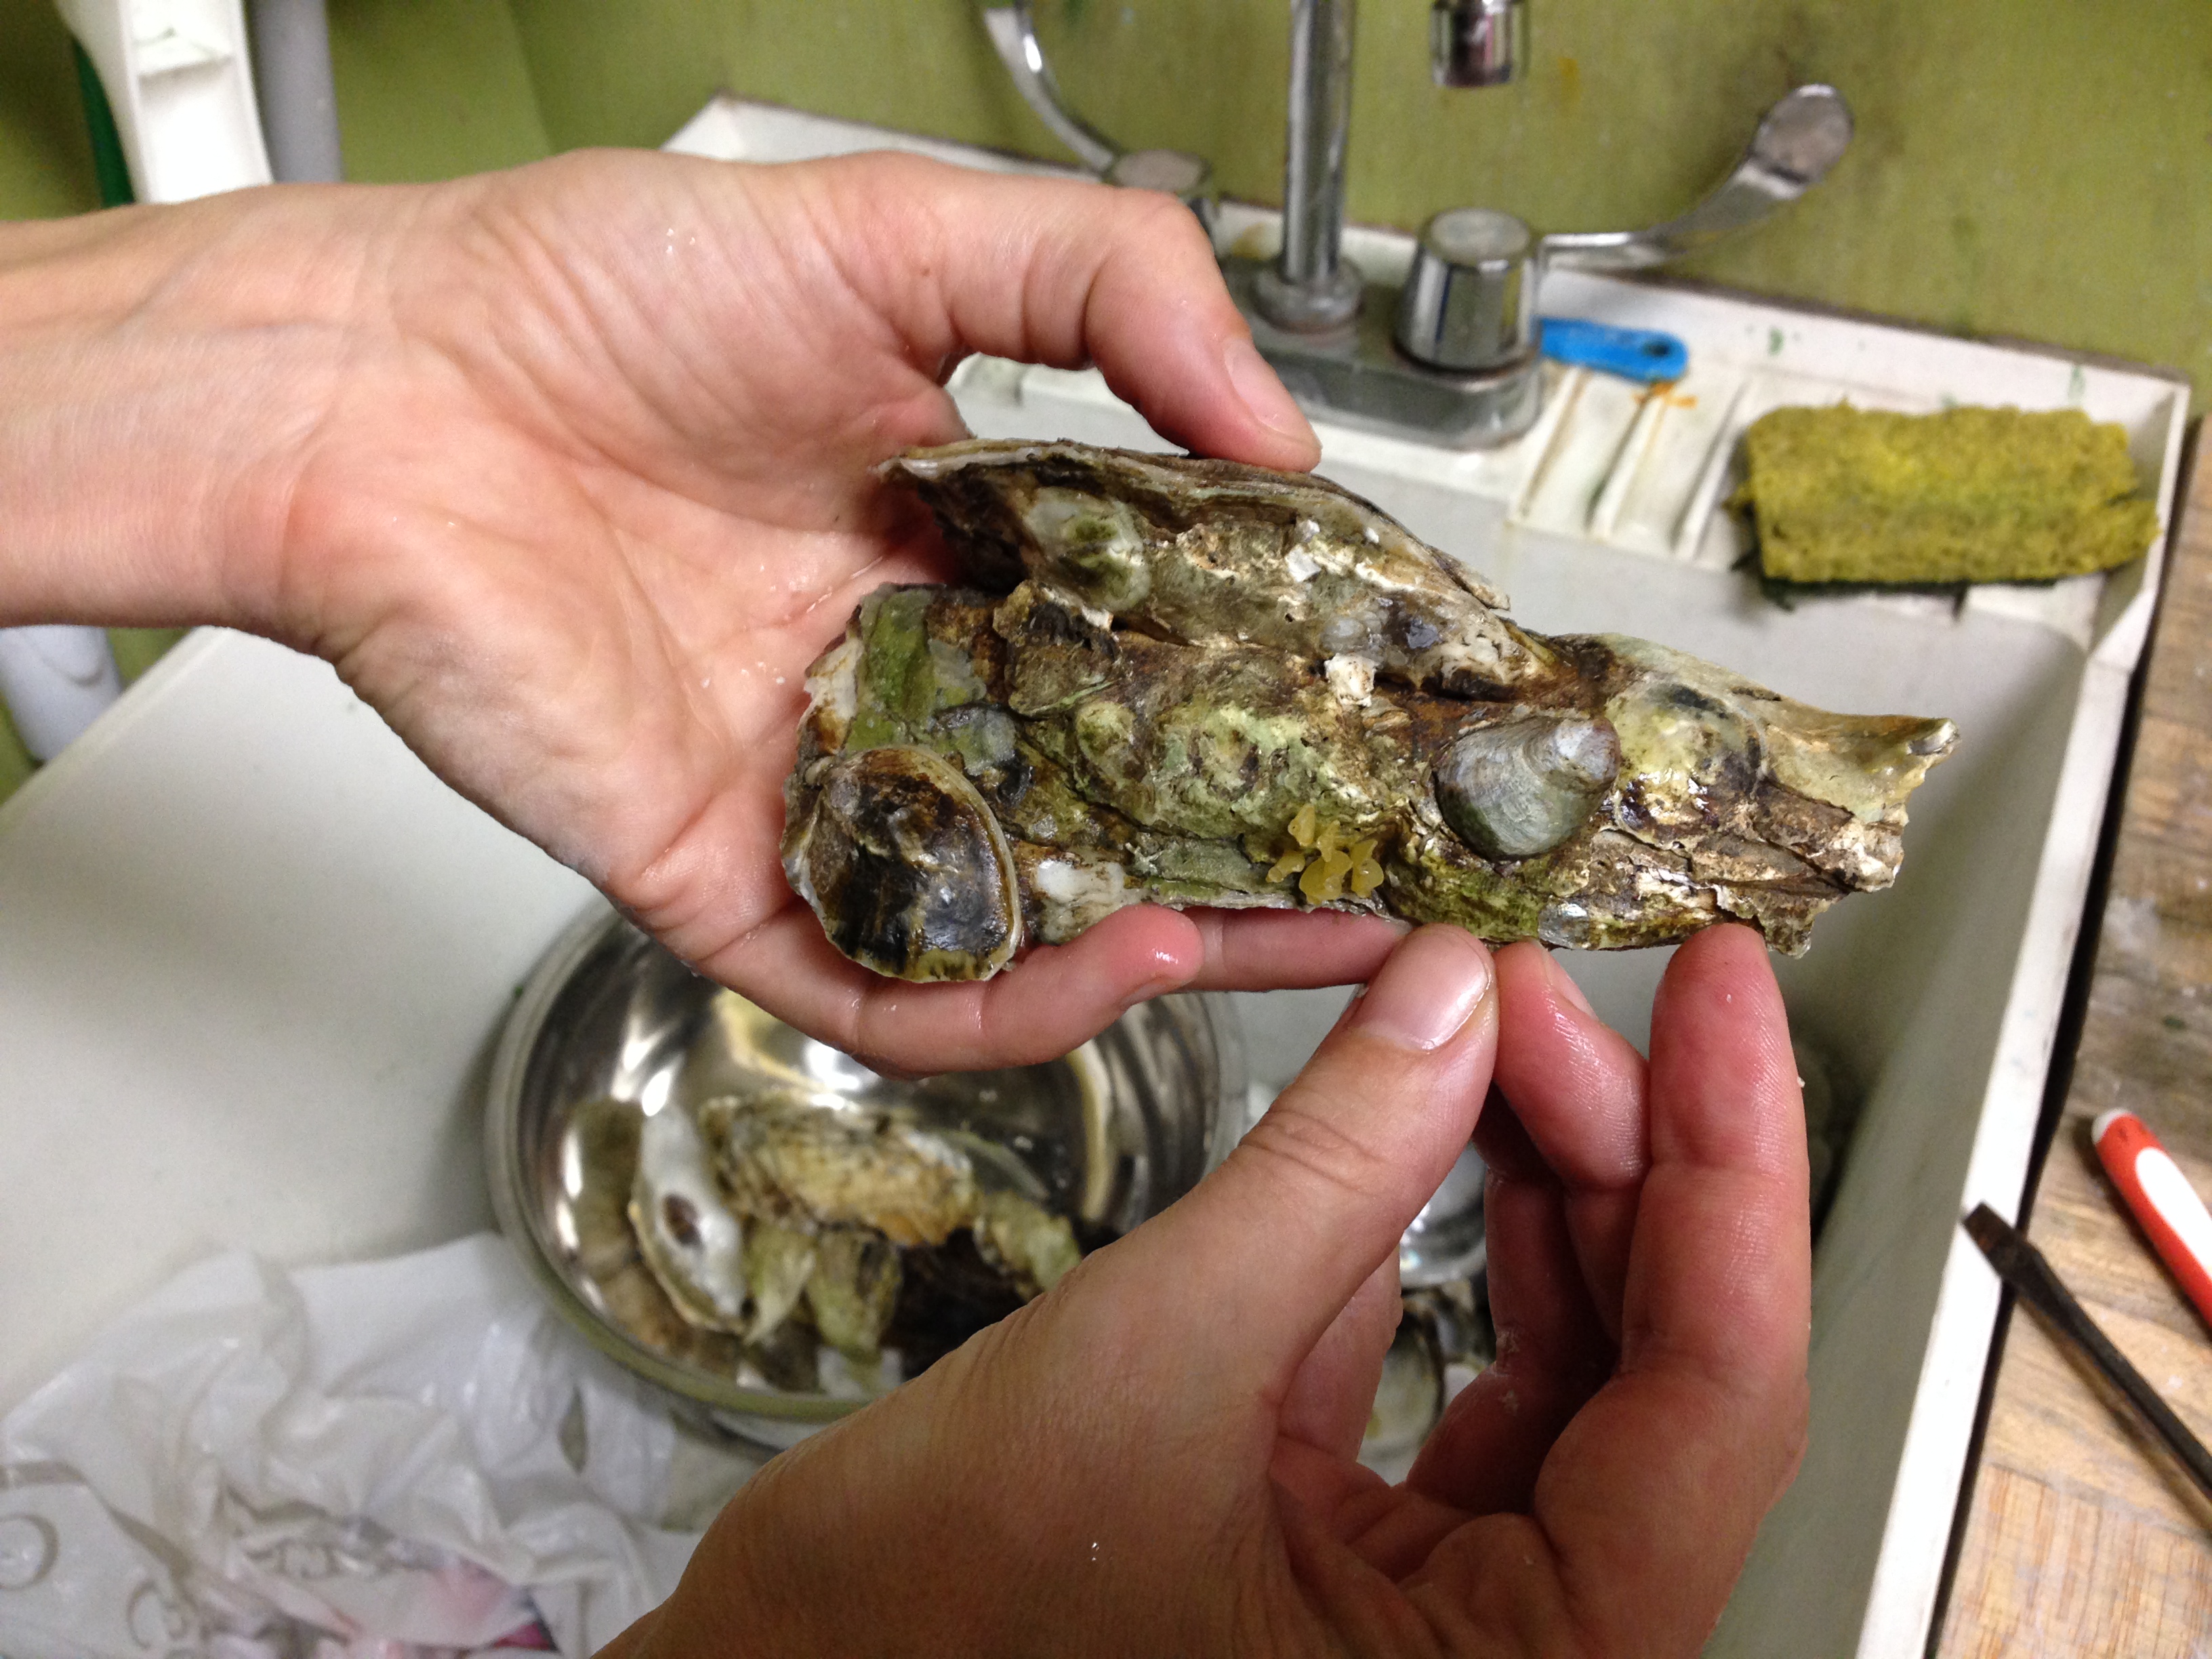
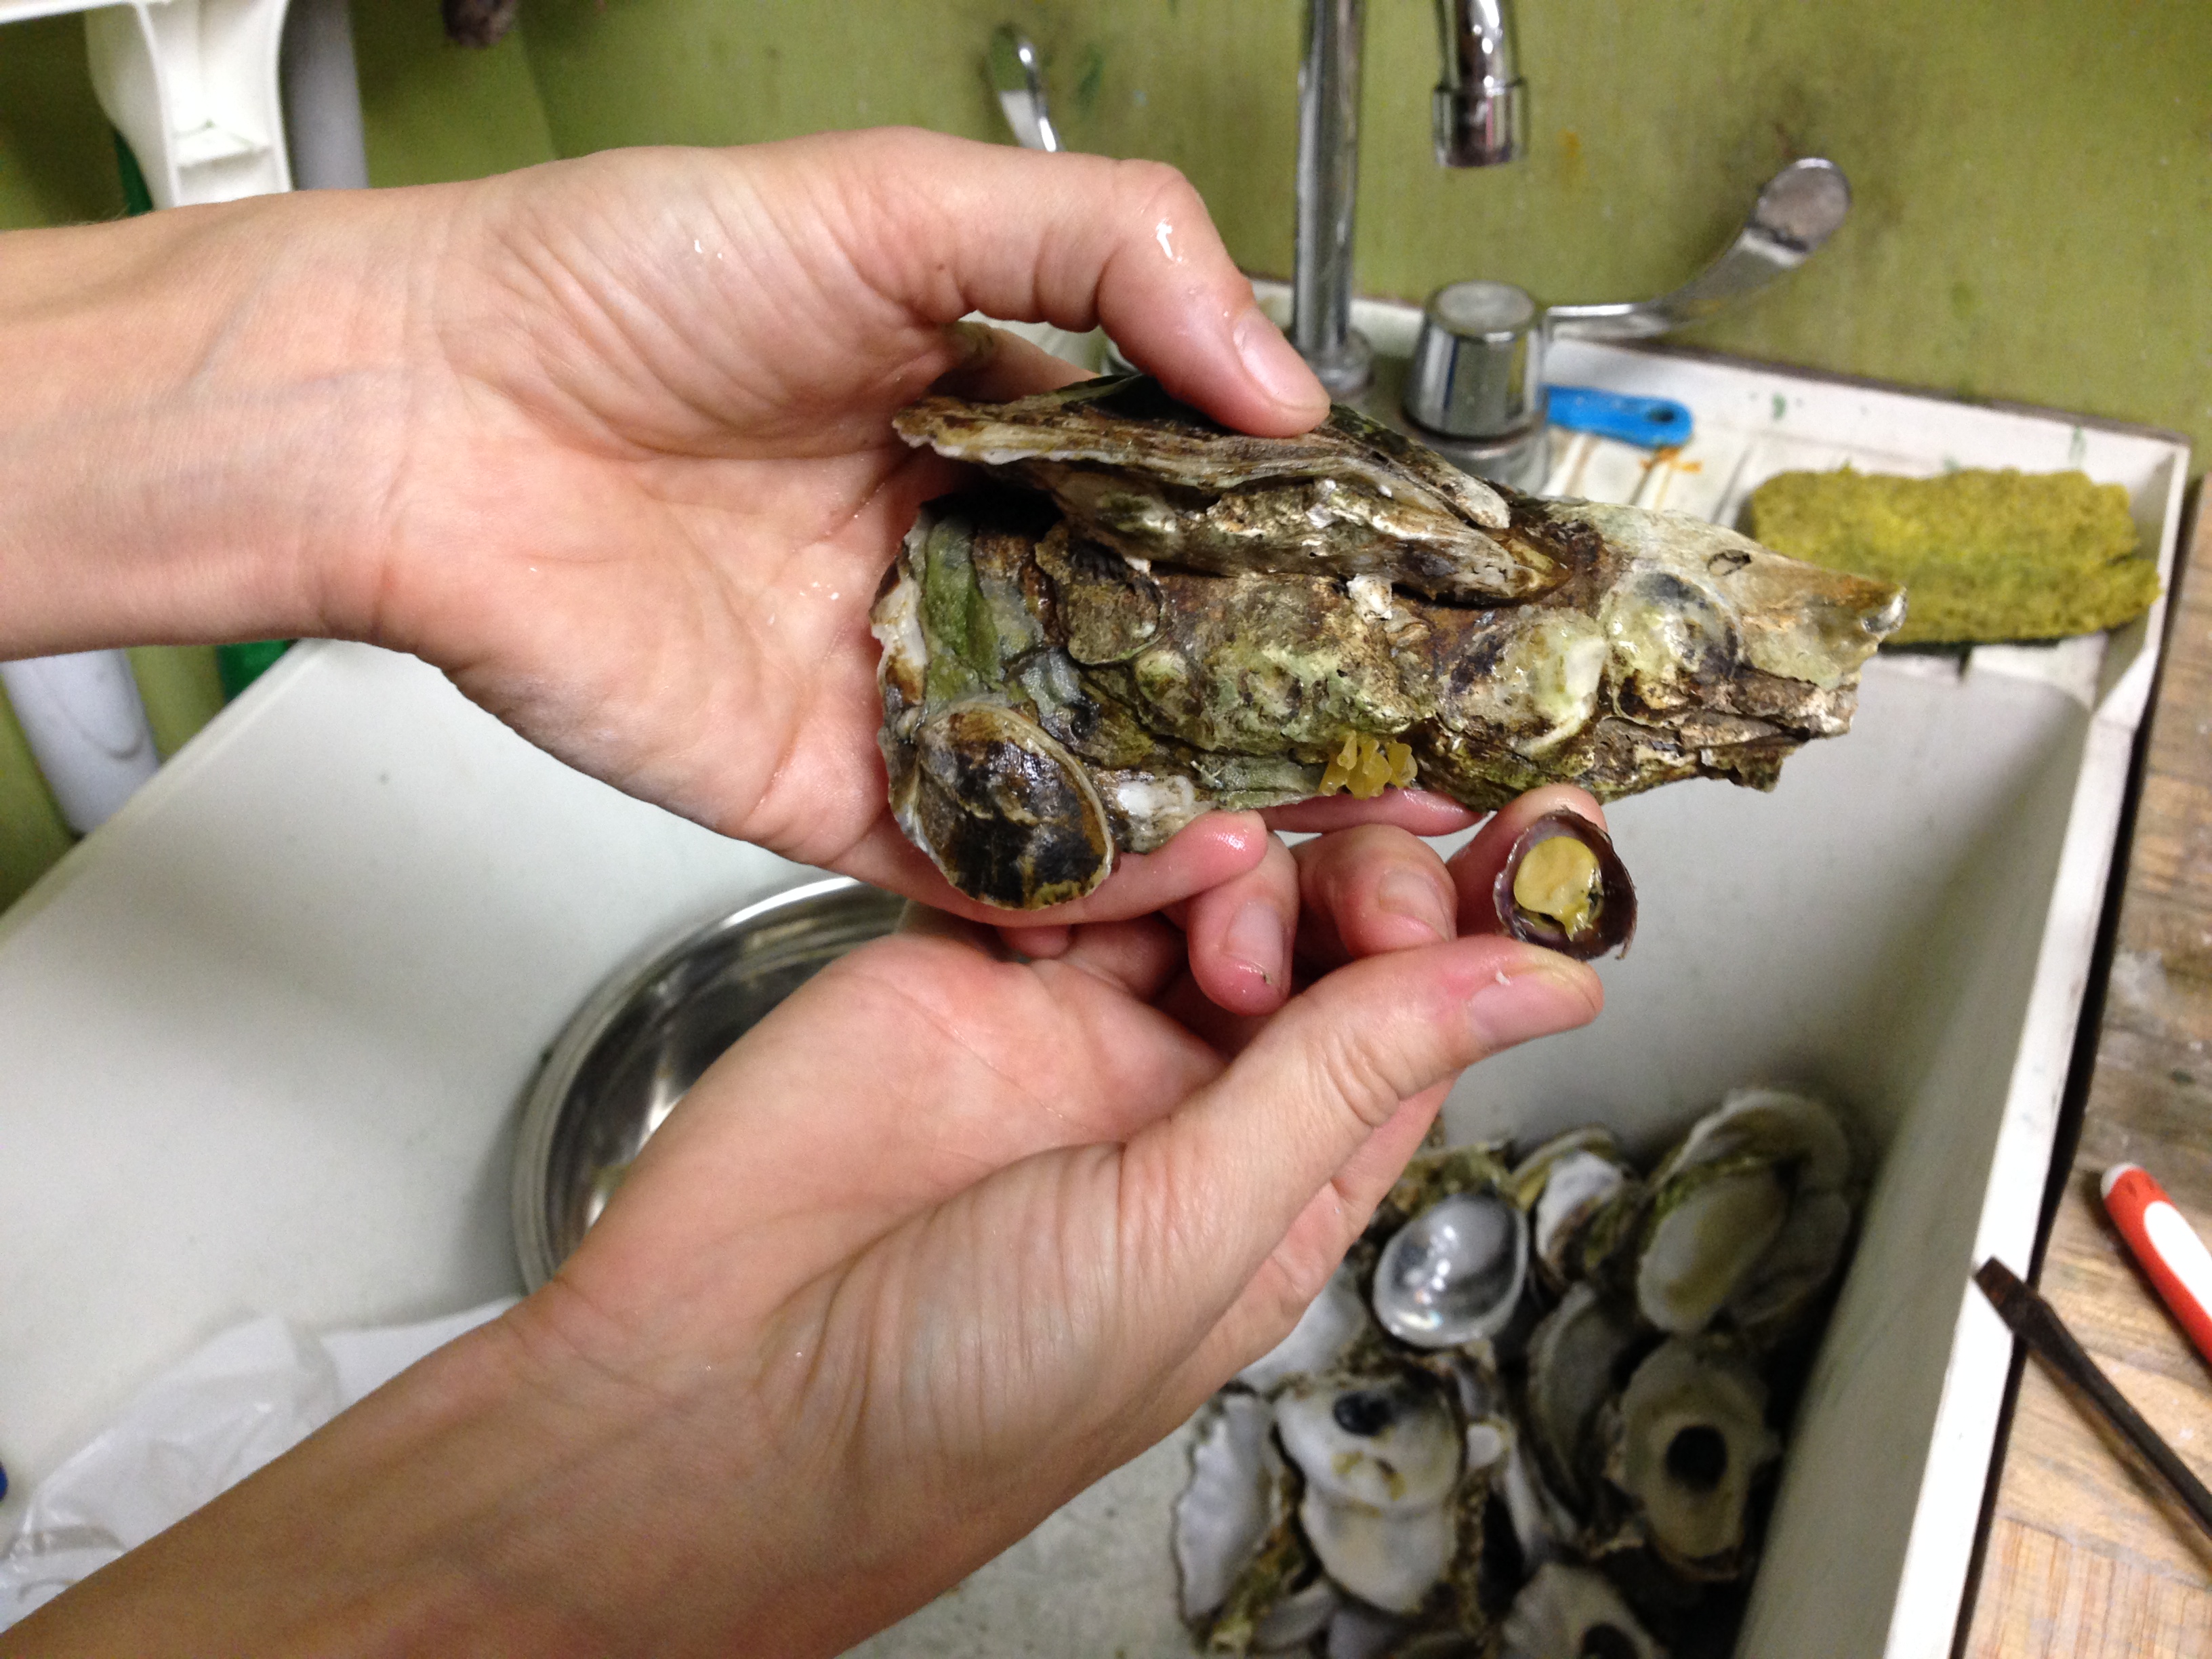
- Before arrival Donna boiled the oyster shells for approximately 5 minutes on gas stove to kill barnacles/clean oysters/reduce odor, then strained them. tacit knowledge observation: Donna boiled oysters before attempting to remove adductor muscle because she knew it would change from slimy to rubbery texture thus being easier to remove; this came up via roundabout other conversation and wasn’t transferred directly until she realized
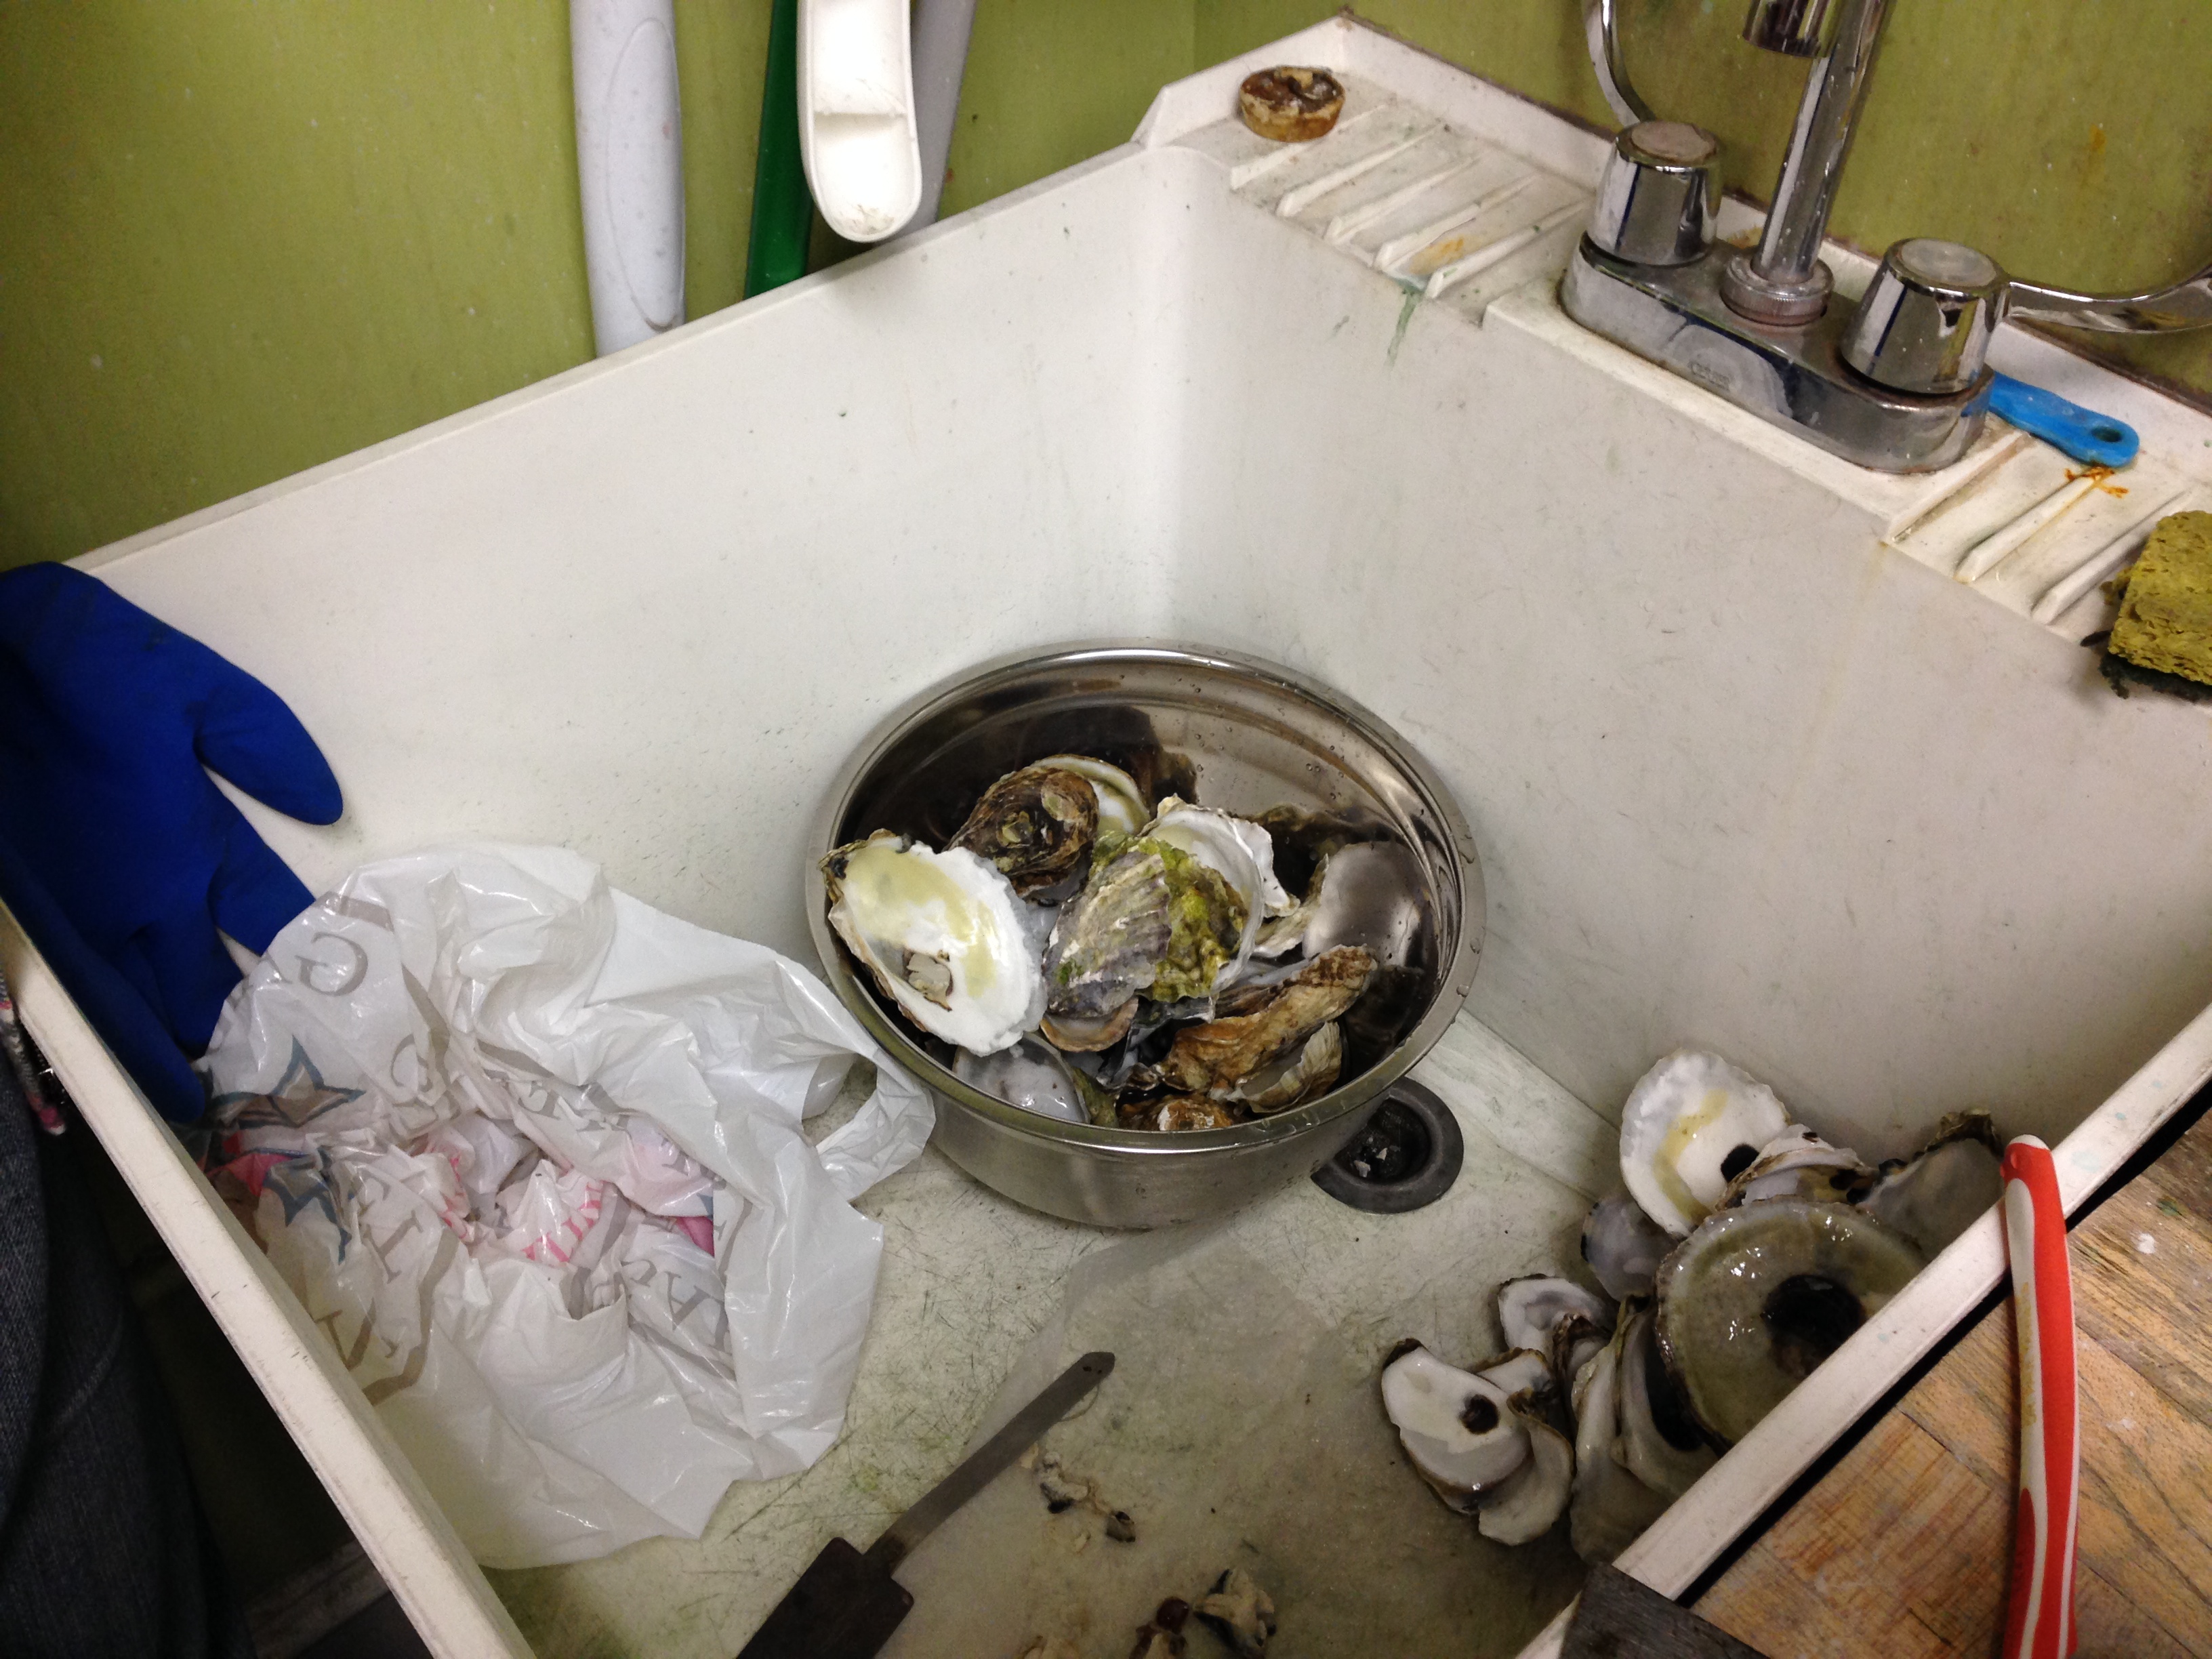
- Using butter knife, Donna scraped off adductor muscle.
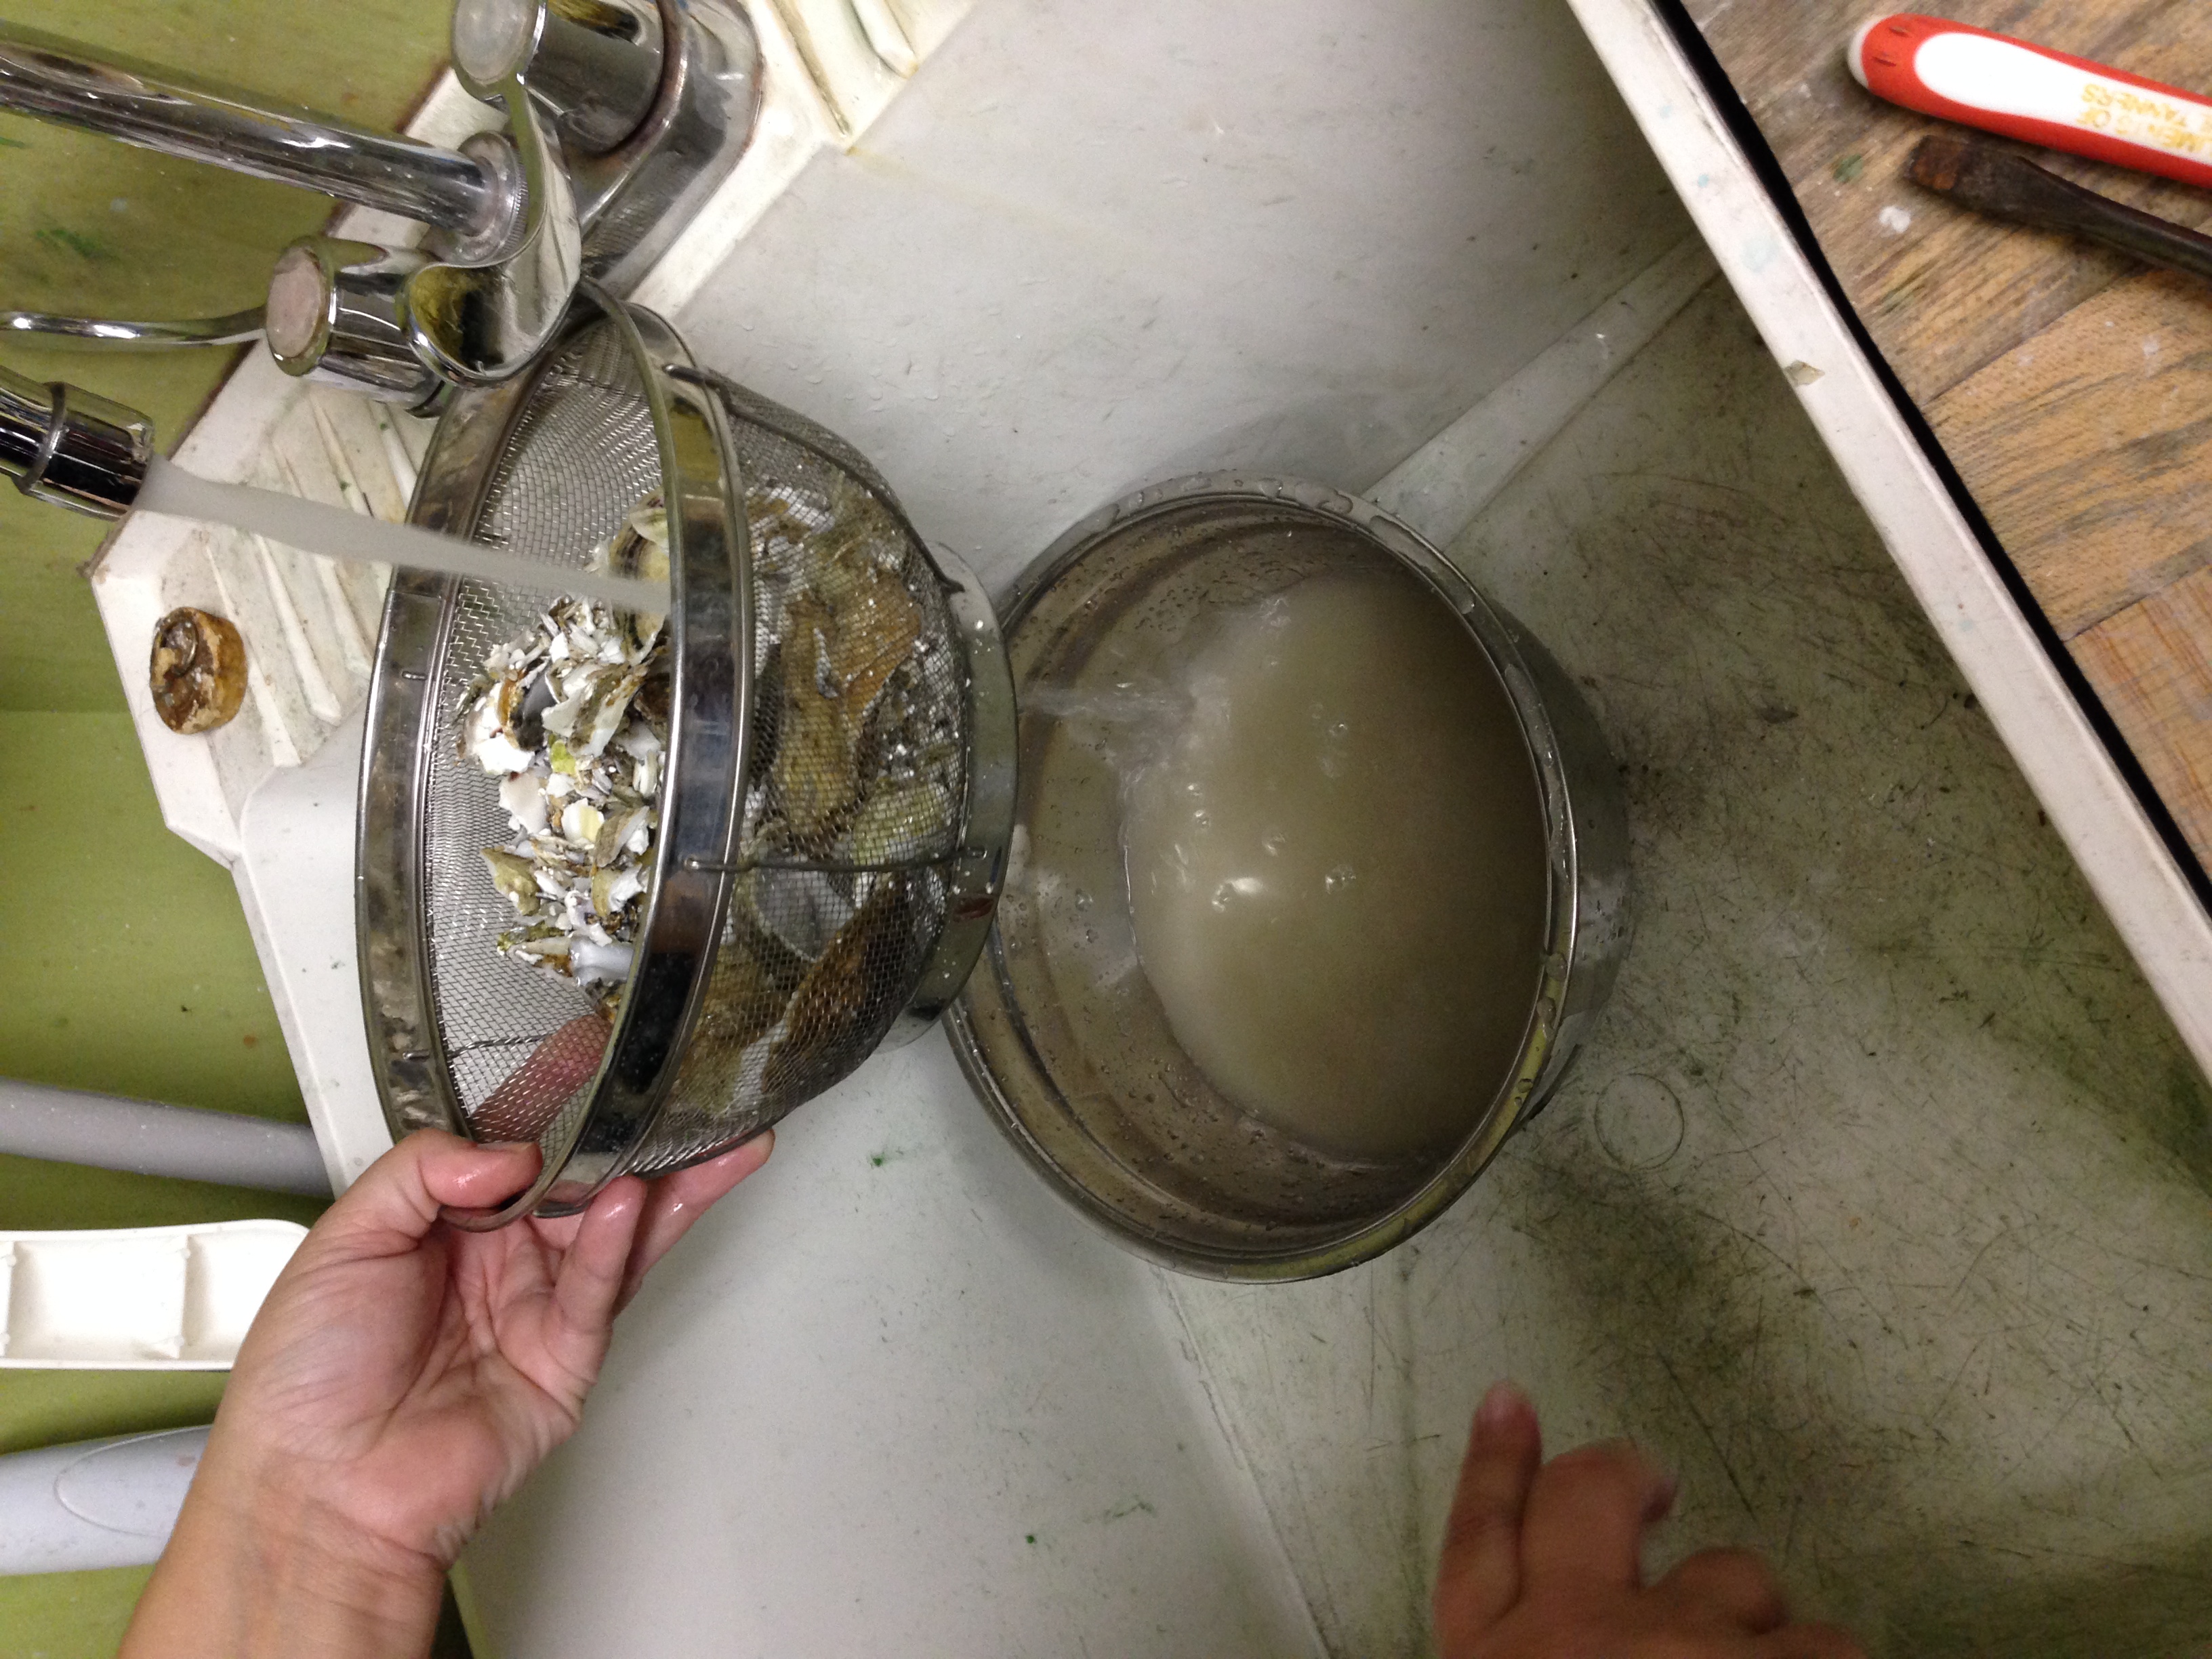
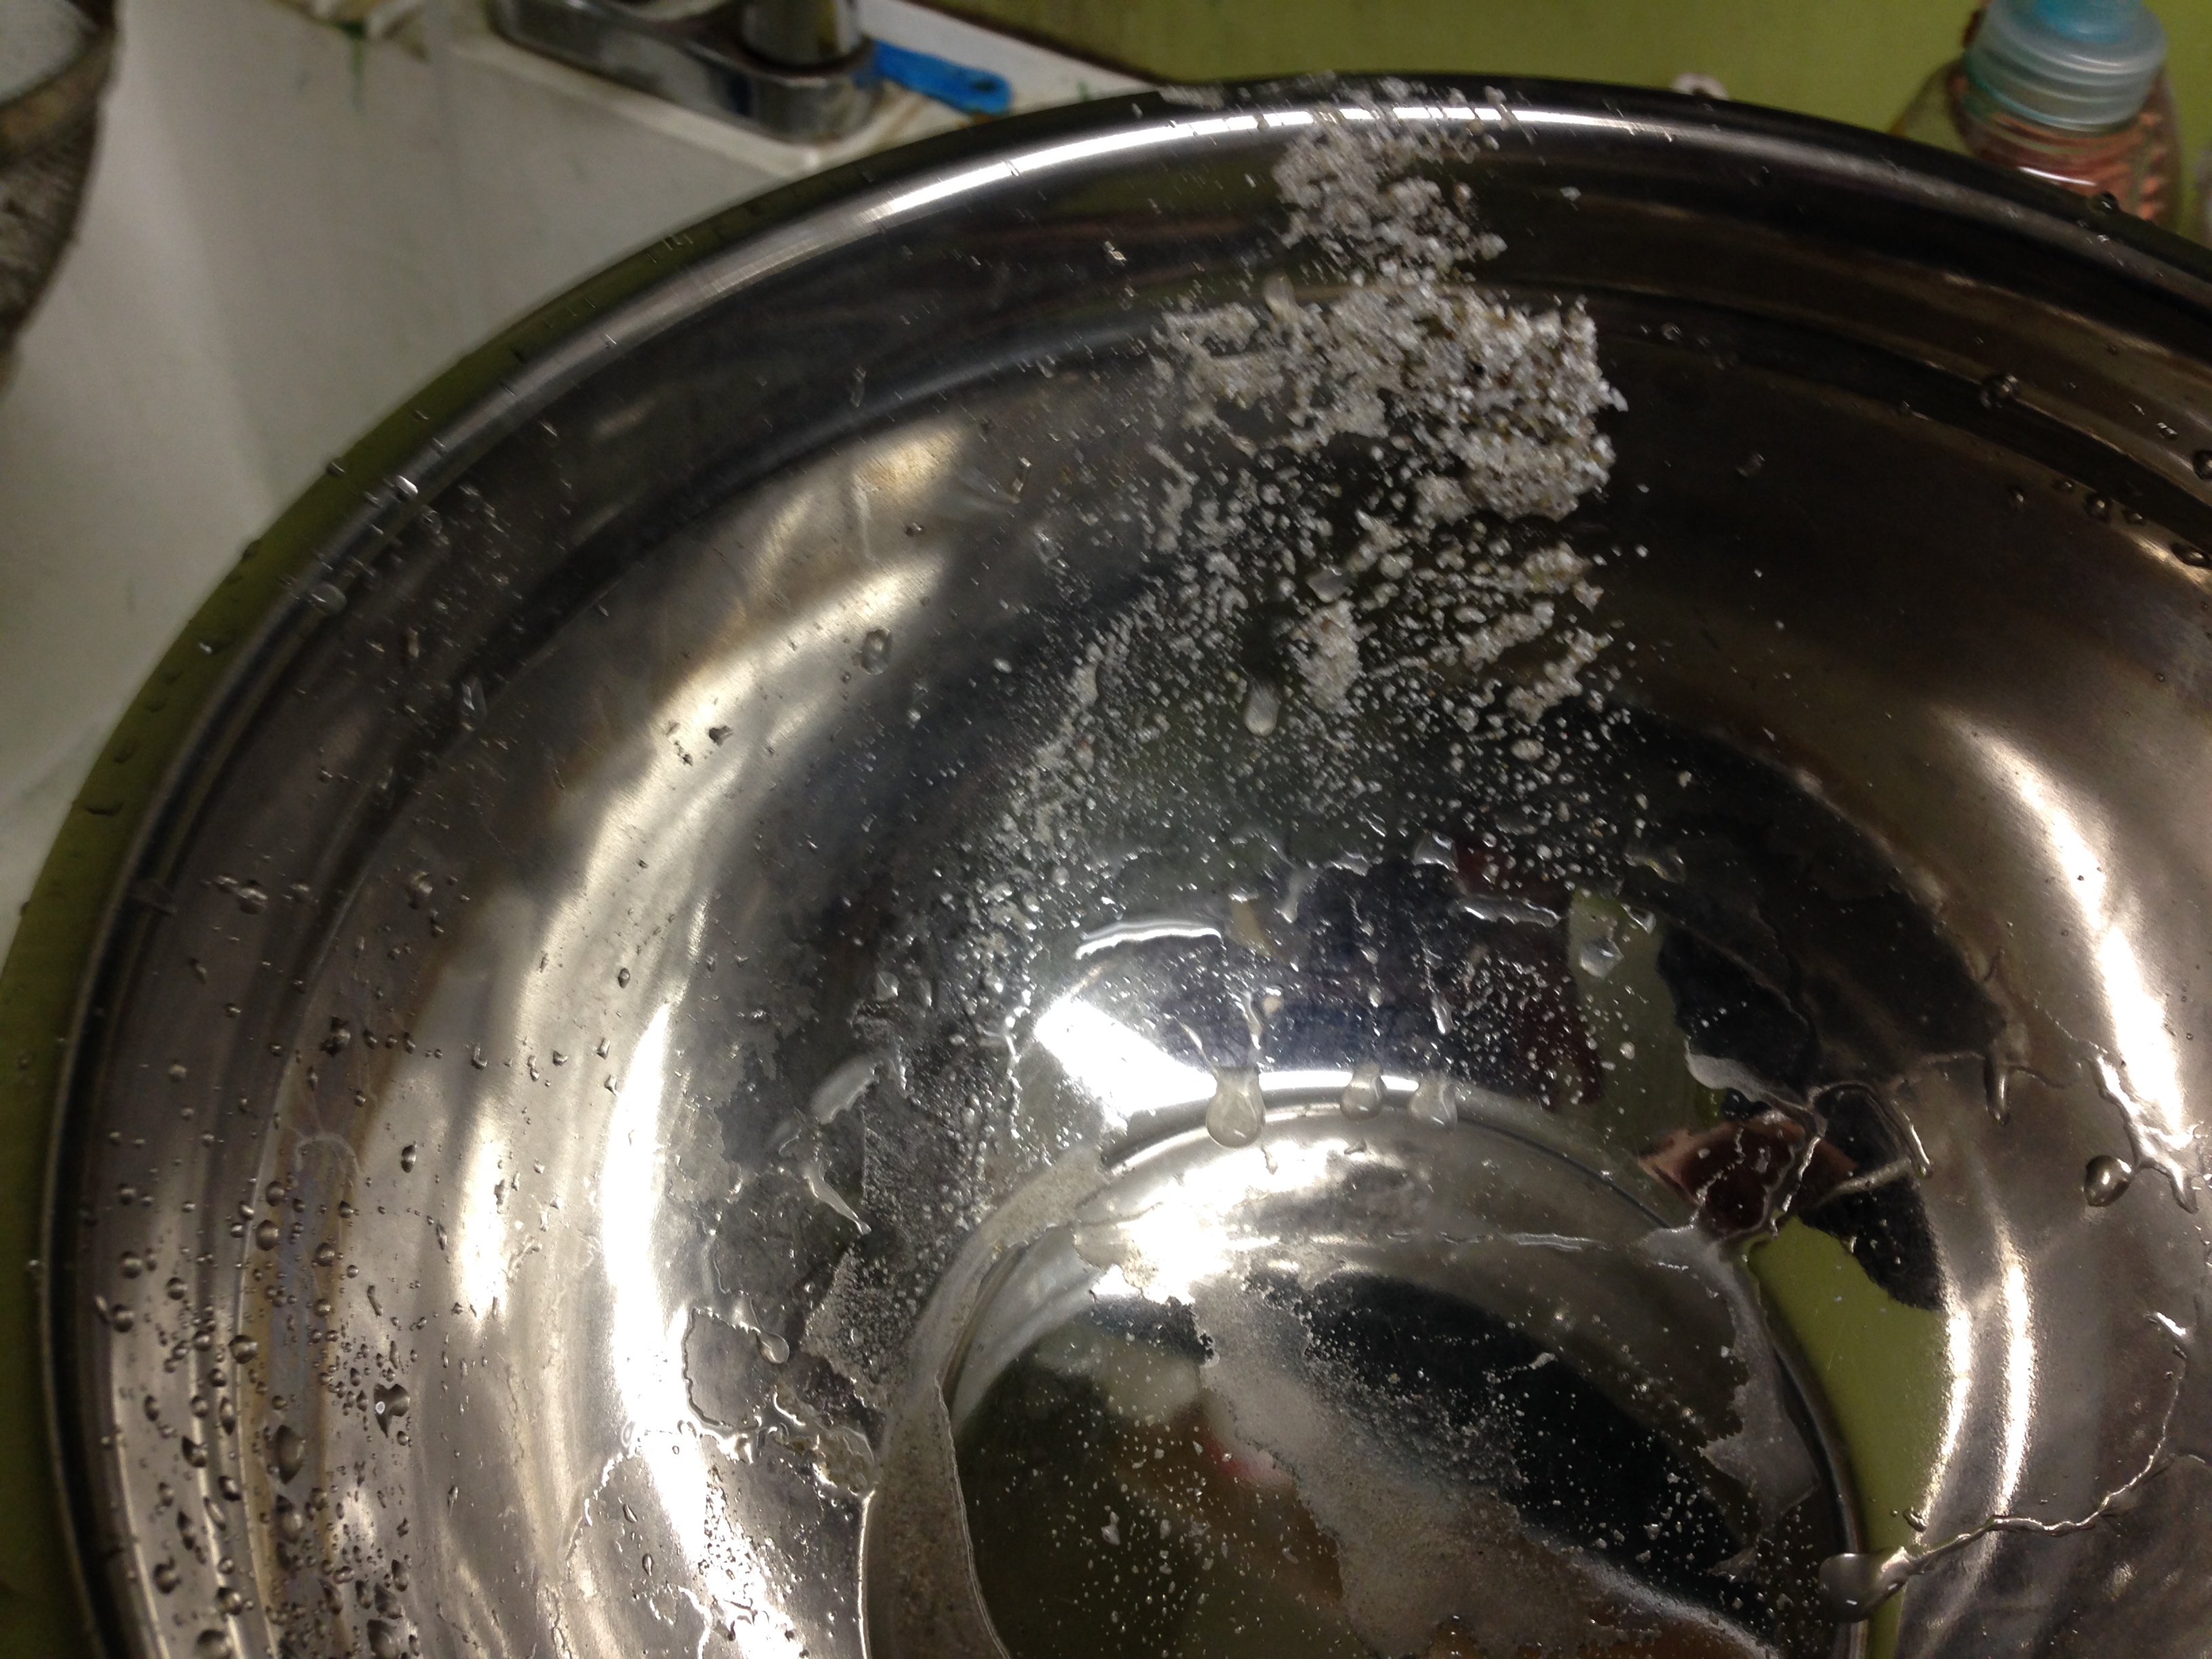
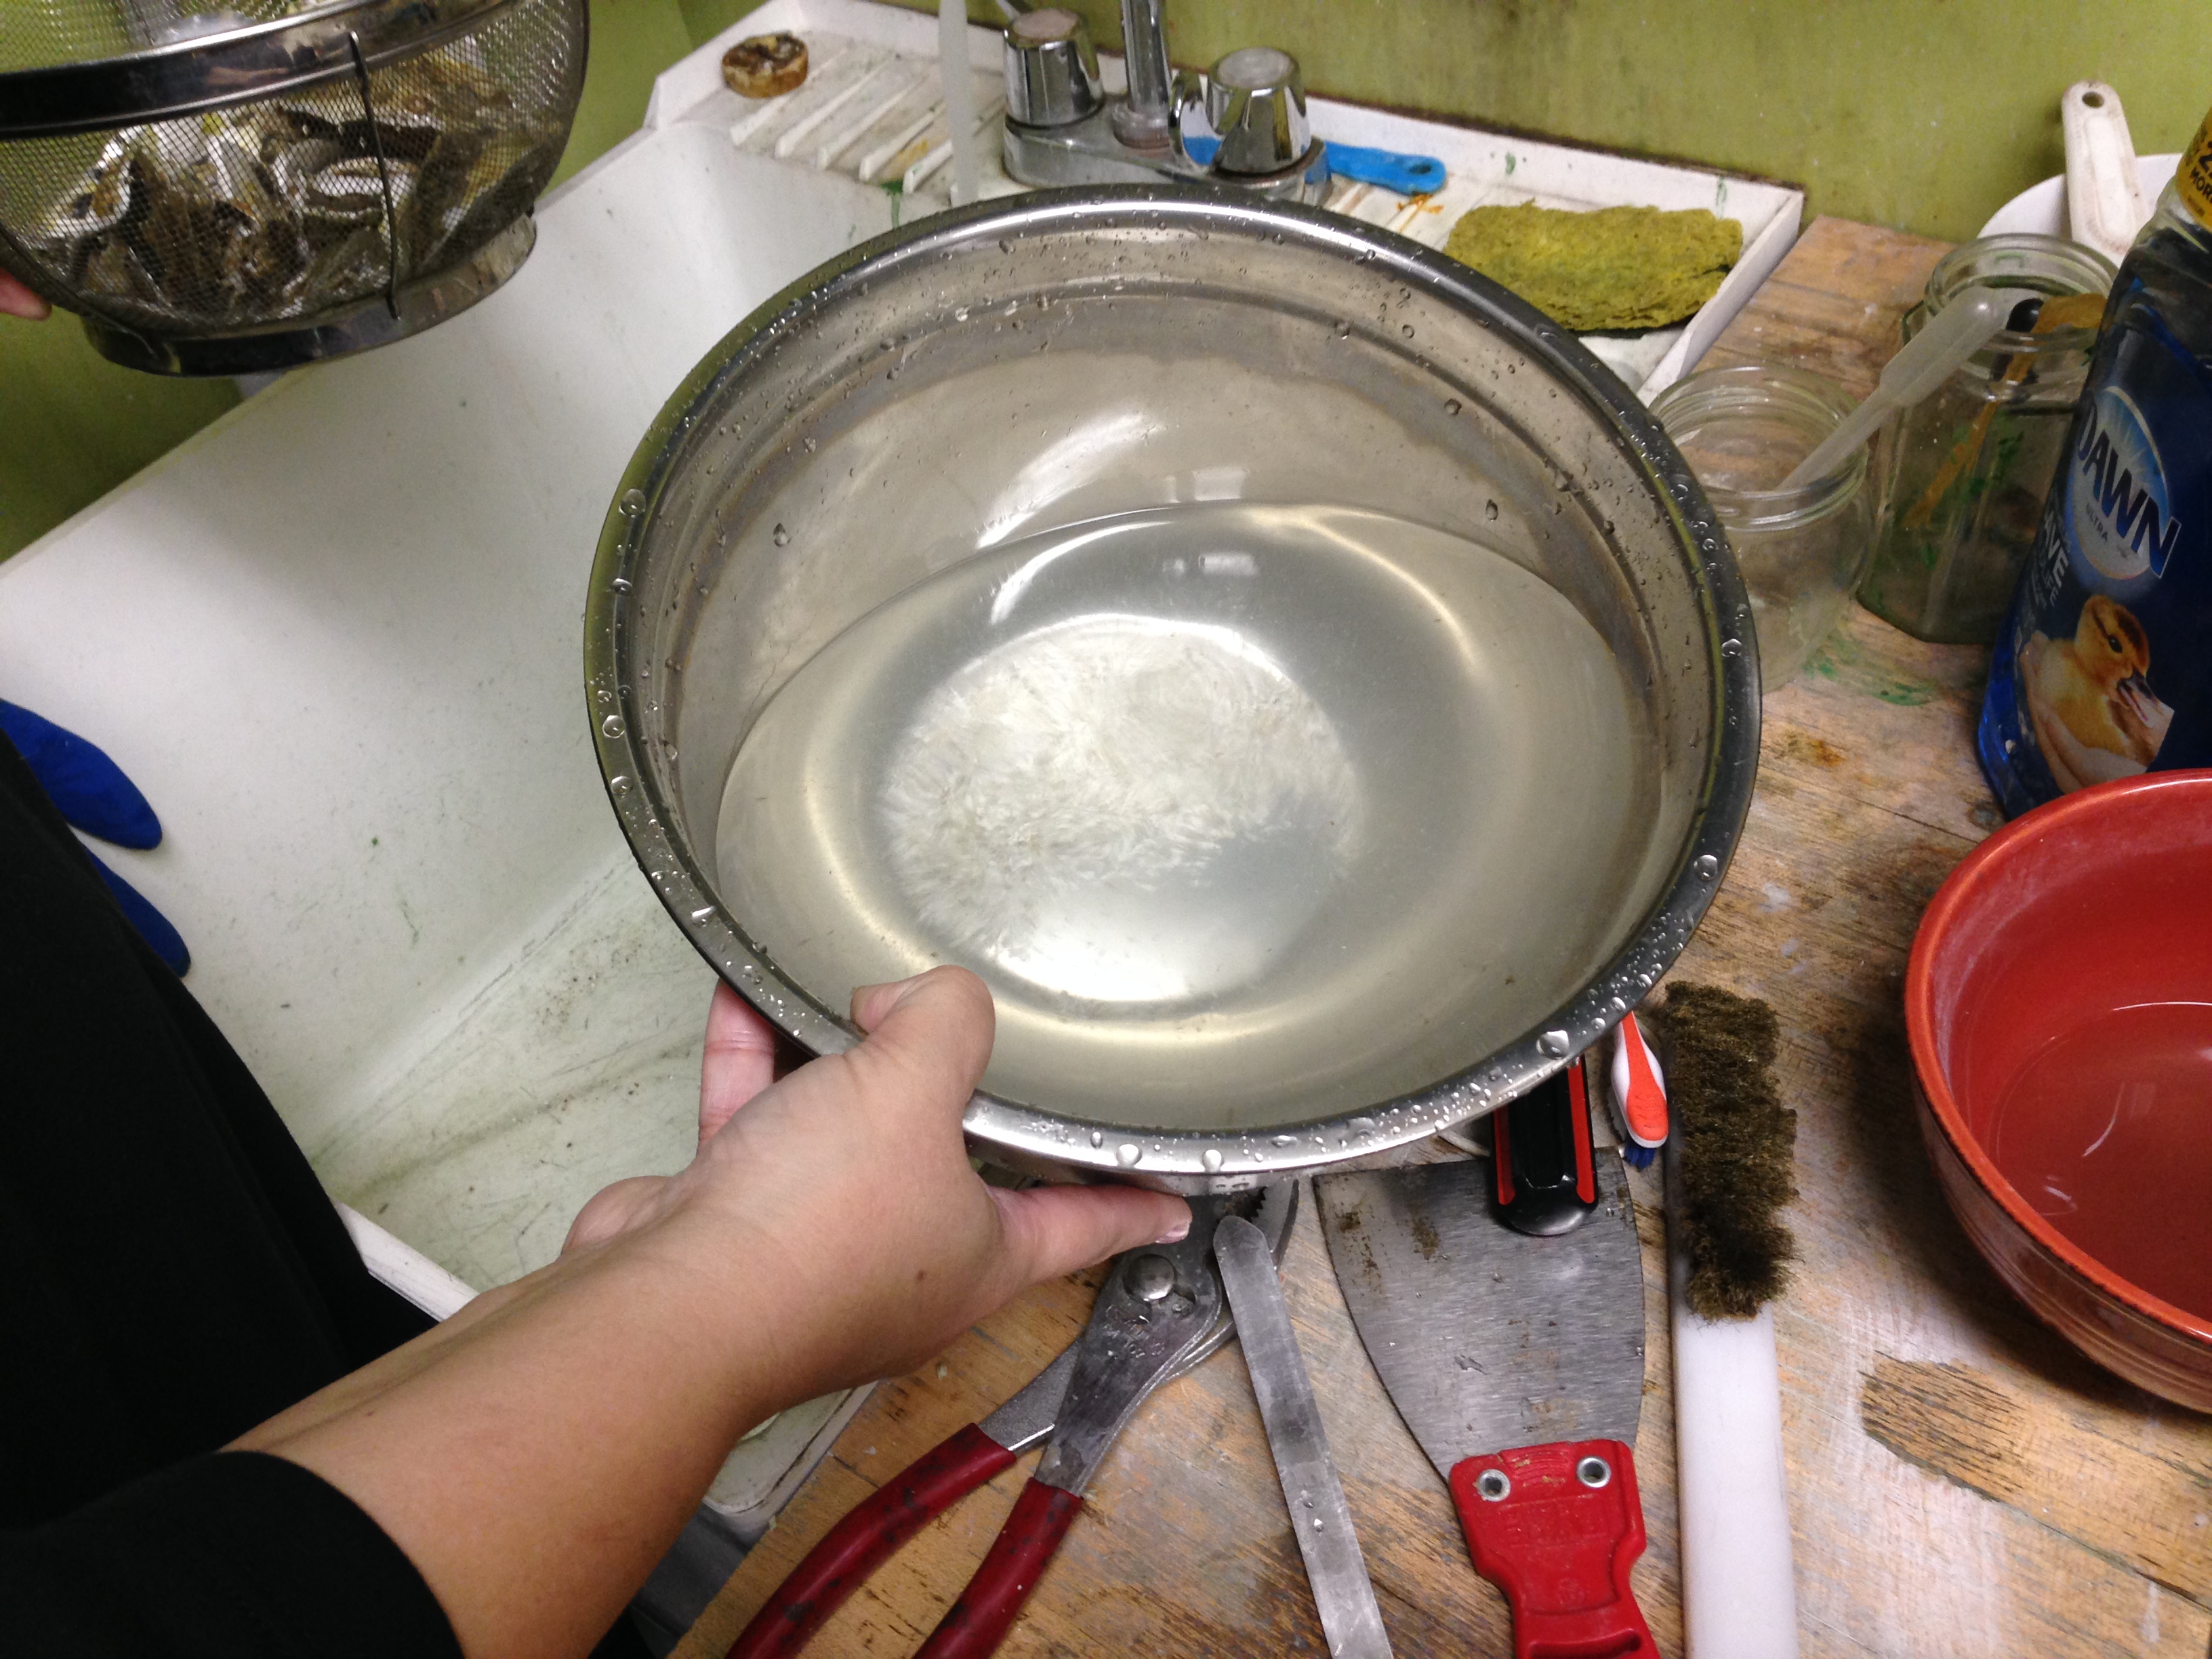
- Using pliers Donna knocks off barnacles from outside of shell and also removes other debris (carrier shells, etc.) the cleaning part of the preparation is extremely labor intensive. Donna rinses the oysters under running water both through a metal sieve and soaking in a bowl. Each rinse leaves behind dirty sandy water filled with silt and debris. The 3rd rinse results in more clear run off but there is still silt at the bottom. The 4th rinse is cleaner but not up to ‘enamel standards’ as observed by Jeanette. [process similar to rinsing of powdered enamel – search Cellini for enamel references!]. Also Donna finds a clam shell in the mix.
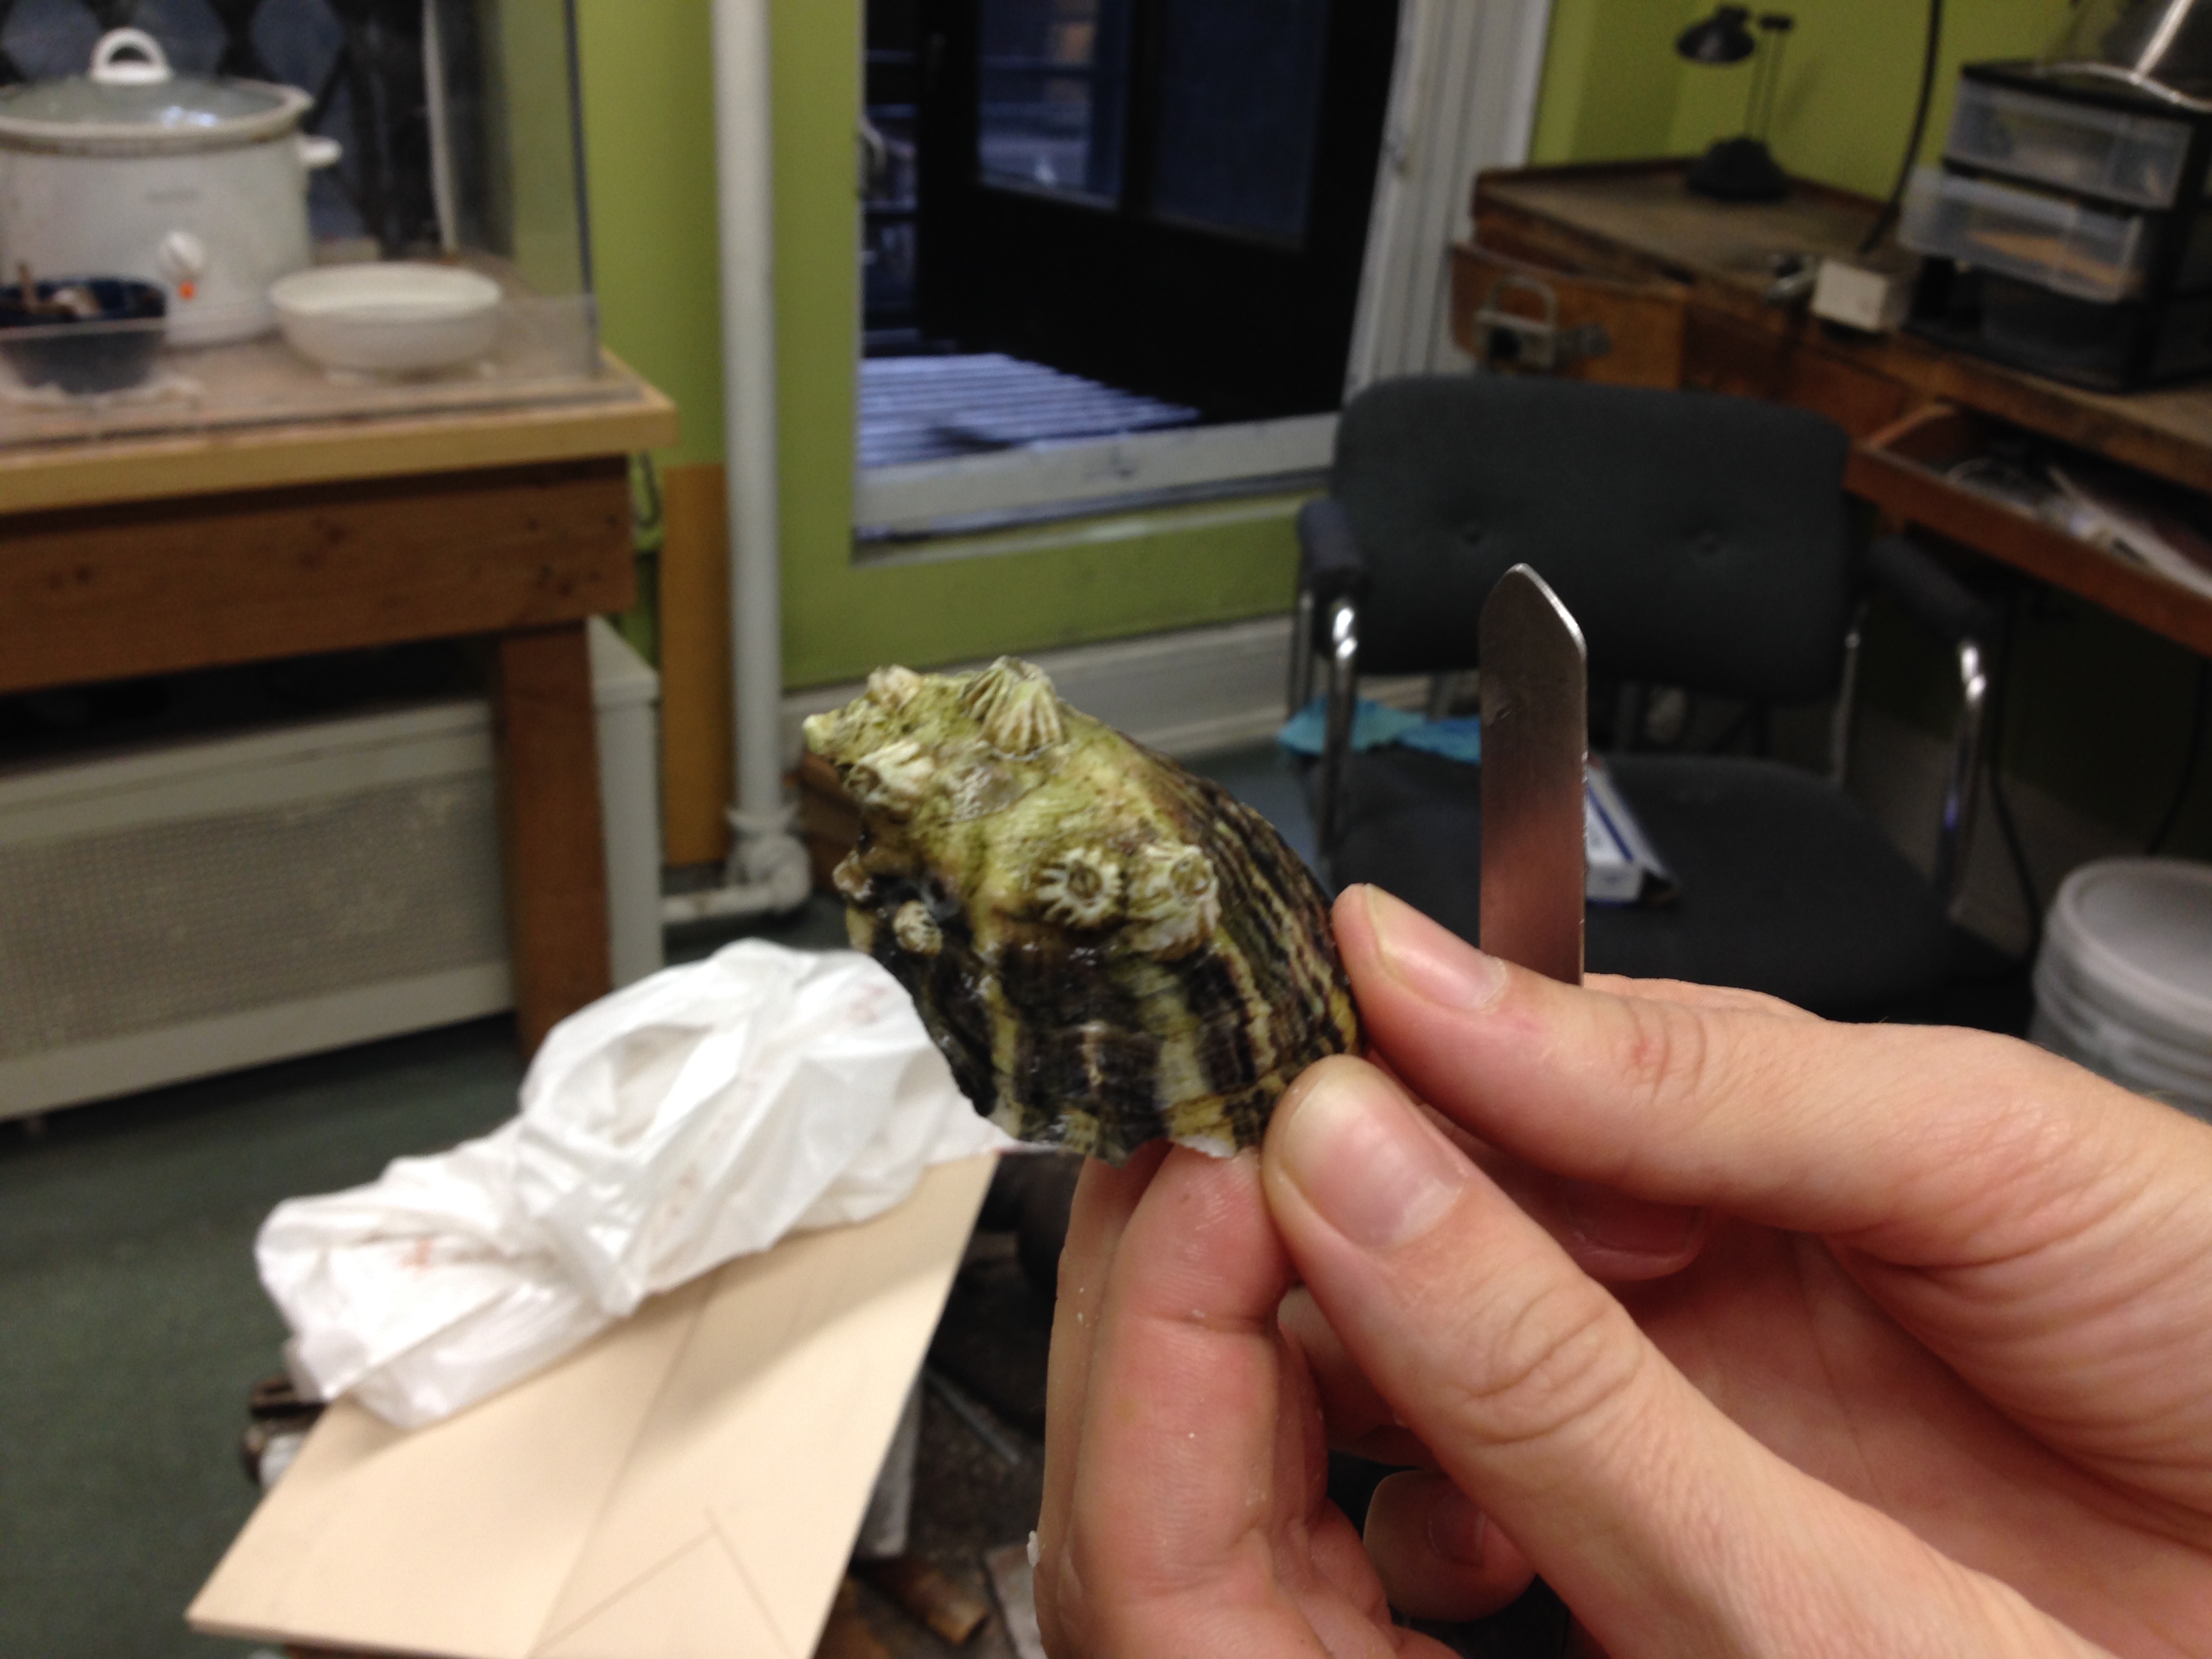
- Next part of protocol shaped by Jeanette and Donna’s research from other sources (sources include 2007 article page 3 regarding temperature and 19th century manual regarding pounding shells into uniform size pieces – presumably for consistent roasting, and putting single layer into kiln) note: observation : I find it difficult to visualize each step of the preparation process (time/tolls/order) before actually jumping in and doing it
- Jeanette smashes bag containing oysters with mallet, using considerable force working for about 5 minutes. Note- enlist the help of some big strong colleagues on Friday’s iteration of this. The mallet rips open the outer paper bag and some small shards of oyster shell escape.

- Make tray boat out of many layers of heavy duty aluminum foil [note: do NOT do this, it melts at high temperature!]
- Select similar size pieces. [Here we used thickness as a primary gage of size and secondarily used length and width, in an attempt for roasting consistency].
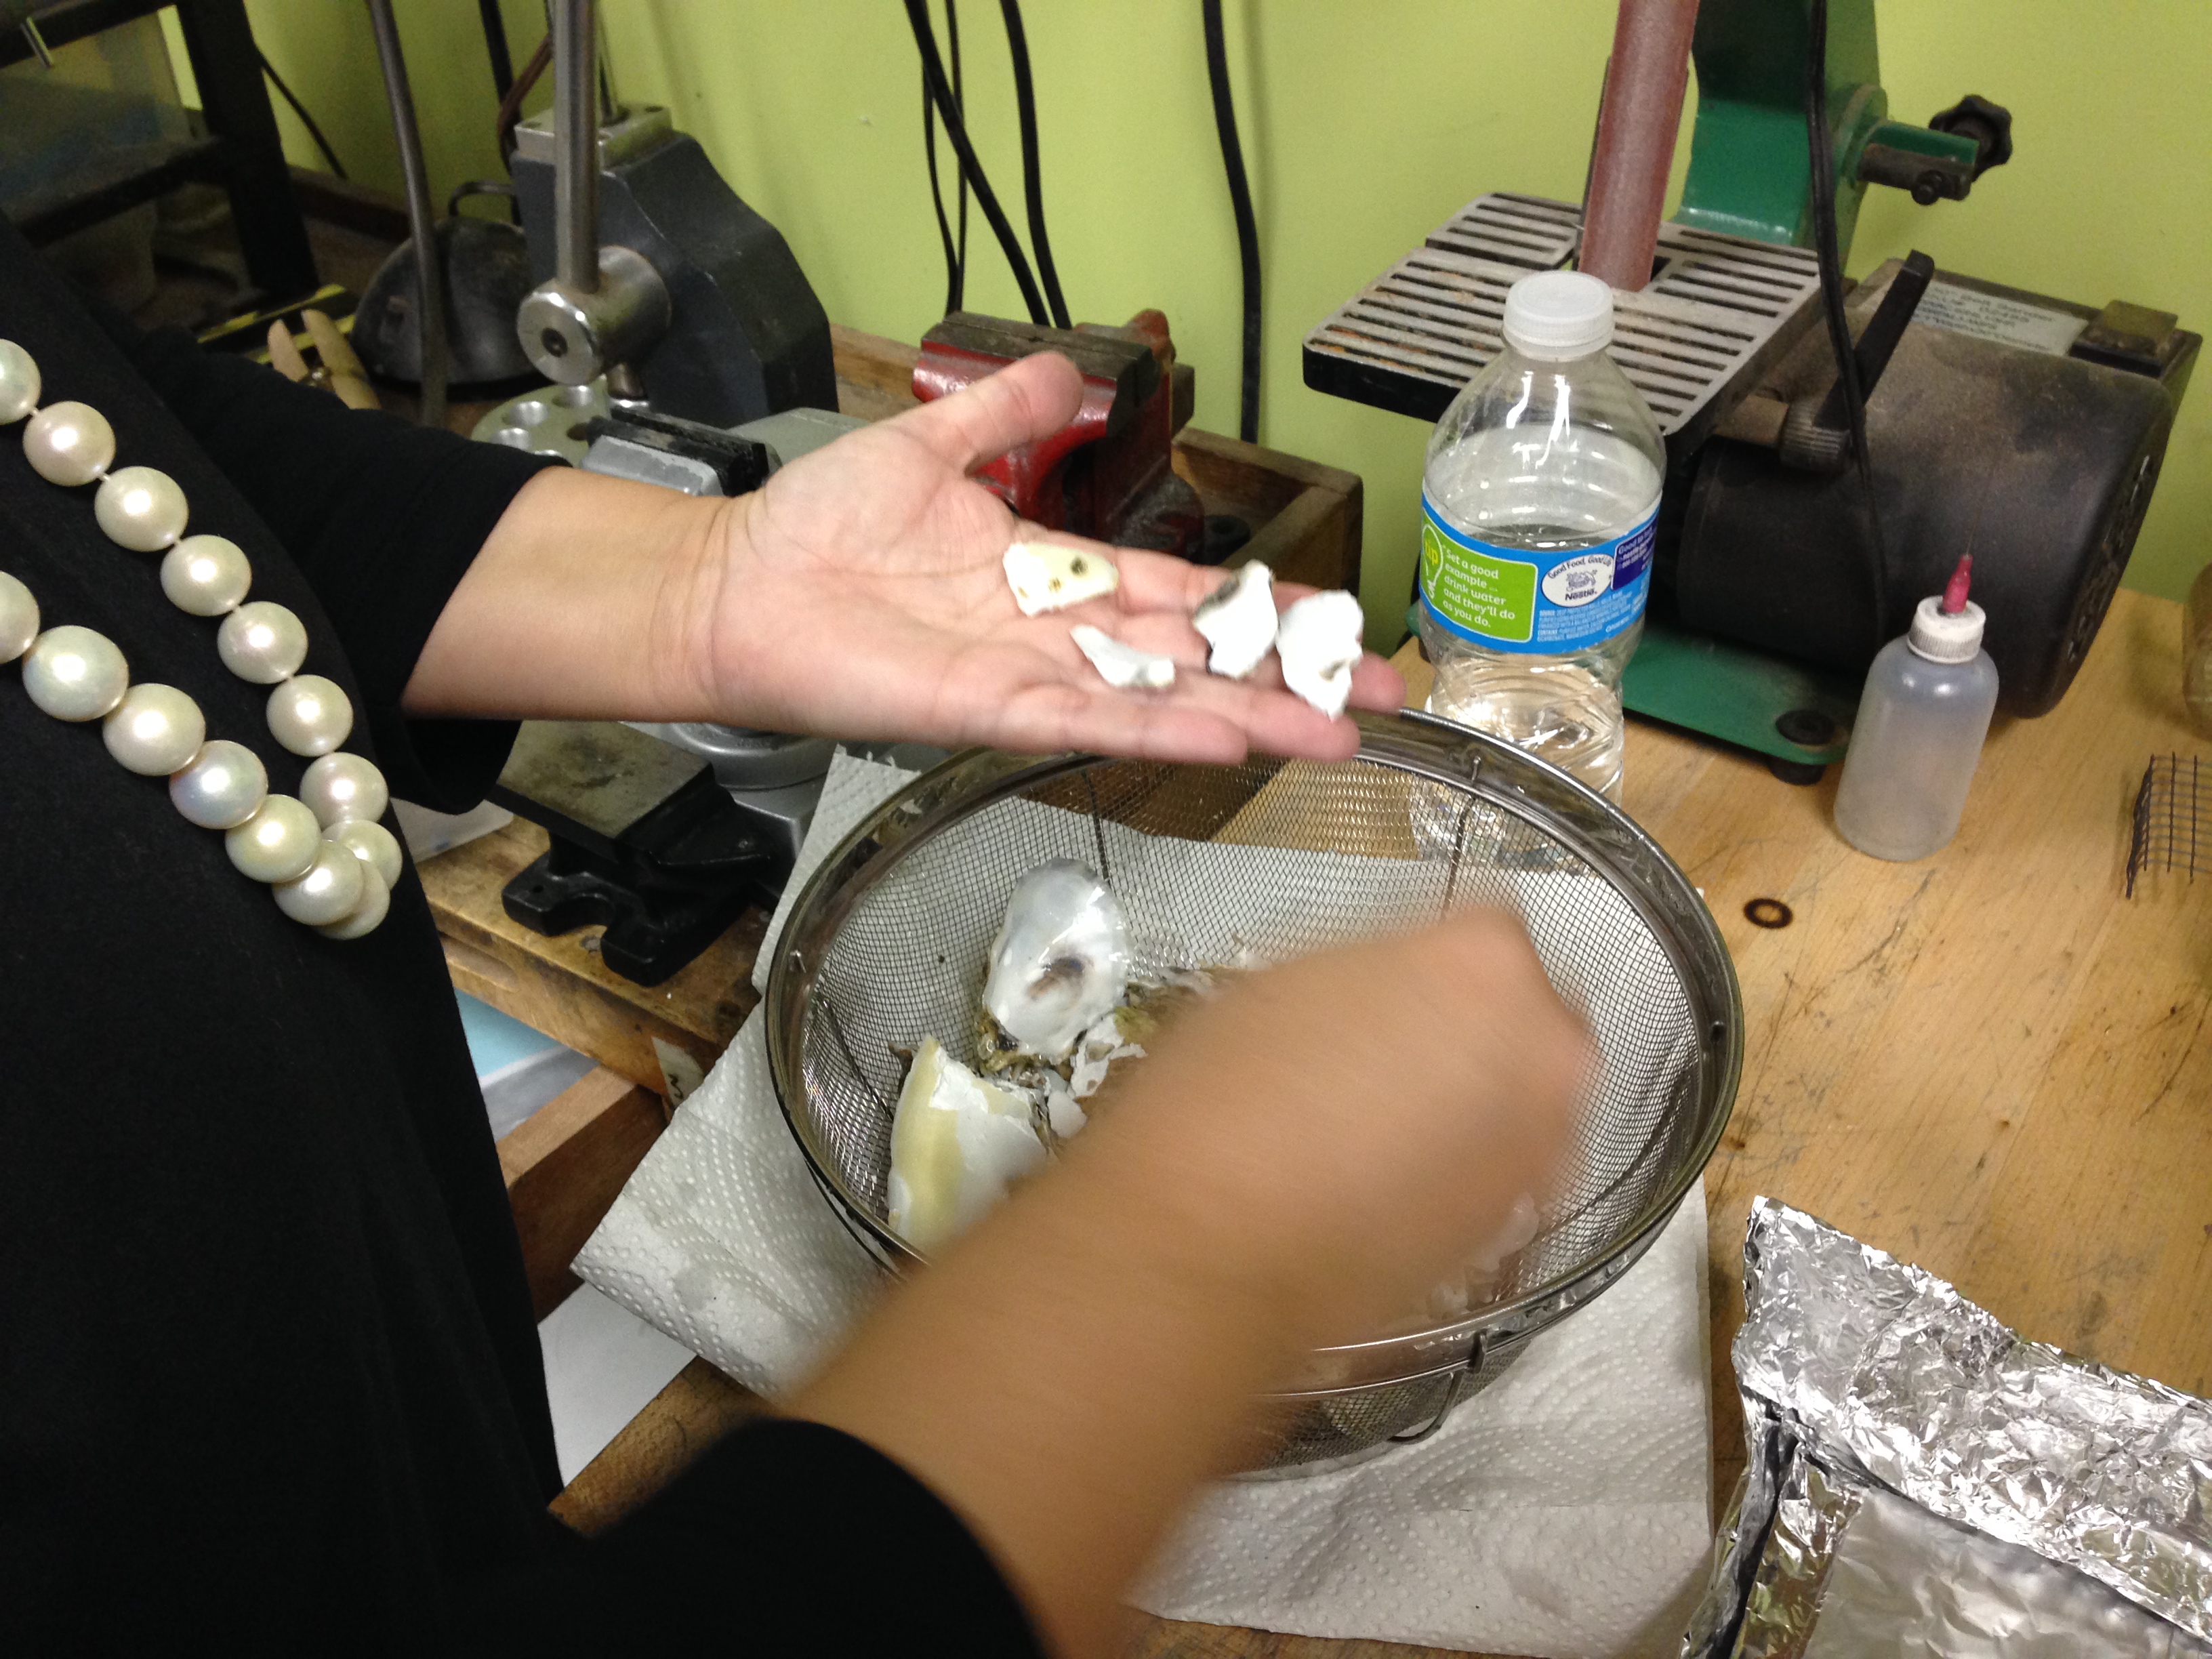
- Selected 9-12 uniform thumb size pieces and place in single layer on foil tray.
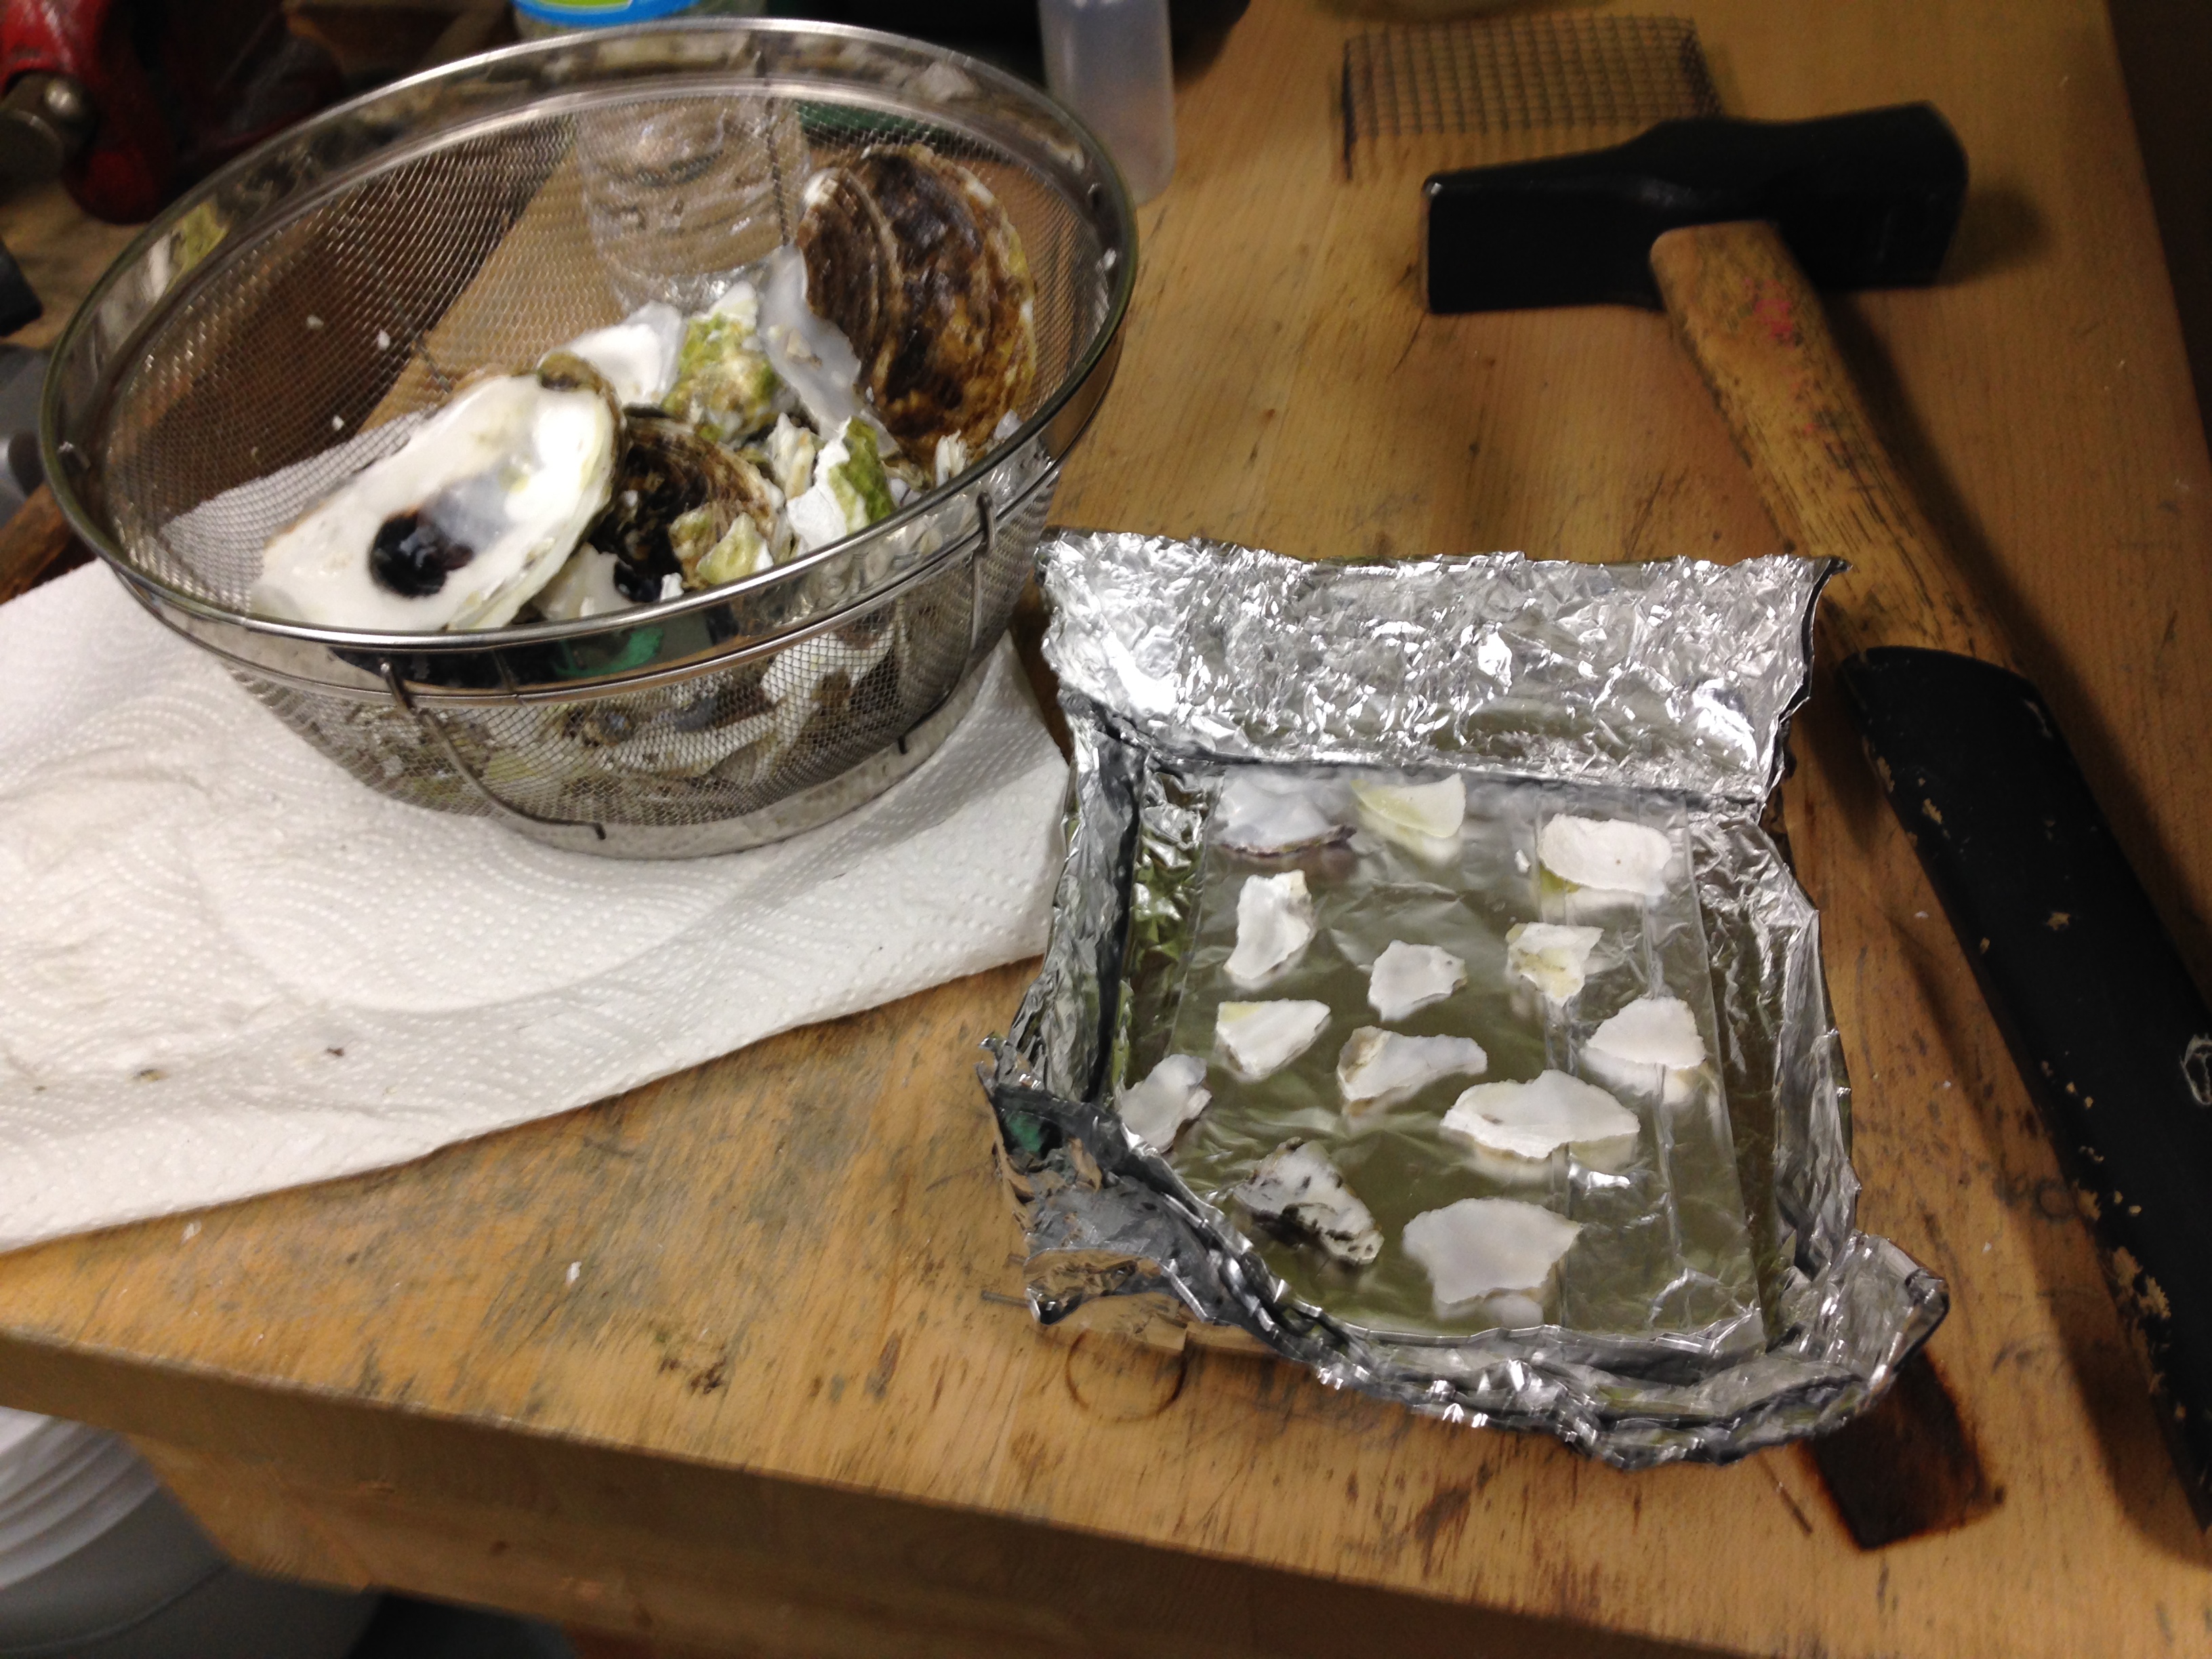
- Placed tray with oyster fragments in preheated kiln at 12:17 pm.question of timing : How long should we roast ? 15 minutes? 1 hour? Bones take a long time to roast. Are oyster shells like bones? We decide to start with 15 minutes and then check.
- .I immediately hear a crackling sound and see steam escaping form the vent. Both subside after 30 -60 seconds, although the steam continues at a less robust rate for about 5 minutes. We assume this is a result of external moisture burning off. Is there internal moisture as well?
- .At 17 minutes (12:34 pm) we open the kiln and find that the tin foil boat has turned white, ashy and is structurally compromised. The shells are chalky, powdery white.
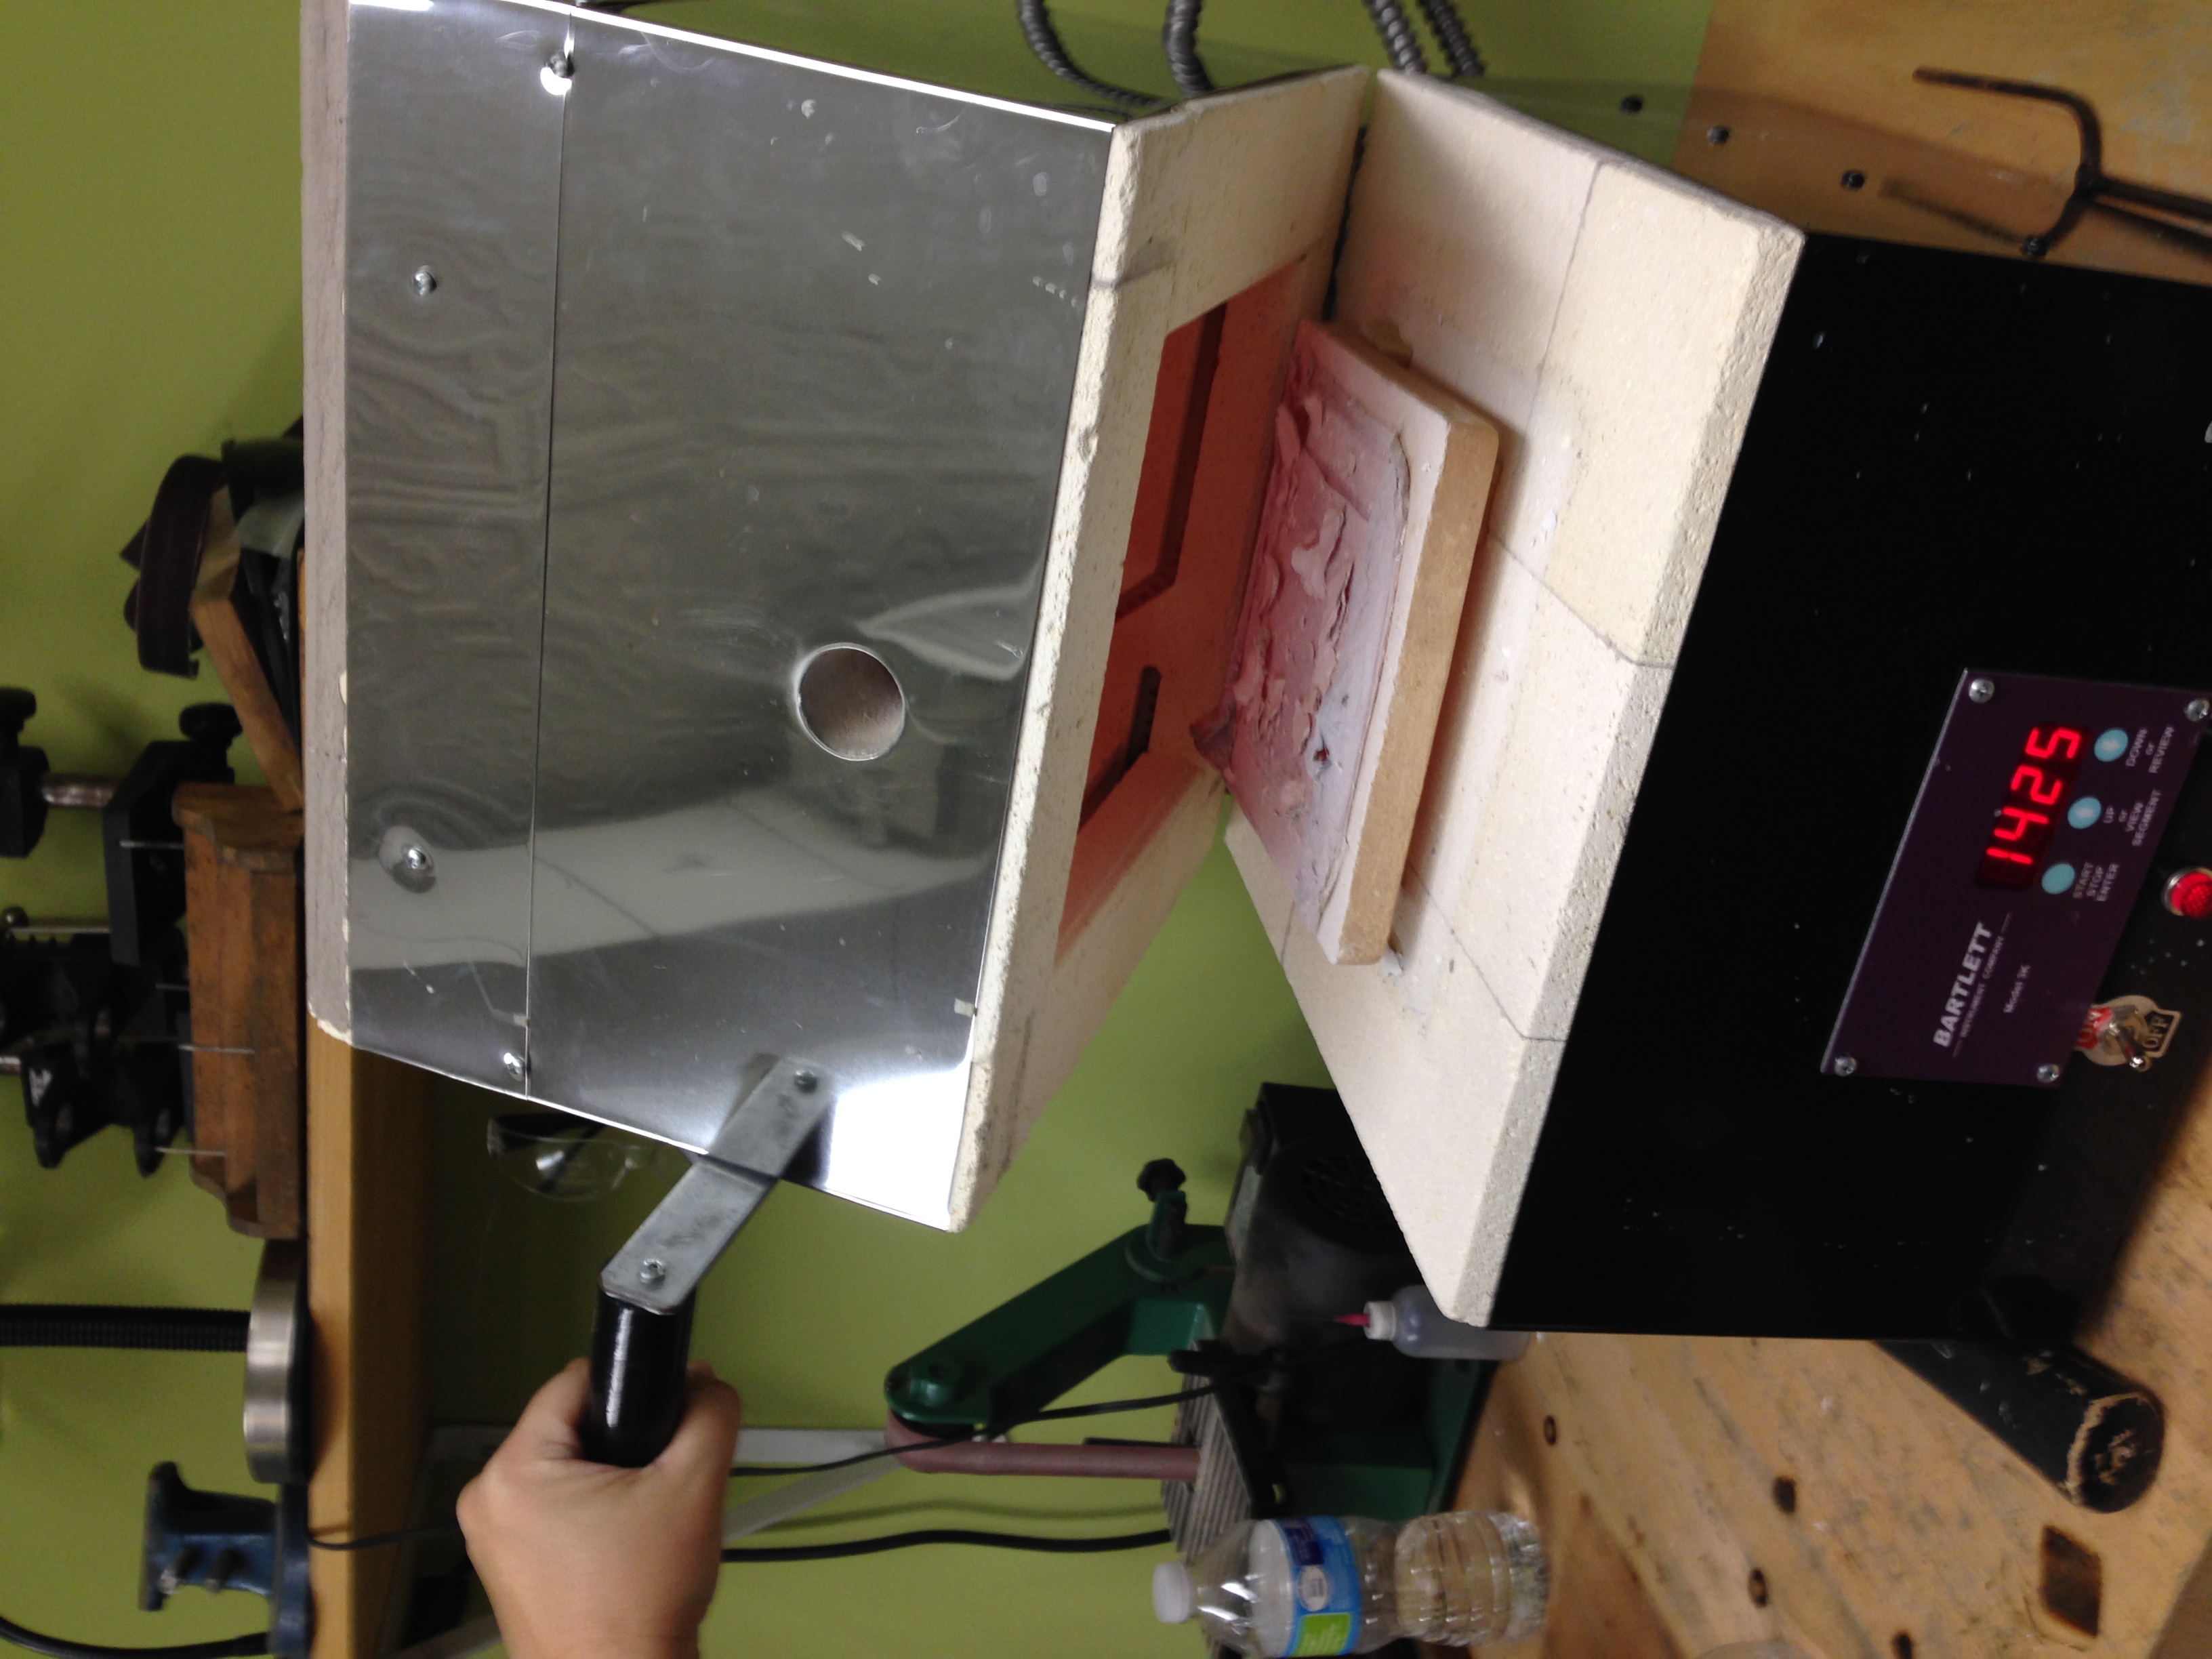
- 12:37pm we turn off the kiln
- Discussion: What can we use as a tray? Lab specific equipment? Copper sheets – will oxidation raise contamination issues? Tintanium trivets? What do potters use? We decide to try a piece of fire brick for next experiment. Note: Search manuscript for furnace information (near the cannon section) make internal references to other parts of the manuscript)
- At 12:52 we remove the oyster shells from the kiln – they look very dry, powdery, and chalky. Once safe to touch, we manipulate the pieces between our fingers and it disintegrates into white powdery chalk very similar in handfeel to talc (slippery, powdery). There is a color difference white vs. gray for outside chalky part vs. inside firmer gray part which requires more manipulation. This could easily be smashed up with a rolling pin into powder.
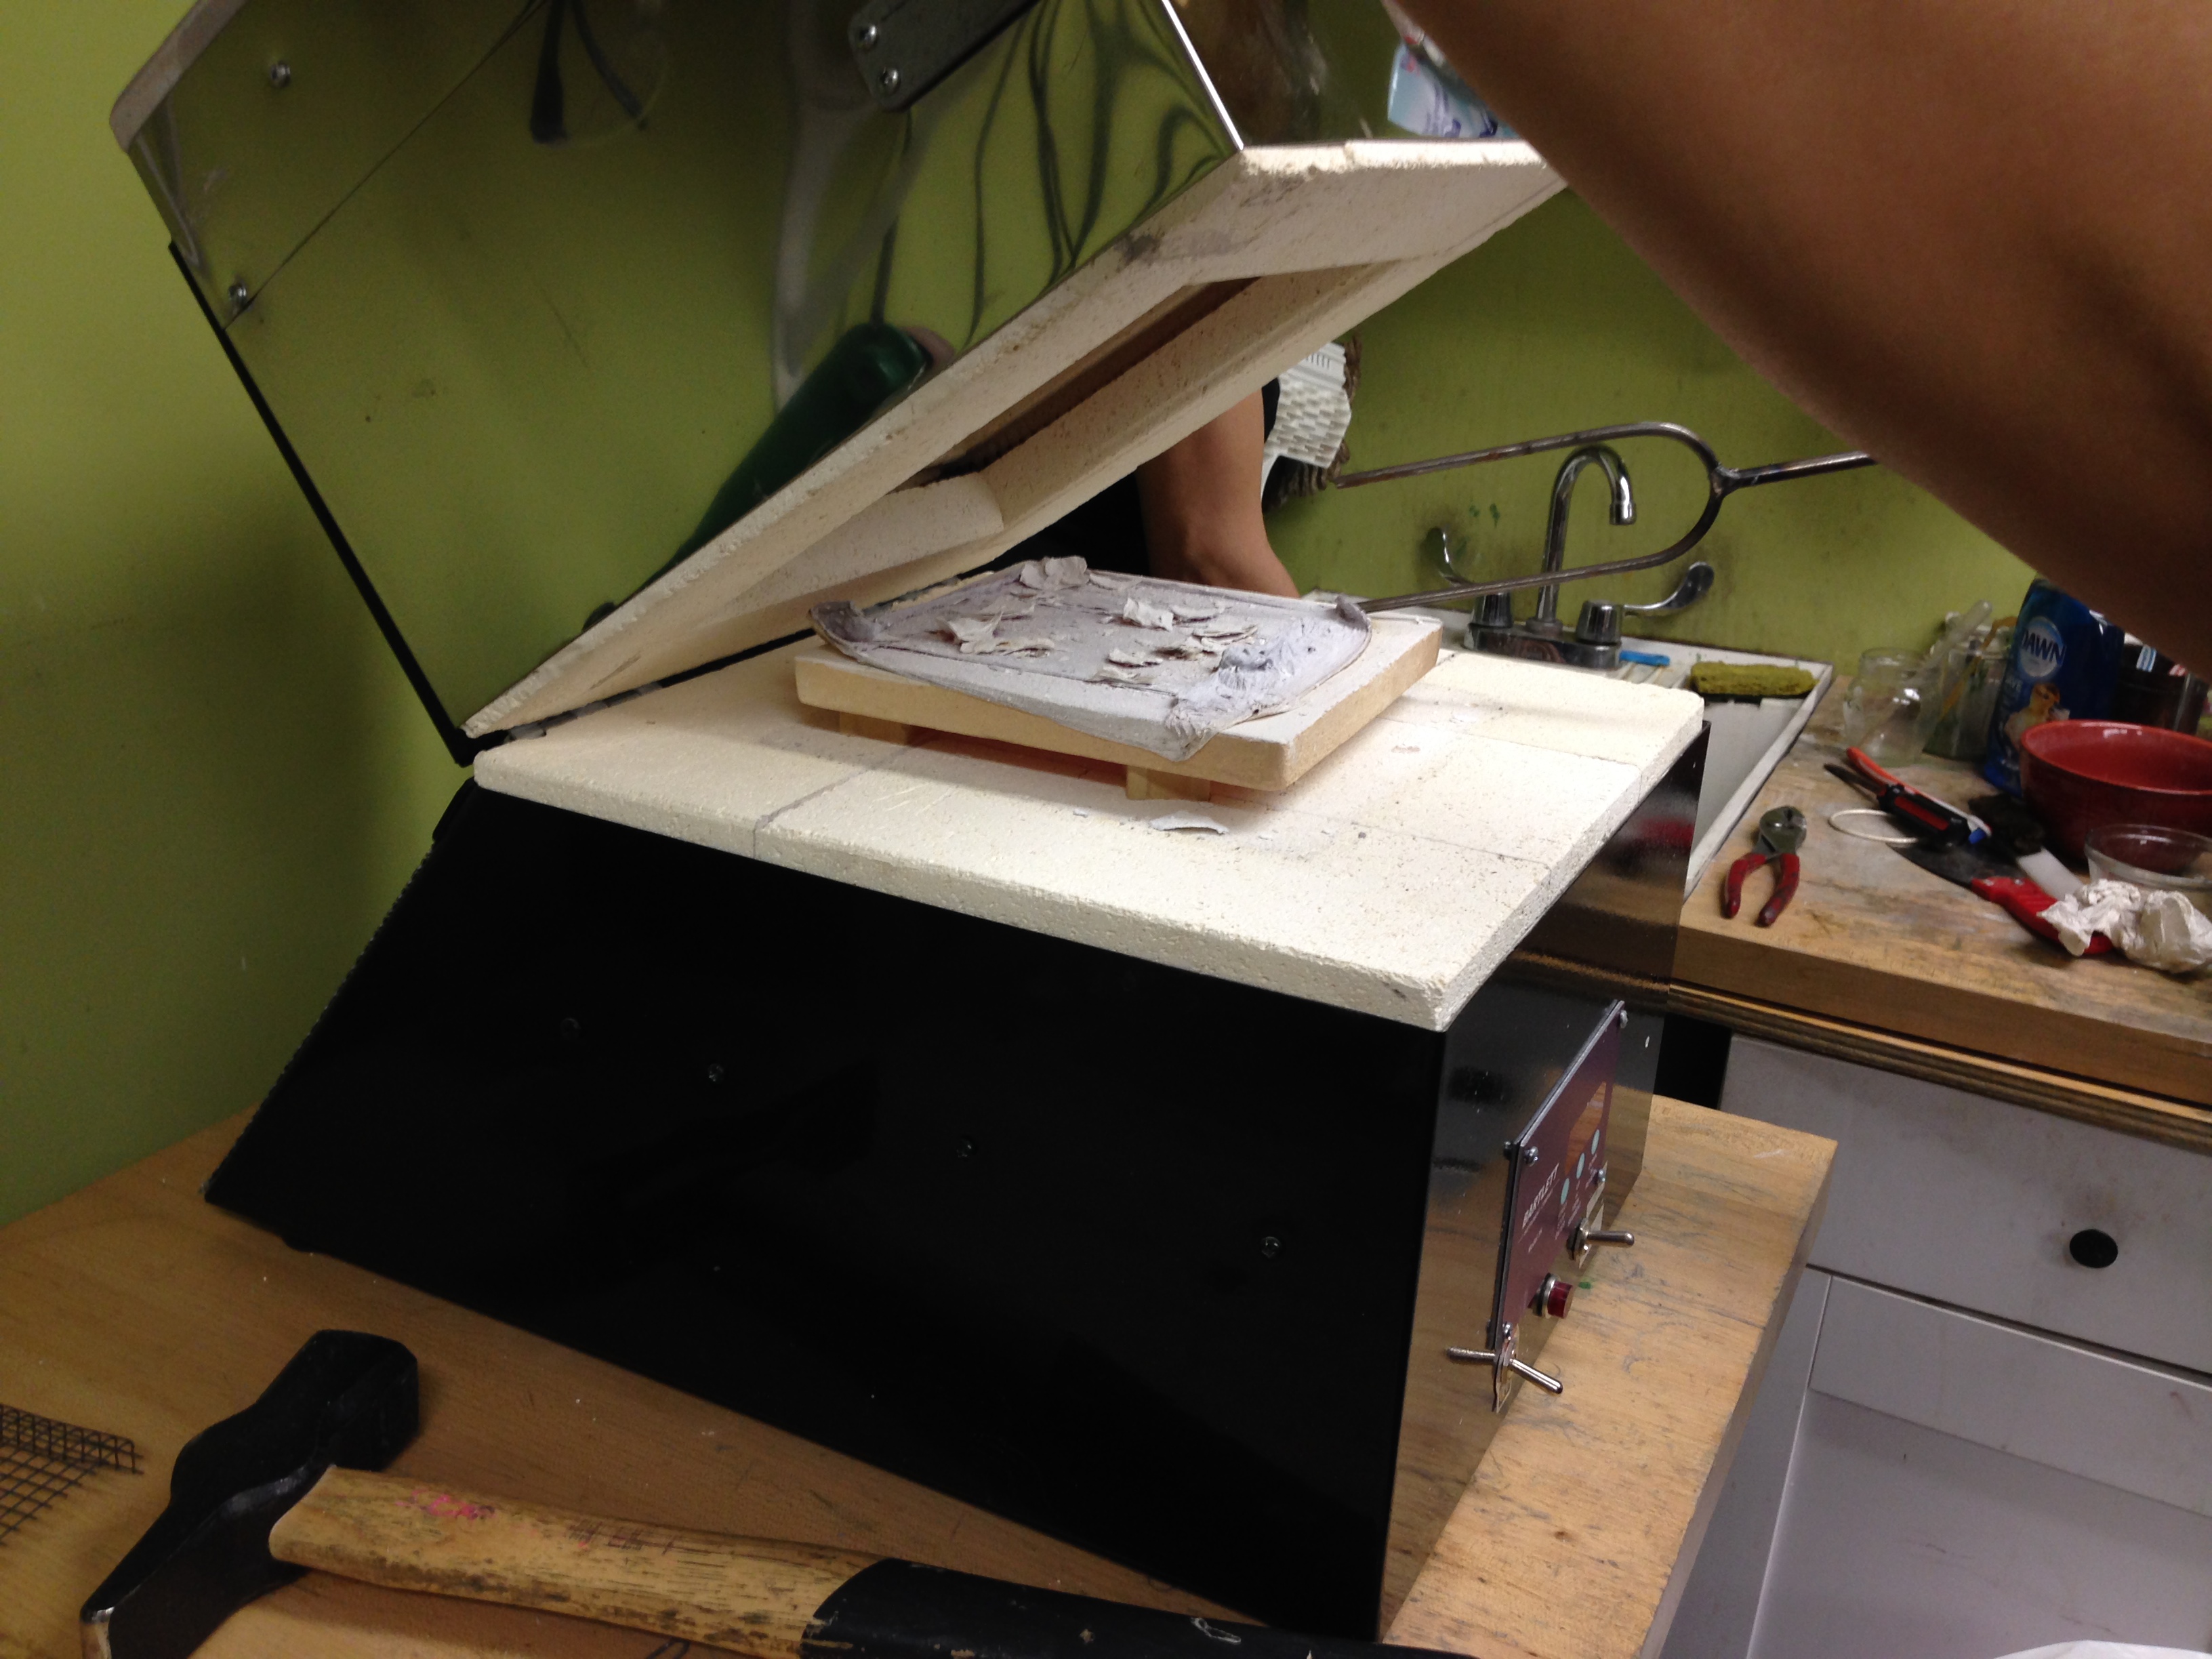

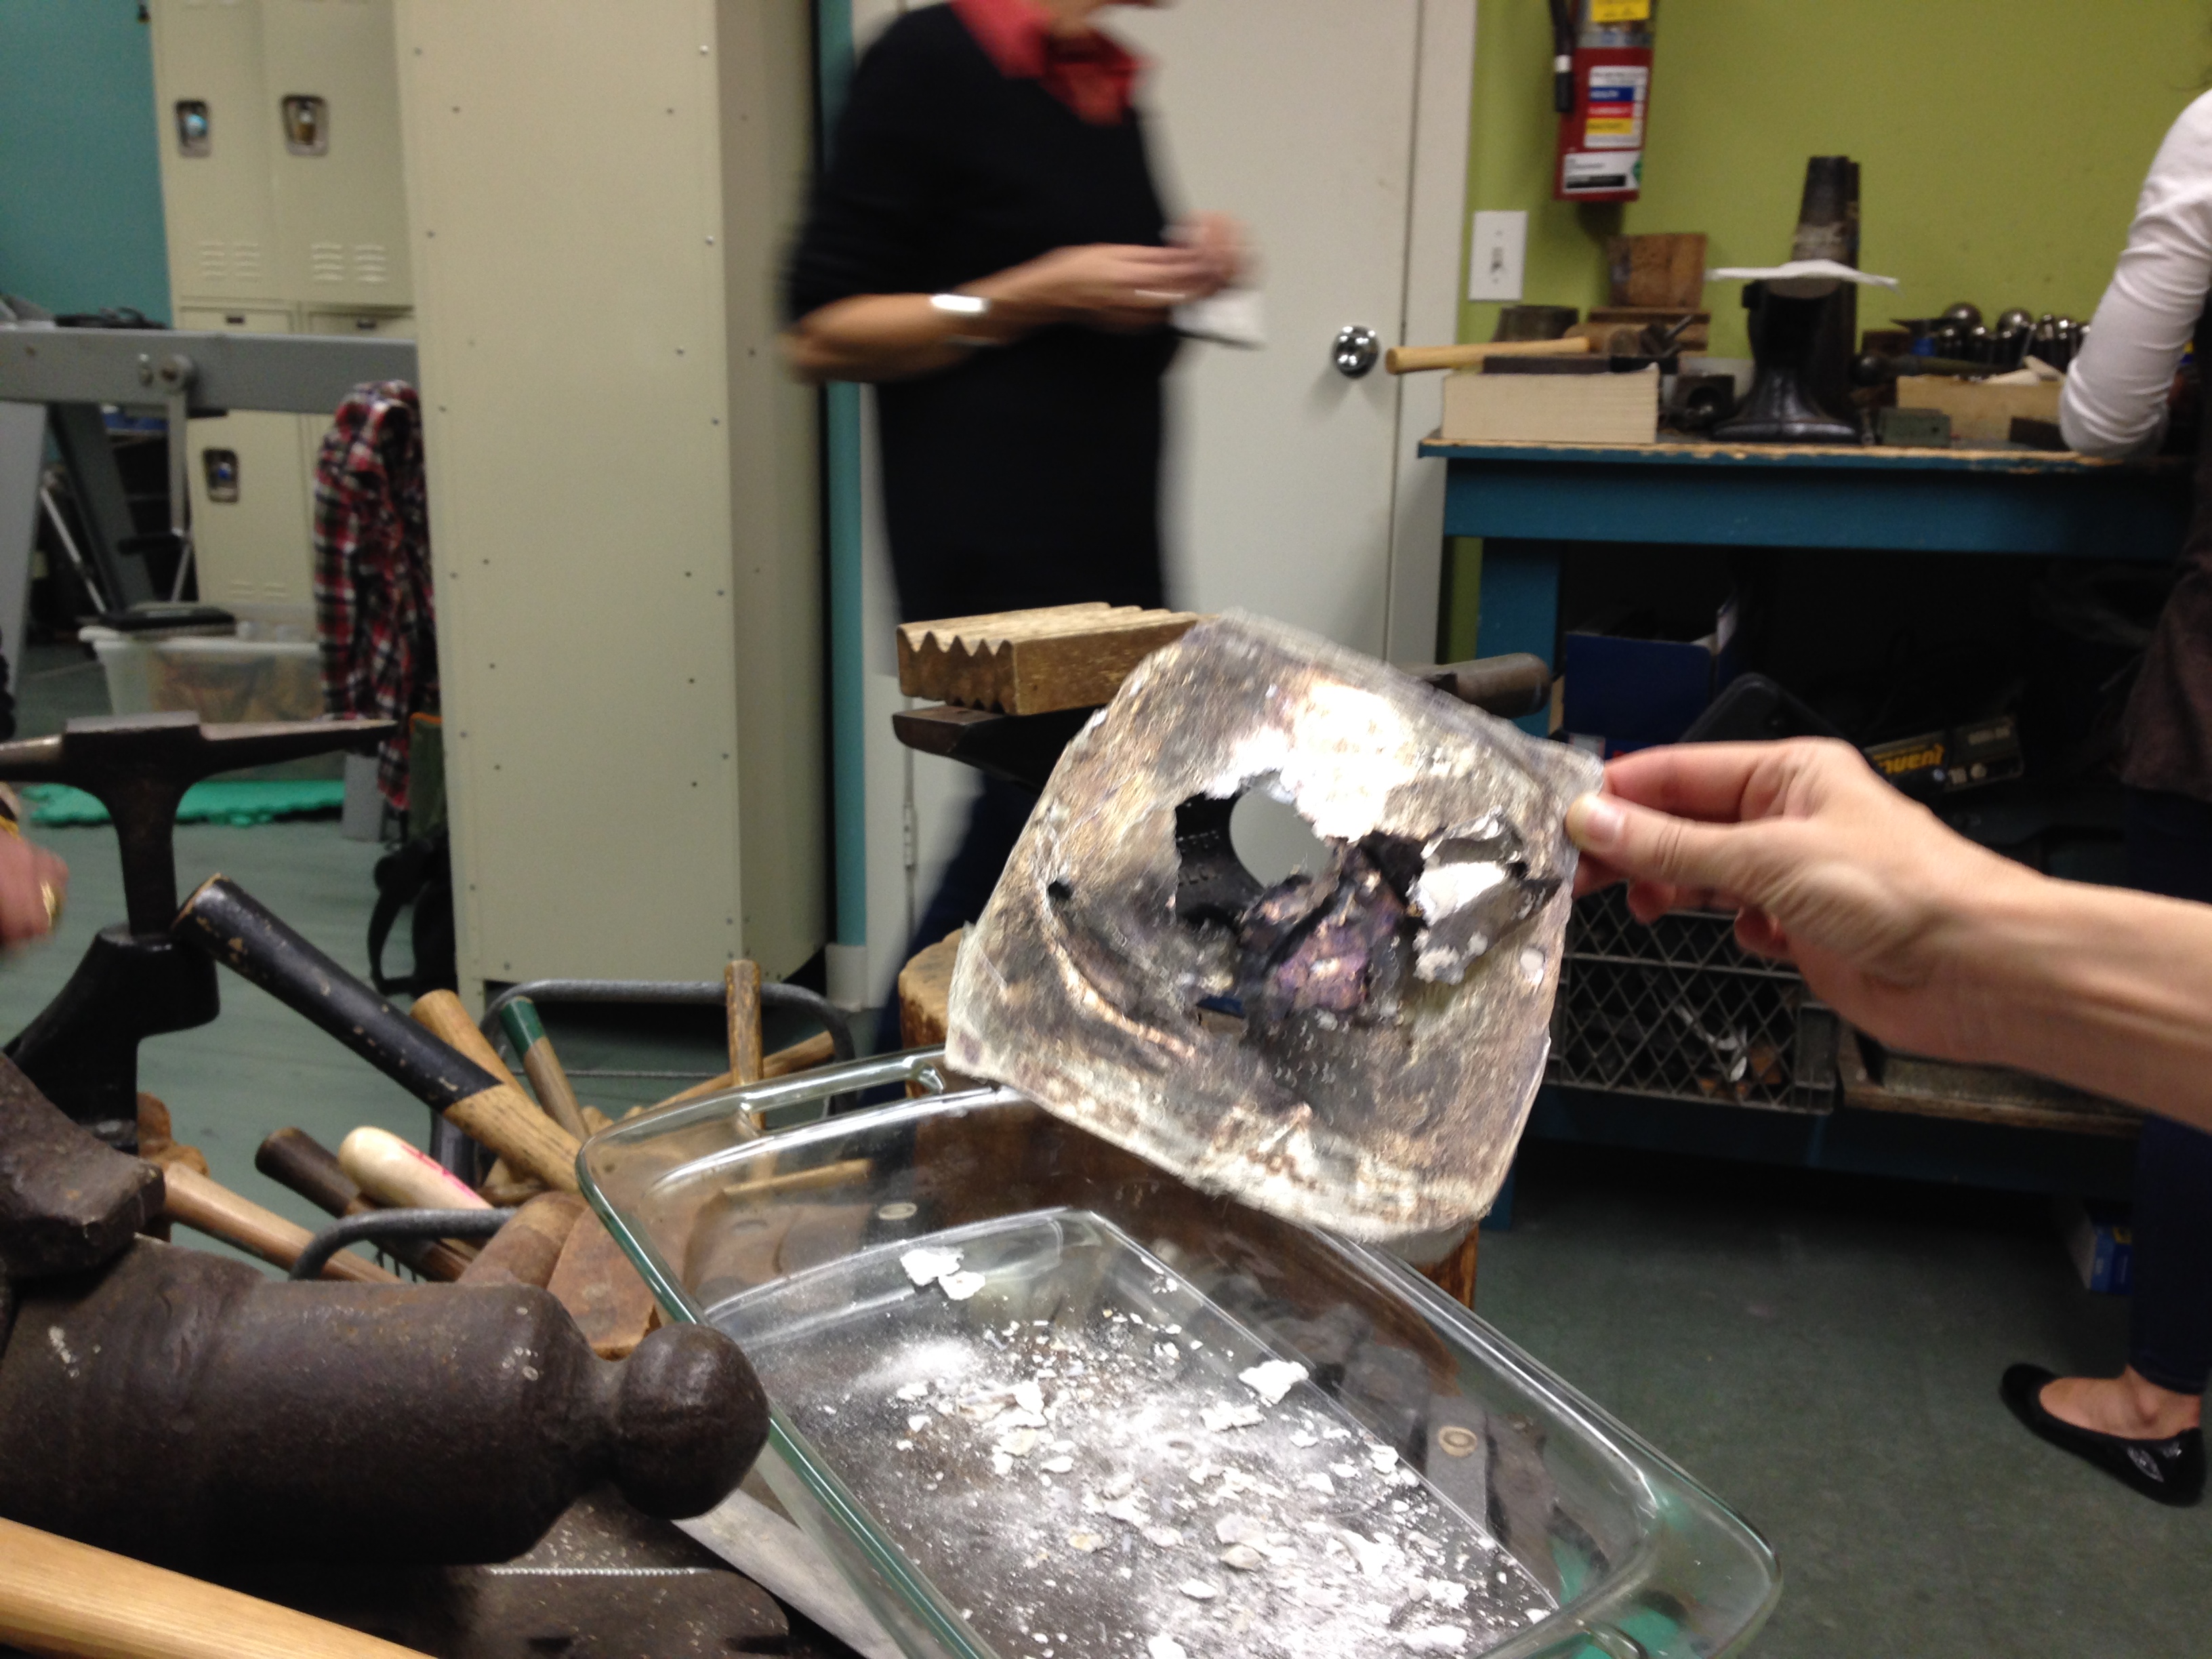
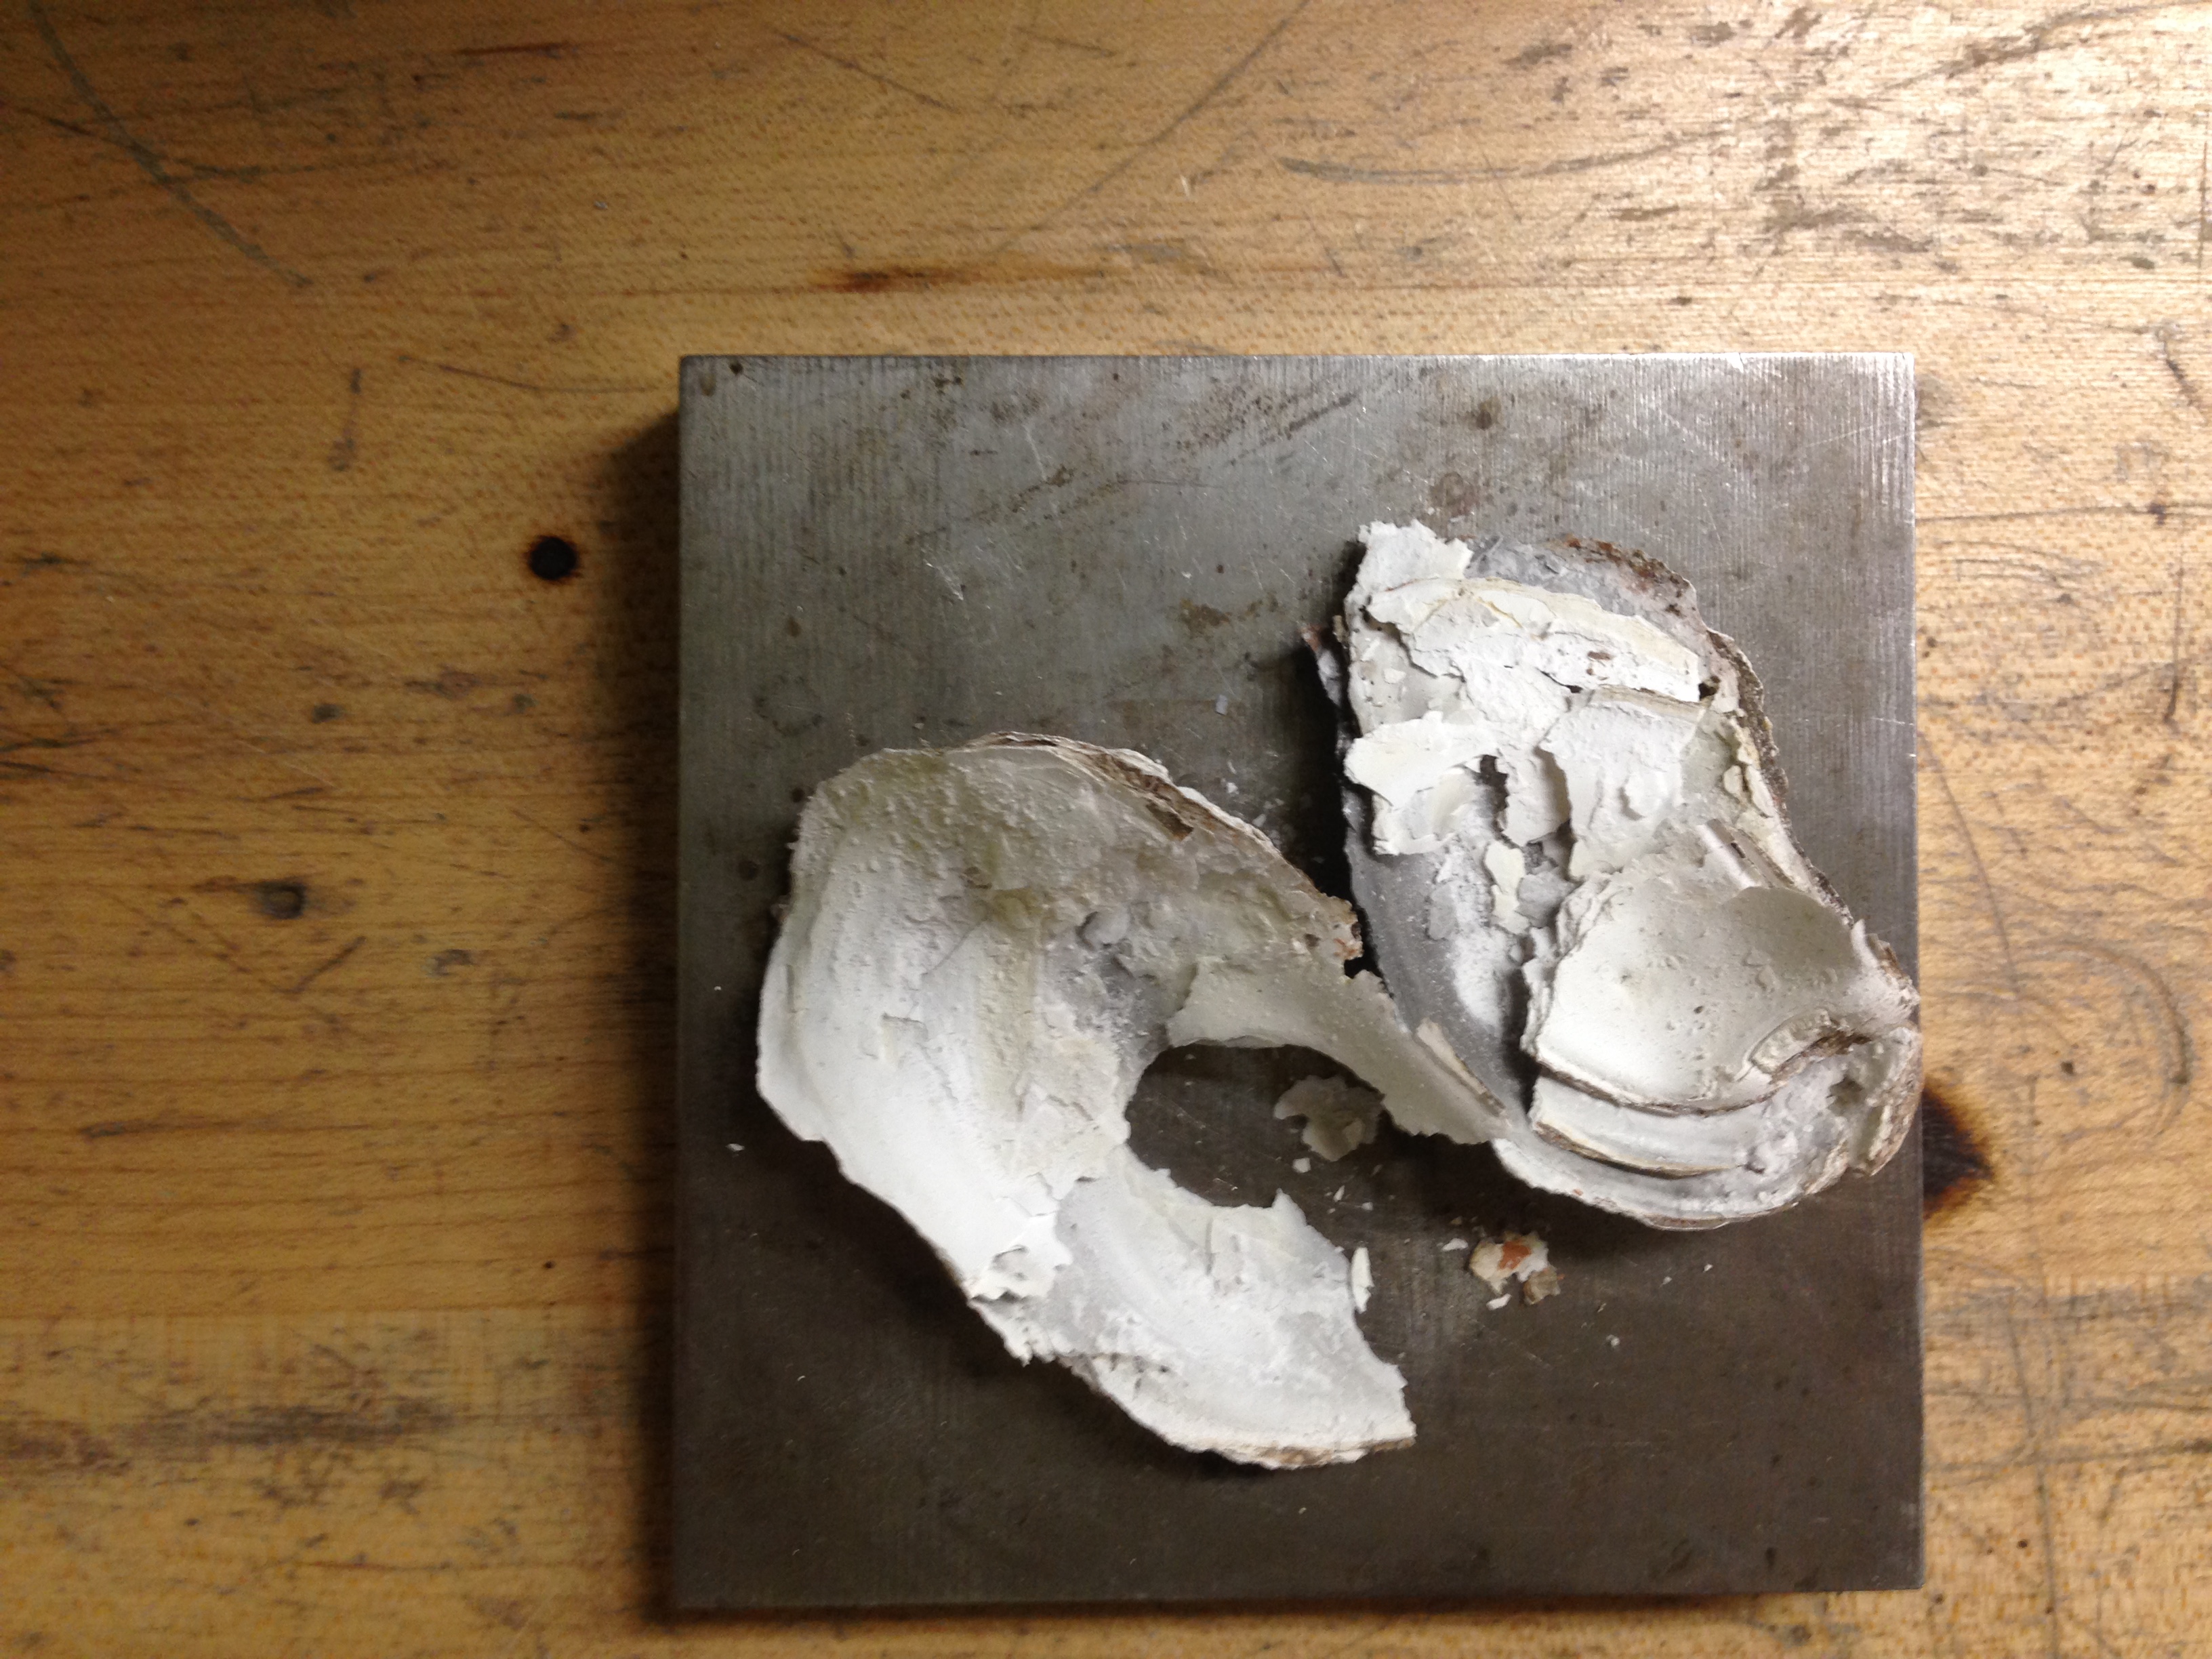
- At 12:55 we place one whole, intact, clean oyster shell on a fire brick and place into kiln which is reset/ heating up to 1500 degrees. Note after ten minutes, whole oyster shell exploded and fell off brick. Must be broken into pieces!
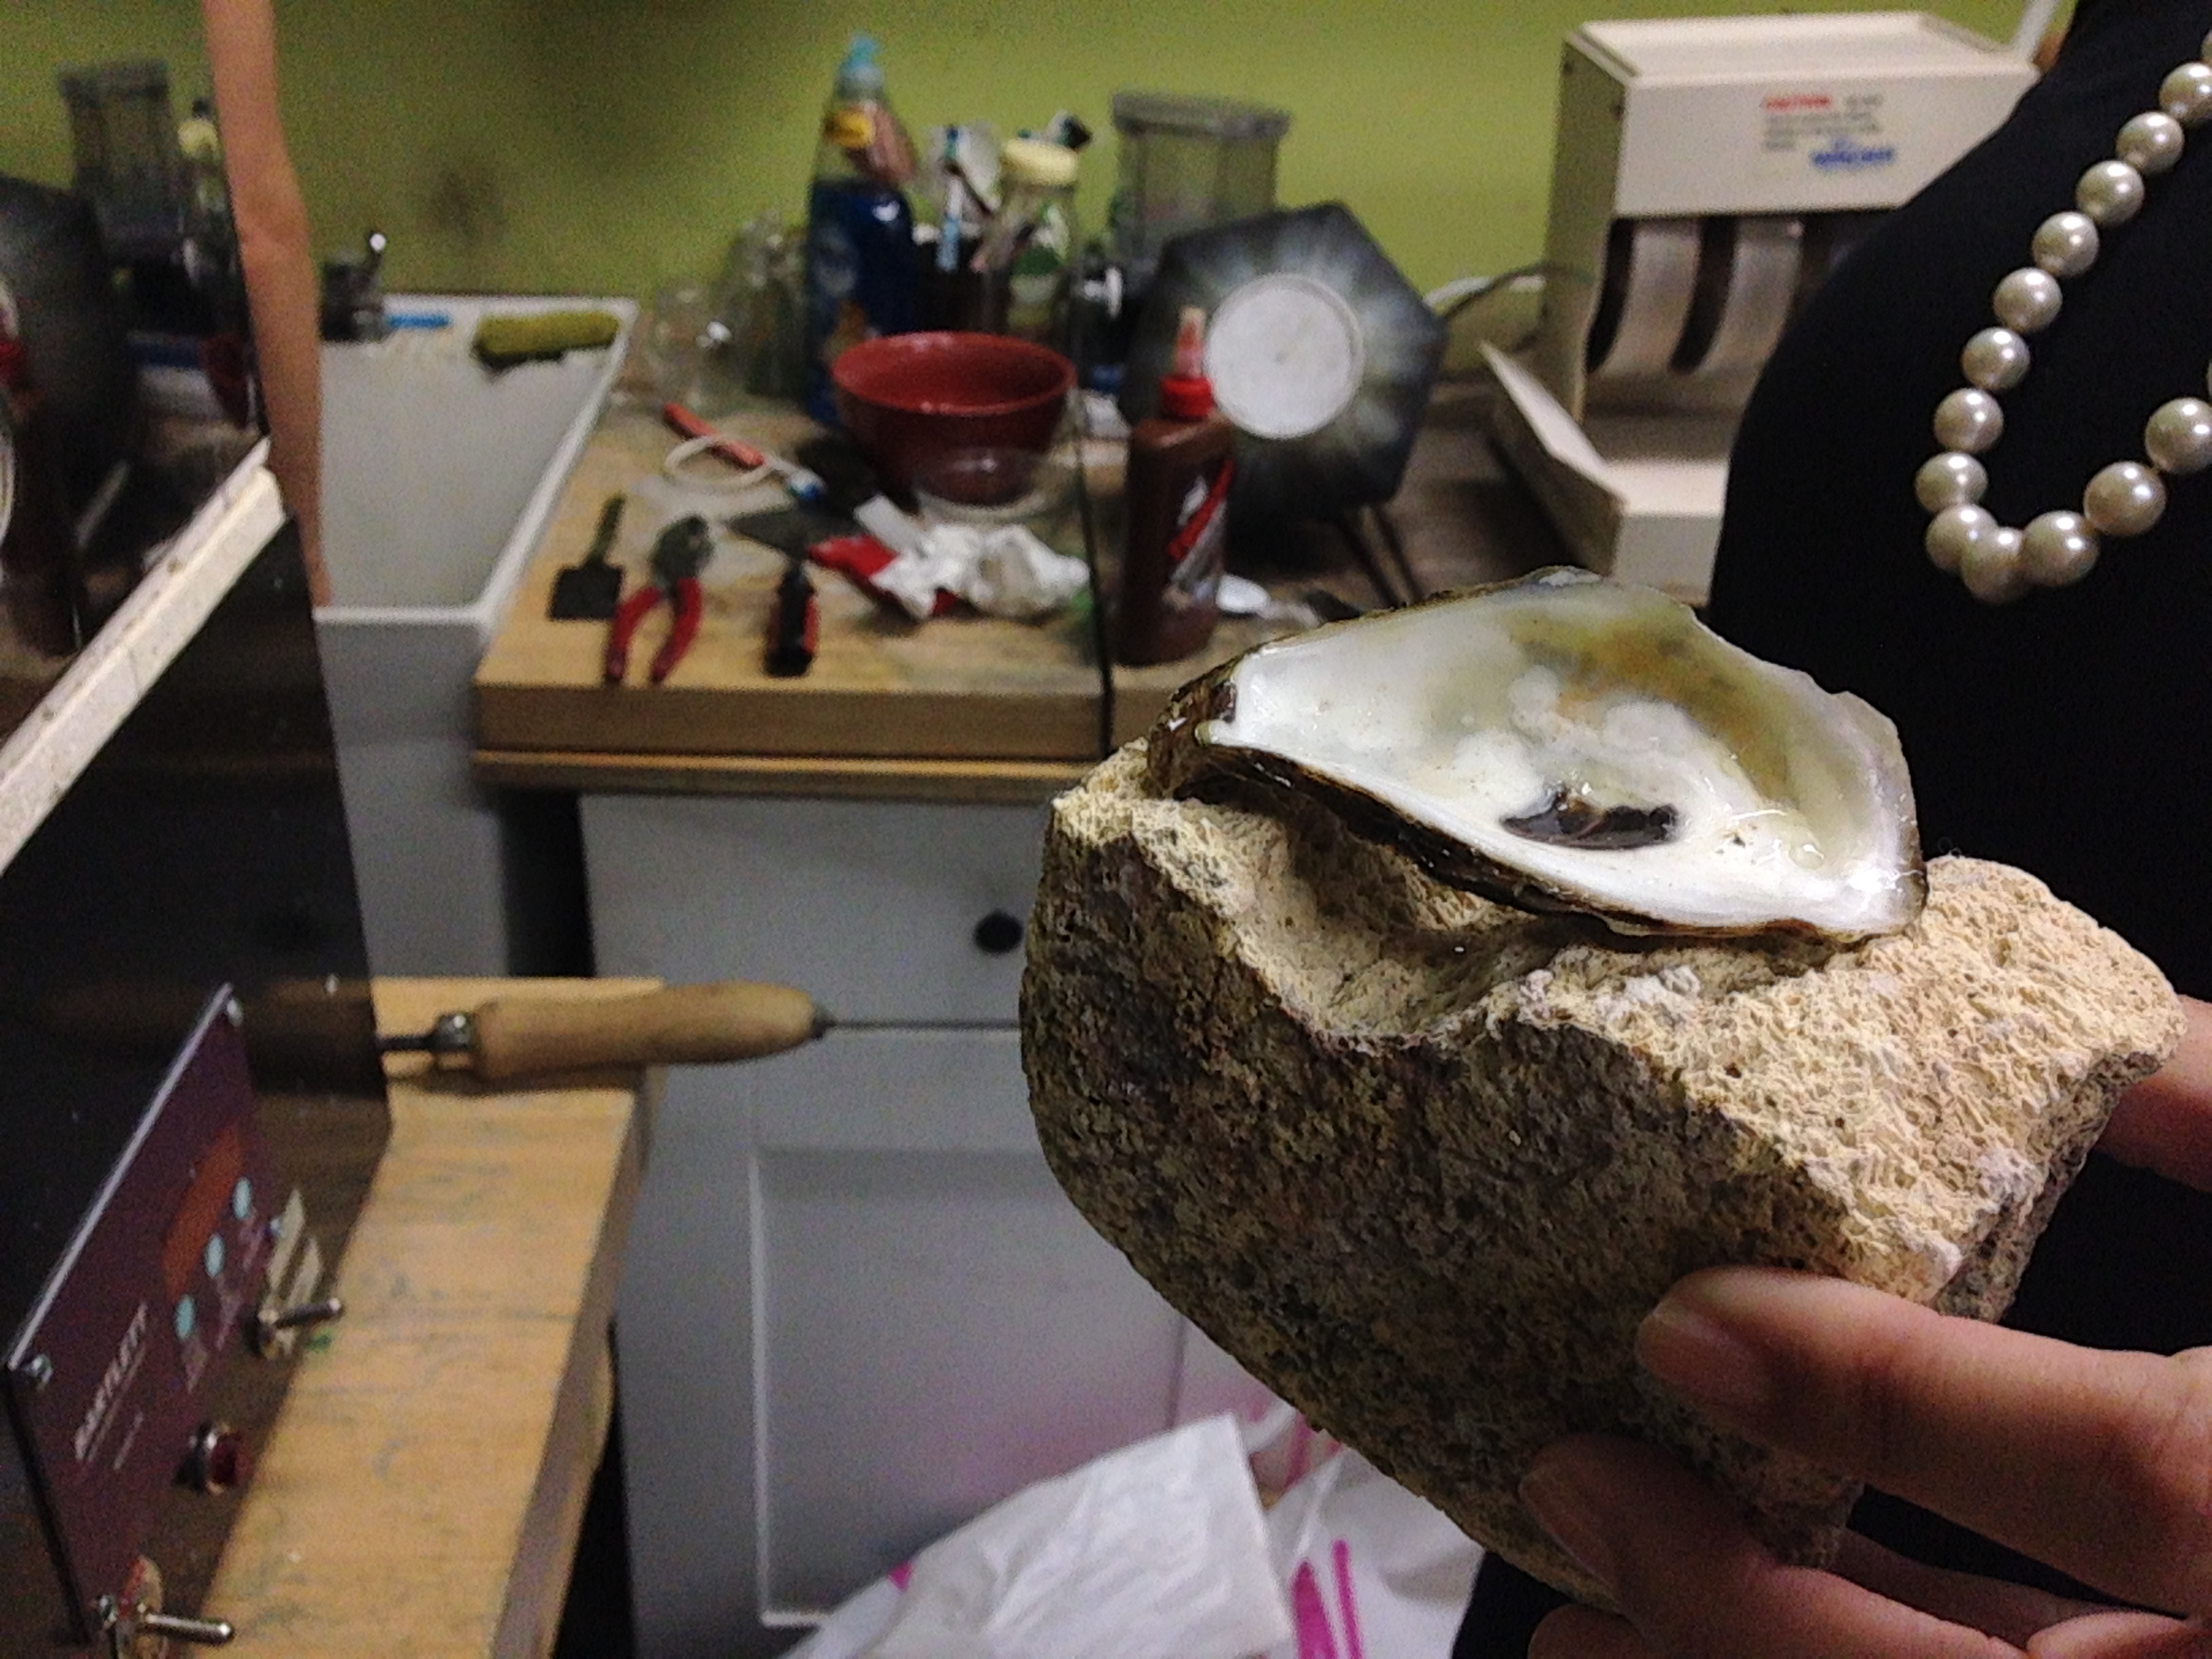
Side note: search manuscript for horse hair sieve craft recipe for tammi cloth substitute
Supplies needed to prepare Oysters
bags (plastic and paper-large)
newspaper?
sieve (metal collander?)
bowl
hammer or mallet
pliers
butter knife
rolling pin
butcher's paper
fire brick or alternative item to use as platform in kiln something that won't melt at 1500 degrees F (figure out by asking potter's what they use or some kind of lab equipment, titanium tray? ask Joel and Pamela and Jenny for suggestions)
oyster shells
Pictures of the exploded oyster shell:
Videos:
November 11: Oyster shells, continued
NAME: Emogene Cataldo & Julianna ViscoDATE AND TIME: 11/11/14 11:15am
LOCATION: Columbia
SUBJECT: Oyster update
Much of the last two class periods have been spent crushing oyster shells. Lessons learned:
- rinse oysters again to get silt and smell off of them
- put oysters in a plastic bag of some sort, but don't put too many---there should only be one "layer" of shells. This makes breaking them up easier.
- the shells are hard and sharp, so they will break through even a thick plastic very easily. To contain the shells and keep them from splintering, wrap them in a bath towel (one layer, so that the shells are still being crushed against a hard surface rather than a soft pile of terry cloth)
- hit the shells with the hammer using your whole shoulder and arm to maximize impact; allow gravity to do some of the work.
- wear PPE: lab coats, glasses, gloves
- sort shells into medium and small pieces
- be prepared for the nasty smell
According to Julia Walther, a practicing ceramicist, unglazed terra cotta pots should be fine as receptacles for the shells up to 1900 degrees ("cone 4" in ceramicist speak). We purchased a terra cotta flower pot. The roasting time might be longer because the shells will not be able to "spread out" on a flatter surface, as was done in the experiment at the jewelry studio.
We've had to adjust our schedule to account for the kiln, so it is possible that we will turn our focus to our wax and tallow experiments.
November 14: oyster shells, continued
NAME: Emogene Cataldo & Julianna ViscoDATE AND TIME: Nov. 14, 12:30pm
LOCATION: Columbia
SUBJECT: Crushing oyster shells
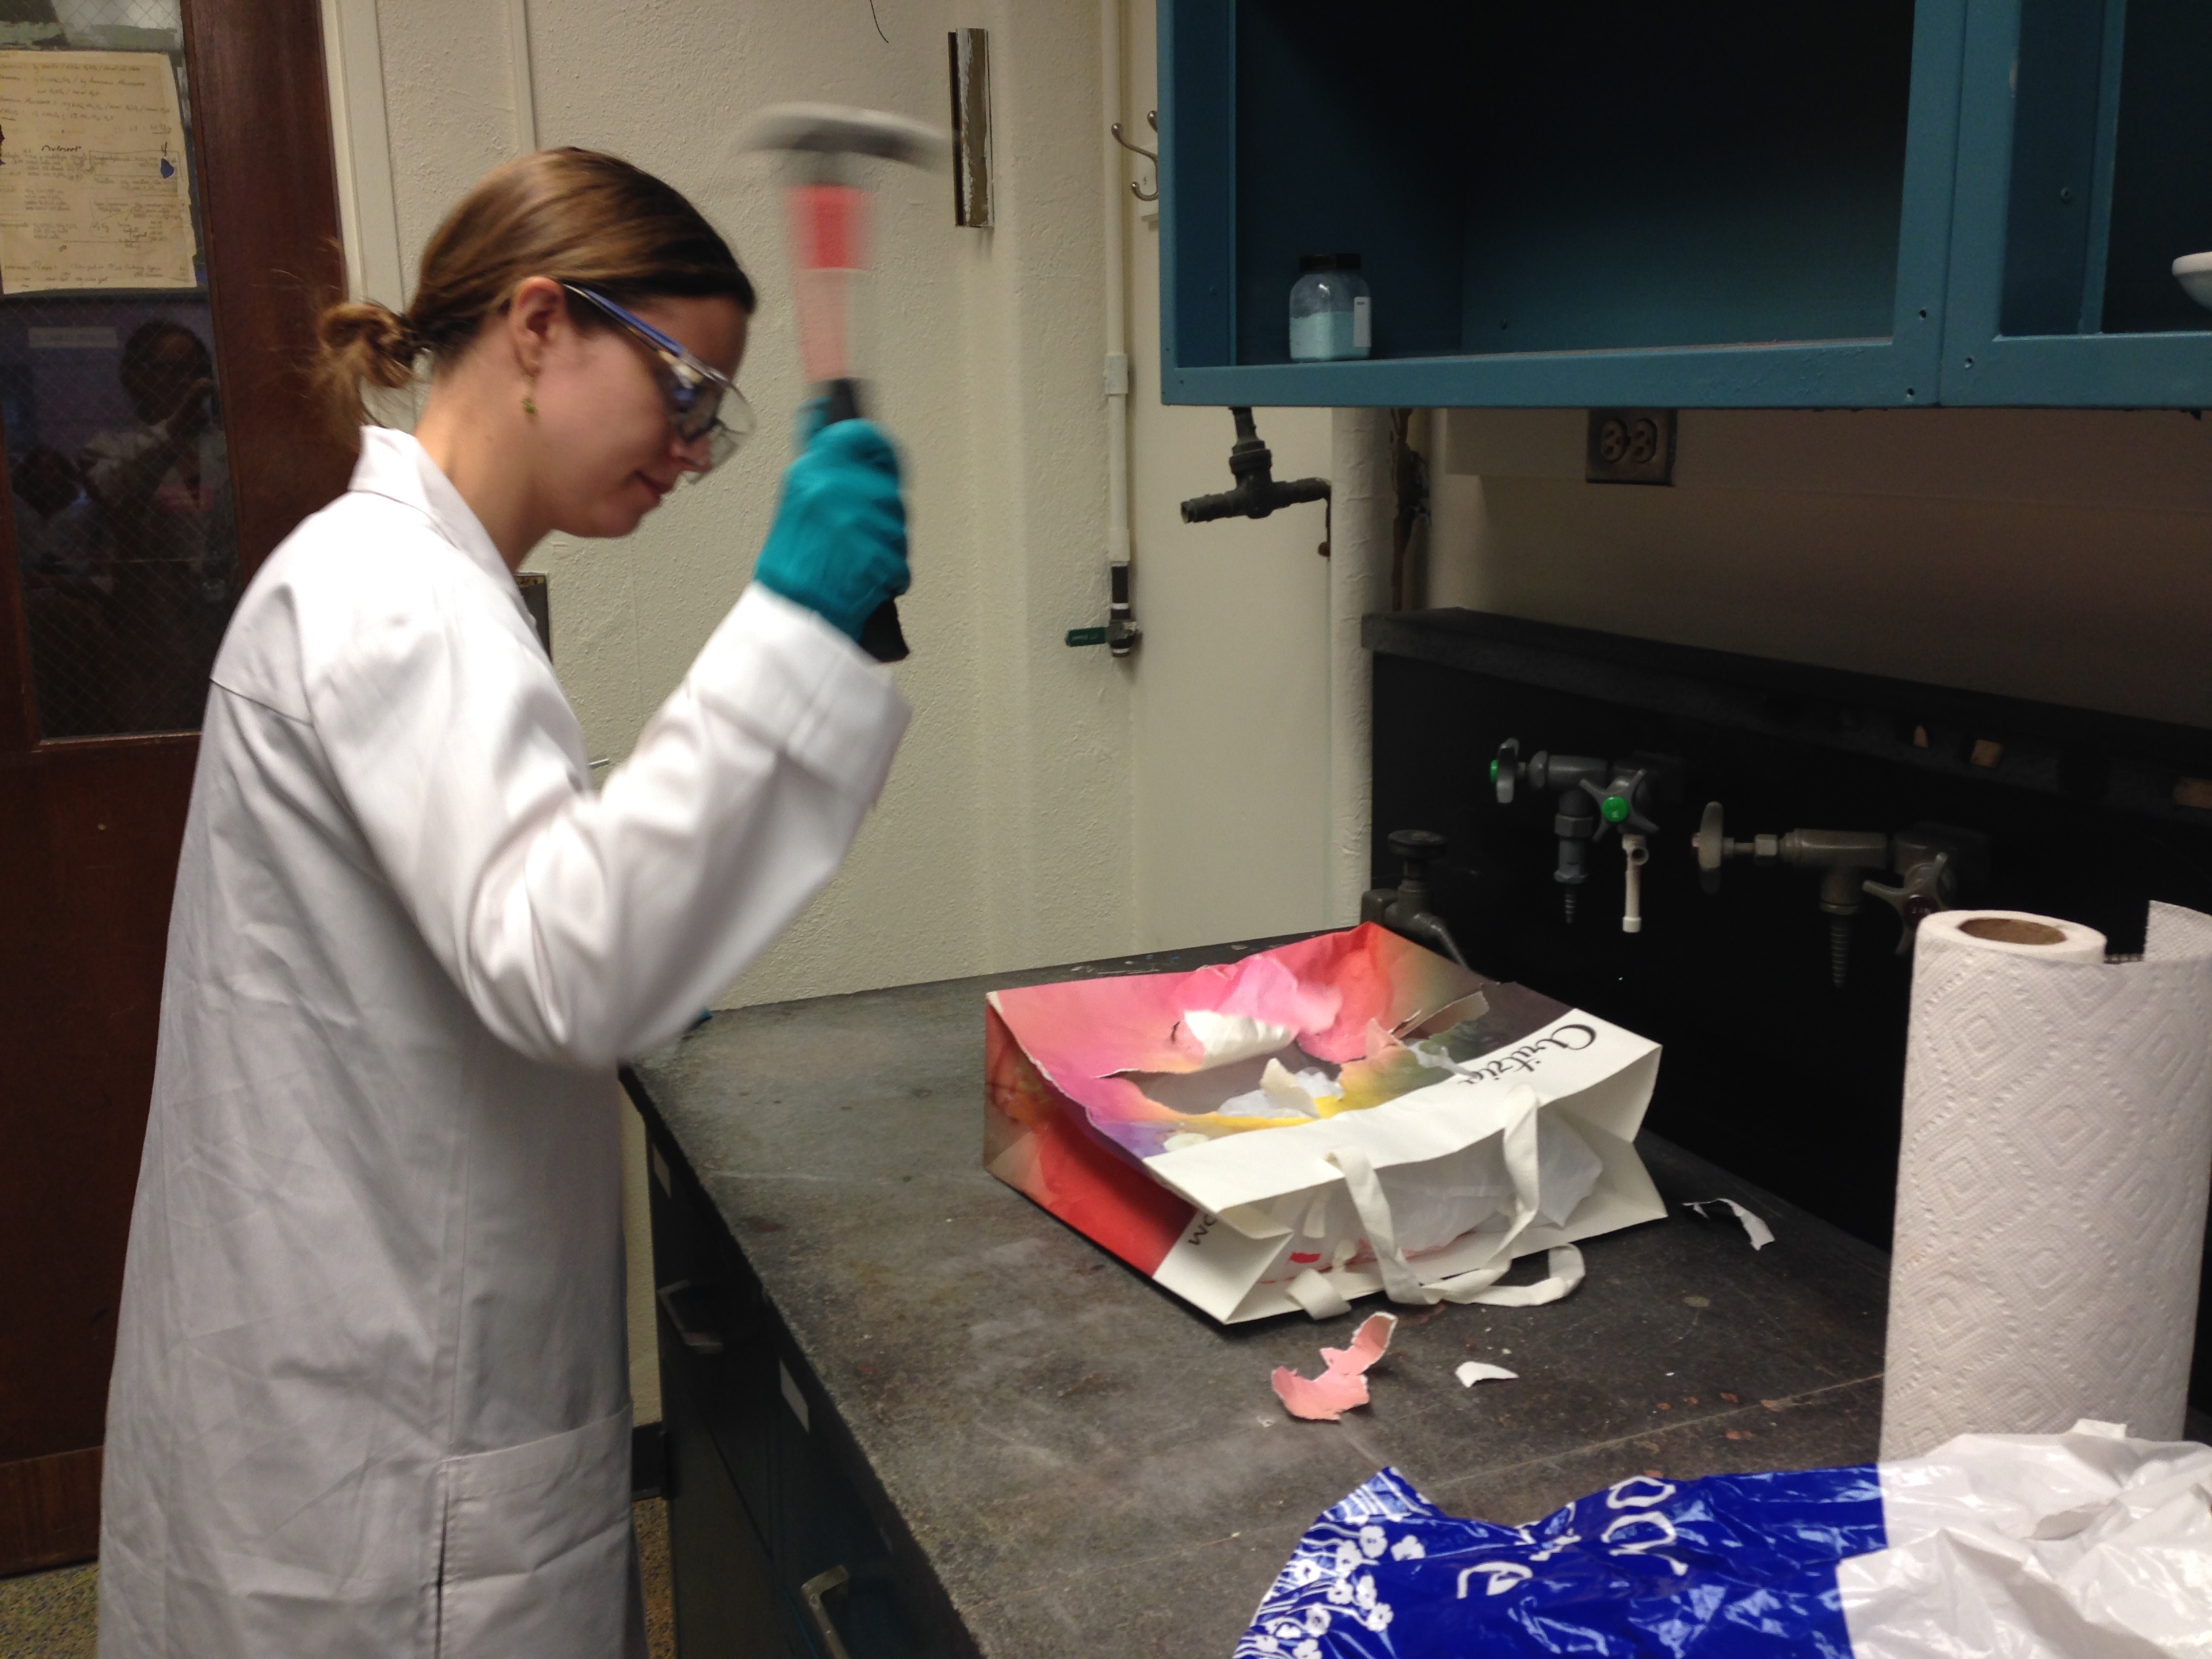 |
| Smashing oyster shells with a hammer (oyster shells contained in several plastic bags, and we wear PPE. |
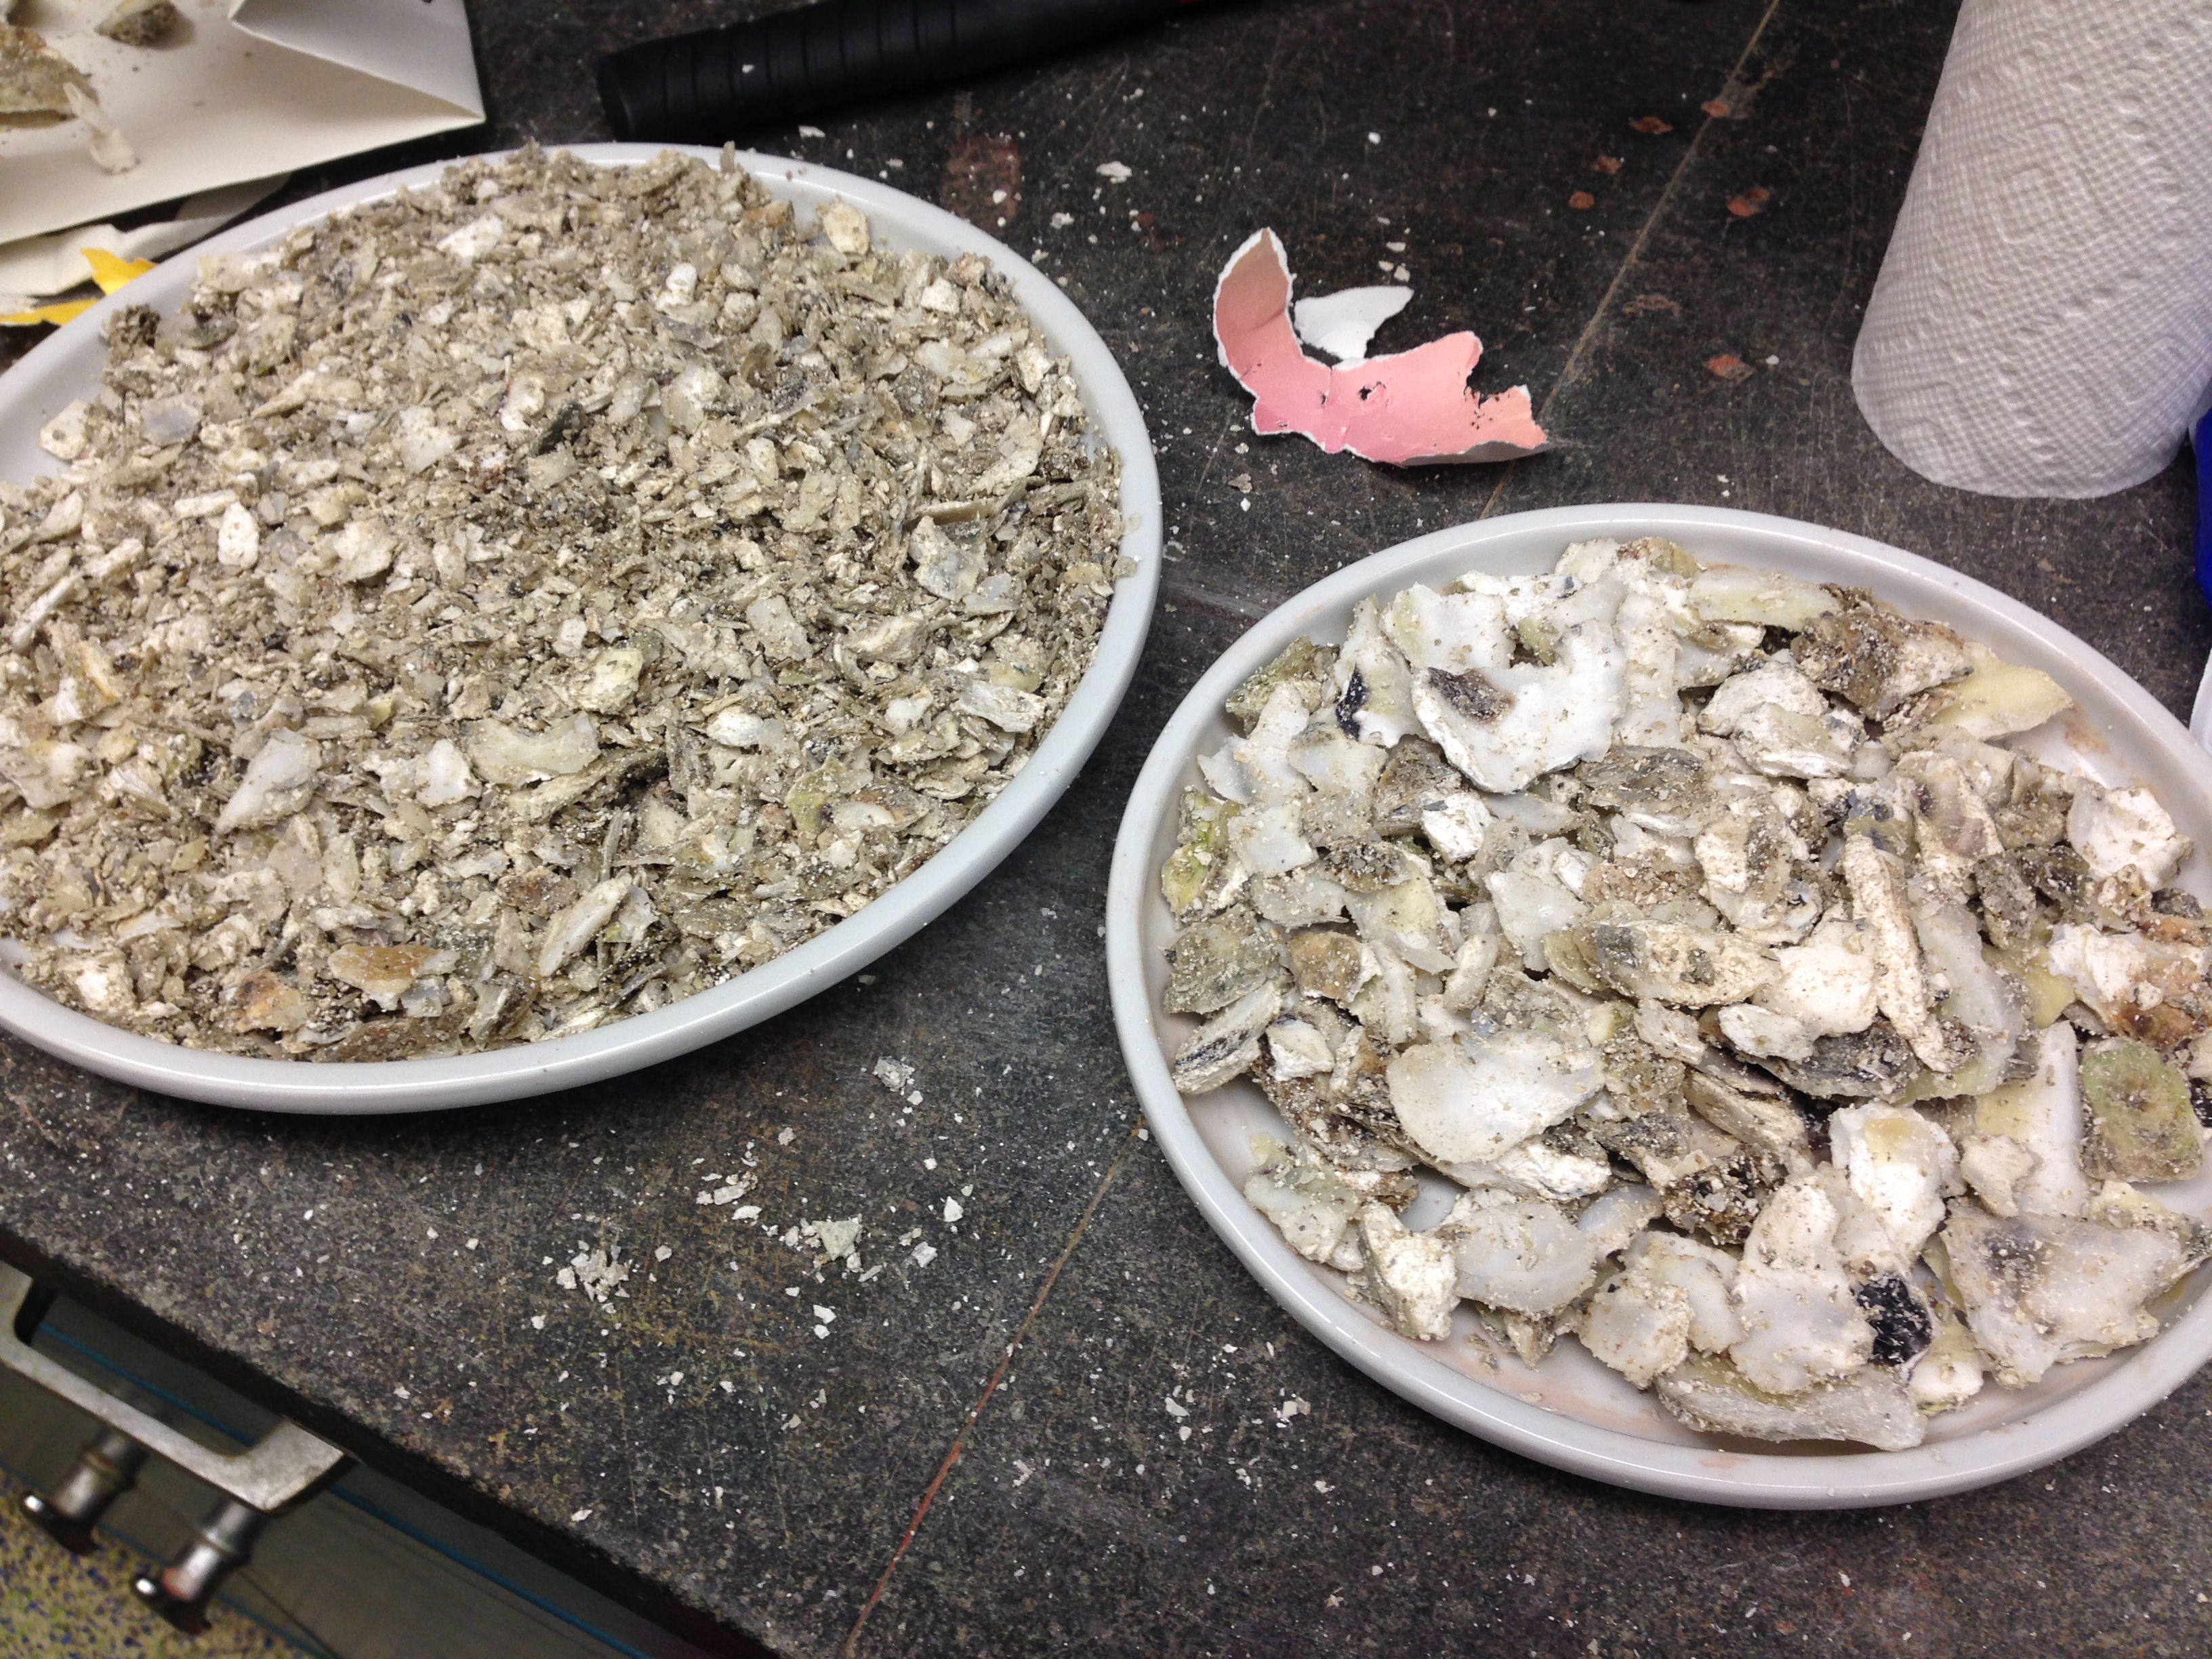 |
| After smashing the oyster shells, we sort them by size/thickness. |
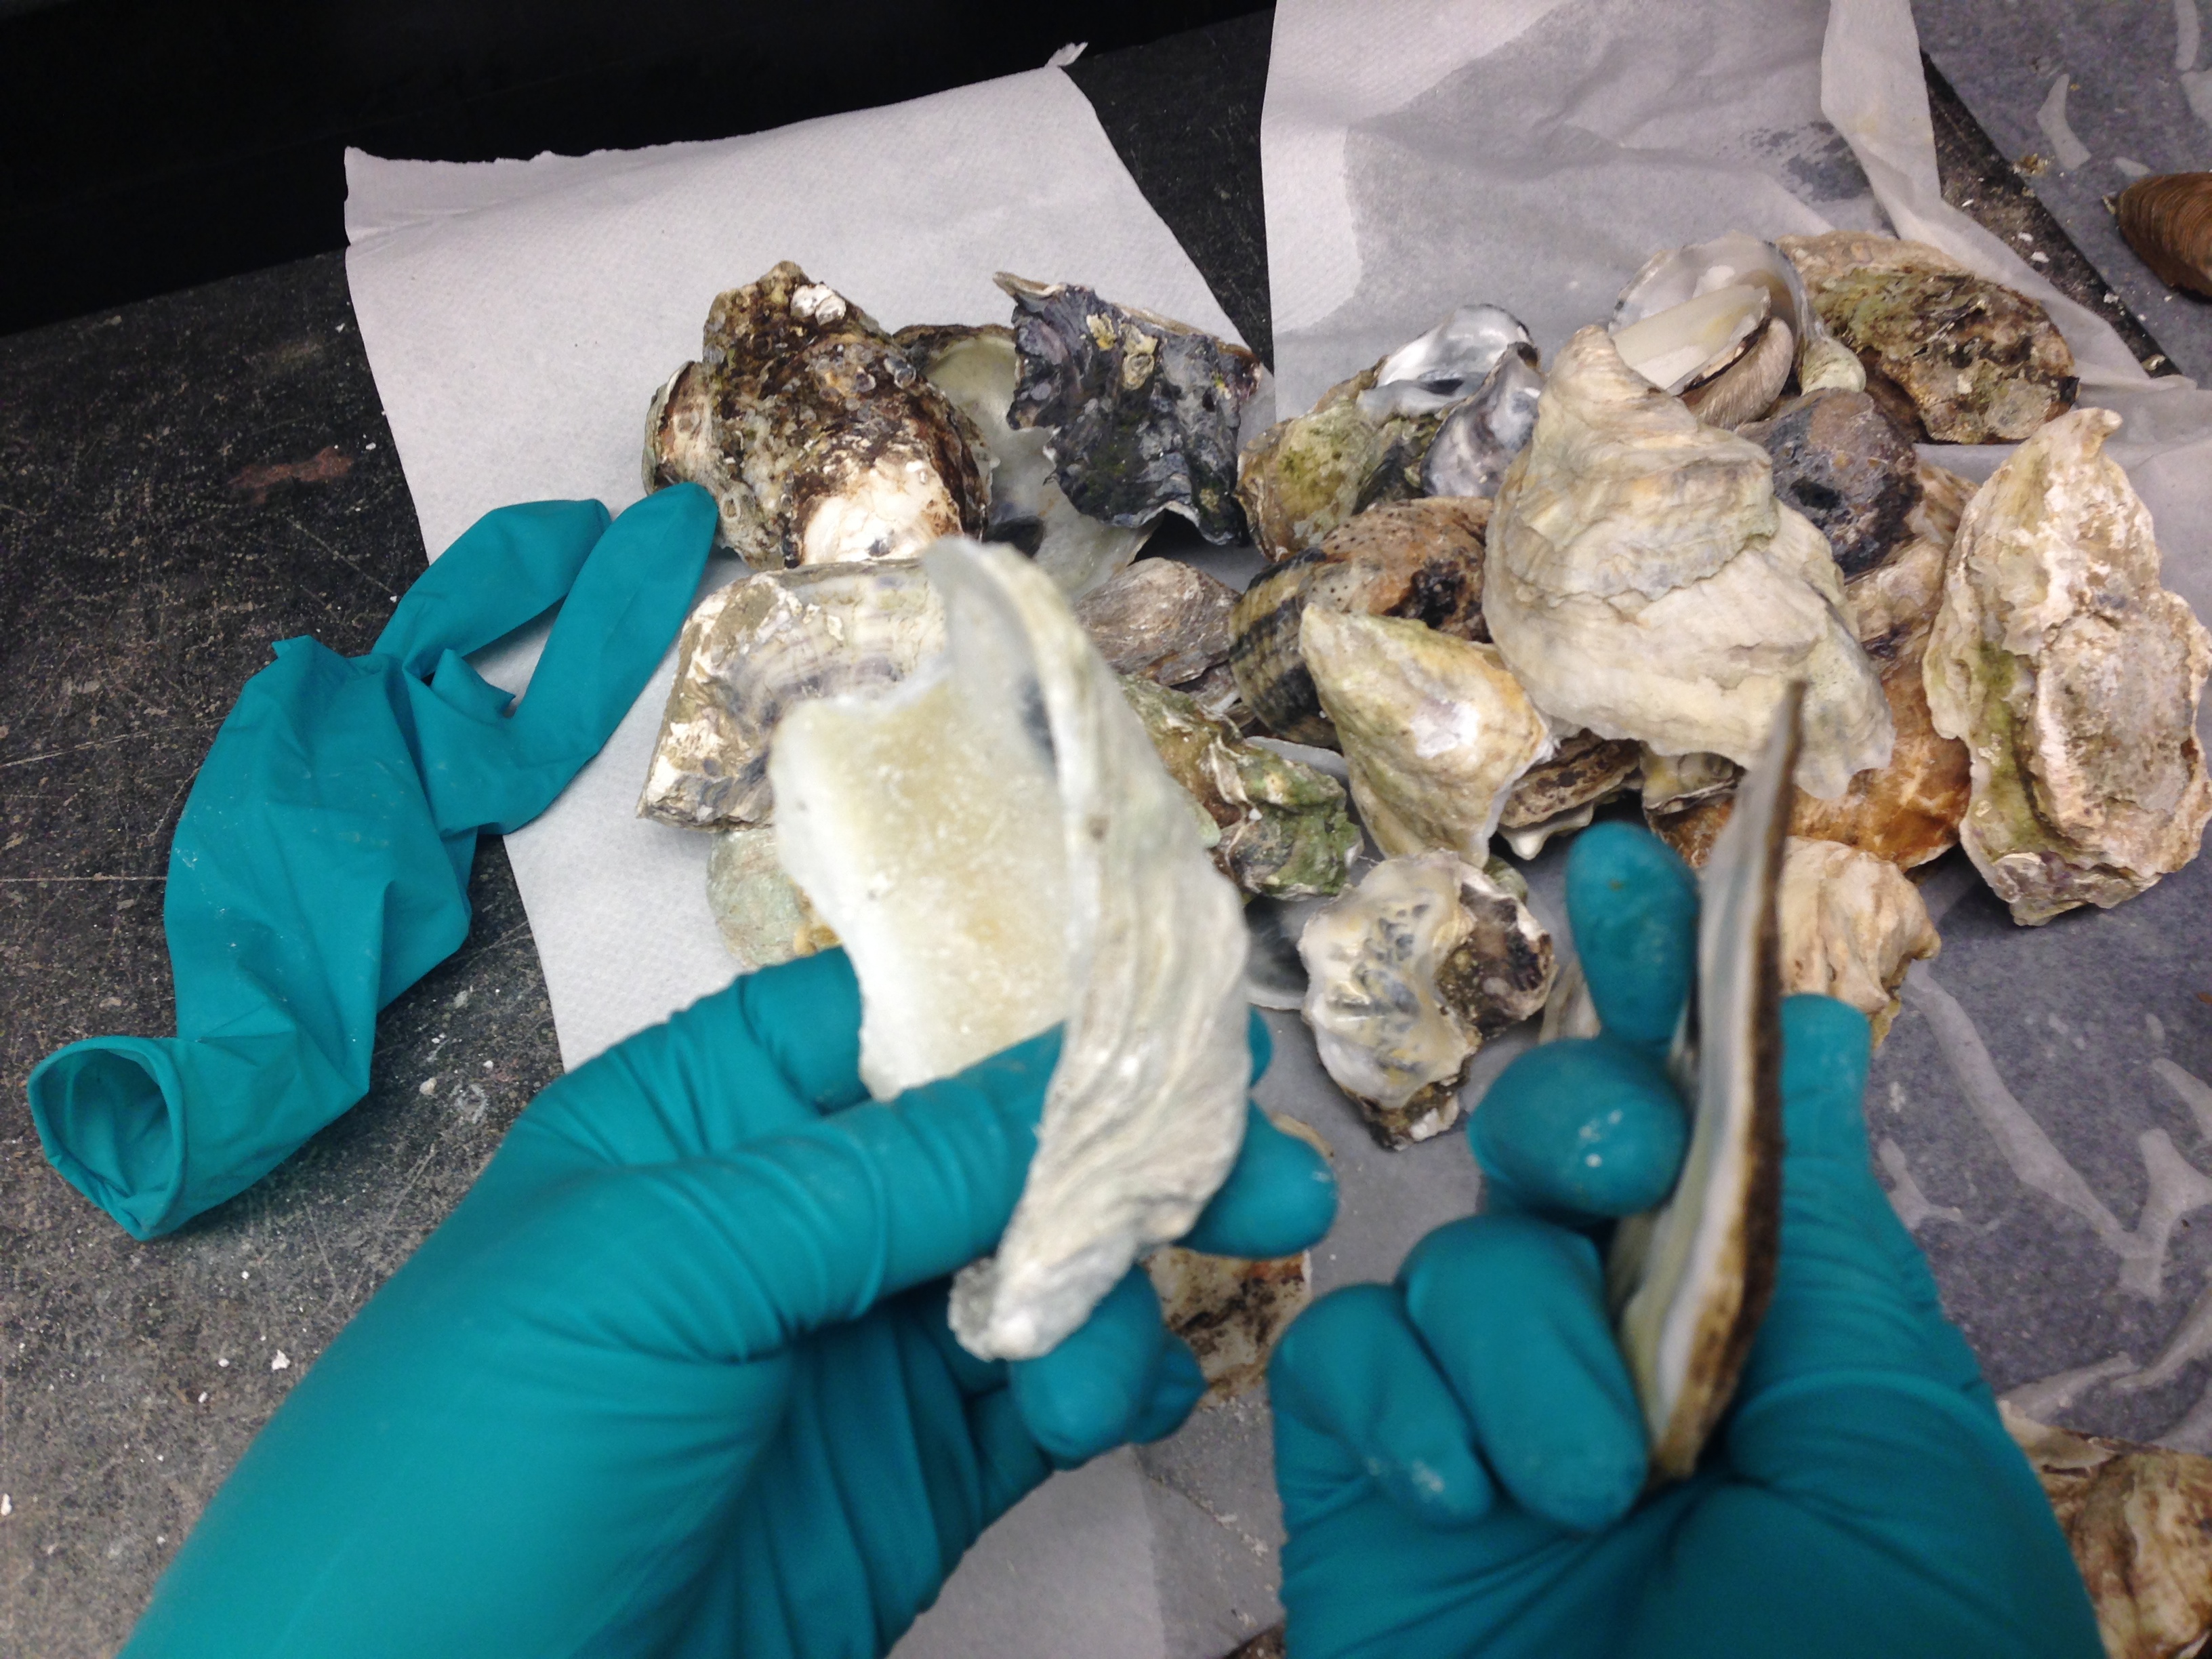 |
| We've found the pre-sorting the oyster shells by thickness helps increase smashing efficiency. |
November 15: tallow
NAME: Emogene Cataldo & Julianna ViscoDATE AND TIME:
LOCATION: Springfield NJ
SUBJECT: tallow
1 lb of pork fat rendered into tallow
cooked in crockpot for approximately 6 hours
strained with cheesecloth
refrigerate overnight (to firm up)
November 16: Wax and tallow and elm infusion
NAME: Emogene Cataldo & Julianna ViscoDATE AND TIME:
LOCATION: Springfield NJ
SUBJECT: tallow and wax continued
1lb of beef fat rendered into tallow
cooked in crockpot for approximately 6 hours
strained with cheesecloth
refrigerate (to firm up)
1/2 lb of rendered pork tallow re-rendered? cooked in crockpot for x hours
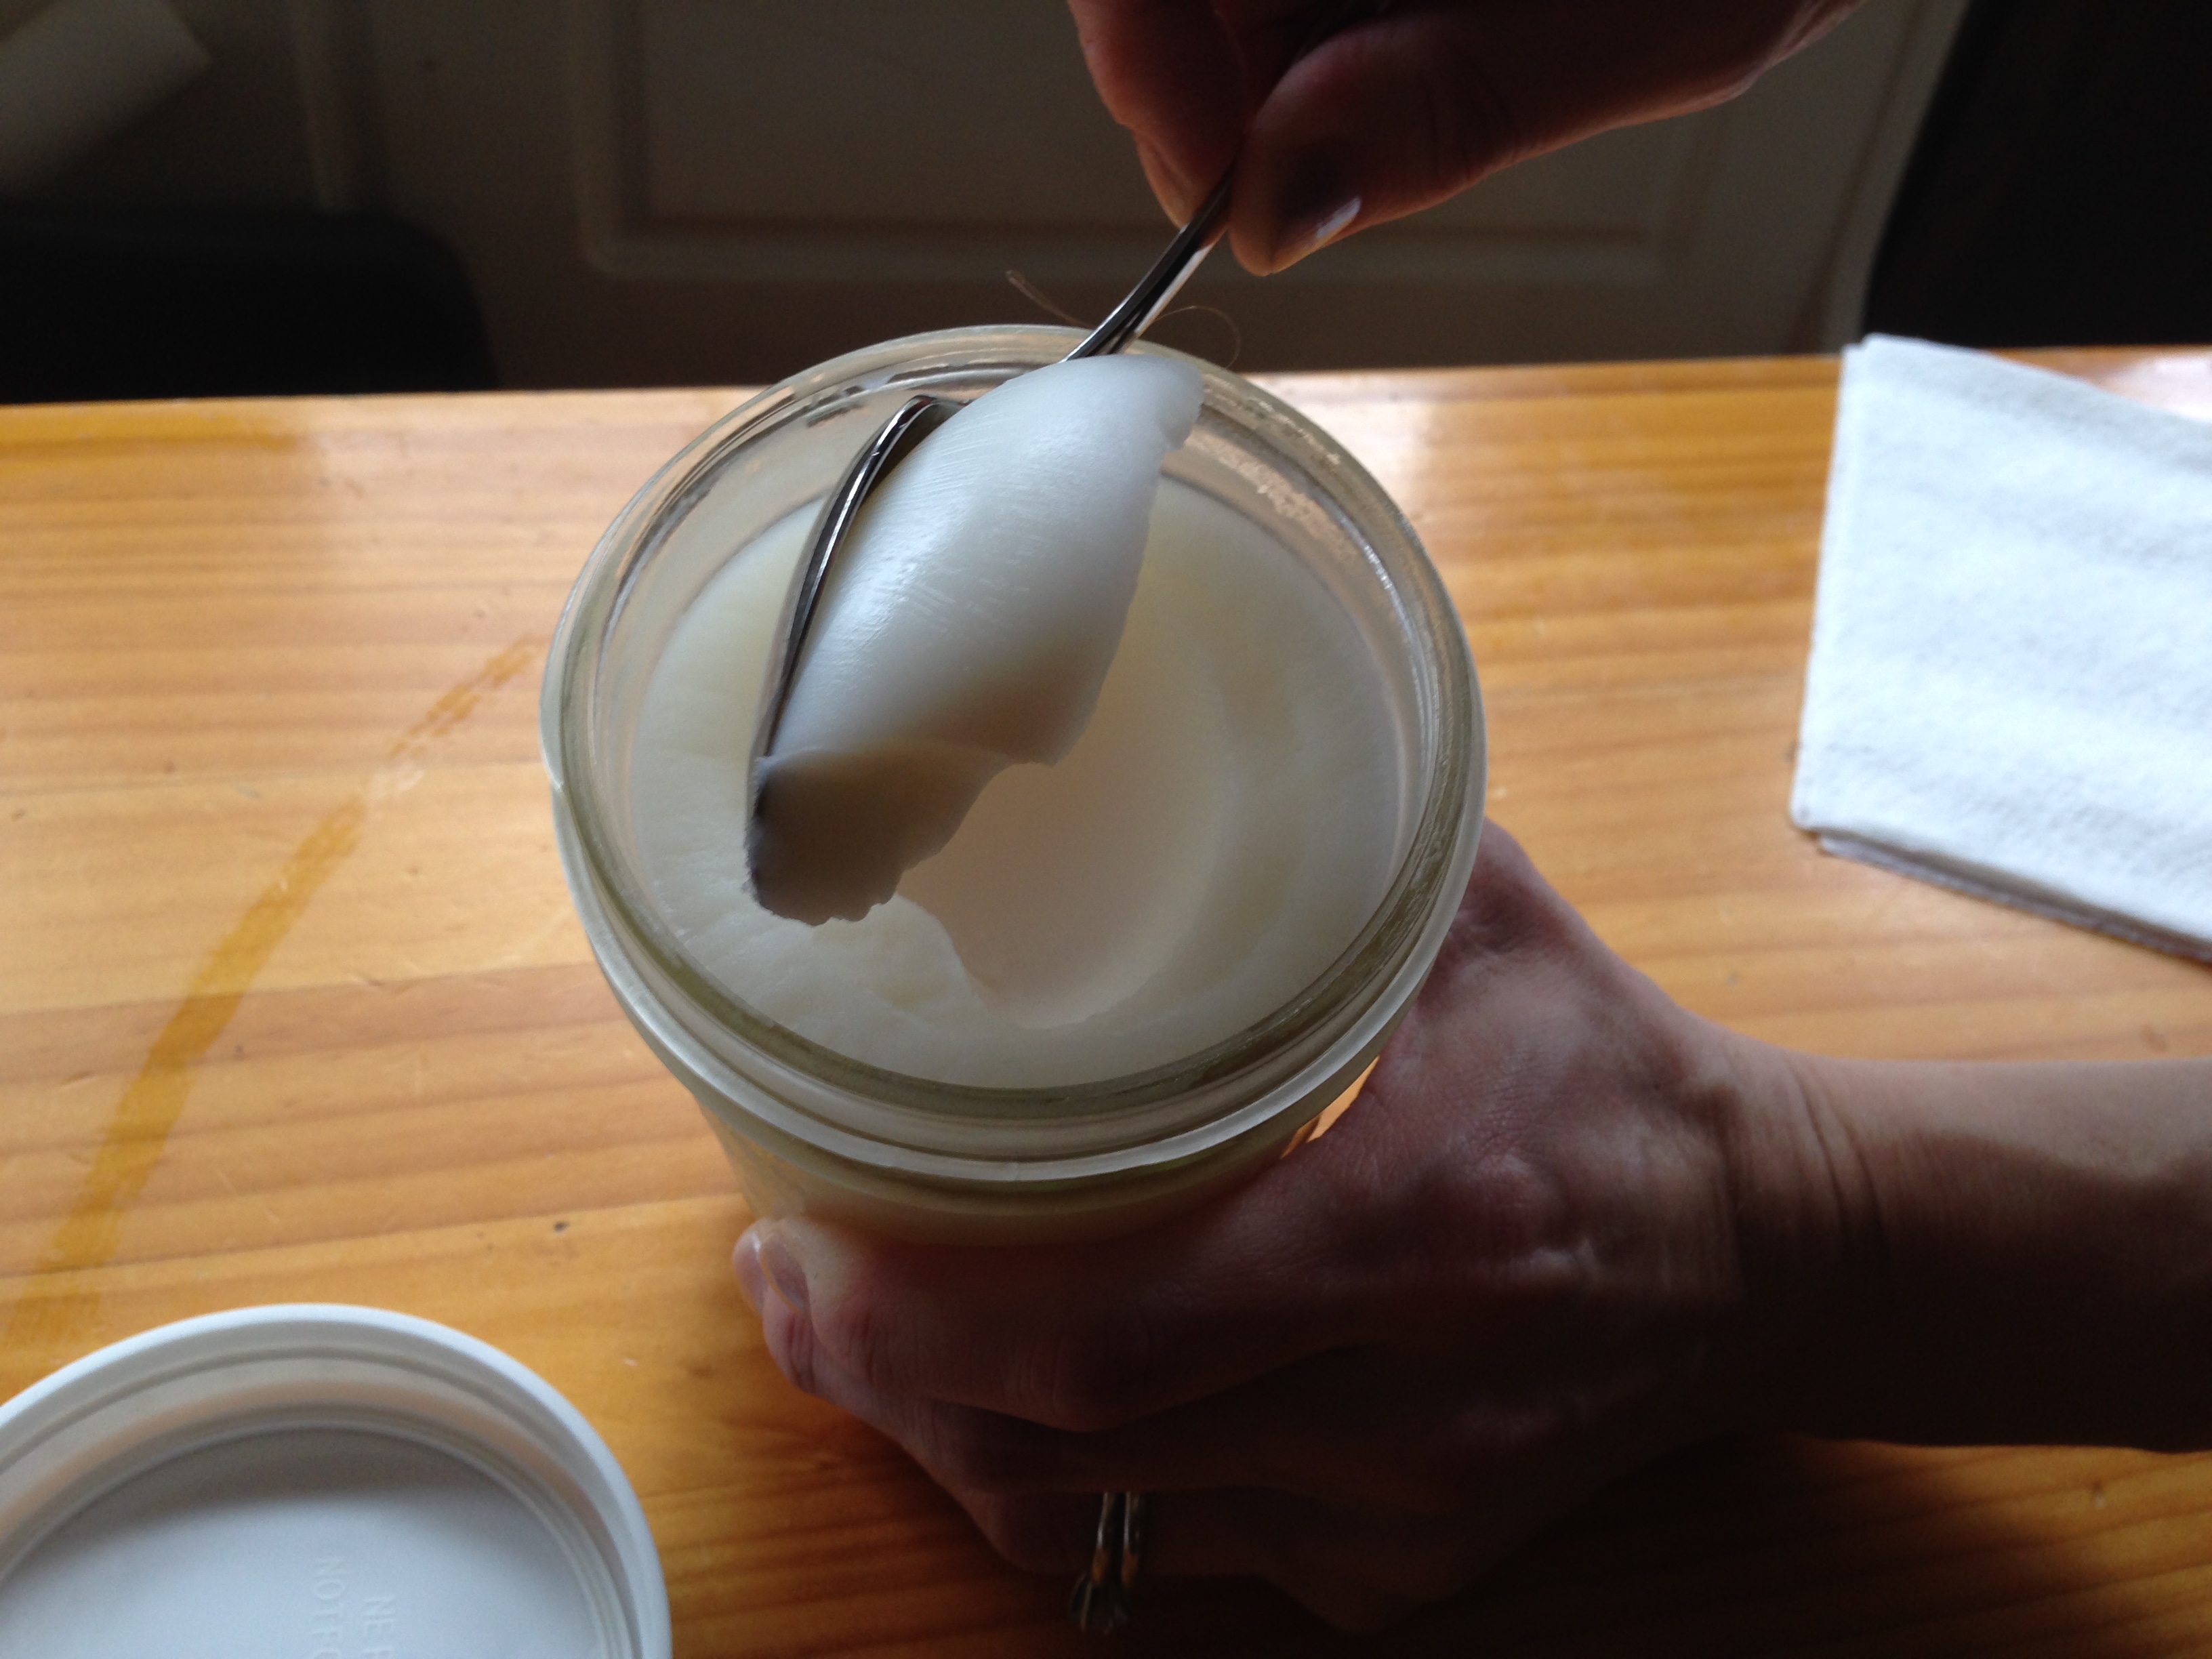 |
| Pork tallow, hardened |
Based on manuscript recipes 109r and 120r, beeswax is the main substrate, to make it firmer one might add rosin, to make it softer one could add turpentine or butter or tallow.
Melting beeswax over low heat electric stove
Quick Notes - Initial Impressions
pork tallow - smoother creamier appearance than beef tallow
beef tallow as it dries shows crackling on surface absent from pork tallow
Pure beeswax (note each substance was melted separately then added together and mixed, due to different melting temperatures
Beeswax with melted butter - bubbled when added
Beeswax with beef fat (2 tsp, rendered once) - crackled when added
Beeswax with pork fat (2 tsp, rendered once) - crackled (popped) change in clarity of wax (decrease!)
Beeswax with beef fat (4 tsp, rendered once)
Beeswax with pork fat (4 tsp, rendered once)
Beeswax with beef fat (2 tsp, rendered twice)
Beeswax with pork fat (2 tsp, rendered twice)
Beeswax with beef fat (4 tsp, rendered twice)
Beeswax with pork fat (4 tsp, rendered twice)
ELM
researching ratios for slippery elm bark to liquid
a recipe for cat cough syrup suggests 1/2 cup liquid to 1teaspoon powdered slipper elm bark
Into a small saucepan place 1/2 cup cold water and 1 teaspoon powdered slippery elm bark
http://www.littlebigcat.com/health/slippery-elm/
we added 2 tsp slippery elm bark powder to one cup of TJ cab (made two batches and combined)
once bubbled and reduced into thick compote like syrup
Pictures
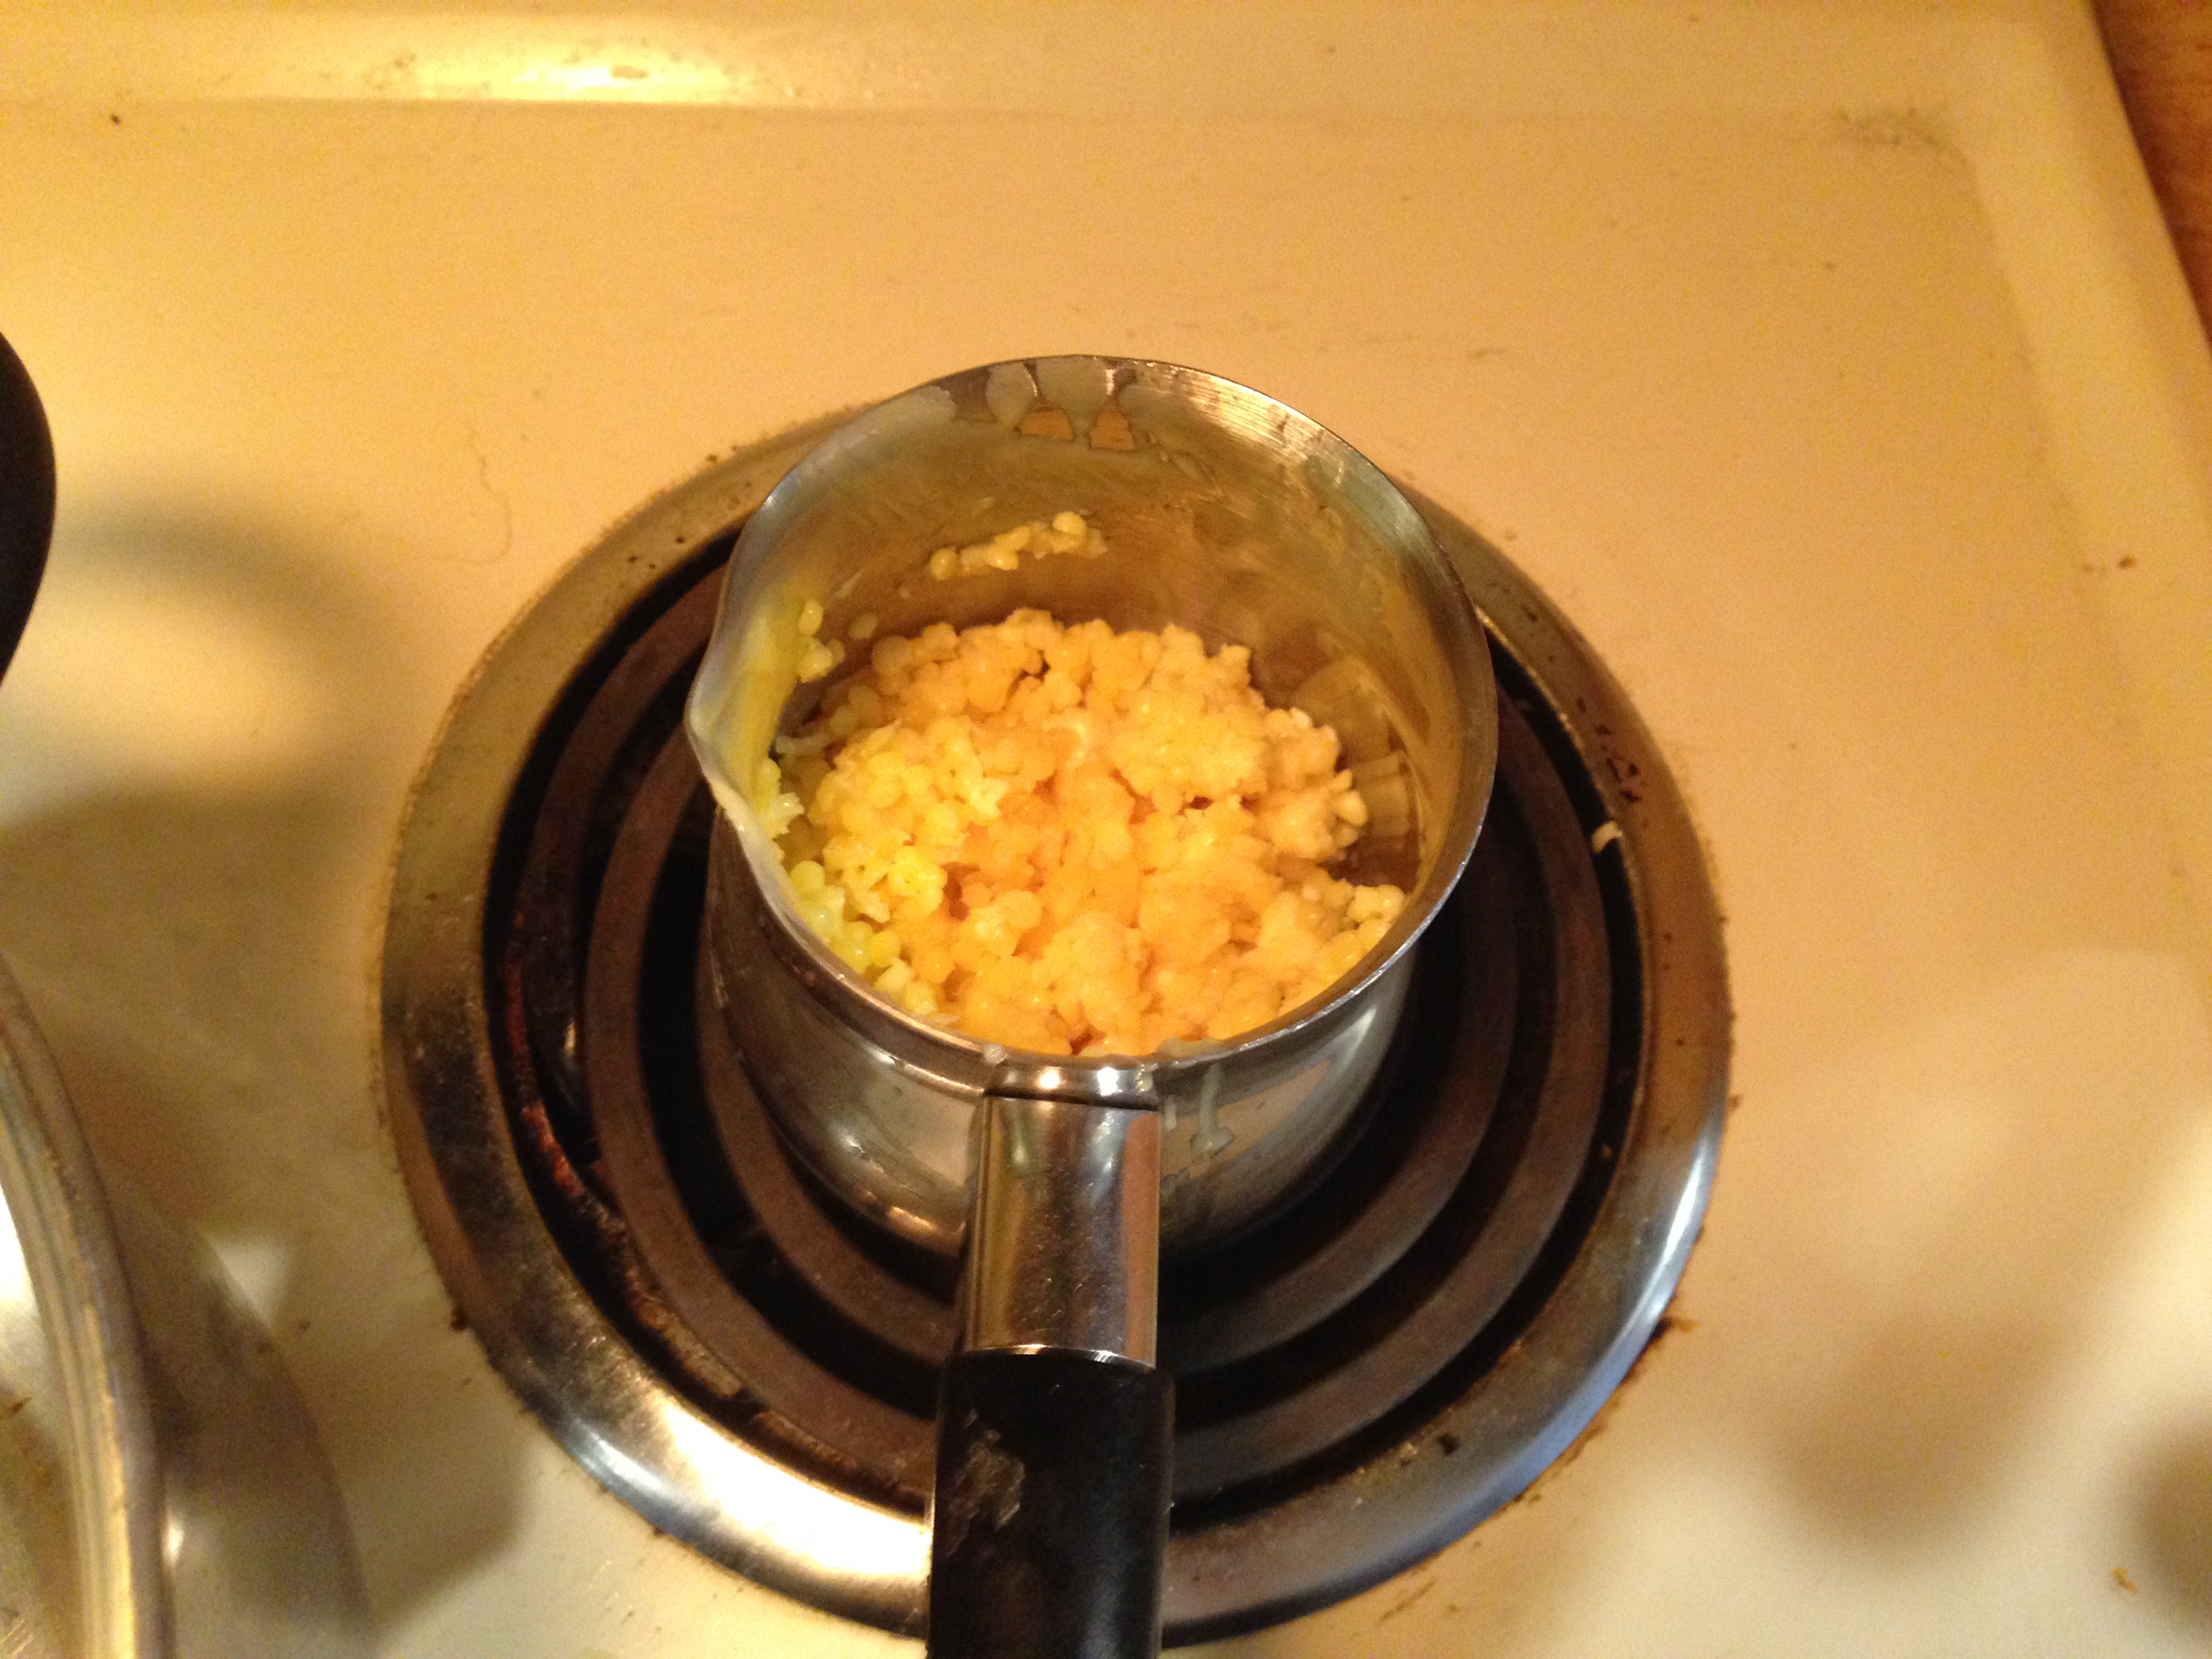 |
| Wax melting on the electric stove |
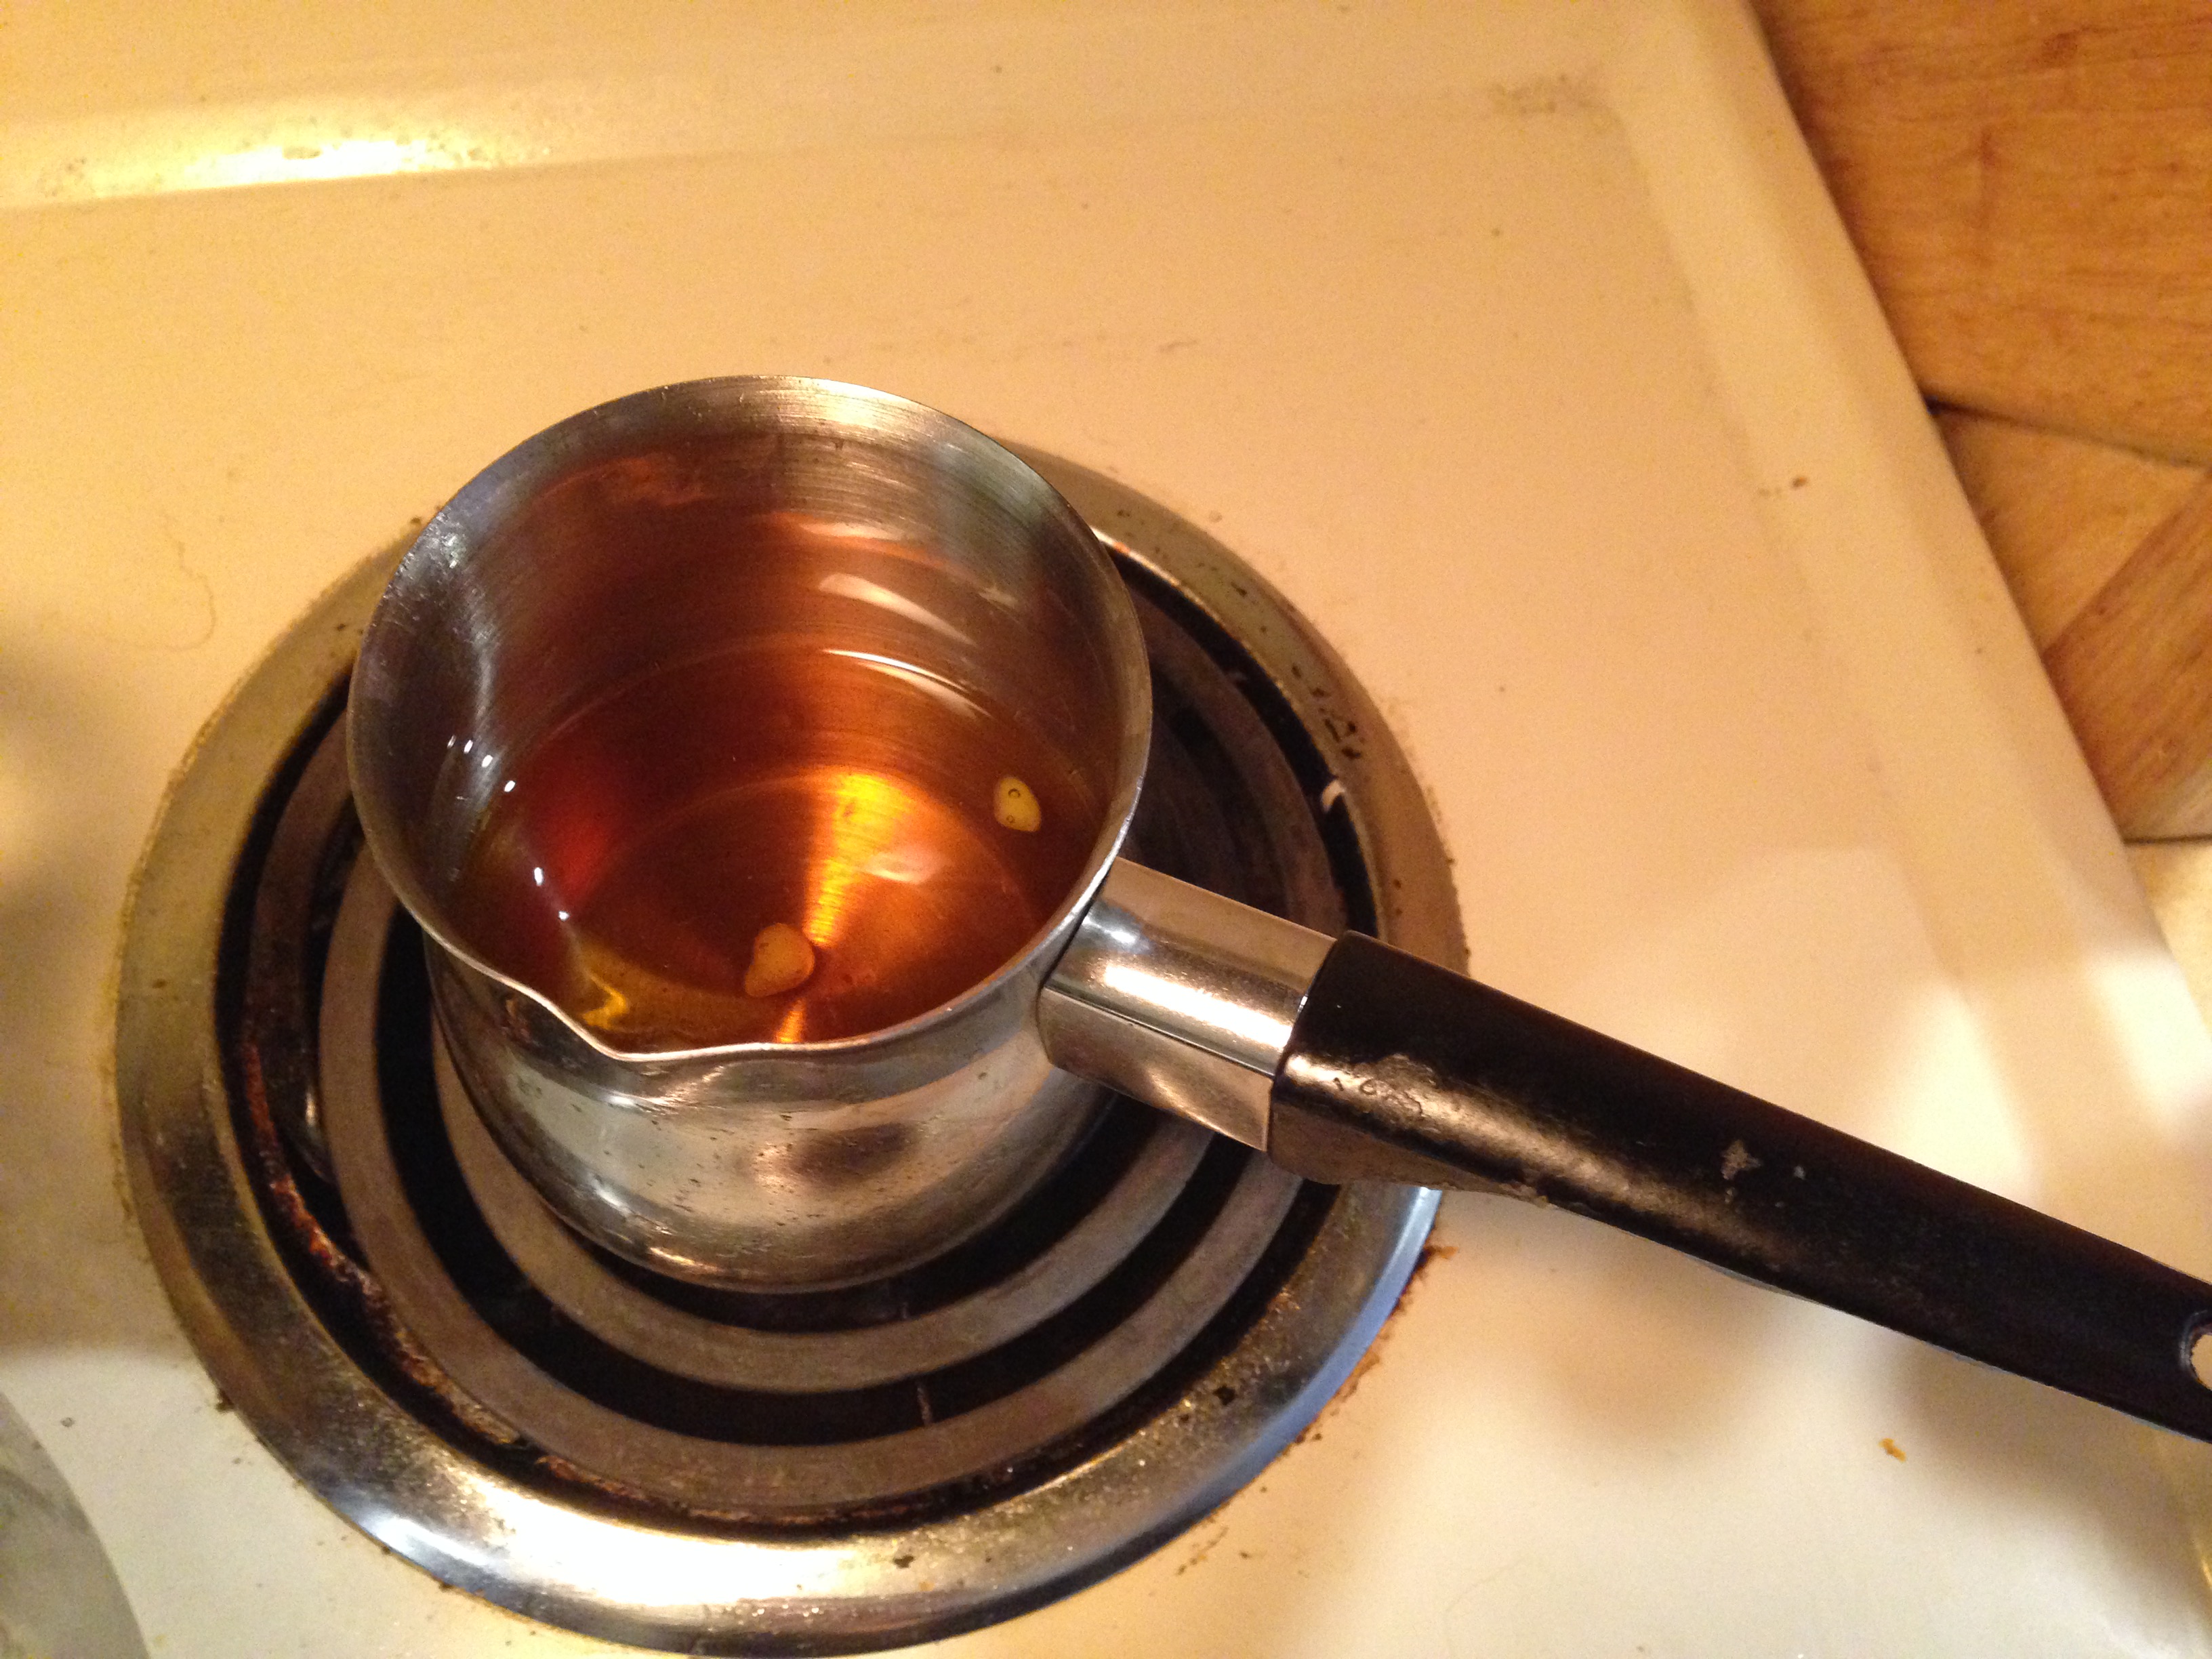 |
| Melted wax |
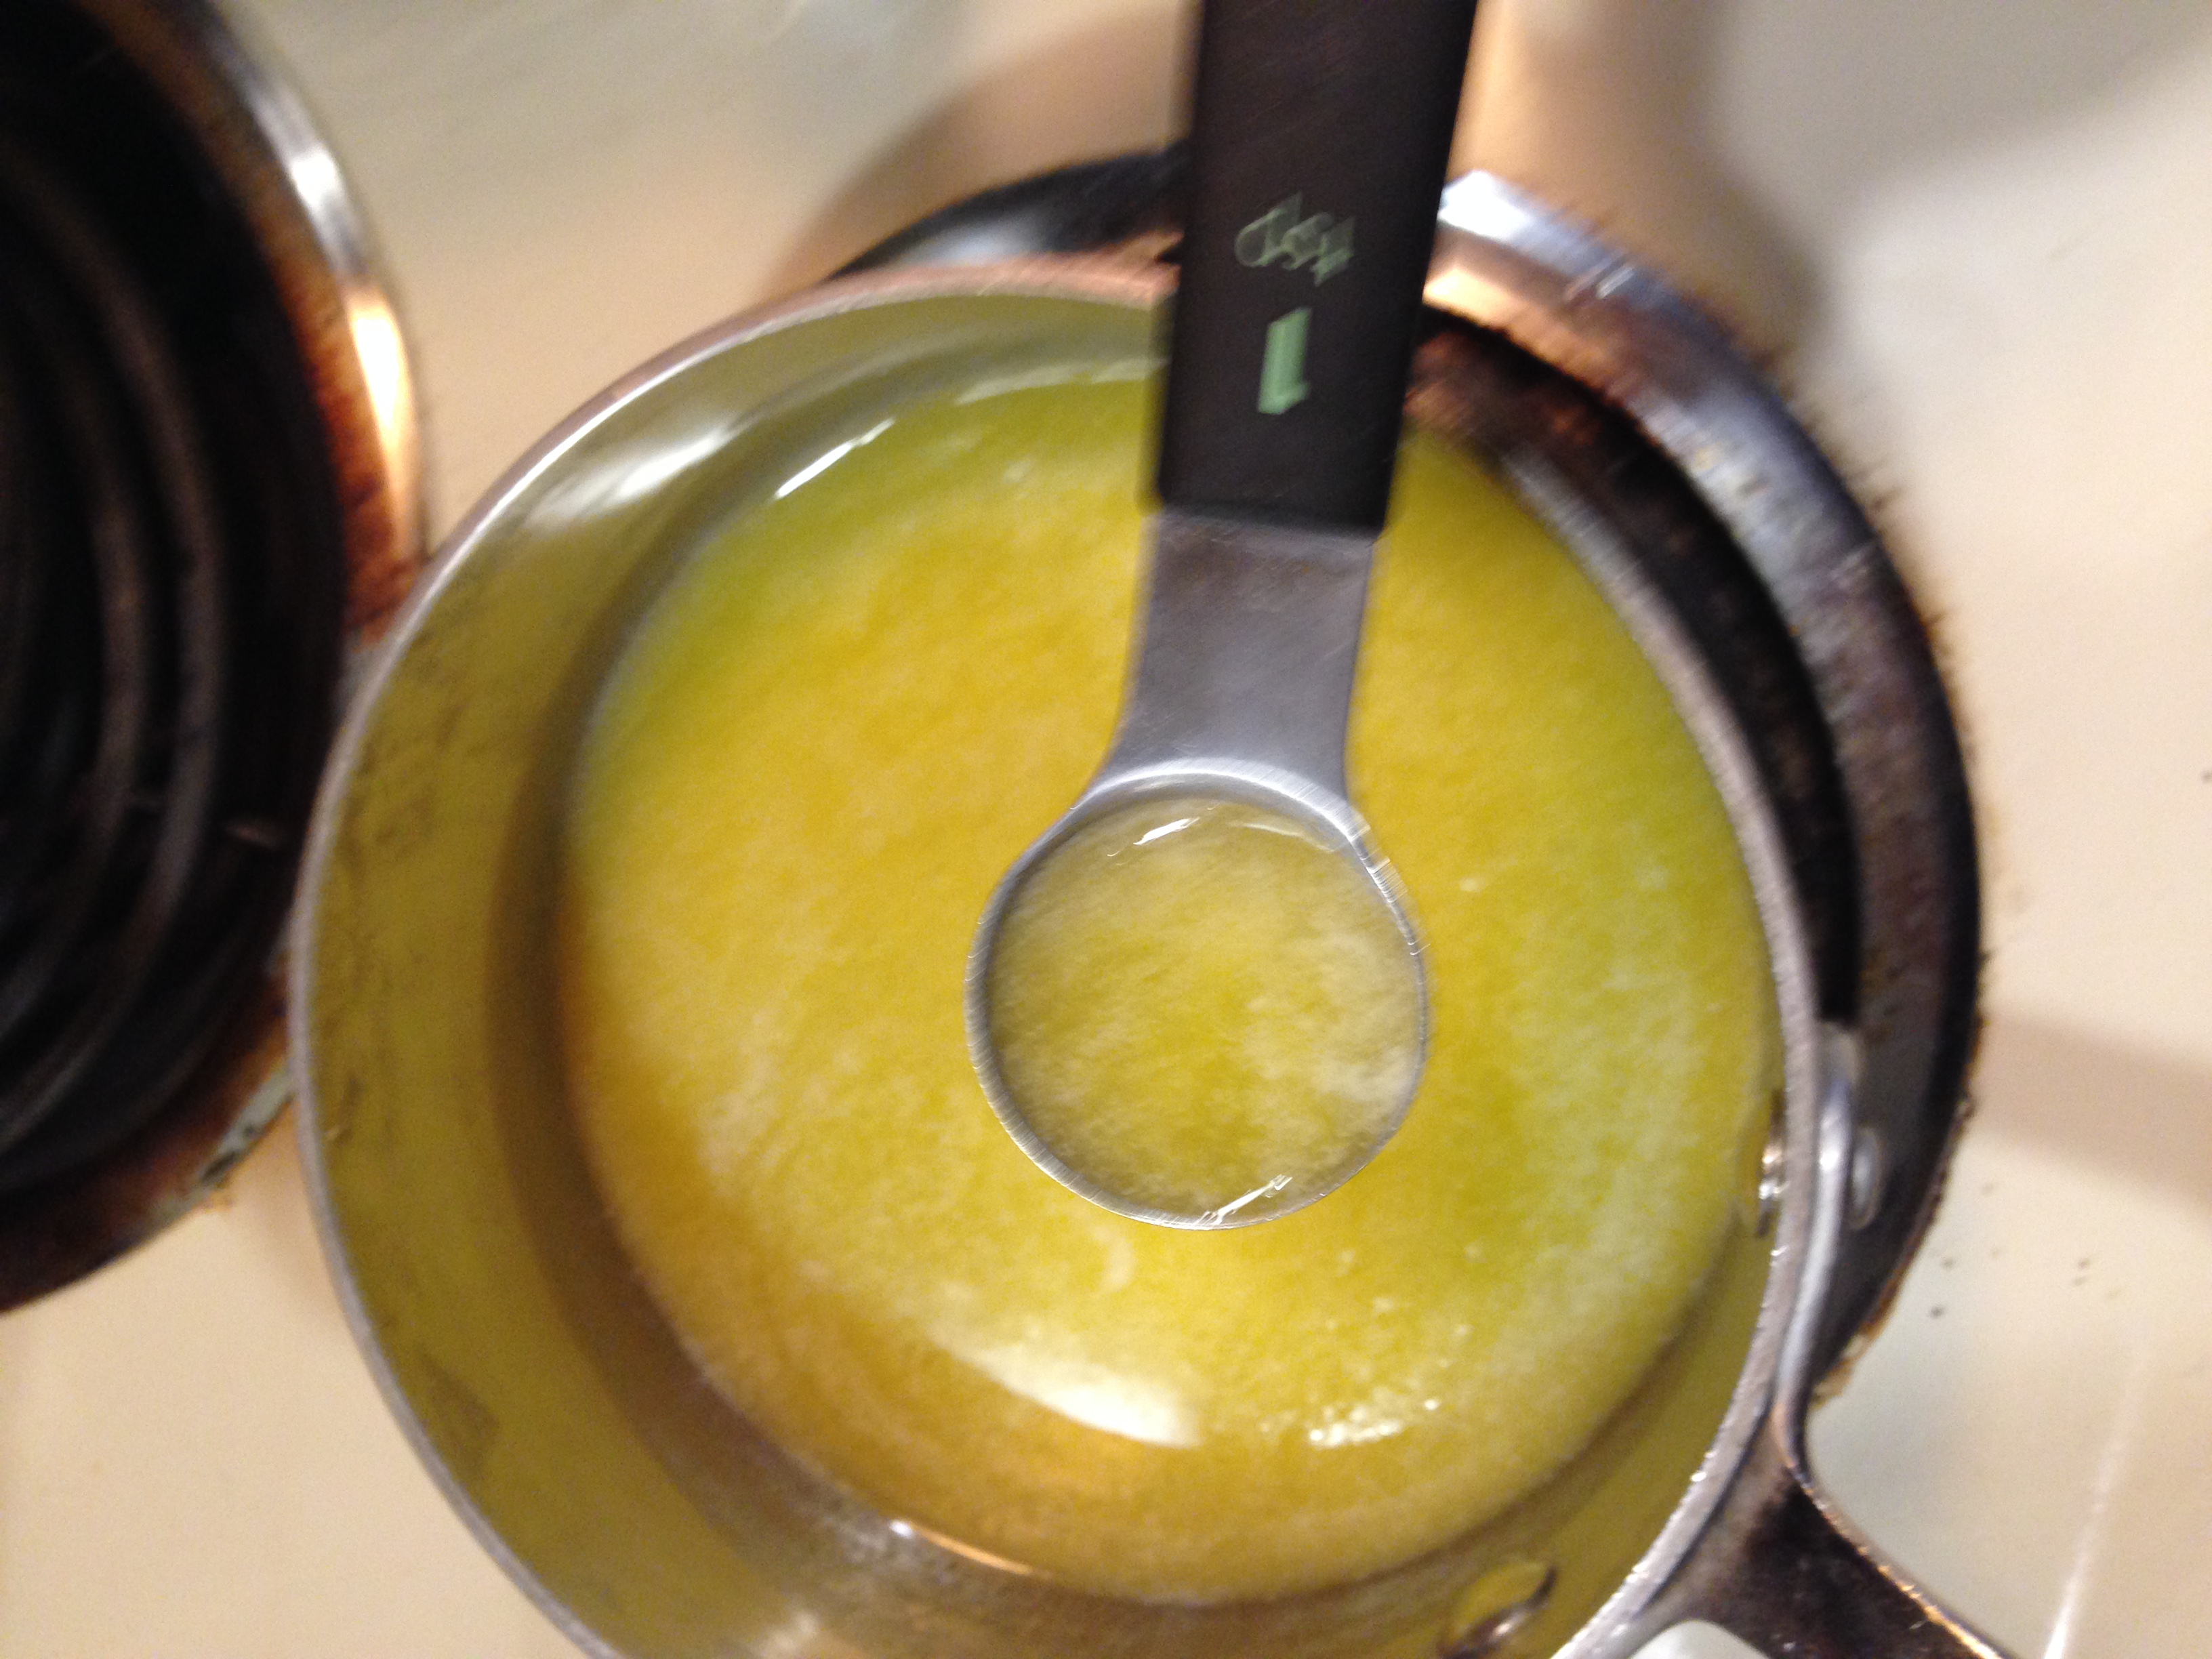 |
| Melted butter |
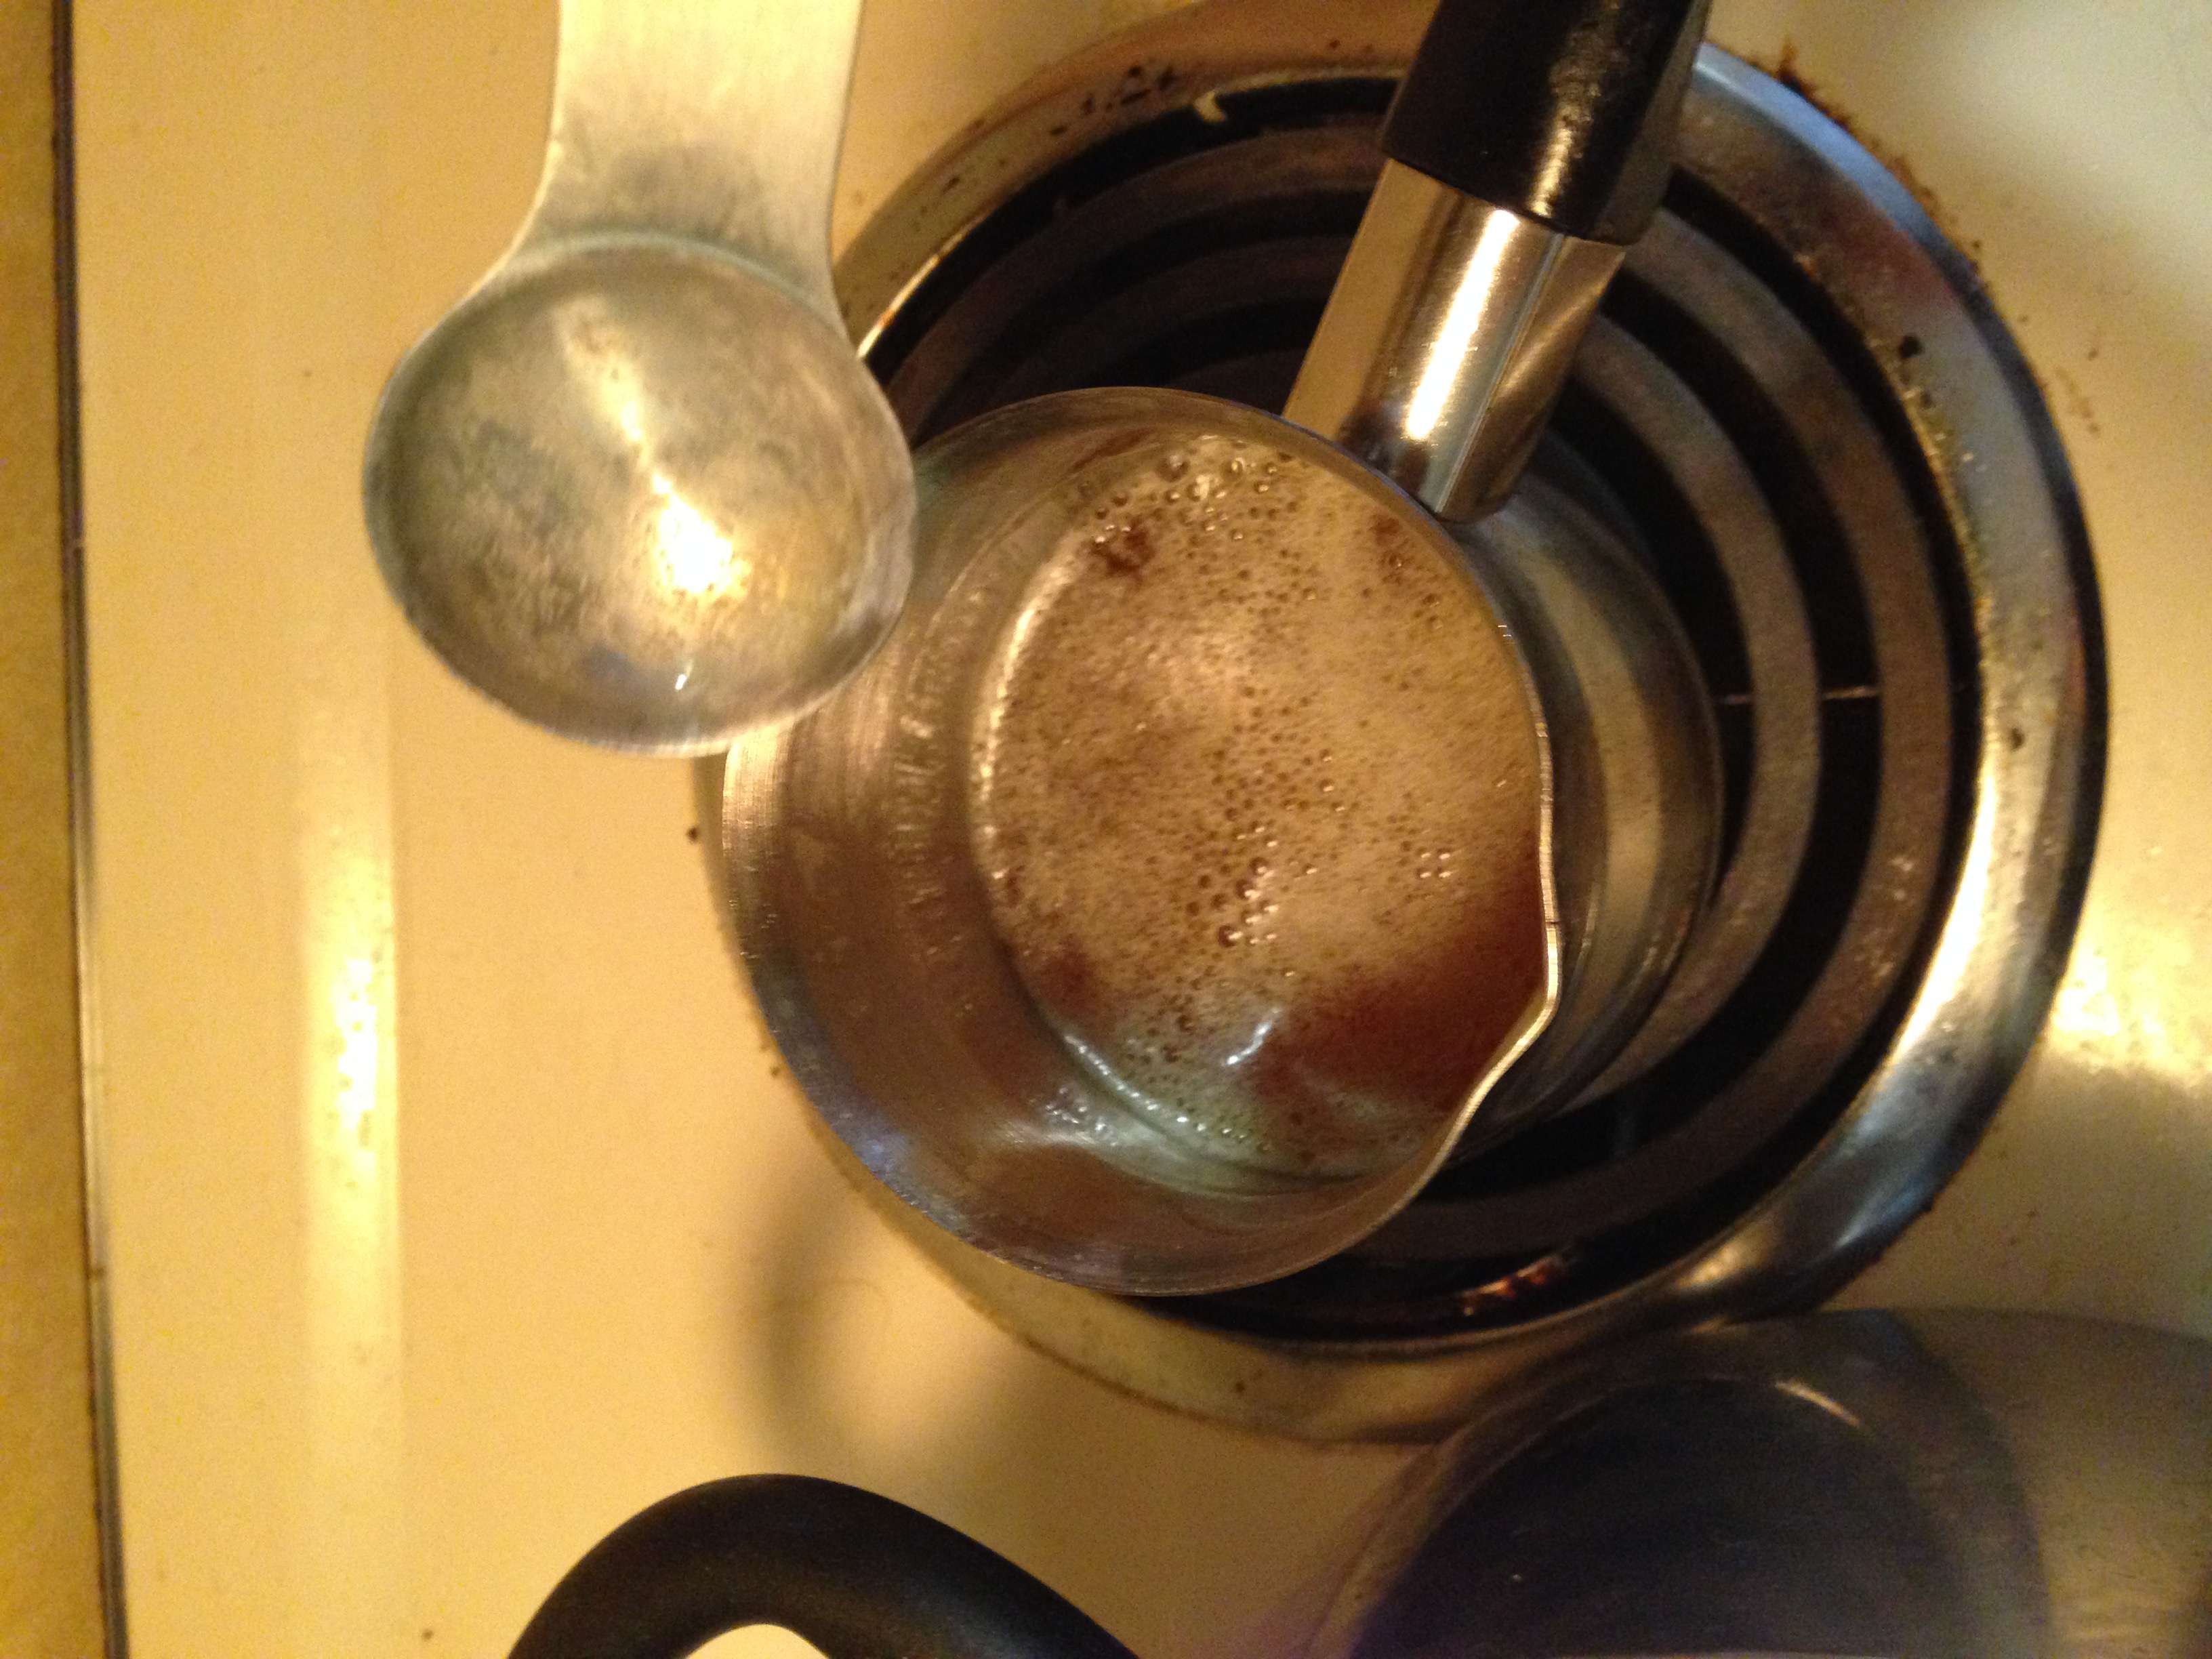 |
| When the butter was added to the melted wax, the mixture bubbled |
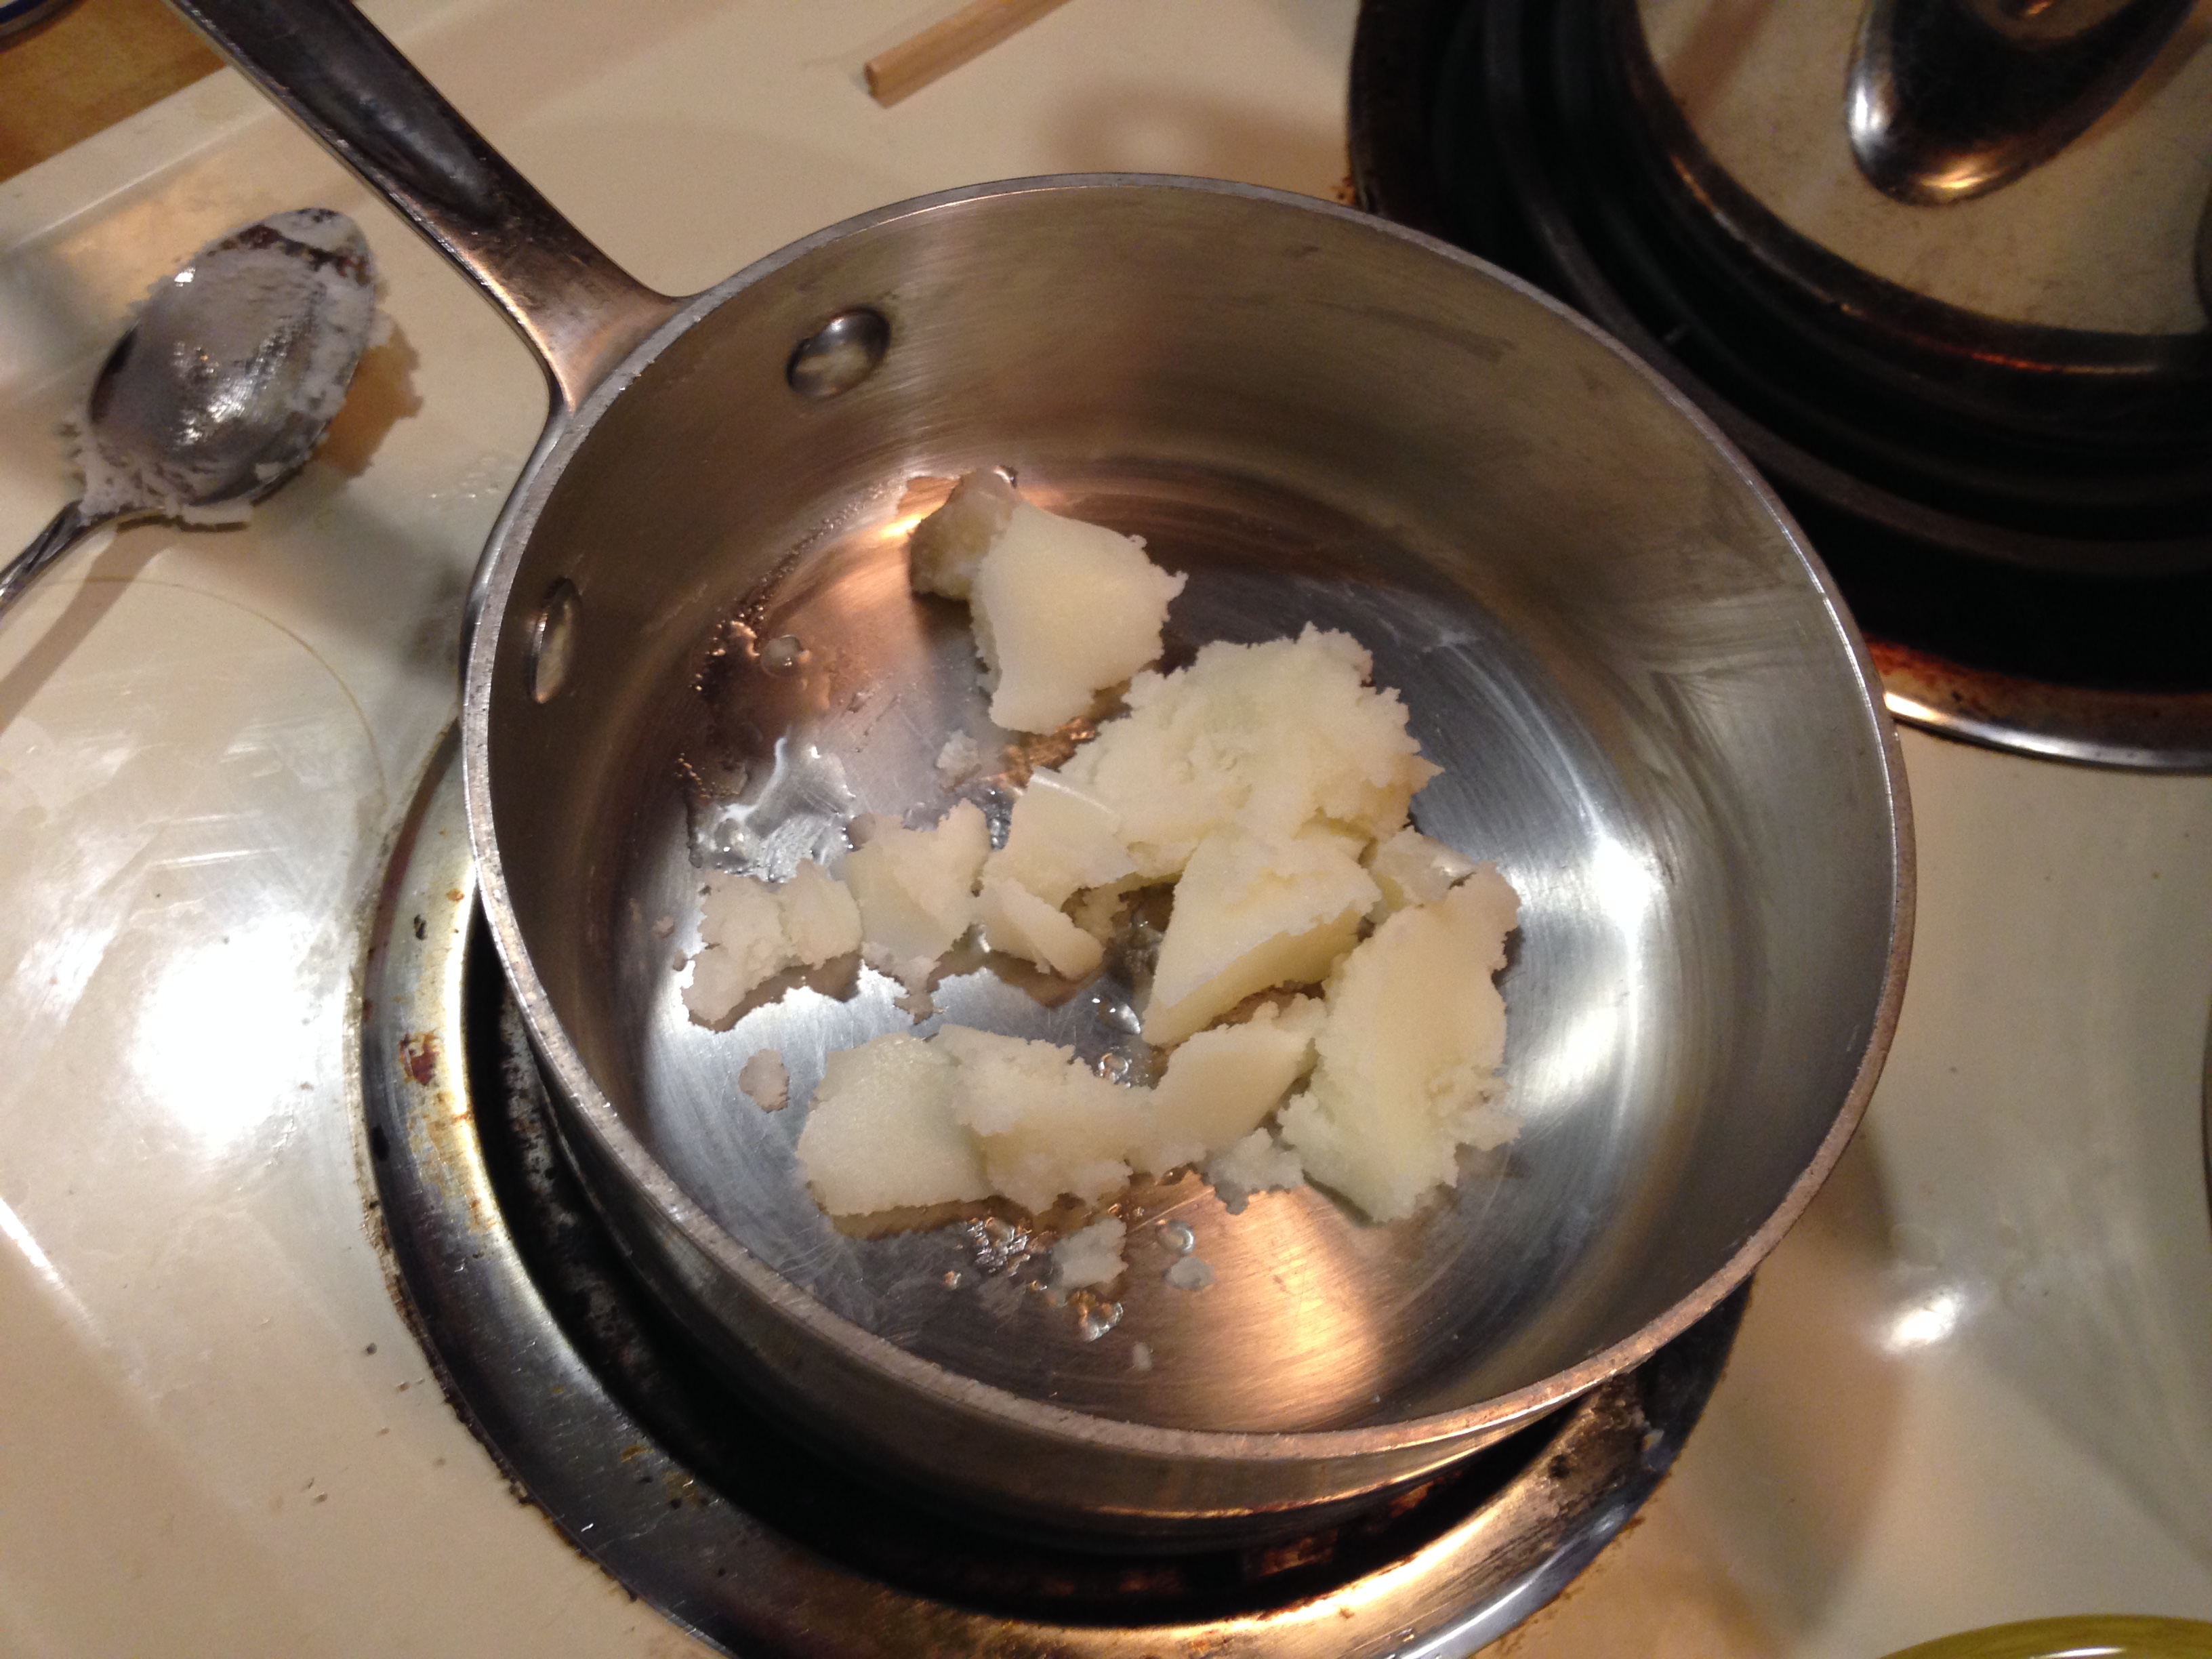 |
| Beef tallow melting on the stove. The pork tallow had a much smoother texture---the beef tallow is more like mashed potatoes than a thick yogurt. |
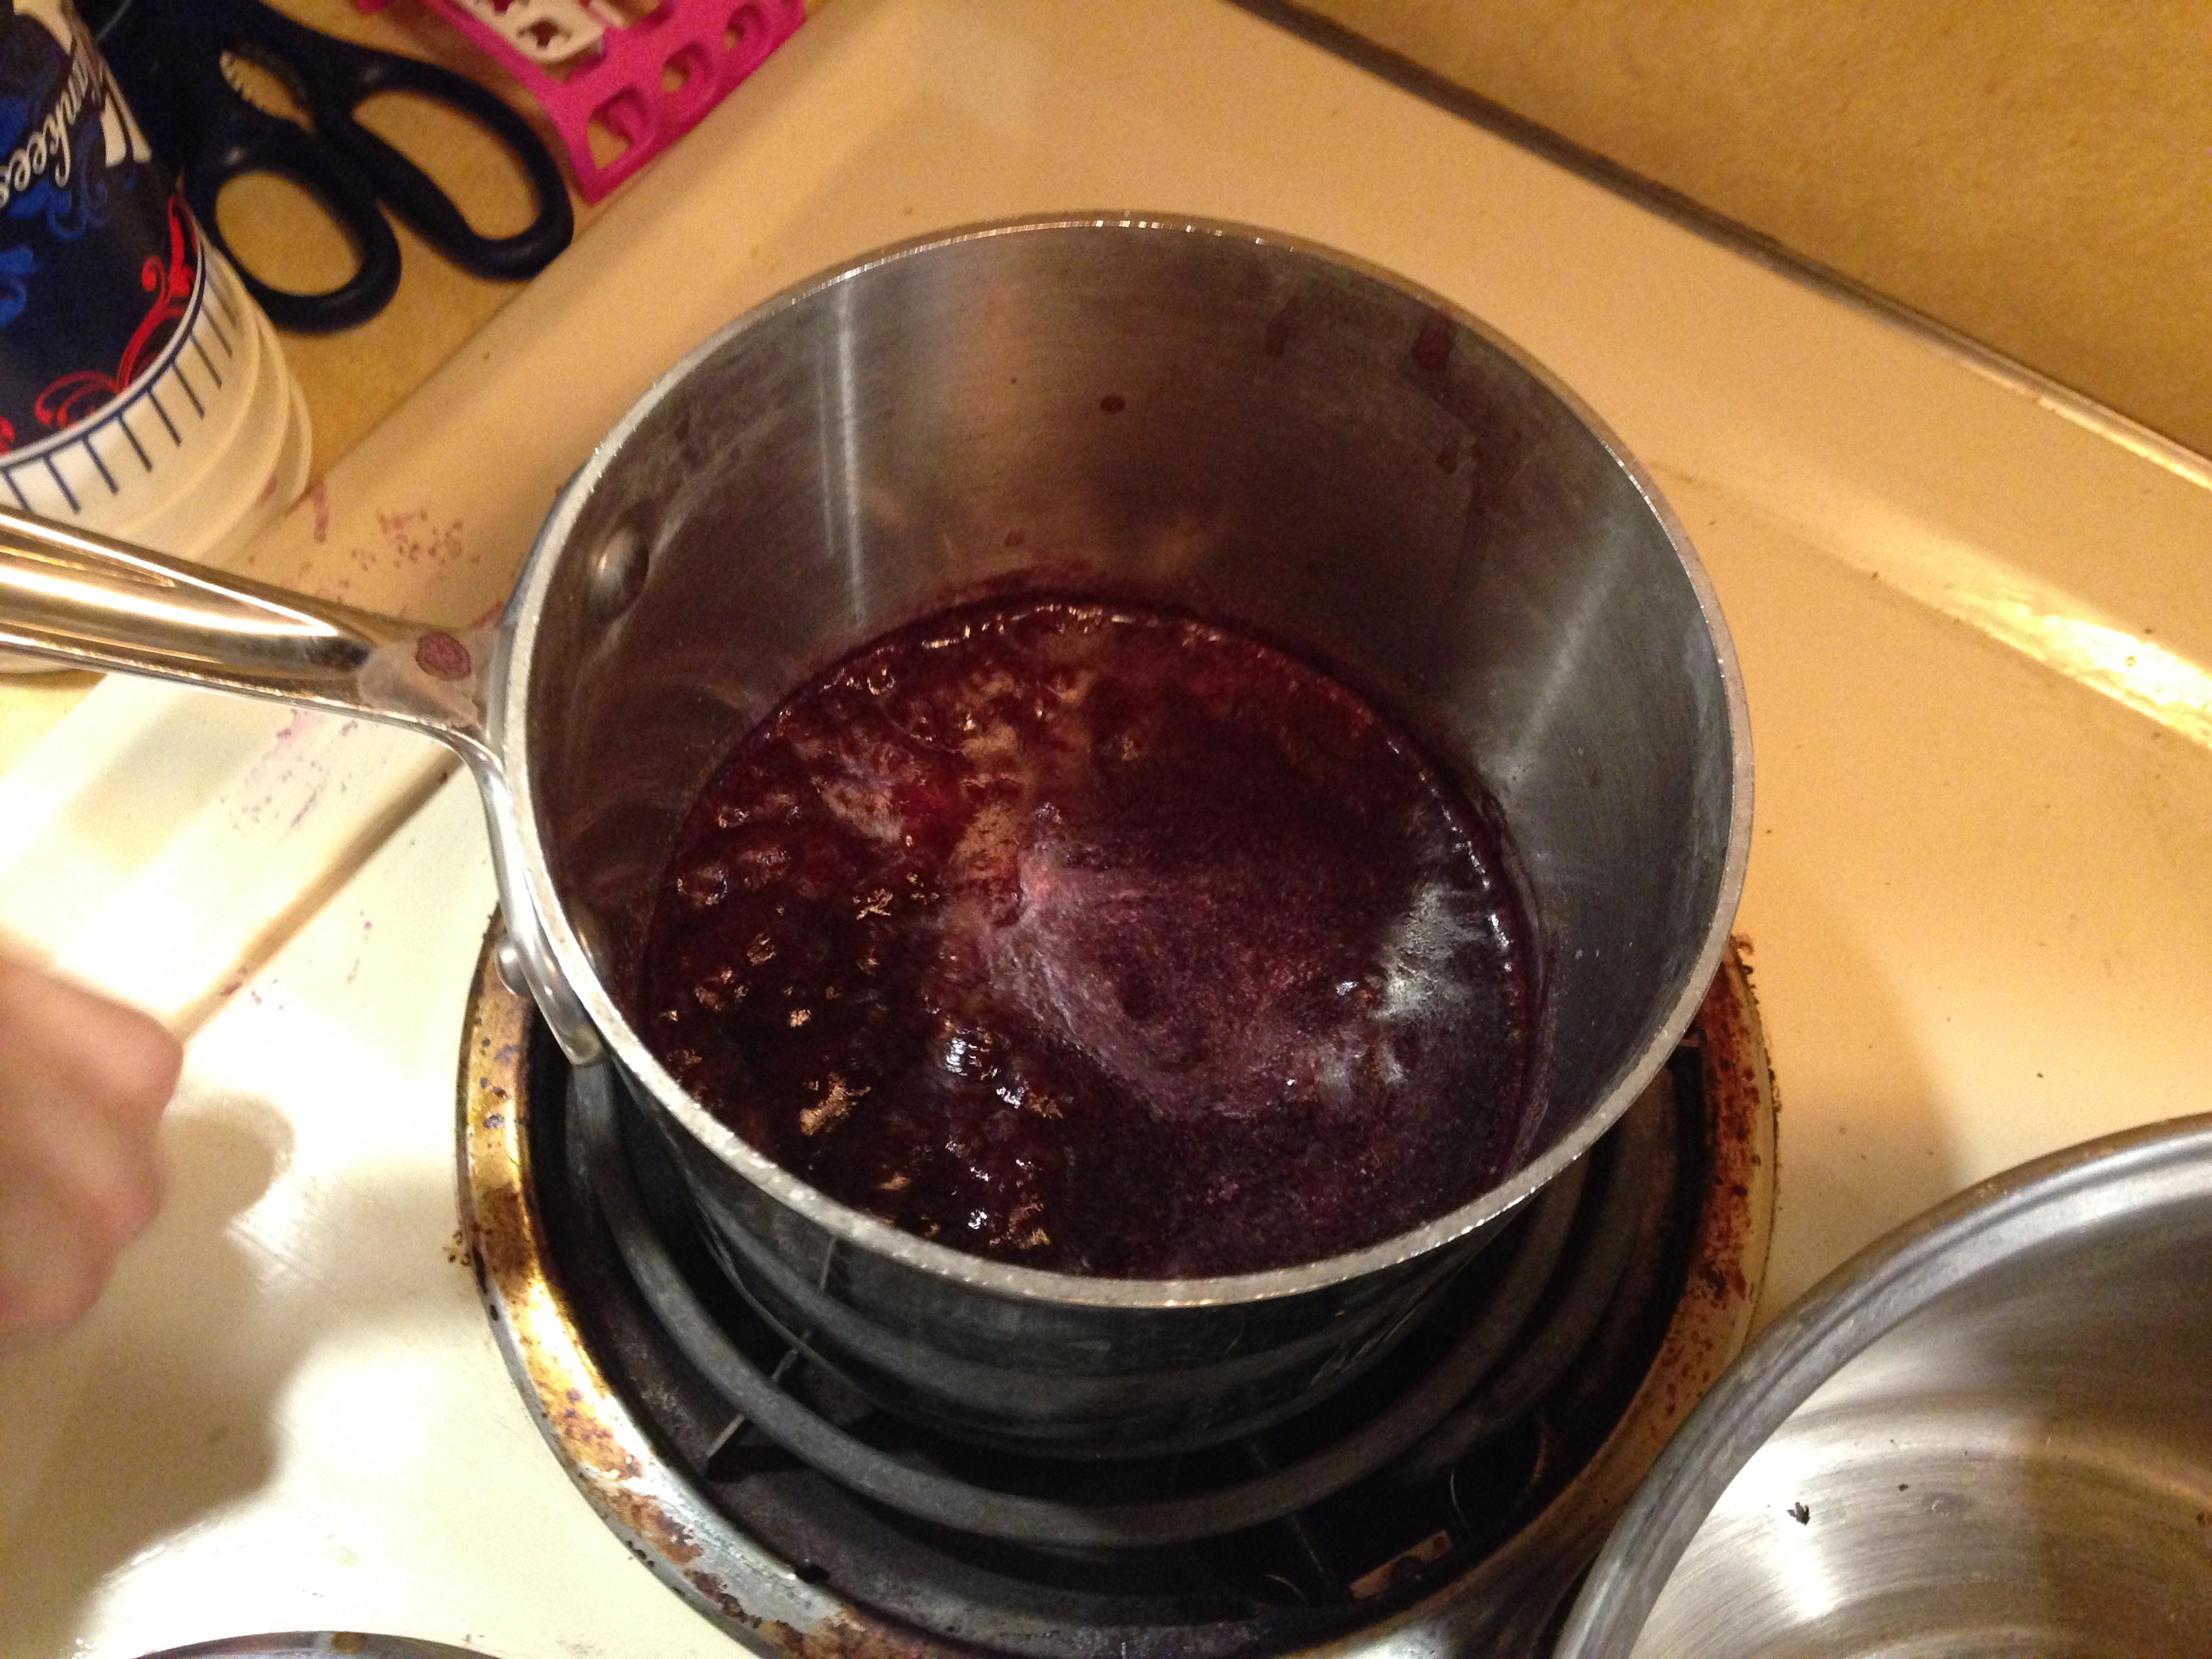 |
| Wine emulsion with elm root, boiling on the stove |
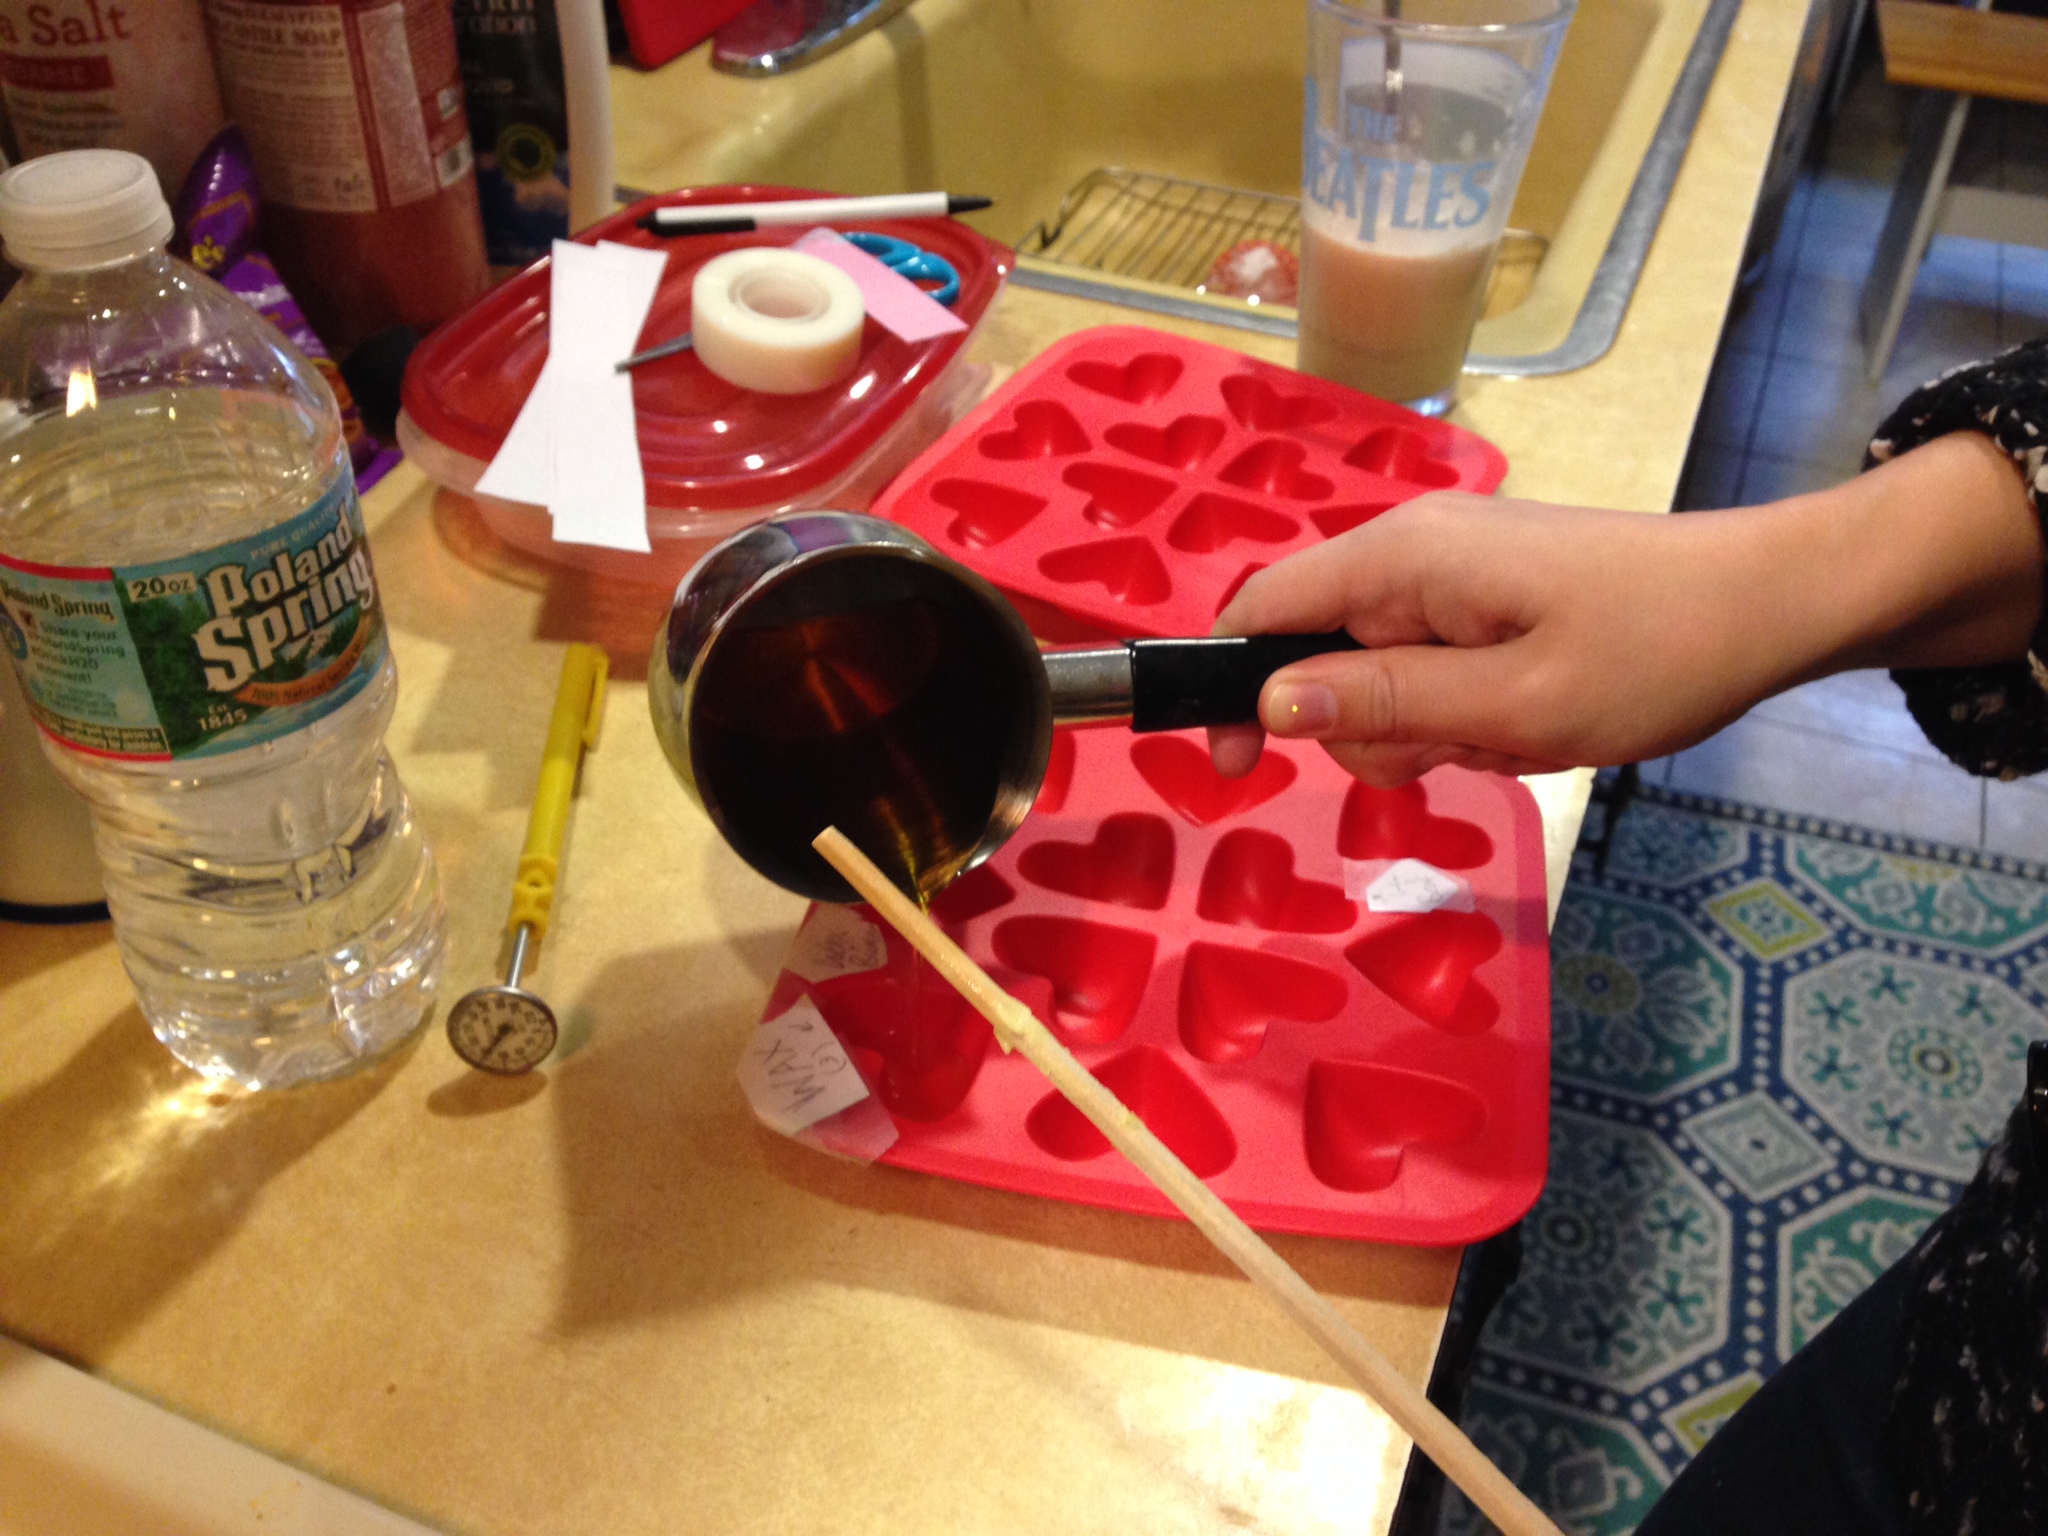 |
| Pouring wax into molds |
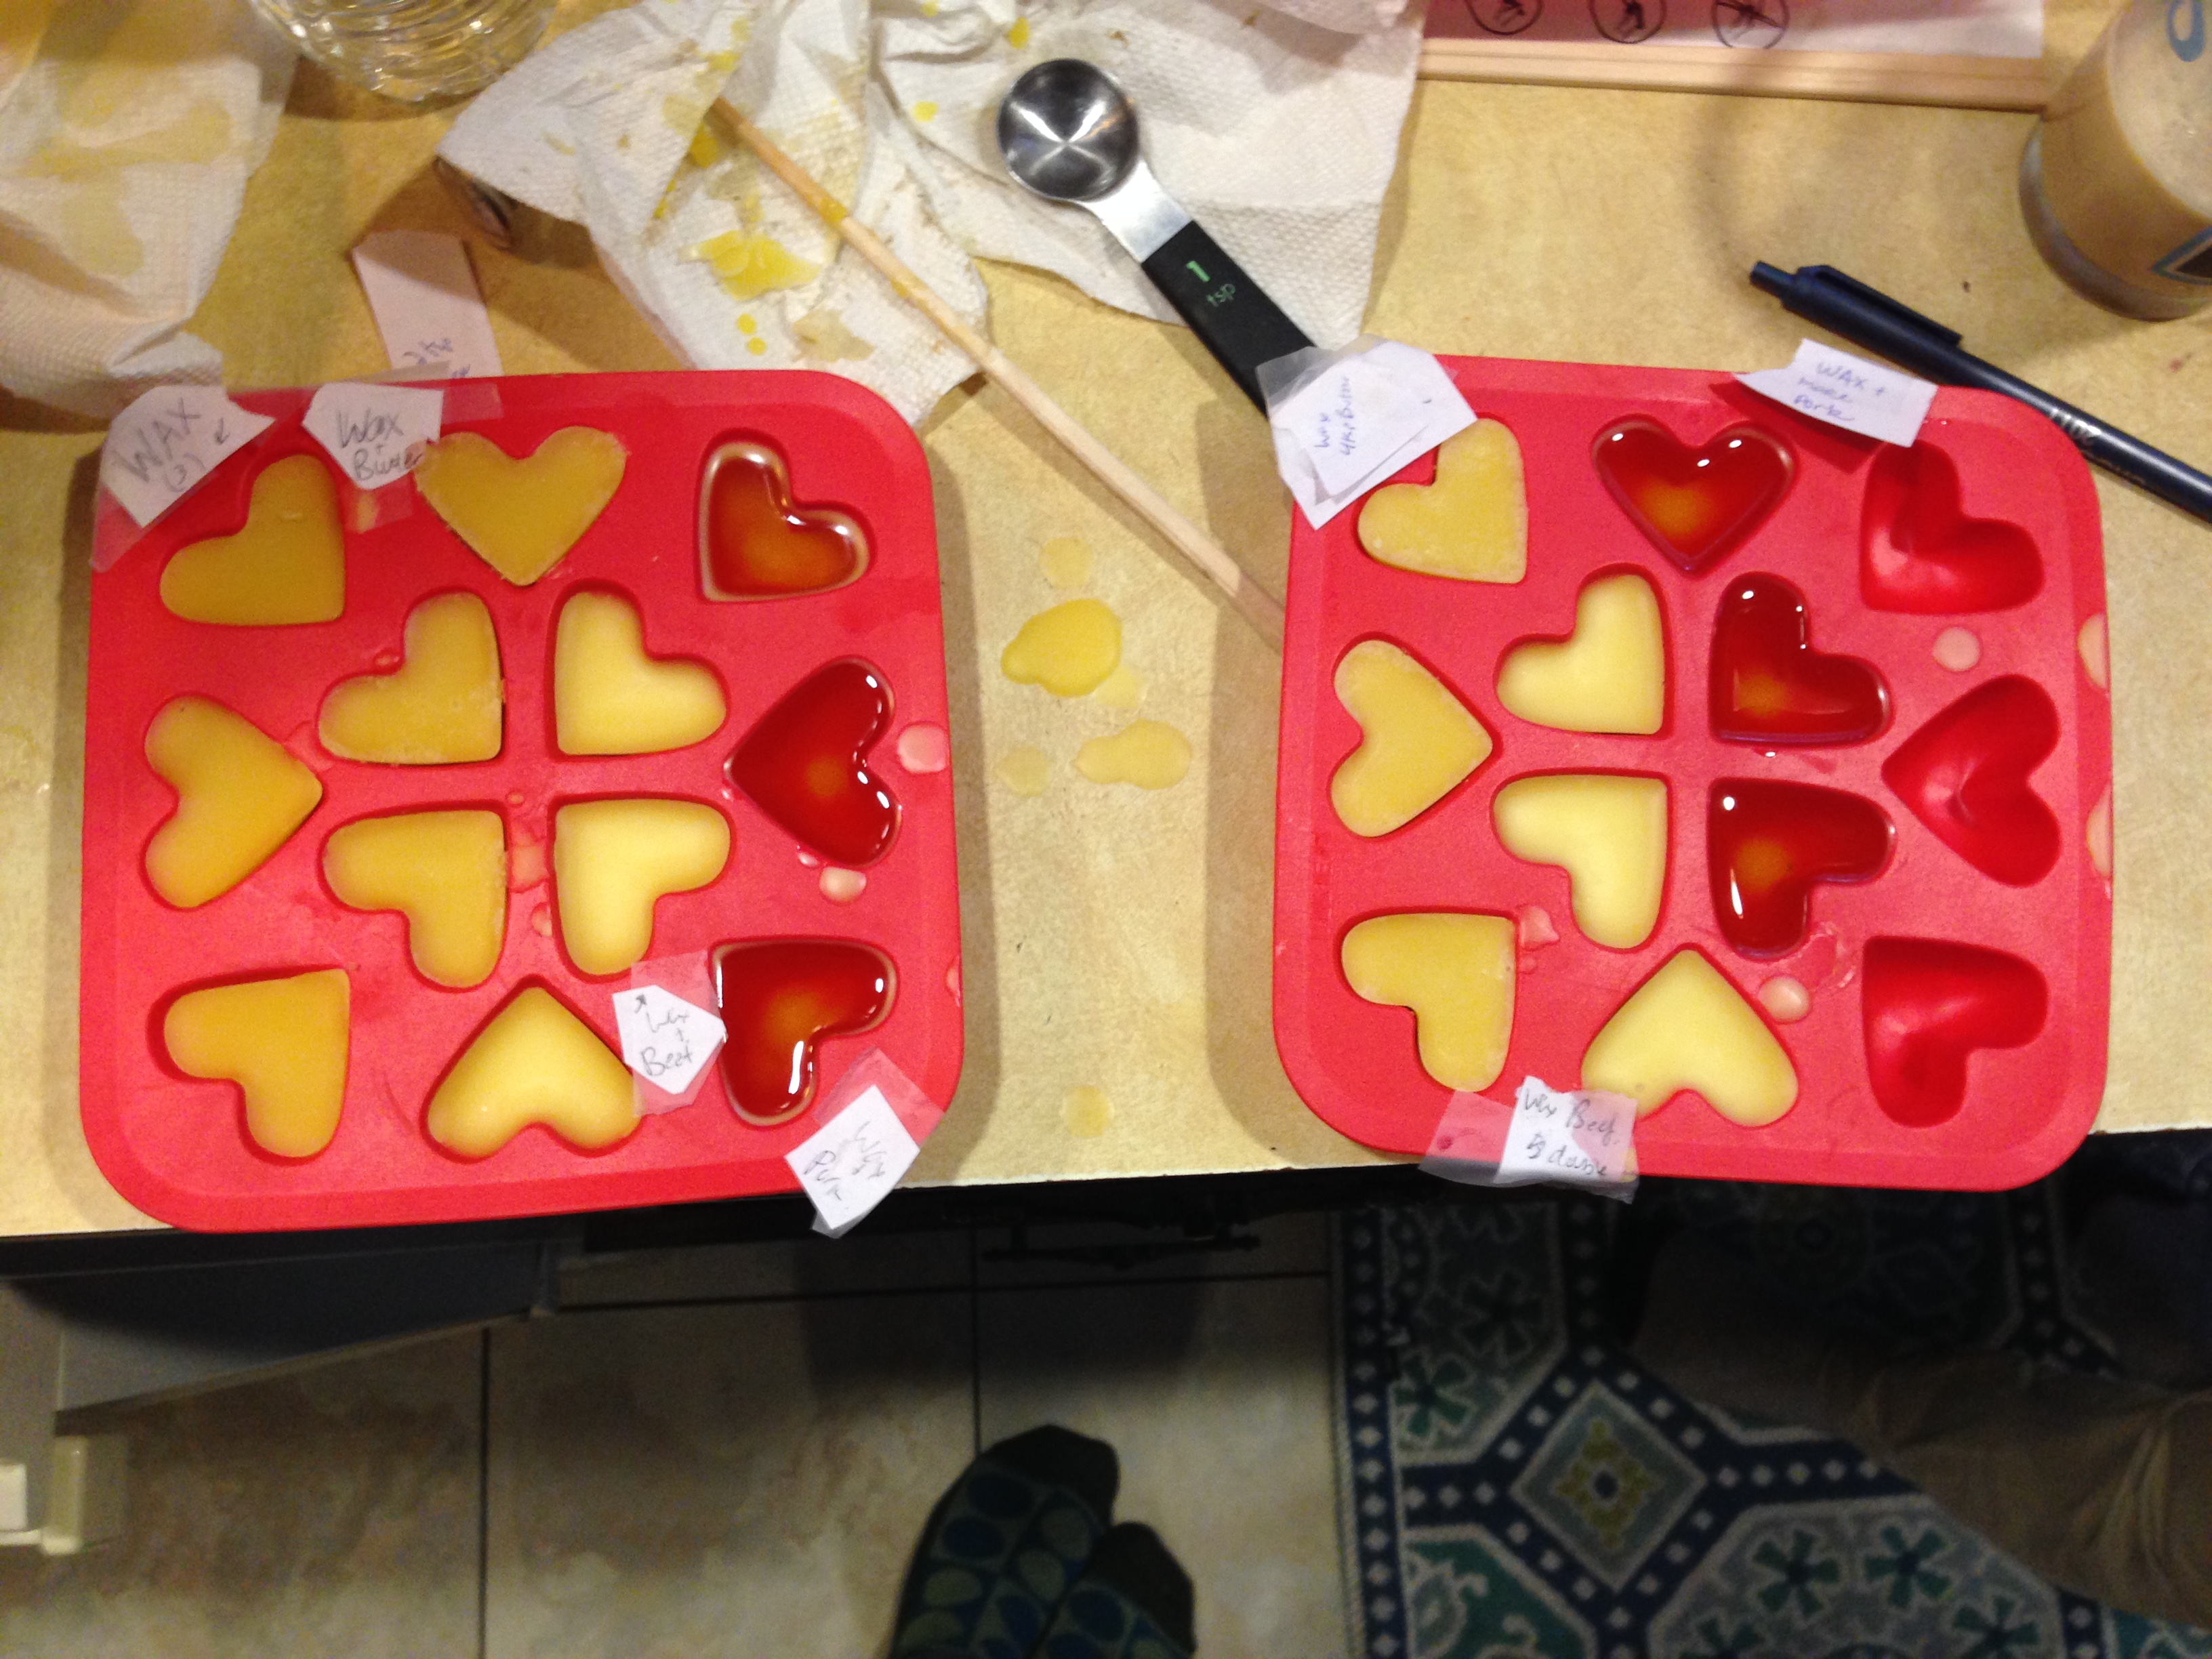 |
| Various wax mixtures poured into silicone molds |
Initial carving (carving letters into the hearts to identify them properly)
W = Wax
W B = Wax + Butter
W BT = Wax + Beef Tallow
W PT = Wax + Pork Tallow
W 2B = Wax + Butter (4 tsp)
W 2BT = Wax + Beef Tallow (4 tsp)
W 2PT = Wax + Pork Tallow (4 tsp)
Observations
- The pork tallow makes the nicest for carving, the carving "glides" through, doesn't pill up, clean indentation, effortless
- Butter - more resistance - drier, bumpier, more difficult to carve, feels uneven, your hand slips
- Beef - hybrid between butter and pork, easier to carve than butter, but not as good as the pork tallow
- Surprising that there is such a difference between the two types of tallow
Plans for this week:
- Hope for kiln to be working this week so we can incinerate our crushed oyster shells
- Wax and turpentine mixture in the lab (must be careful)
- Wax and pine rosin mixture in the lab (must be careful with higher melting point of rosin)
- start our sand casting experiments?
November 17, 2014: Rendered beef tallow second time
Observation: as it cooled, it visually had a grainy texture reminiscent of cream of wheat, in contrast to the double rendered pork which was much smoother and creamier -- no particulatesNovember 21, 2014: Wax experiments, first kiln attempt, plaster pattern
NAME: Emogene Cataldo & Julianna ViscoDATE AND TIME: 11/21/14 (updated 11/24/14)
LOCATION: Lab at Columbia
SUBJECT: wax experiments continued, kiln attempts
Wax:
We mixed wax with (1) pine rosin and (2) turpentine.
(1) Melting pine rosin into the wax had been a concern since the melting point of the rosin is higher than wax. It was difficult to know which substance we should melt first, and when to combine. We decided to first try dissolving the rosin into melted wax. Unexpectedly, this worked well---the nuggets of rosin dissolved like ice cubes in the molten wax.
(2) The turpentine was also a hazard because it is flammable; putting it in contact with hot wax was a concern. We used the "Venice Turpentine," which was thick and viscous. We poured 2 teaspoons into our melted wax and luckily no fire occurred. (Though we were ready; the fire extinguisher was two steps away).
Kiln (oyster shell calcination):
Our first try with the kiln was ultimately aborted. We designed a program for heating the shells (degrees in F):
- Bring up to 300 at full speed; hold for 30 min.
- Bring up to 1400 at full speed; hold for 15 minutes
- Bring back down to 600
We decided to to the smallest bits as it was thought that more oyster ash would be produced and the smallest size might incinerate better/quicker.
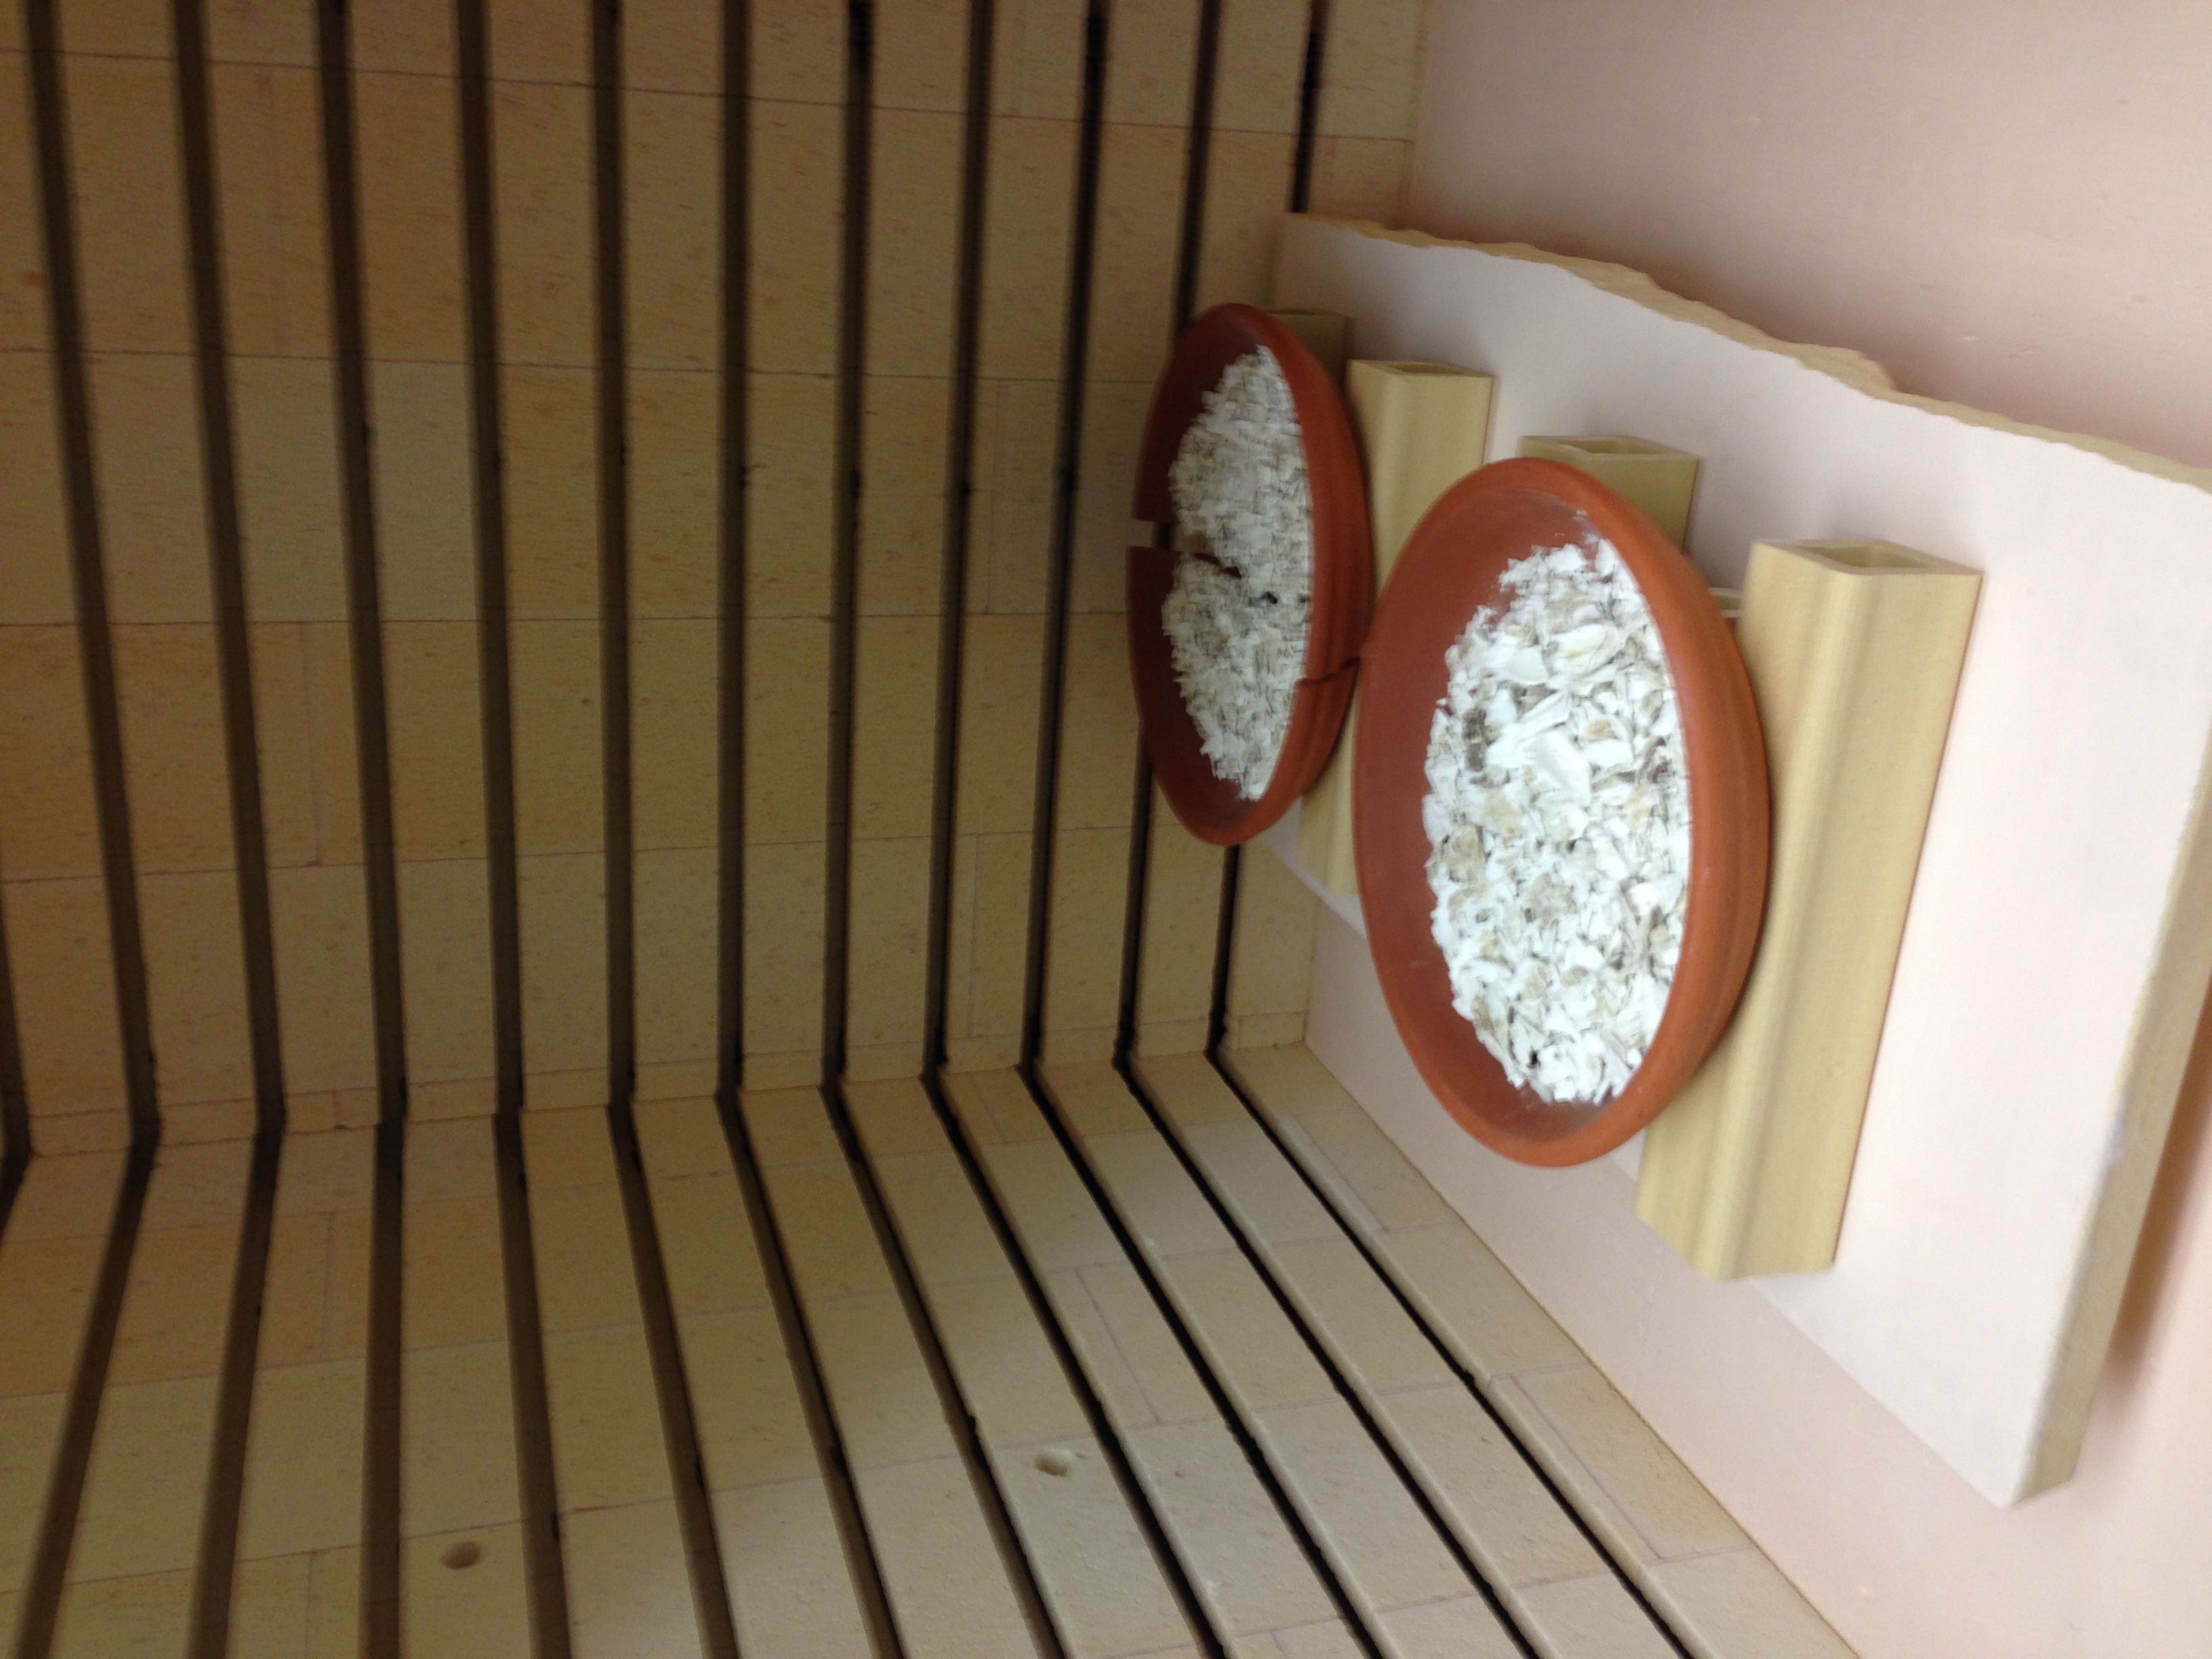
We were concerned about the particulate and whether it would circulate in the kiln. We went ahead and put 3 large terra cotta trays of shells in the kiln.
2:00
Kiln is on; full speed up to 300 was achieved quickly; hold for 30 minutes
programming the kiln was not self-explanatory; took several tries before we got it right
We decided on an emergency protocol if we heard any loud noises or explosions
Alarm started going off after 115 degrees, press any button to turn it off.
perhaps someone programed the alarm by accident; will go off when the kiln reaches or goes above a selected temperature
the kiln overshot the 300 degrees by ~70 degrees; result of warming it up too fast; then, the temperature started dropping
2:20
kiln temp down to 200 degrees
2:40
heard crackling in the kiln; temp is 500 degrees; smelled a burning smell
we aborted the program, it took a few minutes for the temperature to stop climbing
the screen blinked "IDLE"
the crackling noise stopped
2:47
Kiln has cooled to 247 degrees
3:10
Kiln has cooled to 382 degrees
Problem: no visual for the inside of the kiln; hard to know what to do when you cannot see what is going on inside.
When we looked in the kiln, the some oyster shell particulate had "jumped" out of the trays onto the kiln shelf.
Plaster Pattern:
We poured plaster into Jonah and Rosemarijn's silicone molds to make patterns for our sandcasting next Tuesday.
Photos:
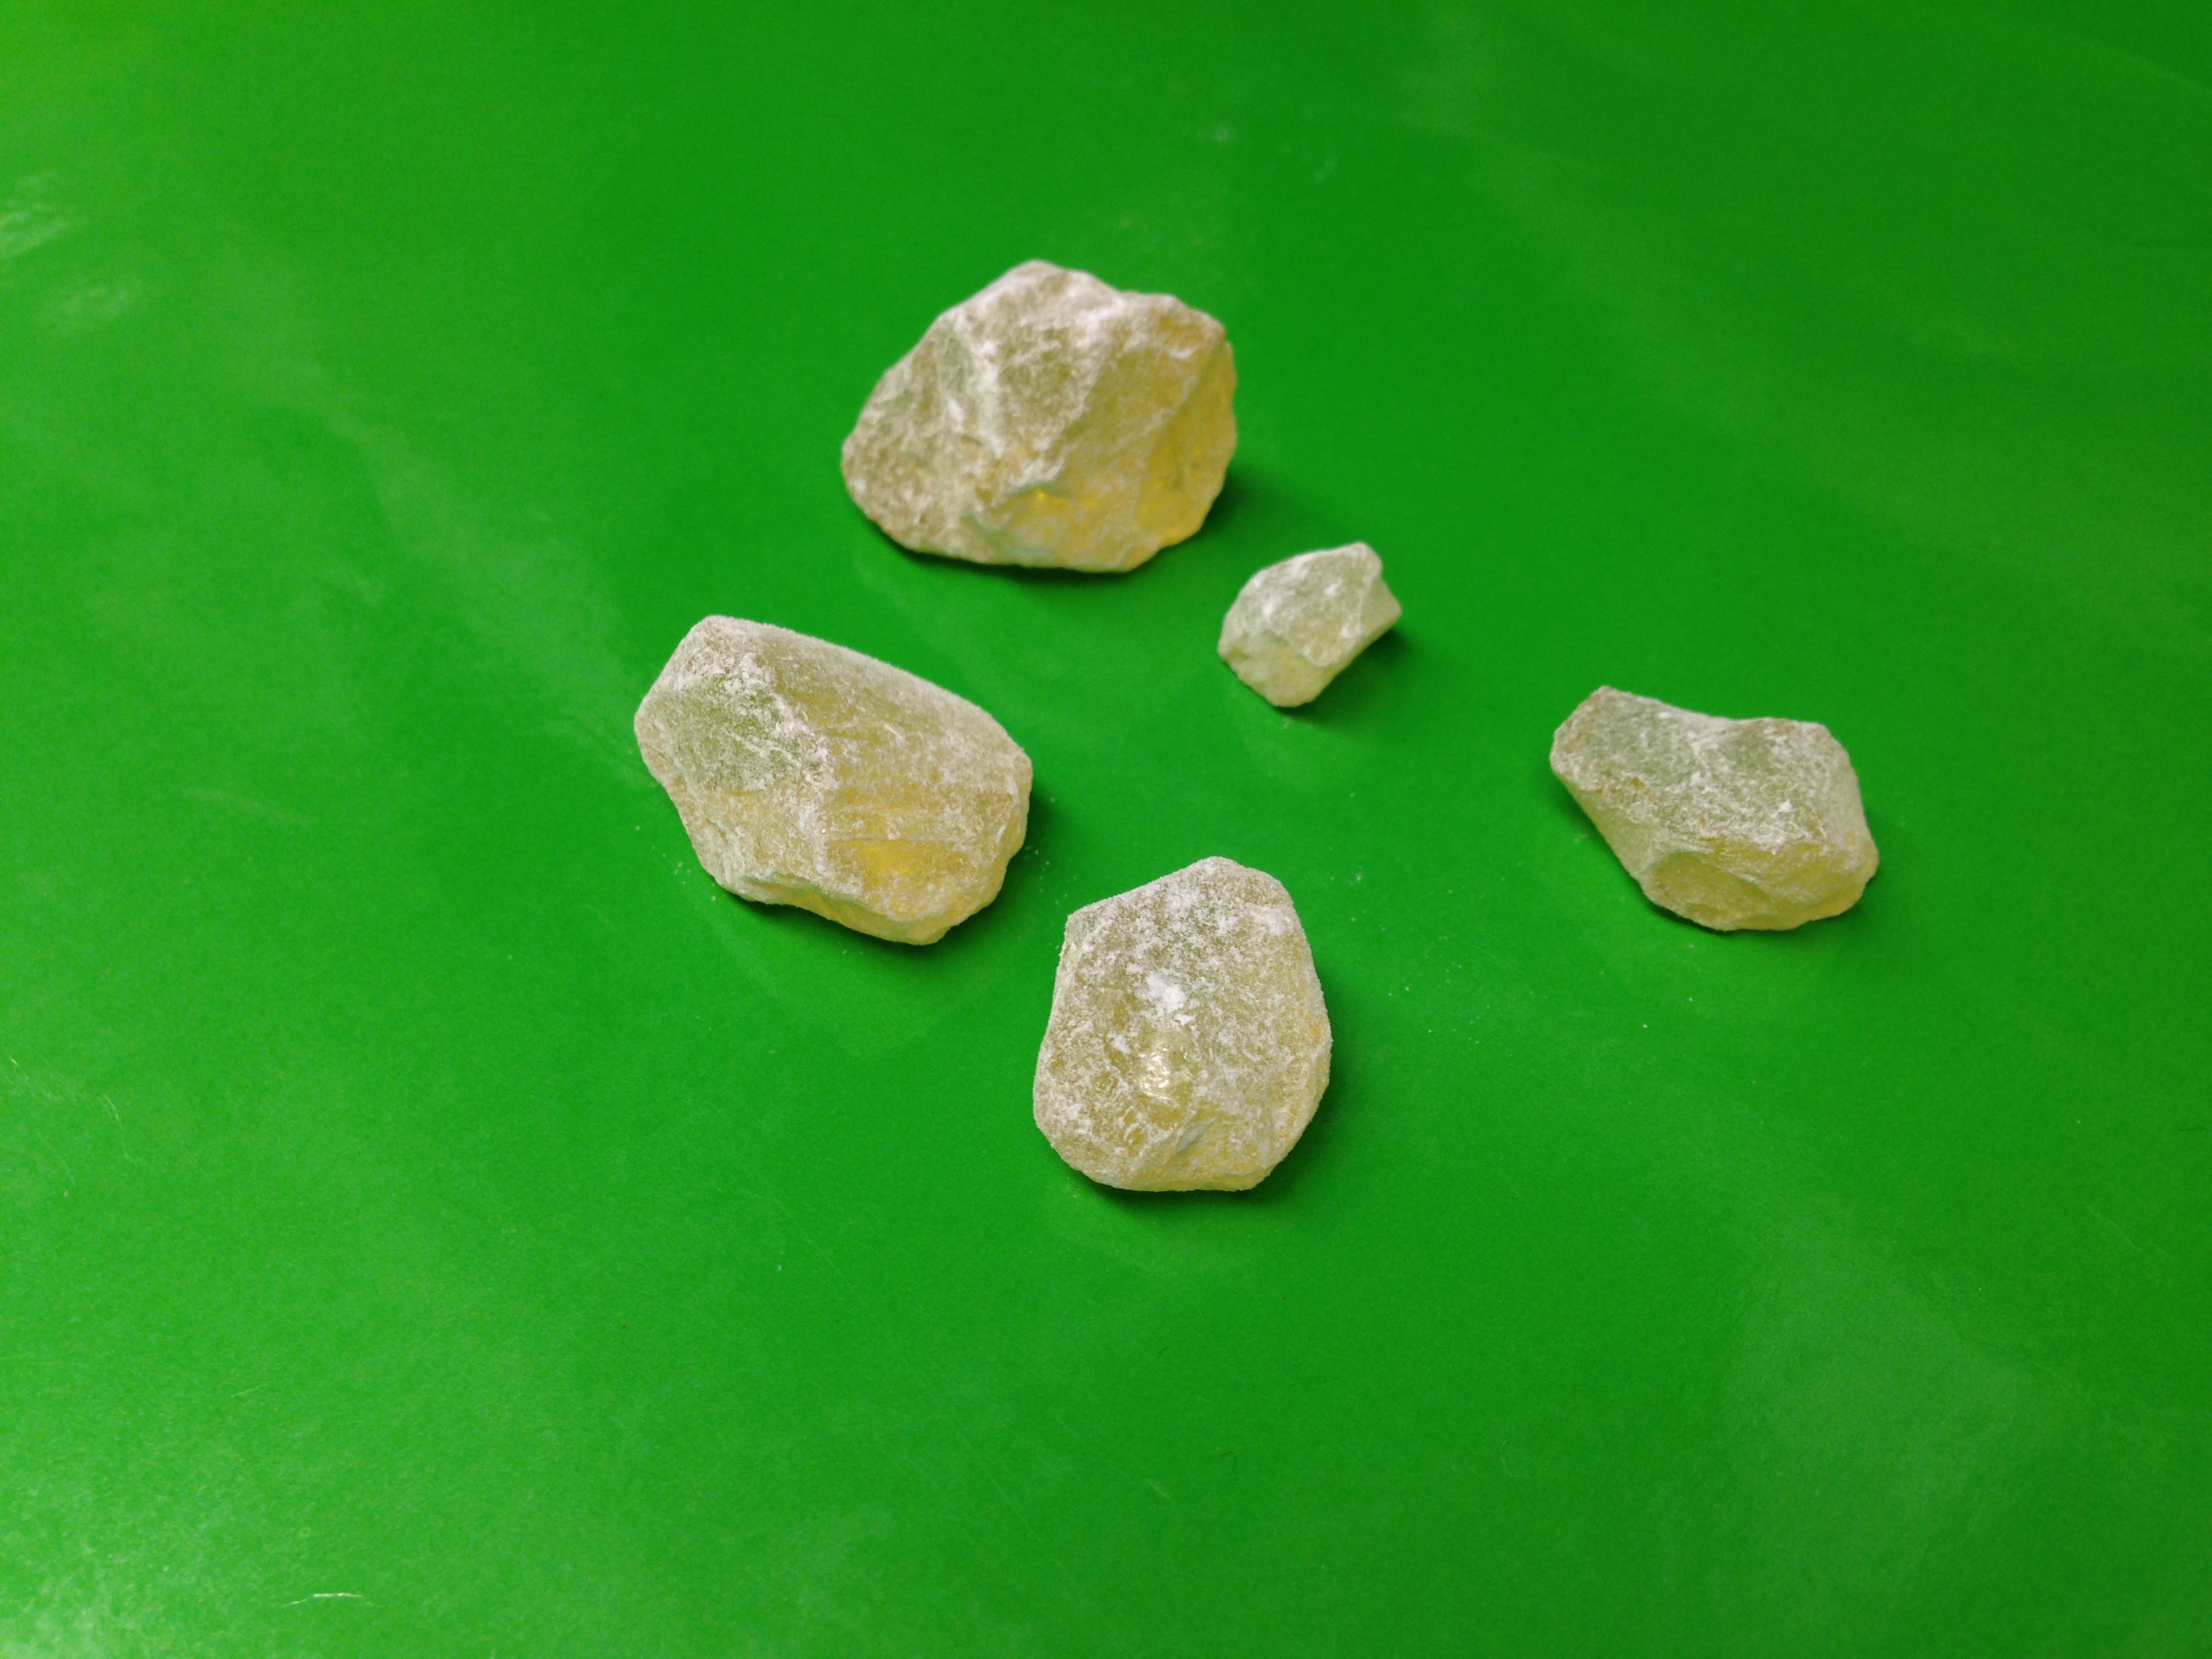 |
| Pine rosin nuggets |
note: we melted beeswax, added a pellet (approx. 1 cm diameter) to melted hot beeswax. via stirring it felt like ti was softening, visually melting like an ice cube in cold water; added a 2nd pellet (larger than 1st), mixture began to get sticky like melted gummi bears. poured easily, clear, thinner than other wax mixtures previously attempted.
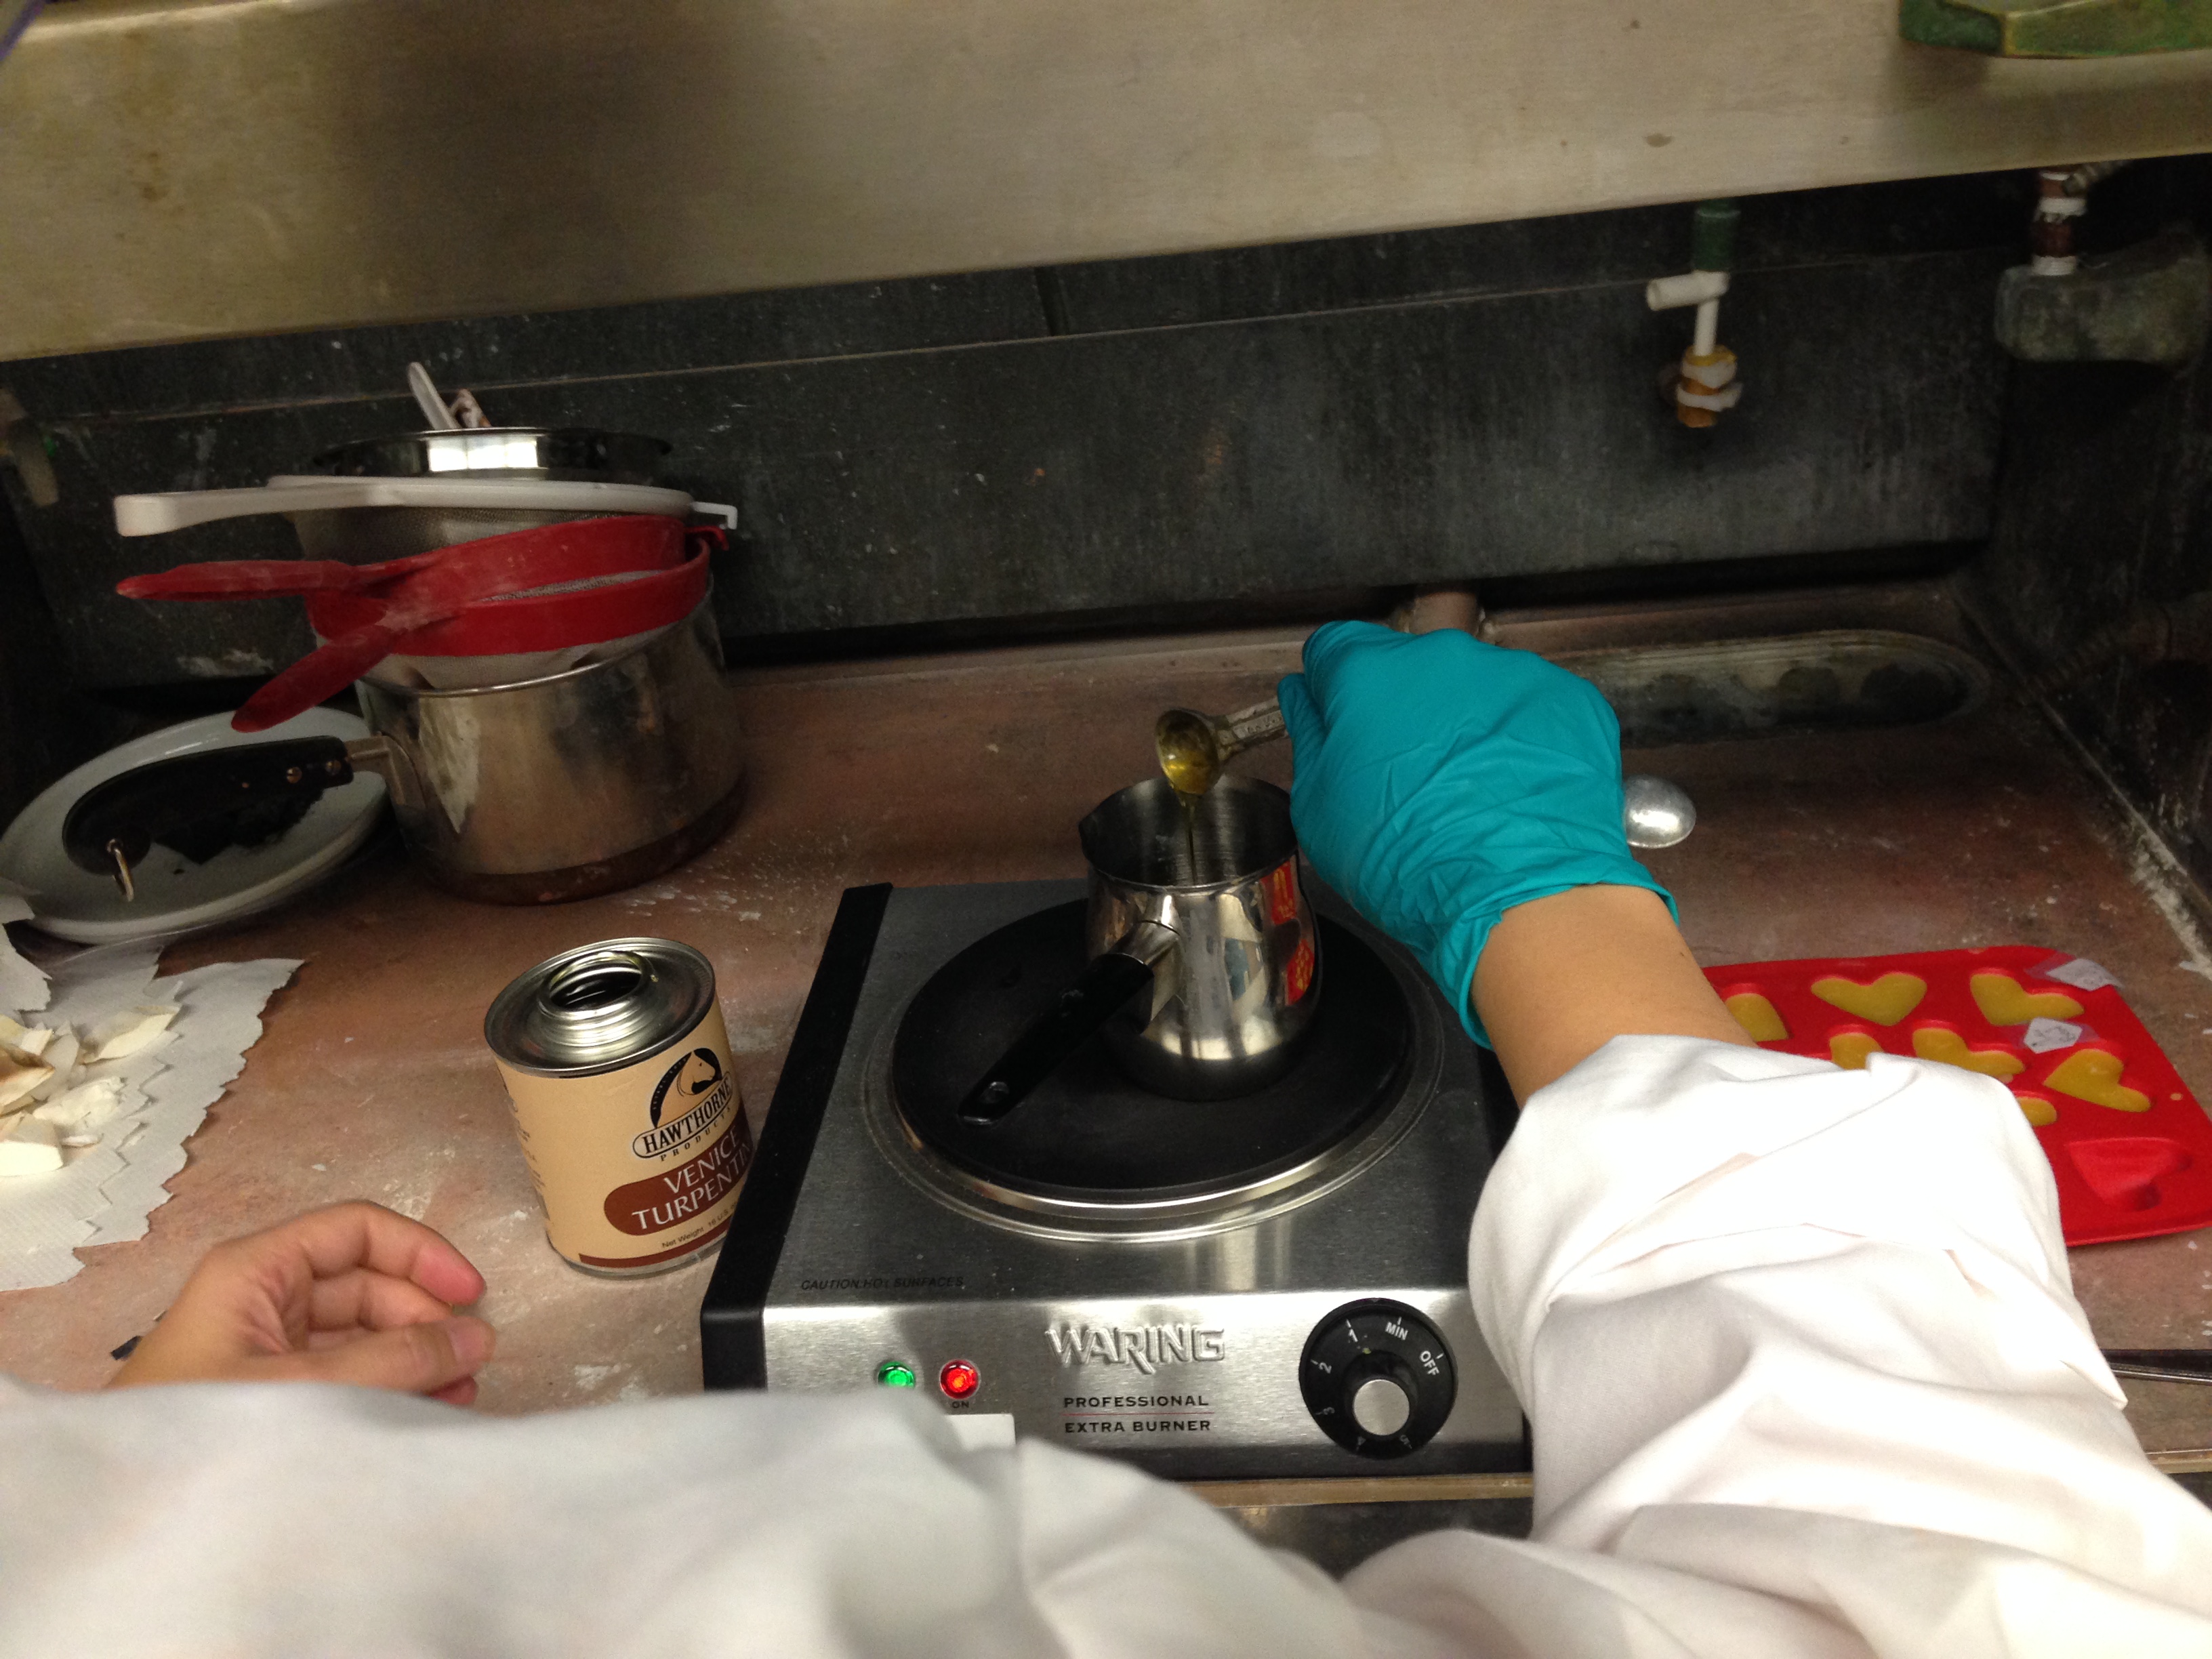 |
| Mixing turpentine into the molten wax |
melted beeswax again in preparation for adding turpentine. turpentine is thick with strong chemical smell, nasal pungency. add 1 teaspoon. consistency is visually like honey. becomes sticky, while stirring the handfeel is similar to pine rosin in terms of resistance felt from product.
pour.
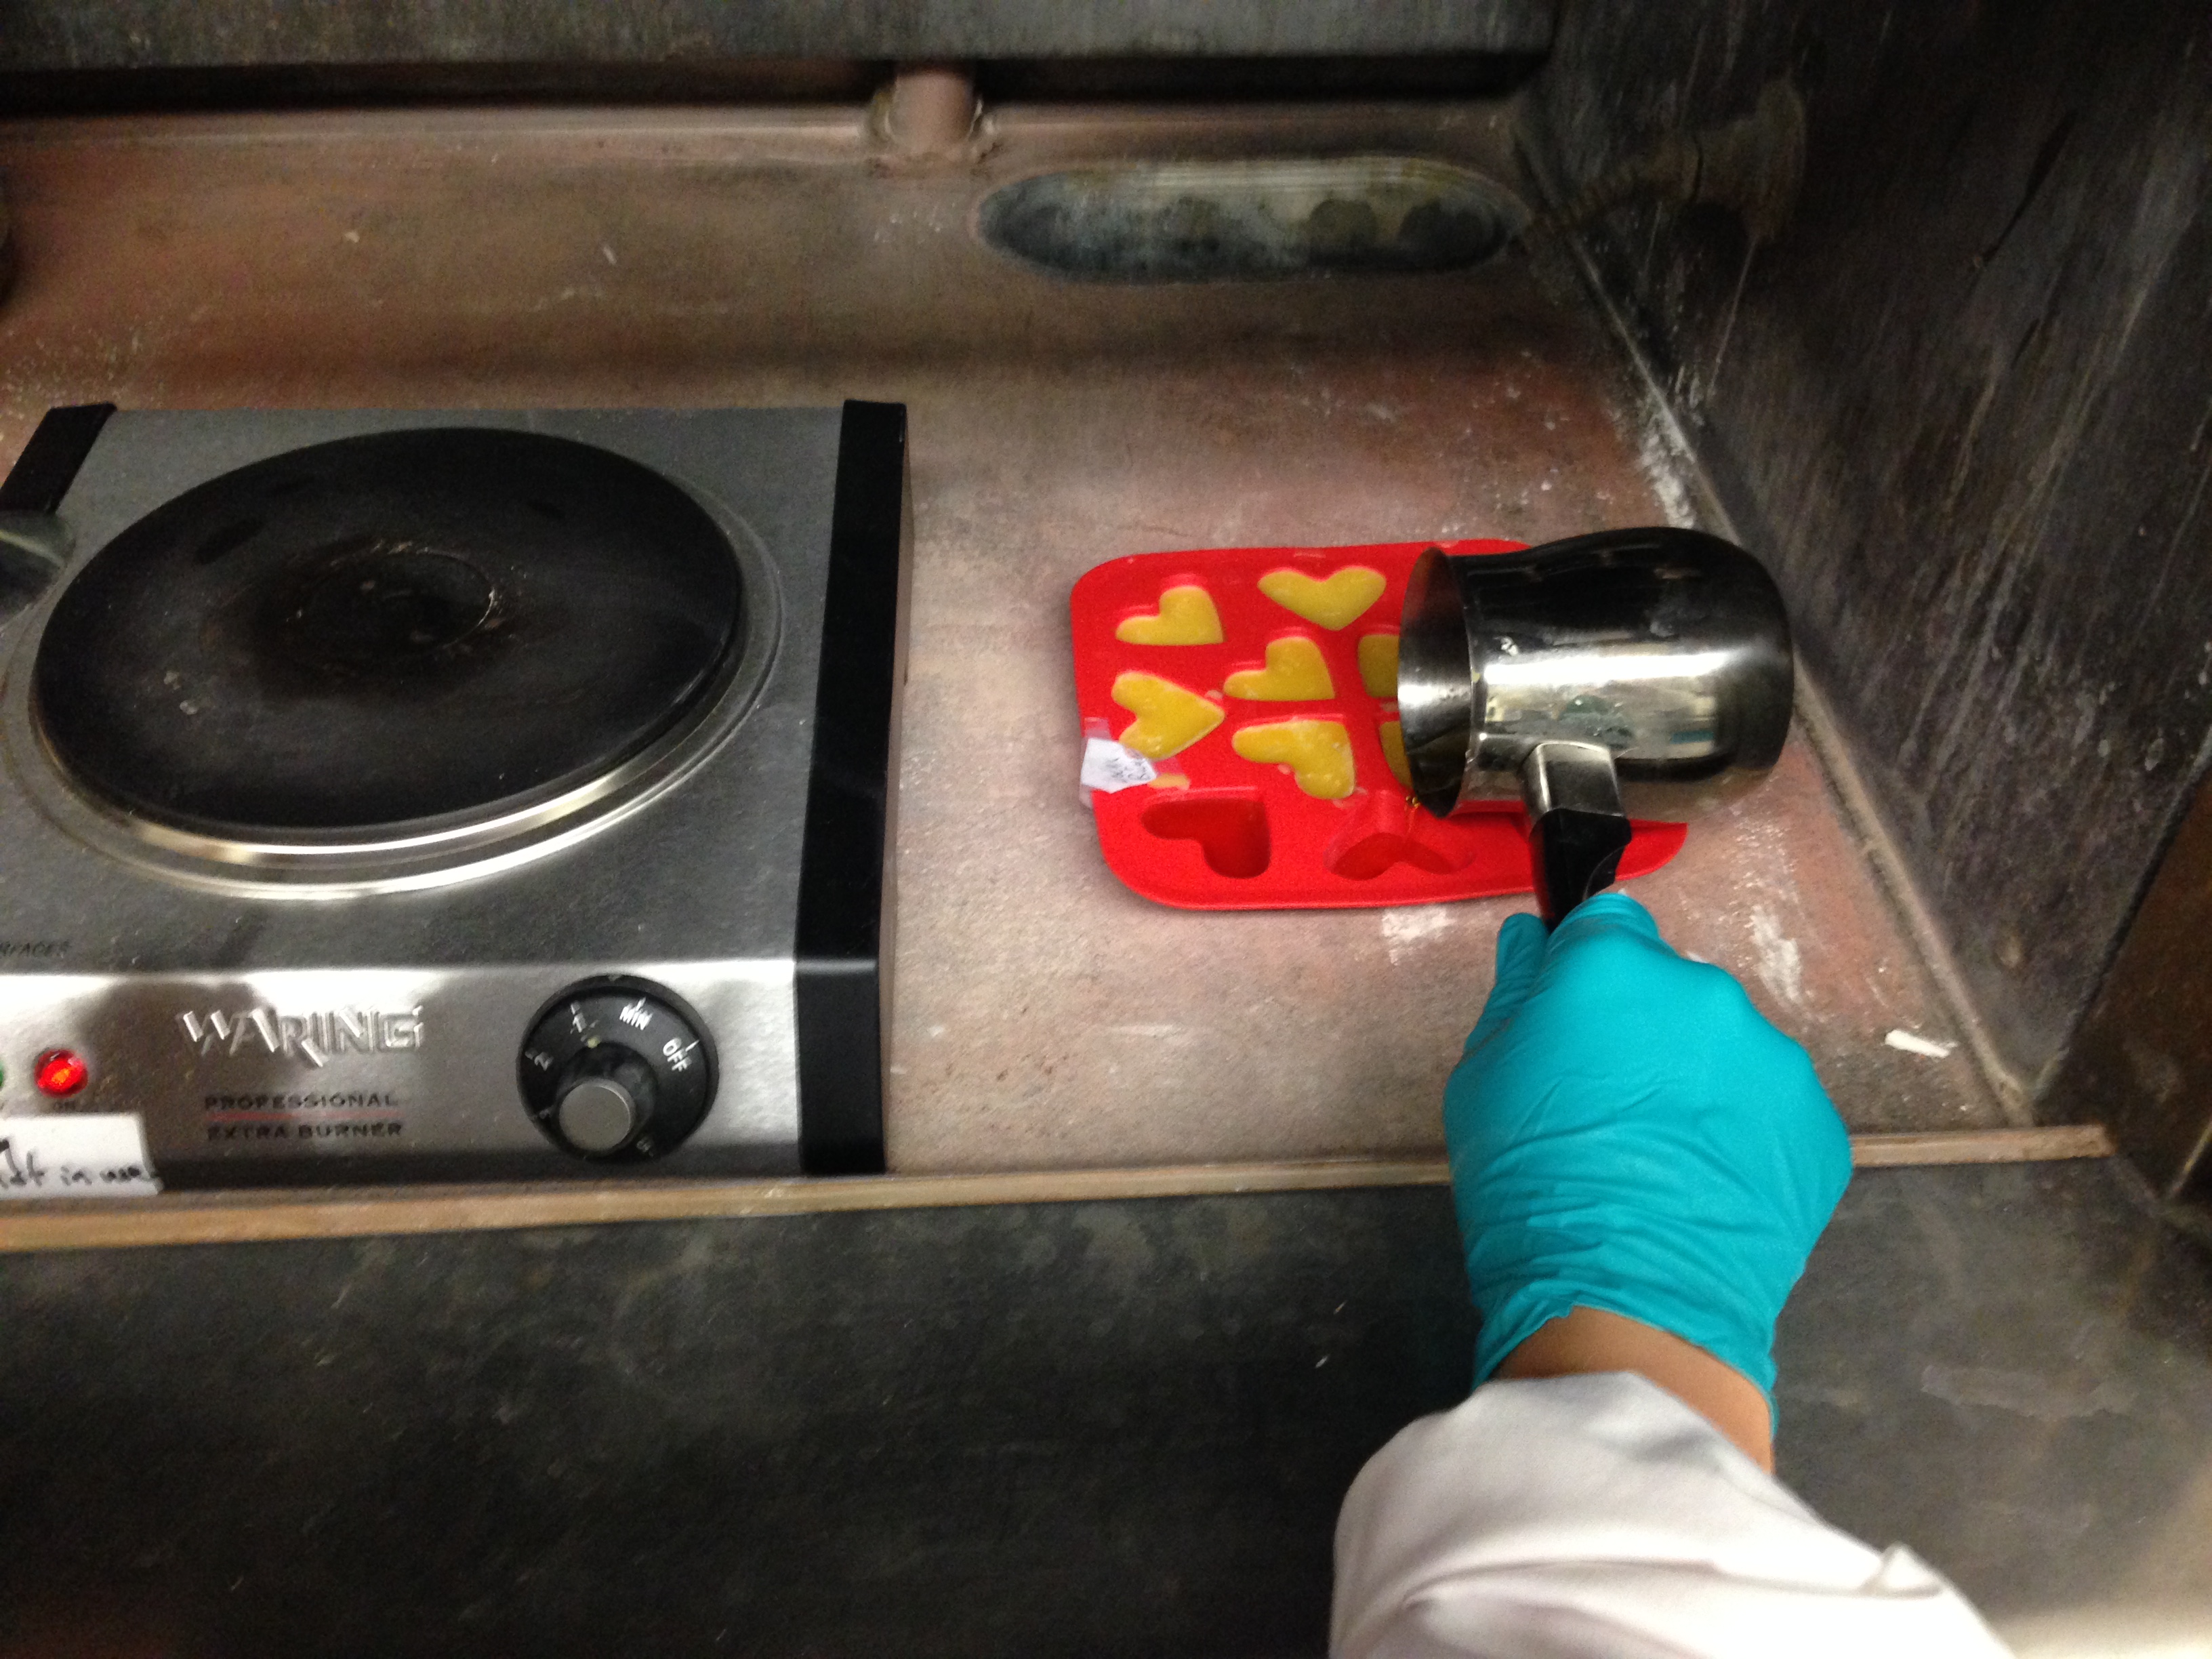 |
| Pouring turpentine-wax mixture into silicone molds |
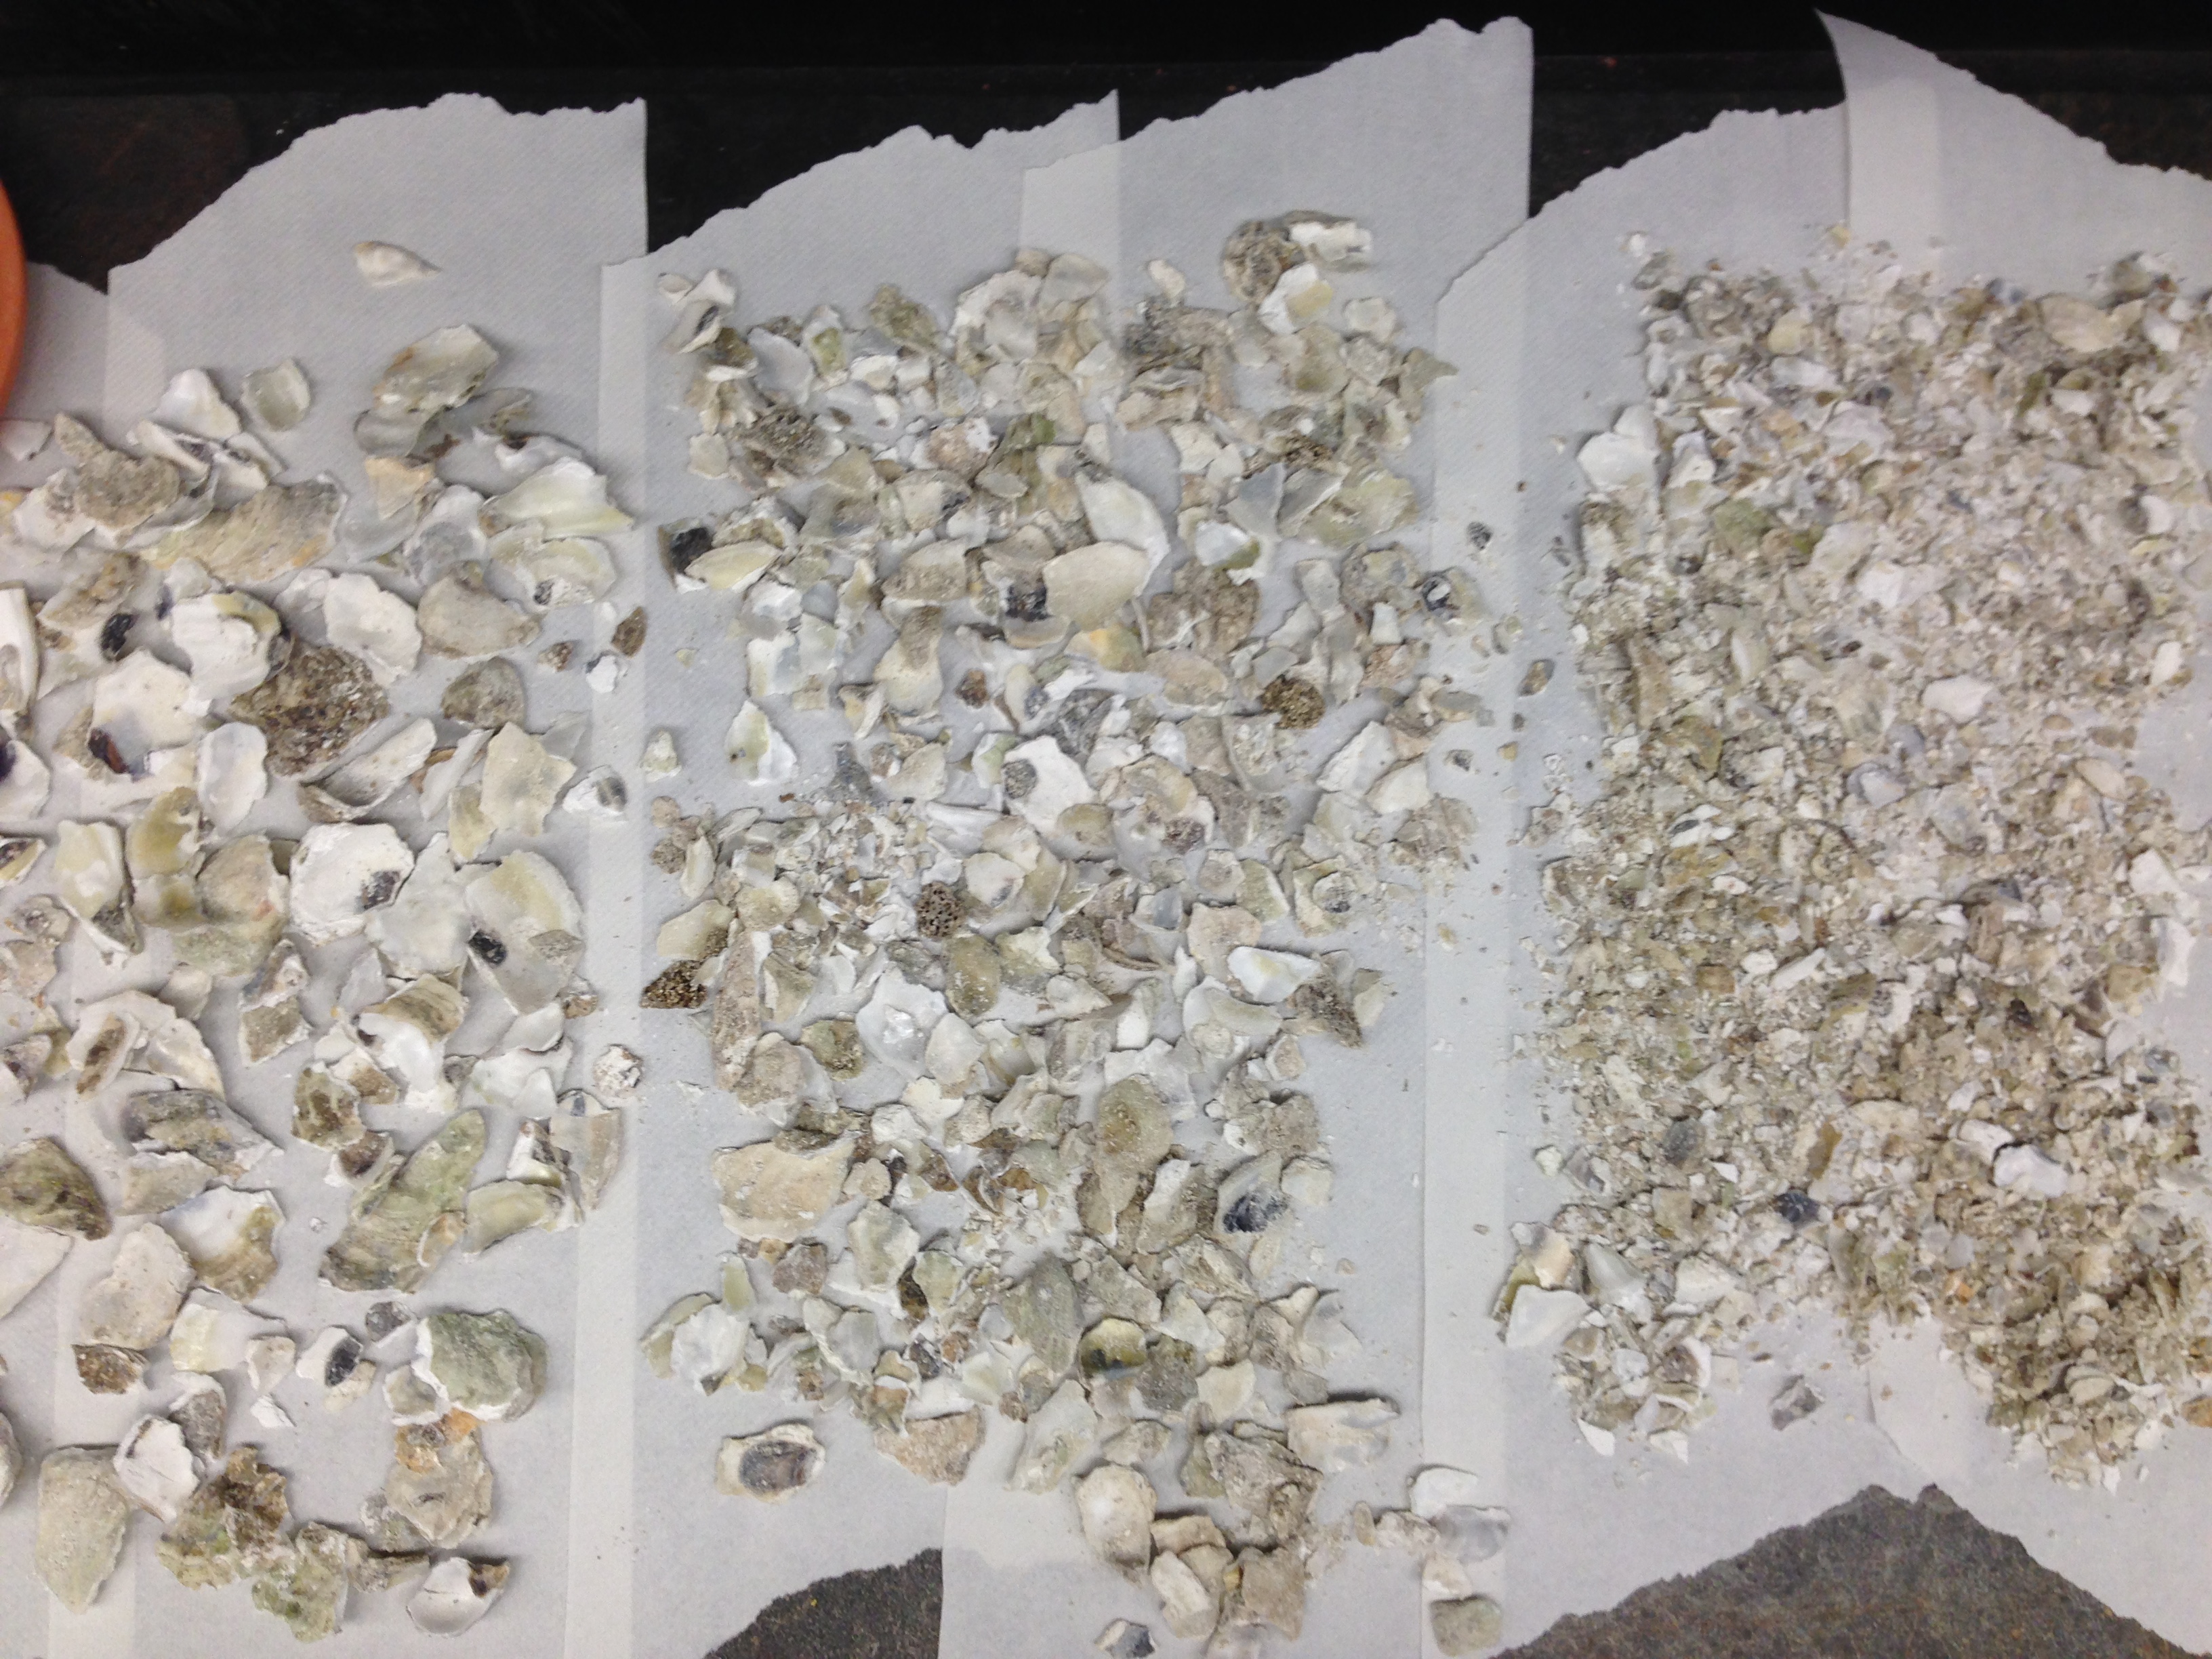 |
| Separating crushed oyster shells by size |
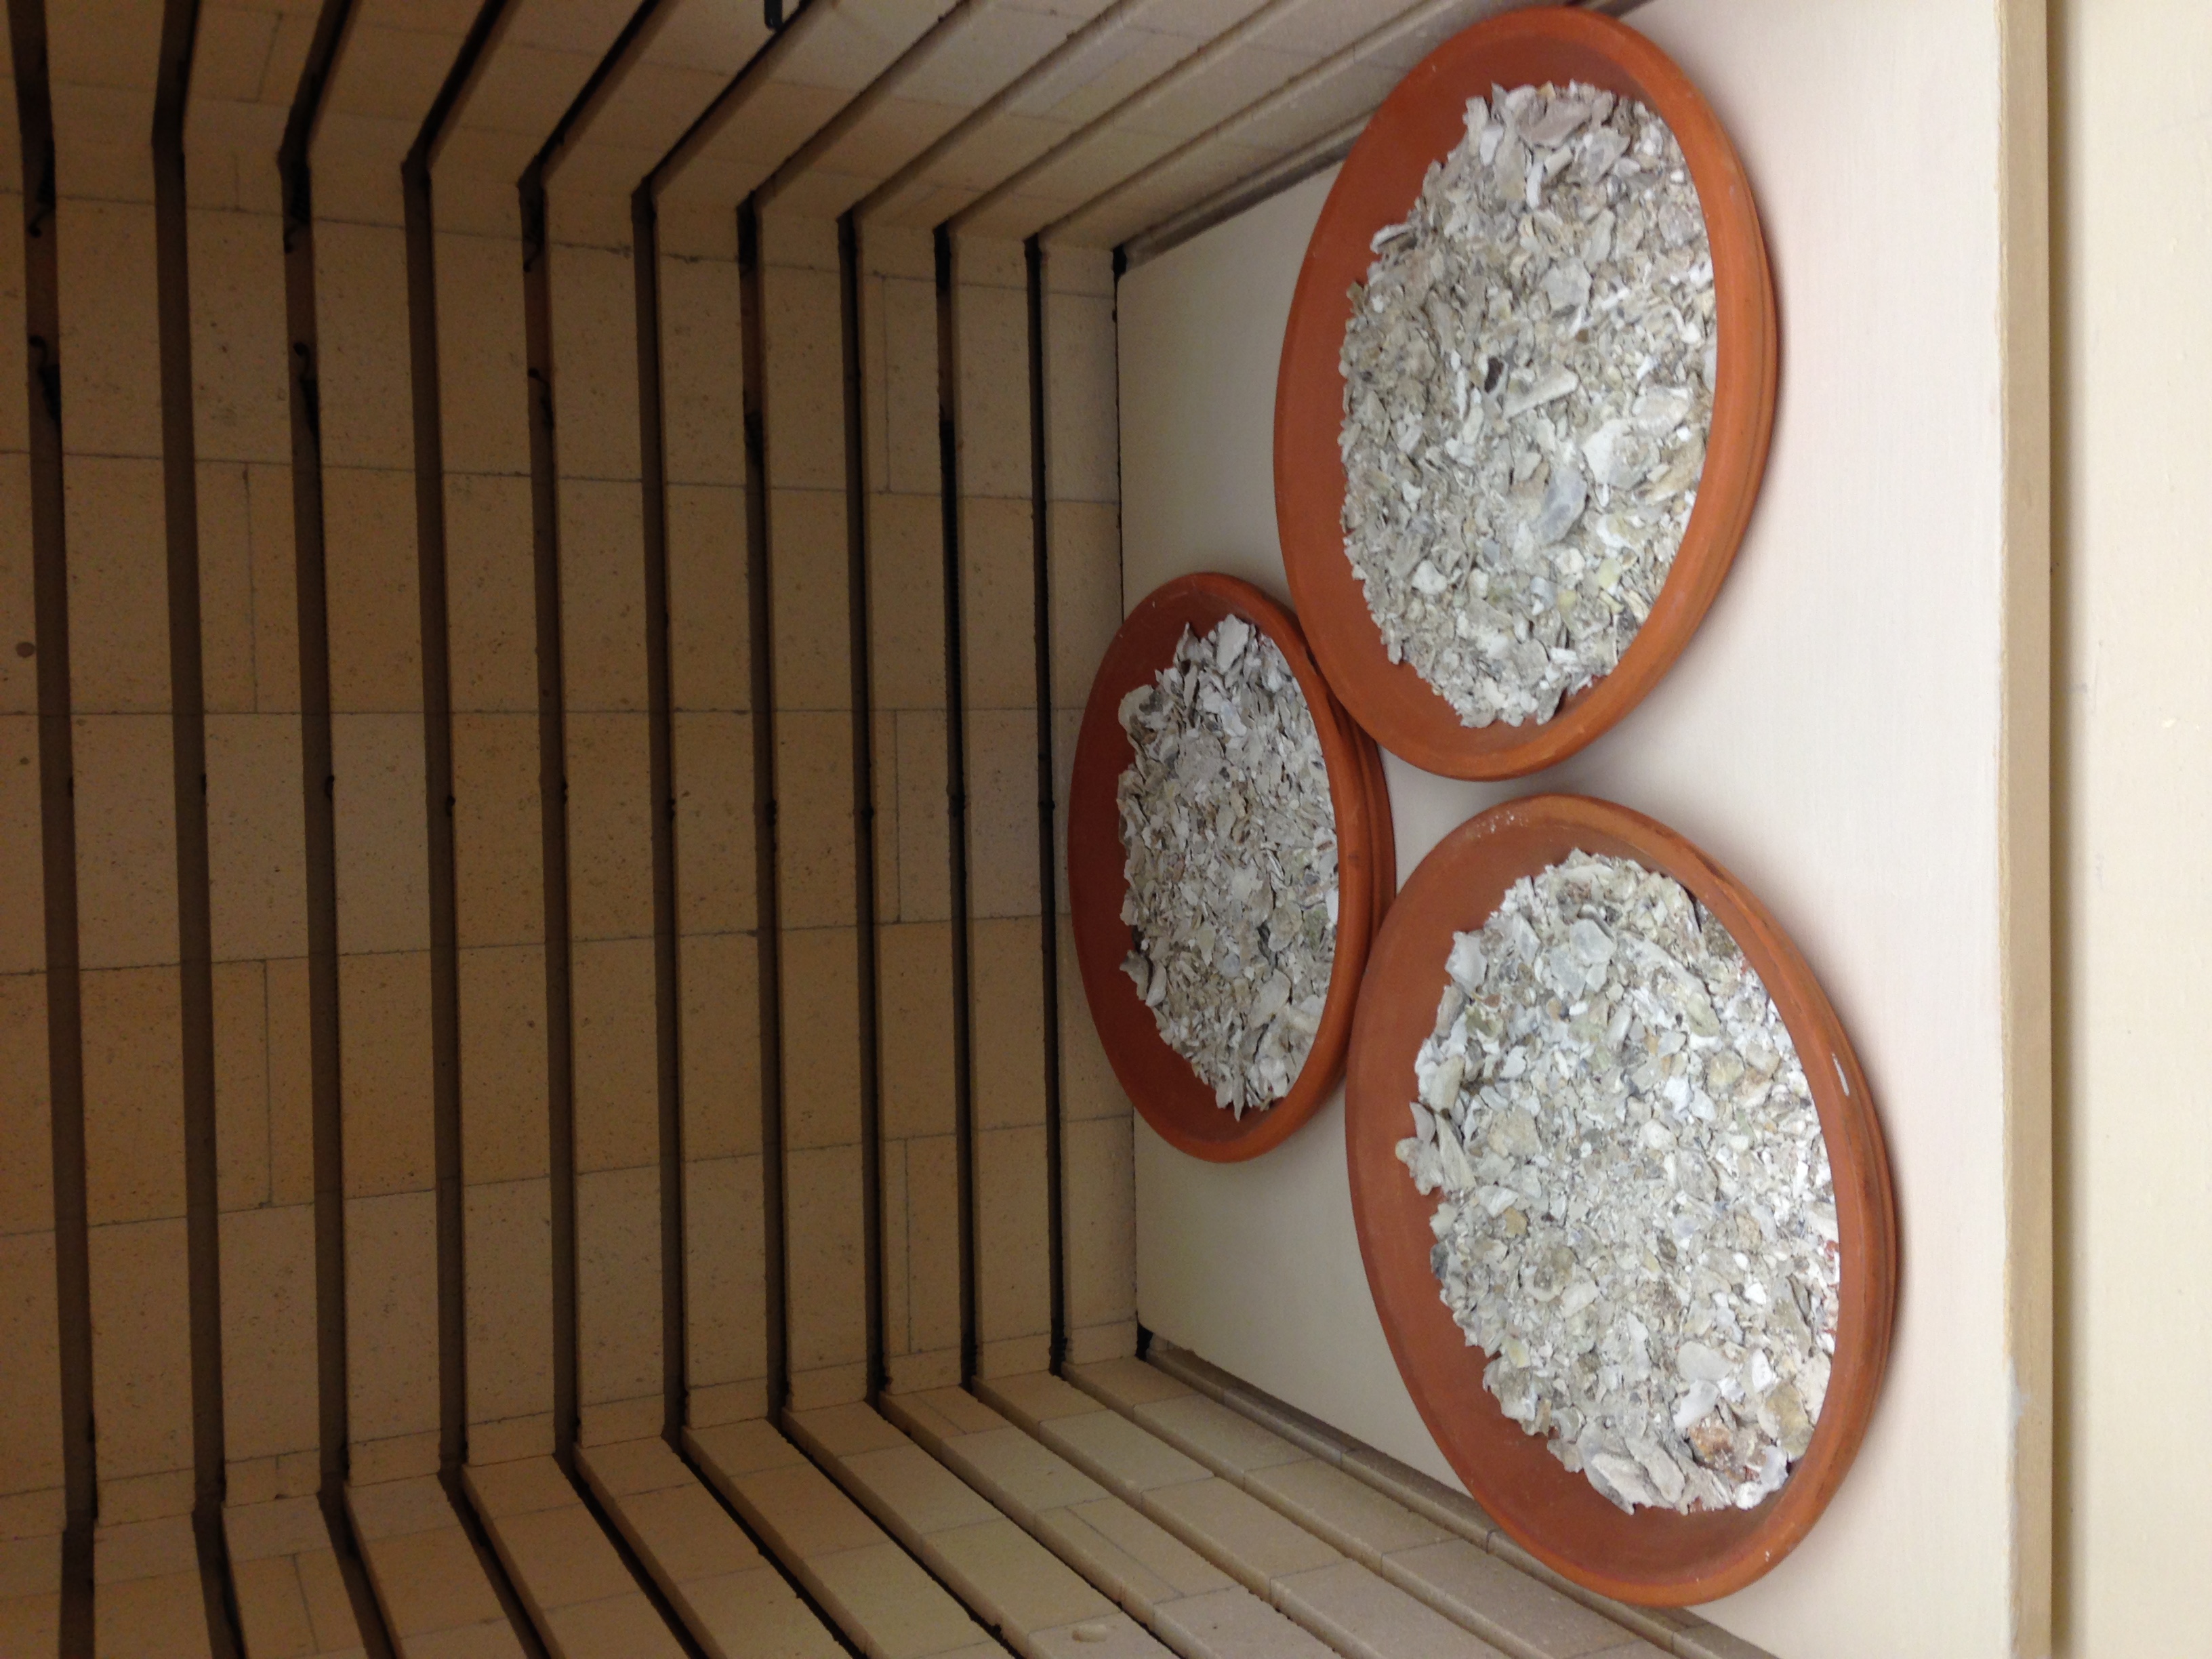 |
| arrangement of terra cotta trays in the kiln |
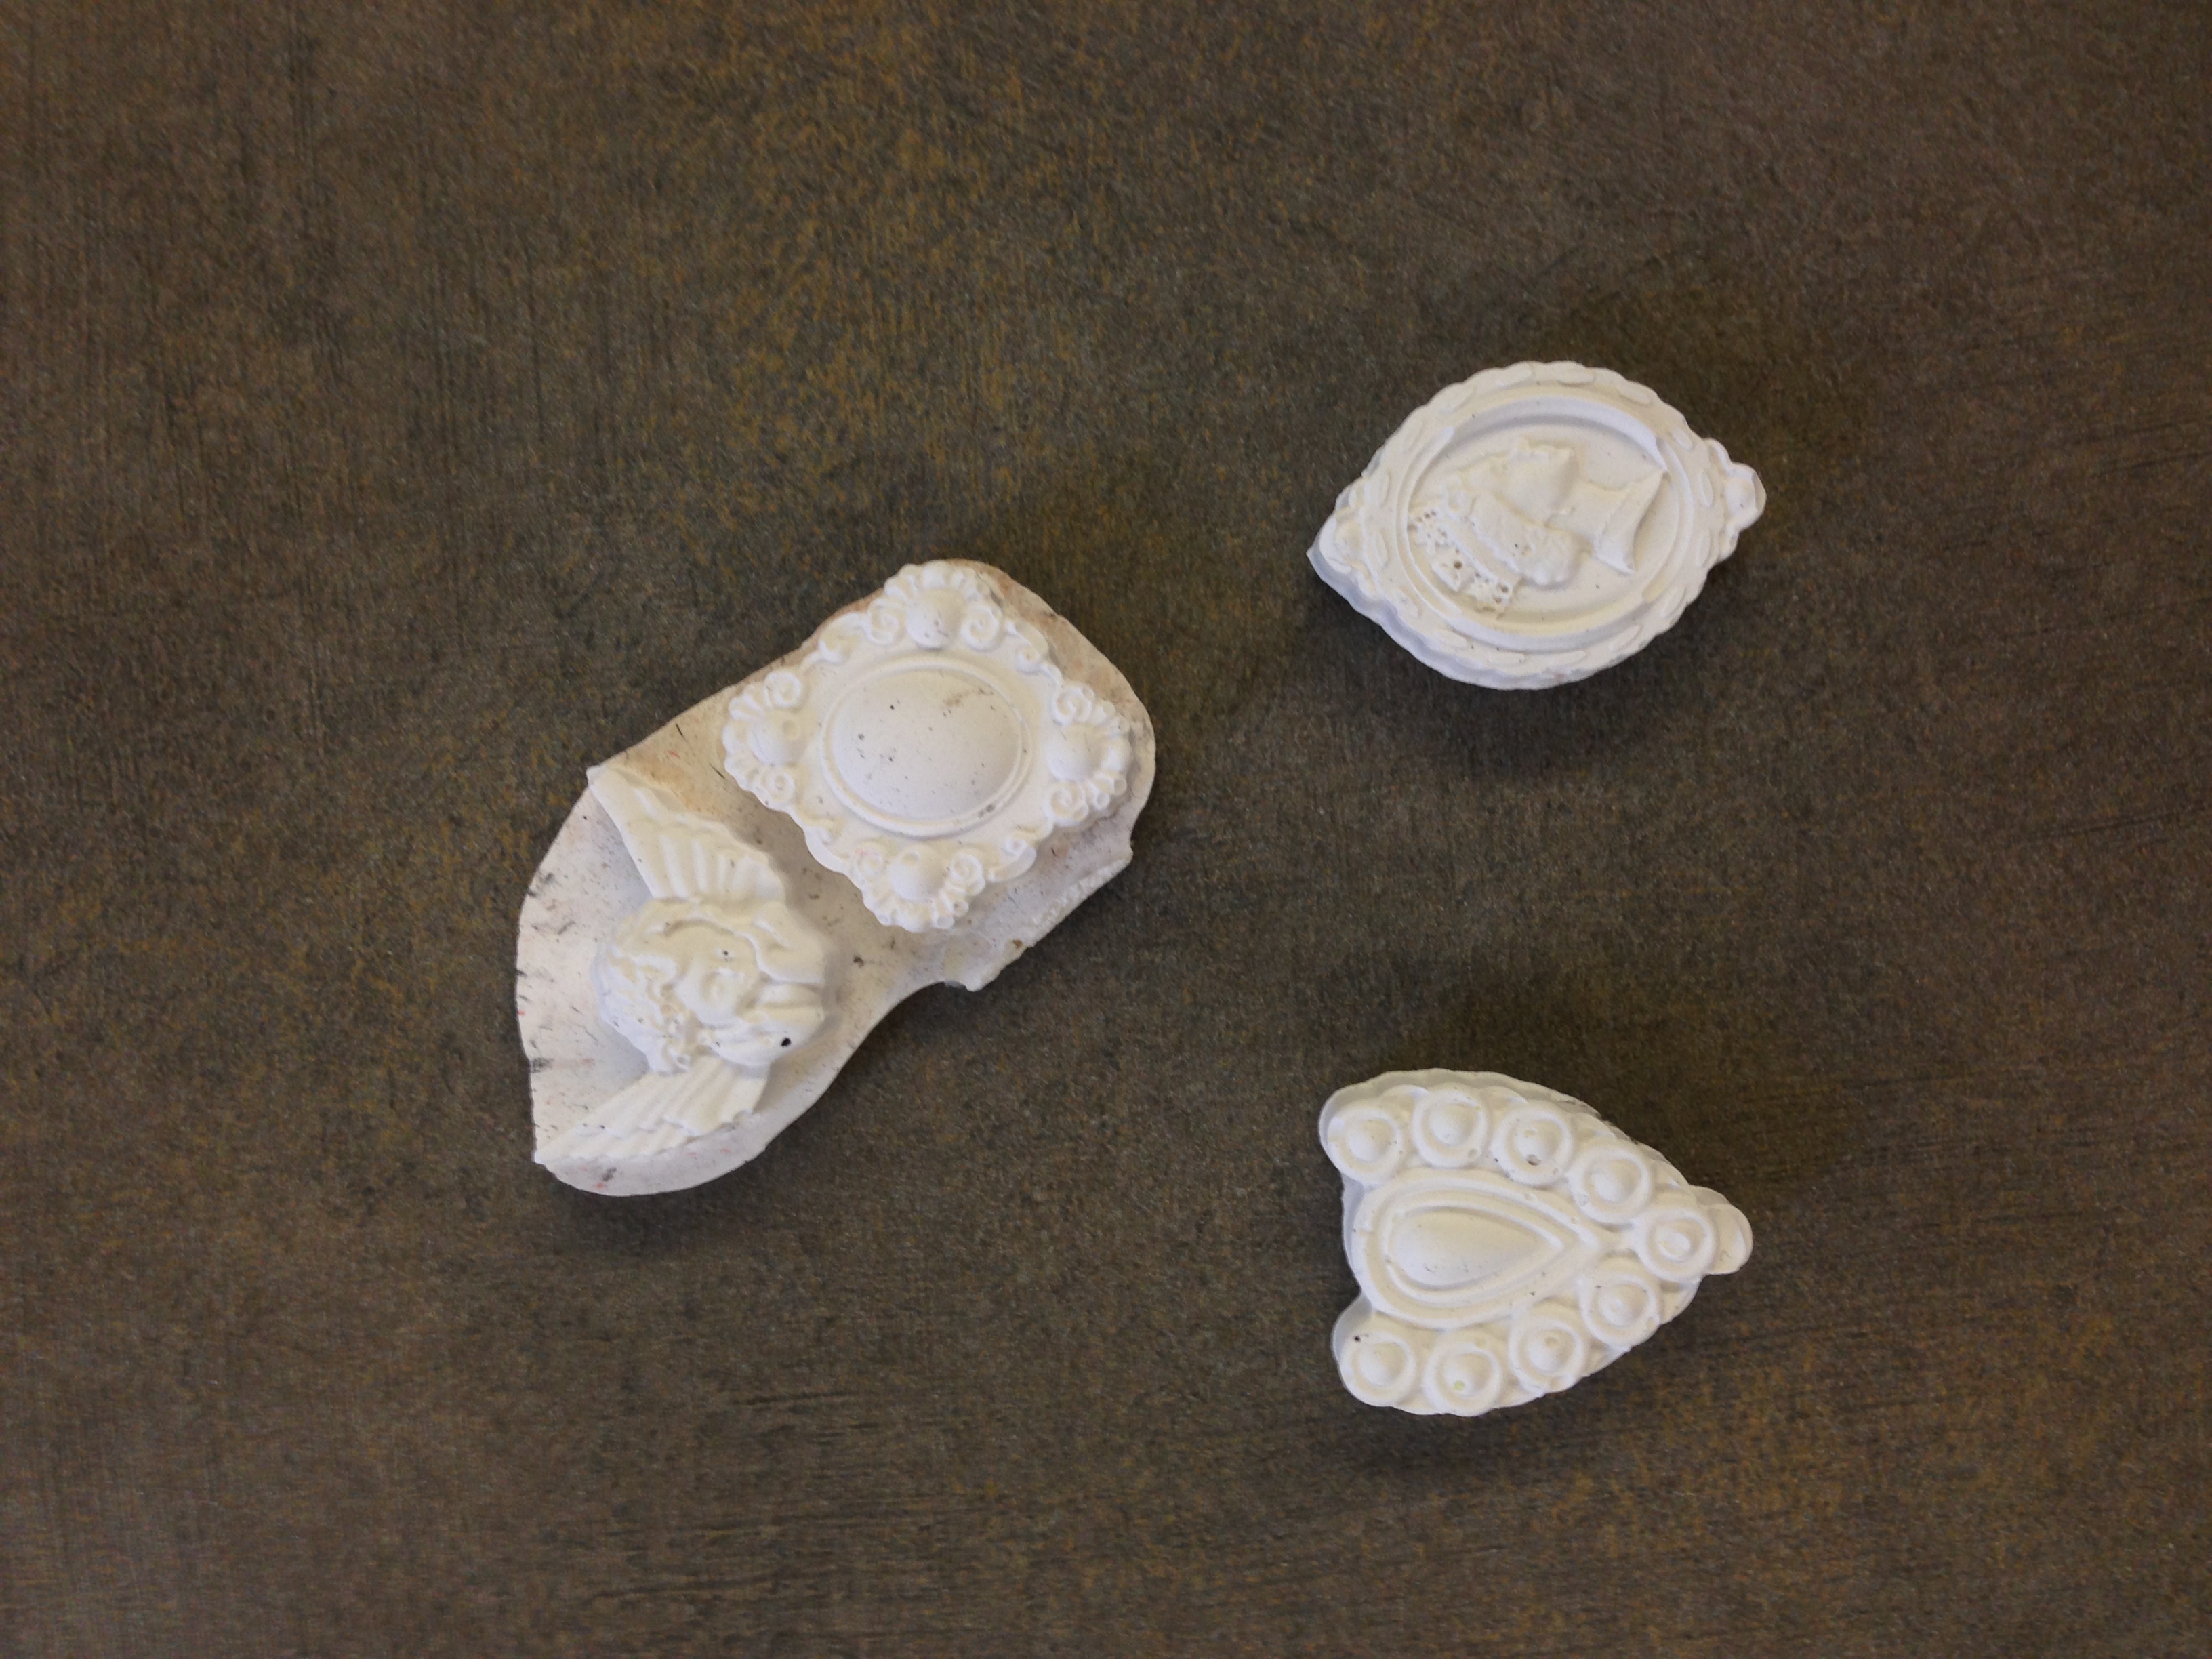 |
| Plaster patterns, to be used for sandcasting |
November 25, 2014: 2nd kiln attempt and sand casting
NAME: Emogene Cataldo & Julianna ViscoDATE AND TIME: 11/25/14 (updated 12/3/14)
LOCATION: Columbia Lab
SUBJECT: Kiln disaster, sand casting success (?)
Kiln disaster
Today we attempted the oyster shell calcination for the second time in the large kiln in the lab. The results were not as we hoped for; after talking to a ceramicist, Pamela, and doing some online research, it seems that the kiln was heated too quickly and the elements inside could not cope.The kiln shelf broke, which is extremely rare in the case of ceramic kilns. The program was as follows:
- Begin at room temperature (78 deg); ramp up full speed to 1500
- Hold for 10 minutes
- Bring down to 500
The mistakes here were:
- Heating the kiln too fast
- 0-1000 degrees should take 2 hours at minimum; slower is better
- after 1000 degrees, the temperature should "creep" up
- the kiln shelf should have been supported better by the kiln furniture
9:05 am place oyster shells in covered terracotta tray at room temperature 78 F.
Set to rise to 1500F
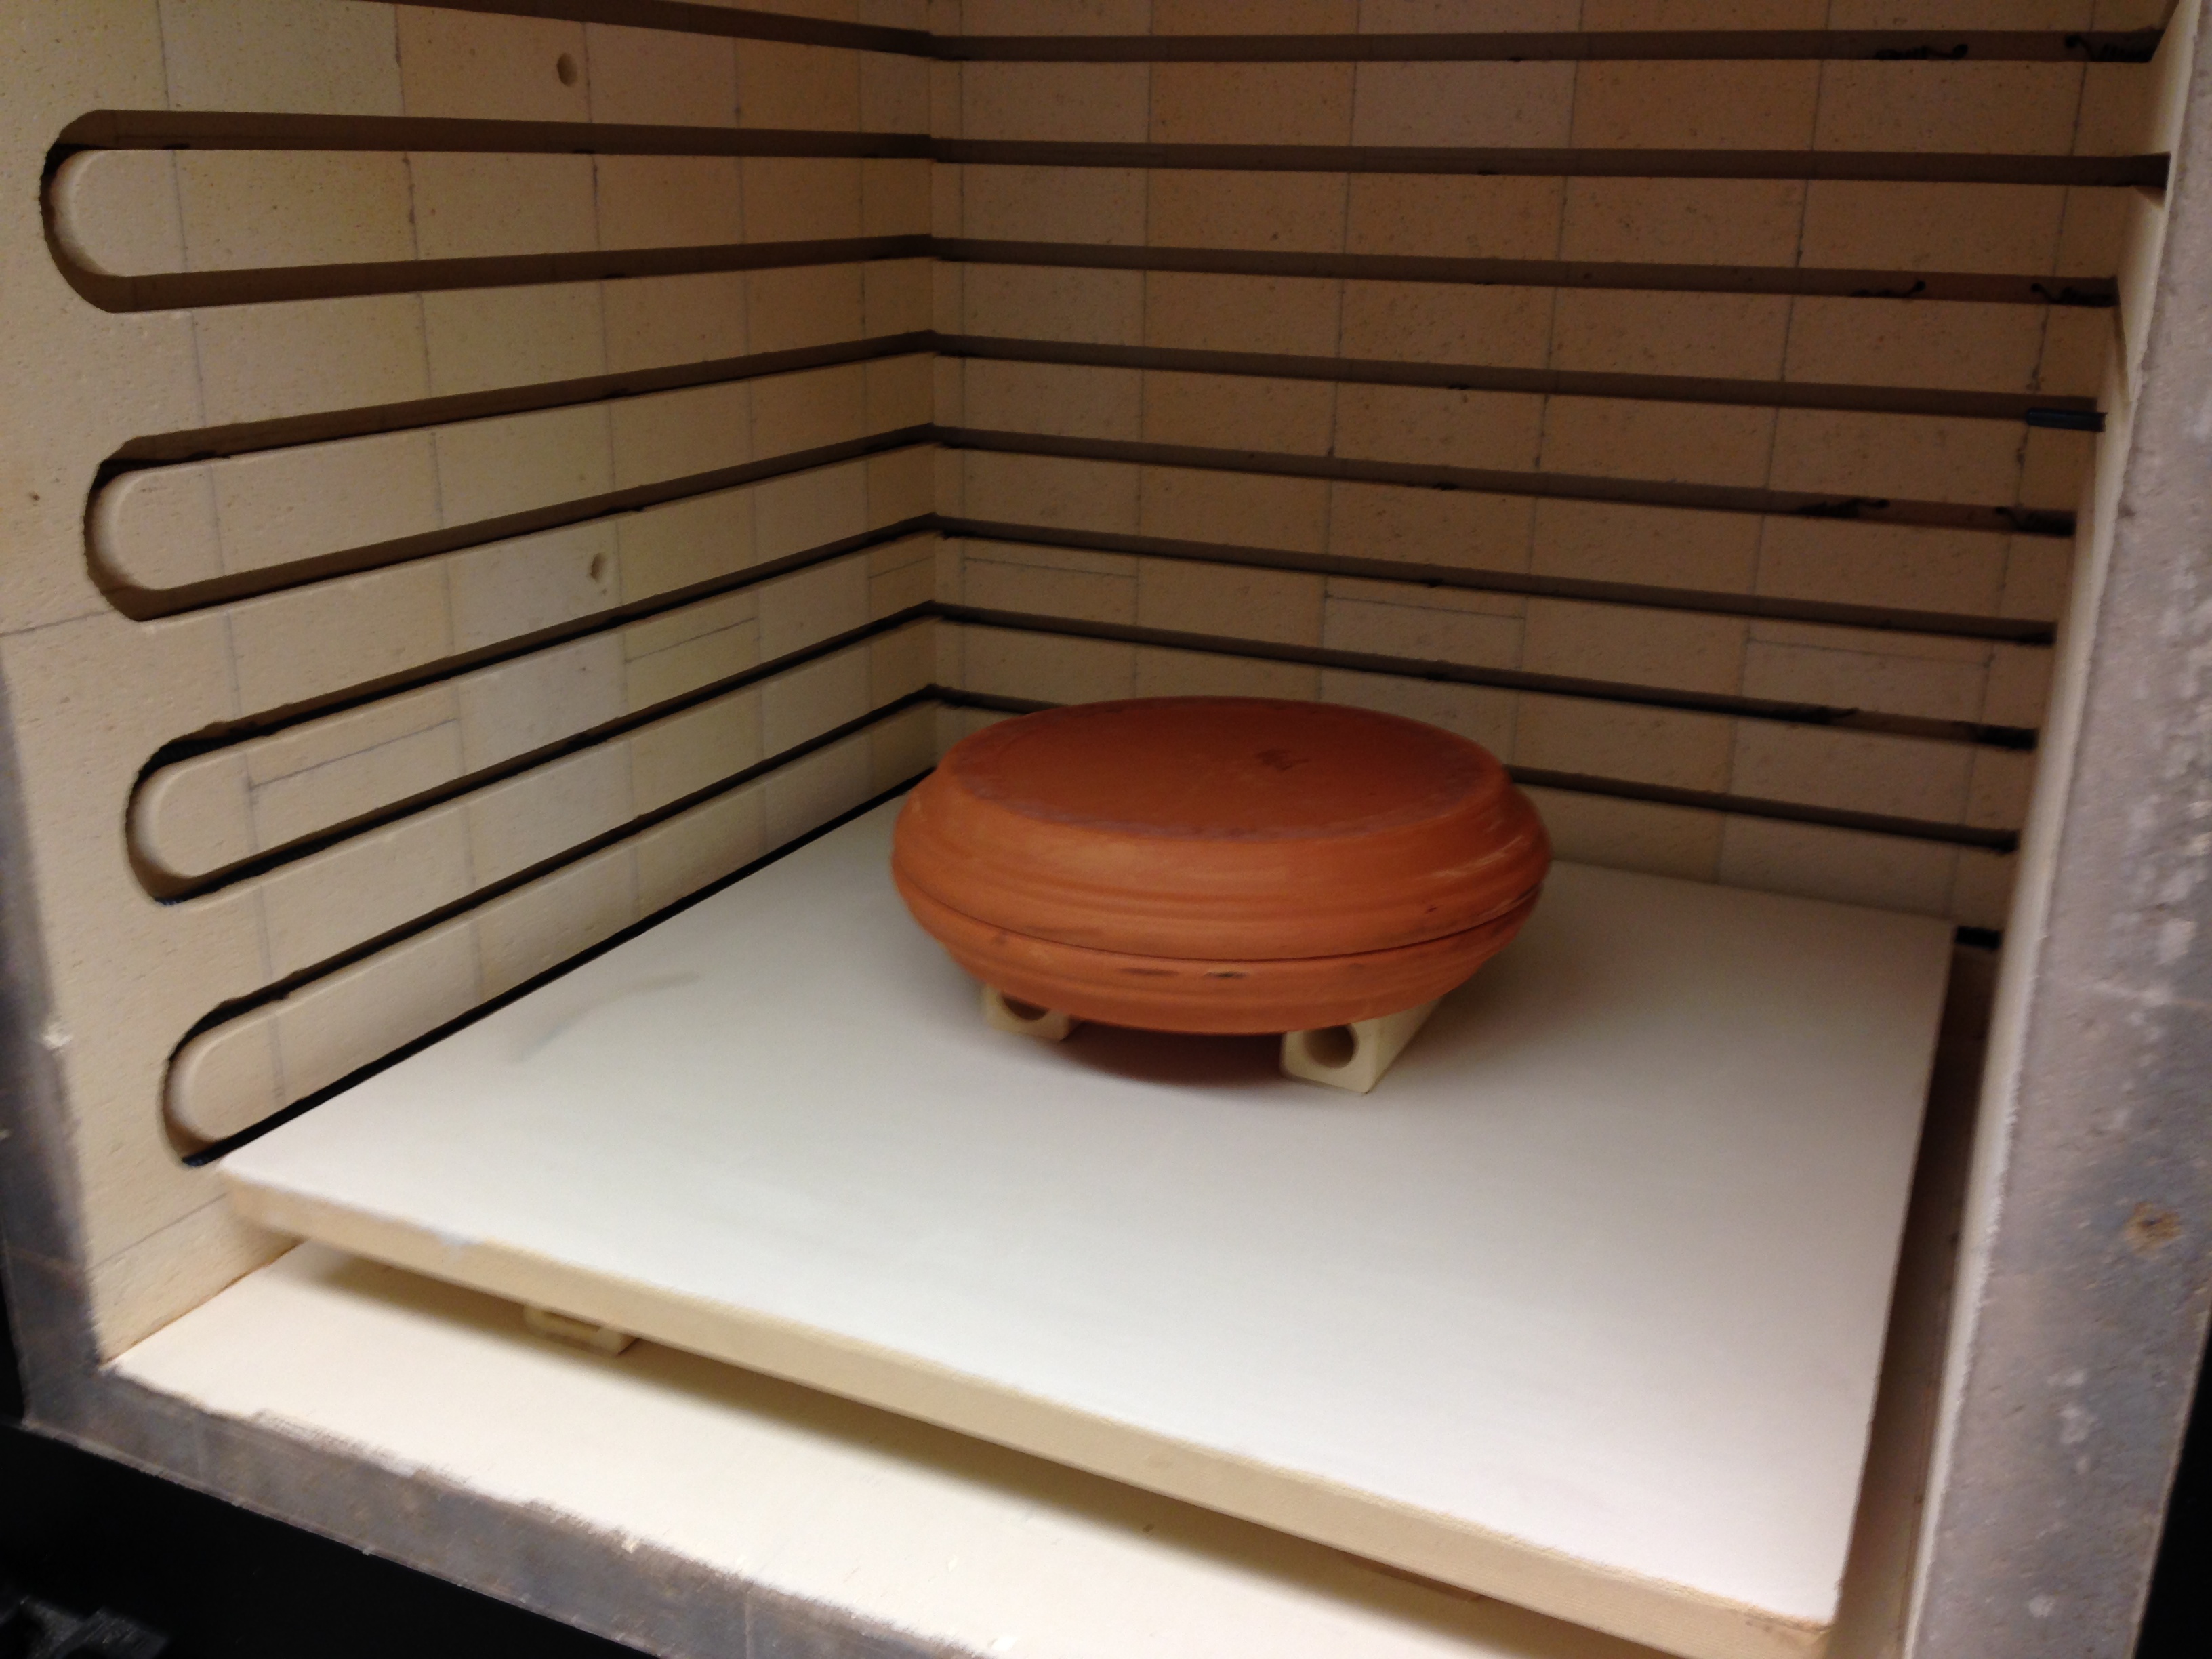

with plan to roast at 1500 for ten minutes then bring back down to 500 and remove.
a popping sound is heard. (See / insert Jenny's time chart here)
when kiln is opened, broken shelf, and exploded grey oyster ash found.
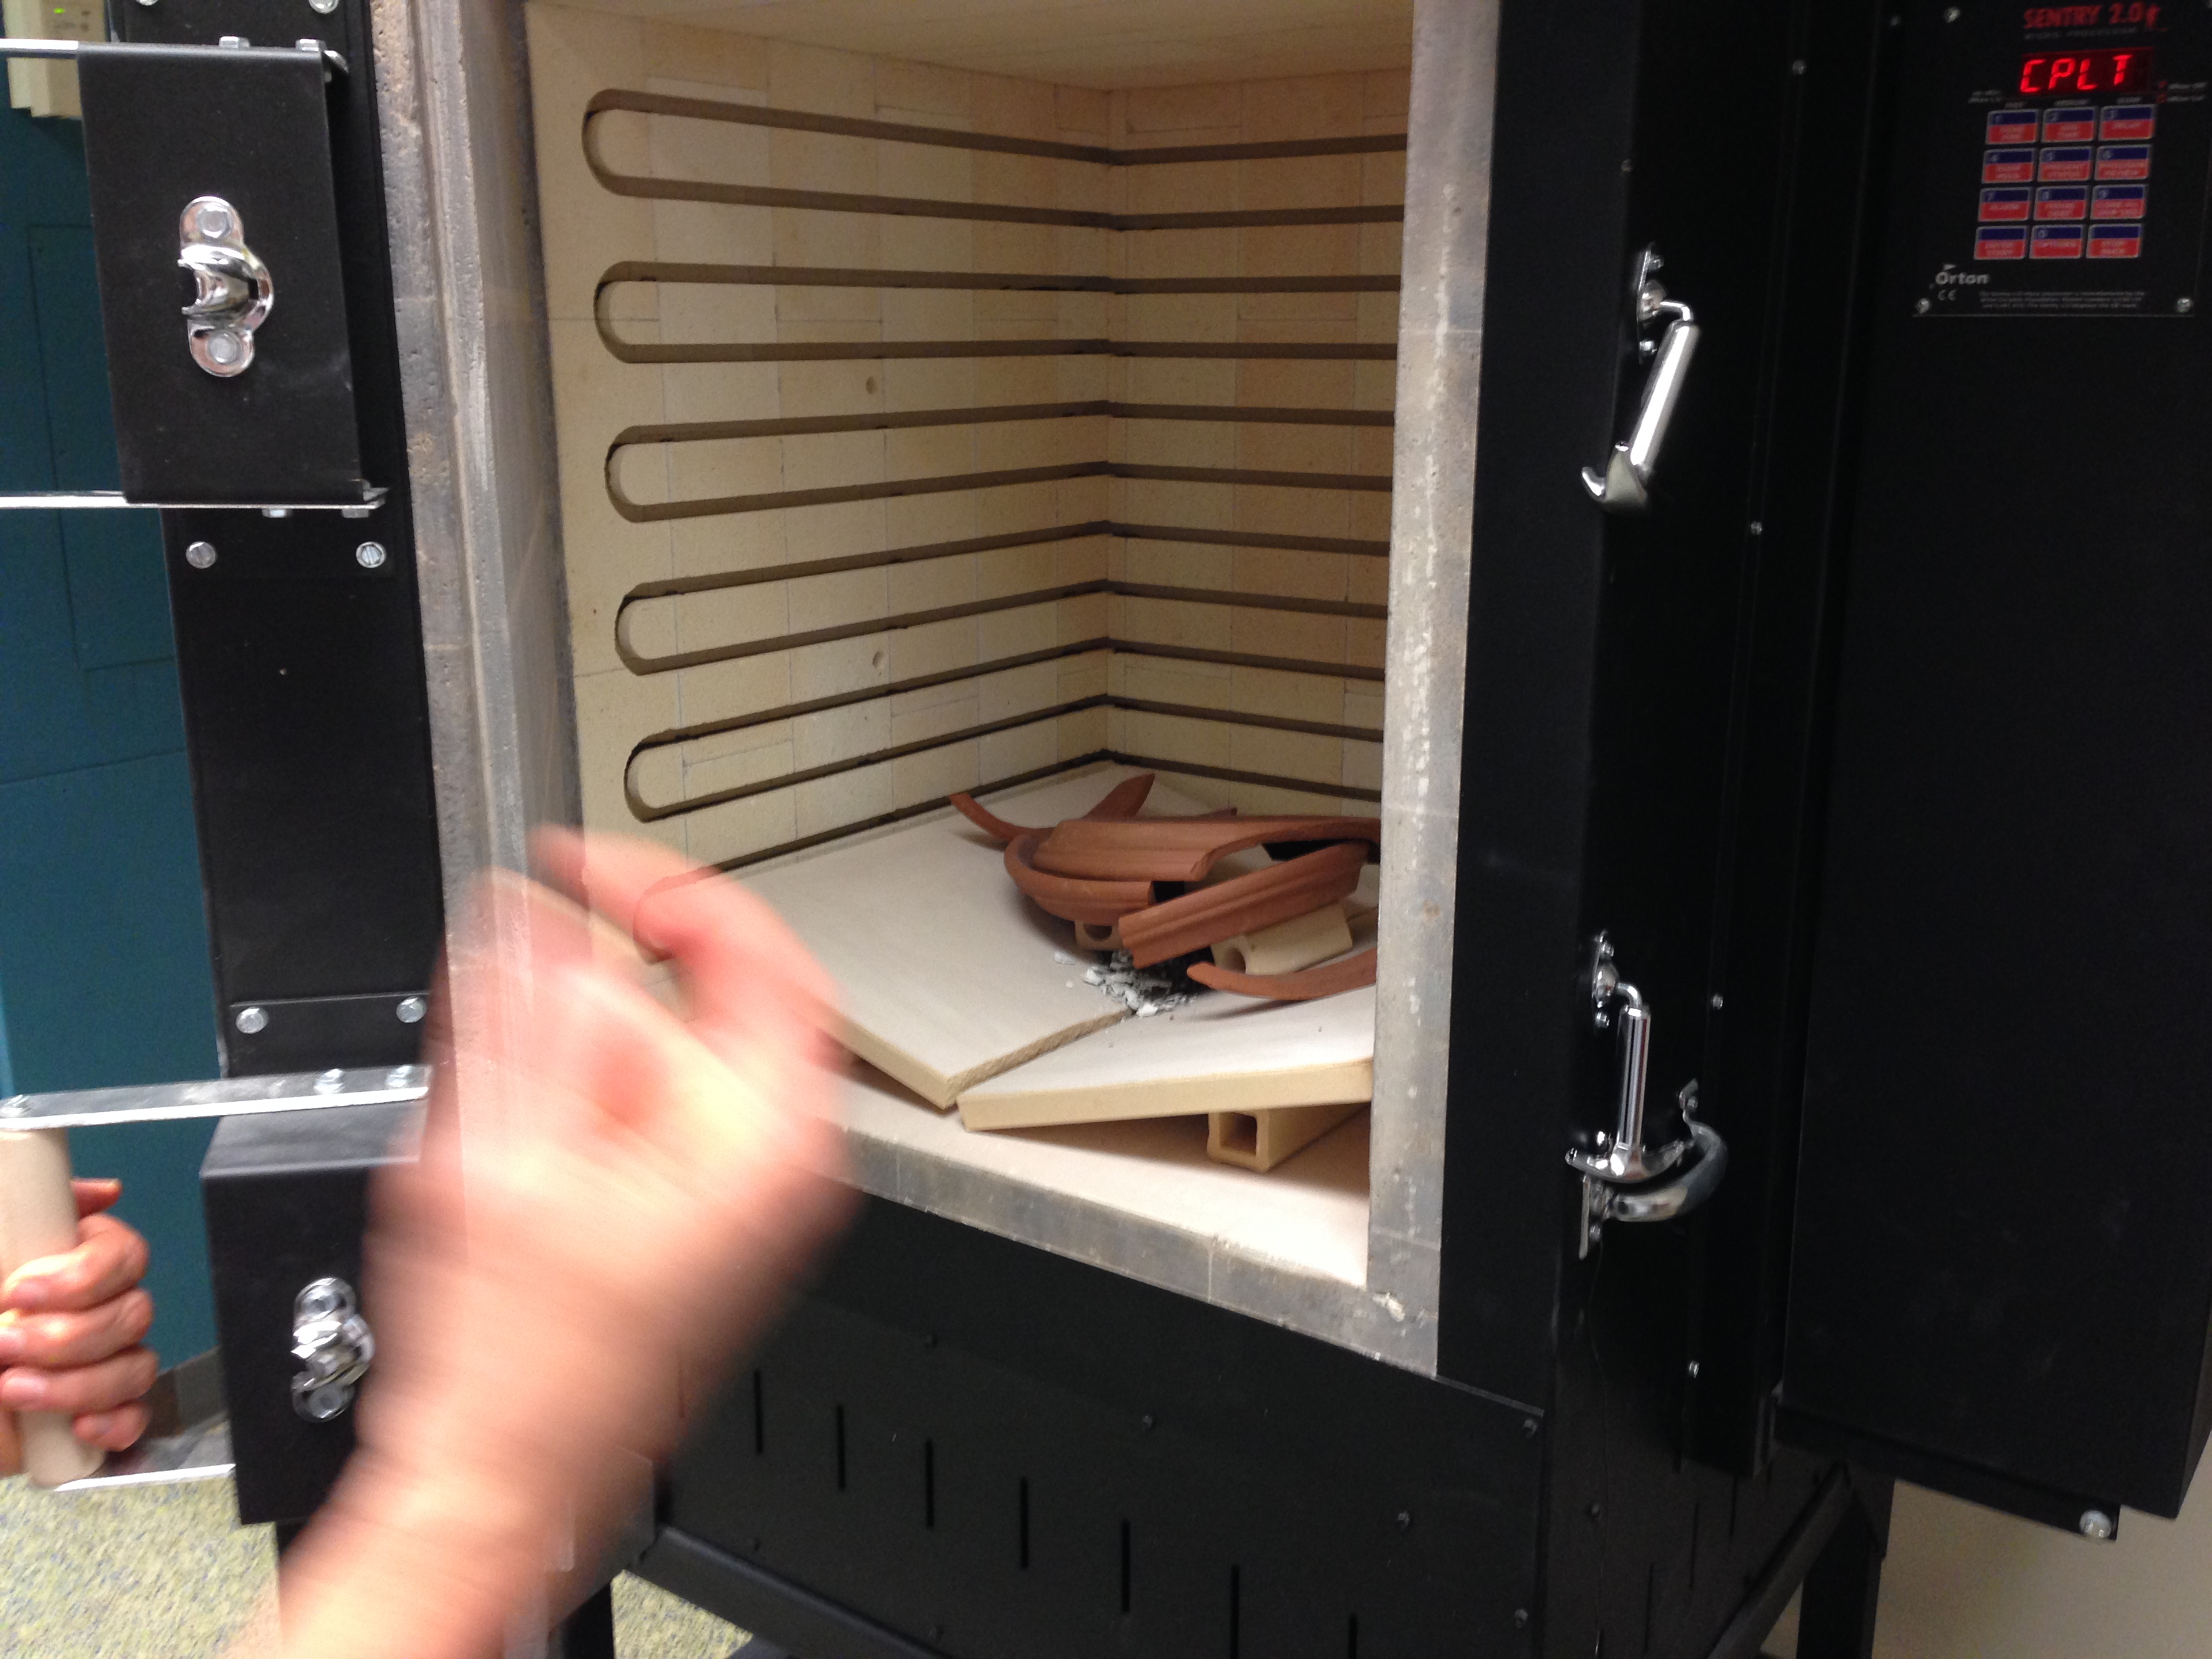
Sandcasting: mold making
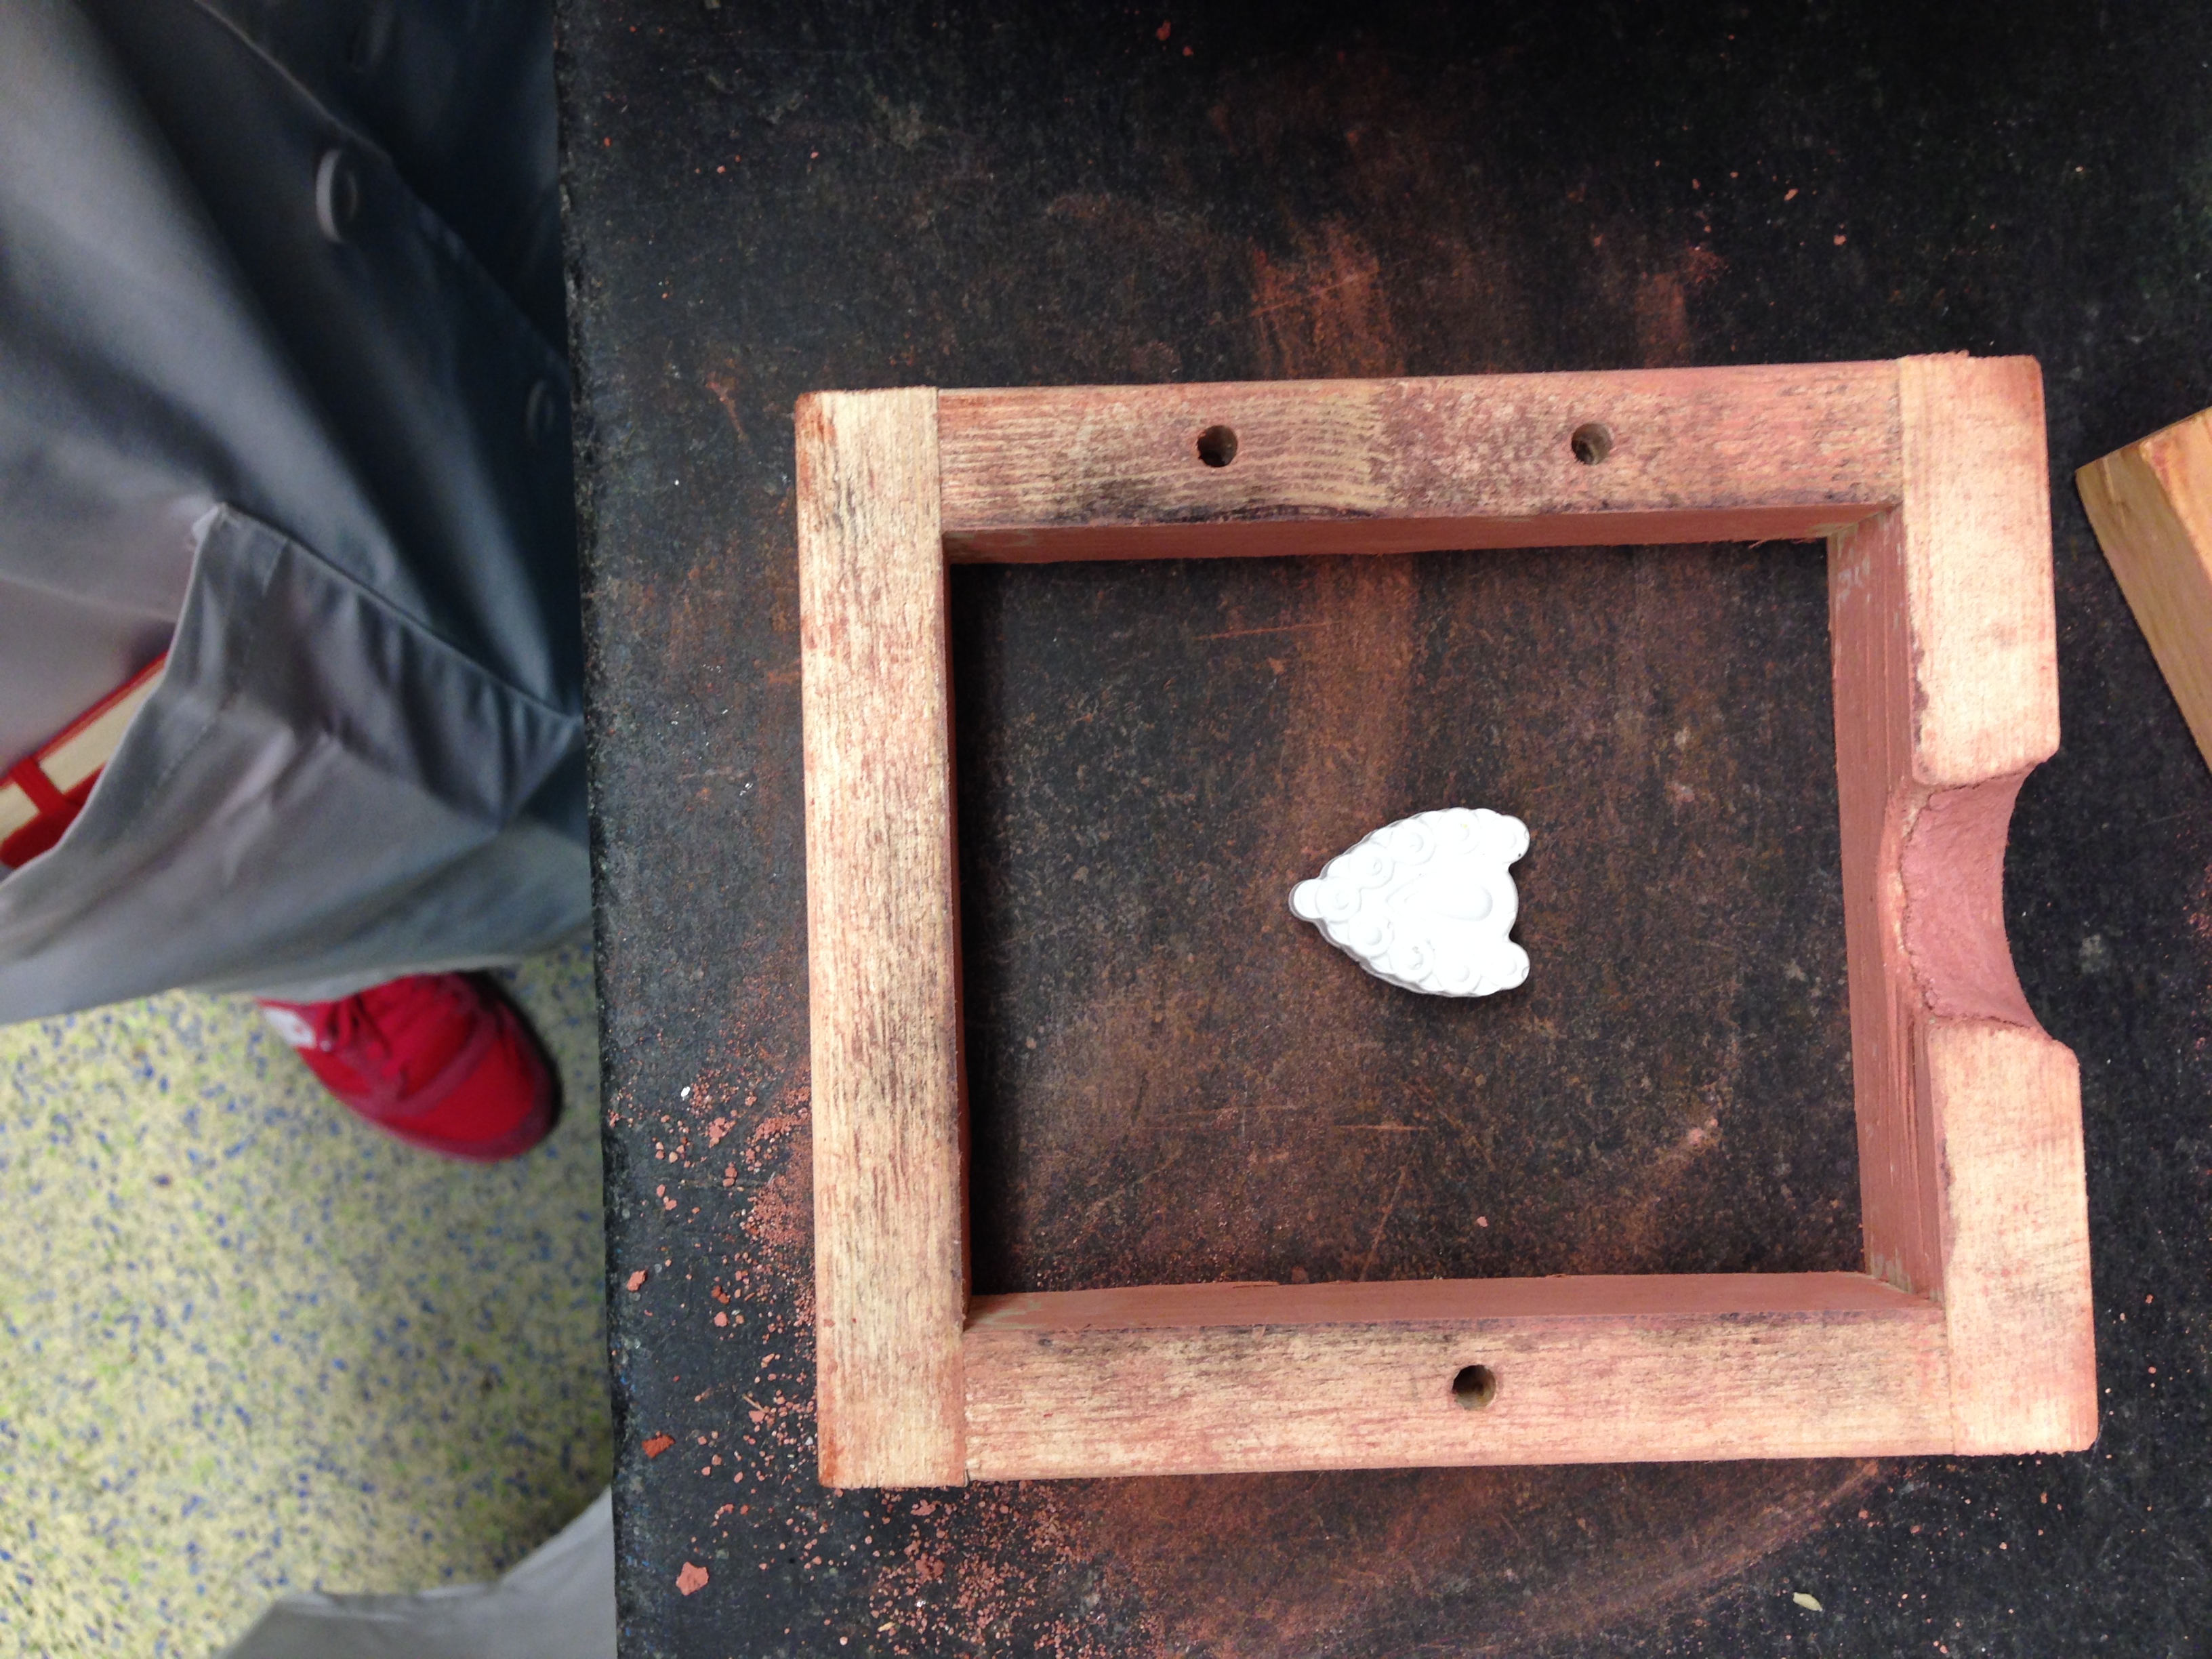
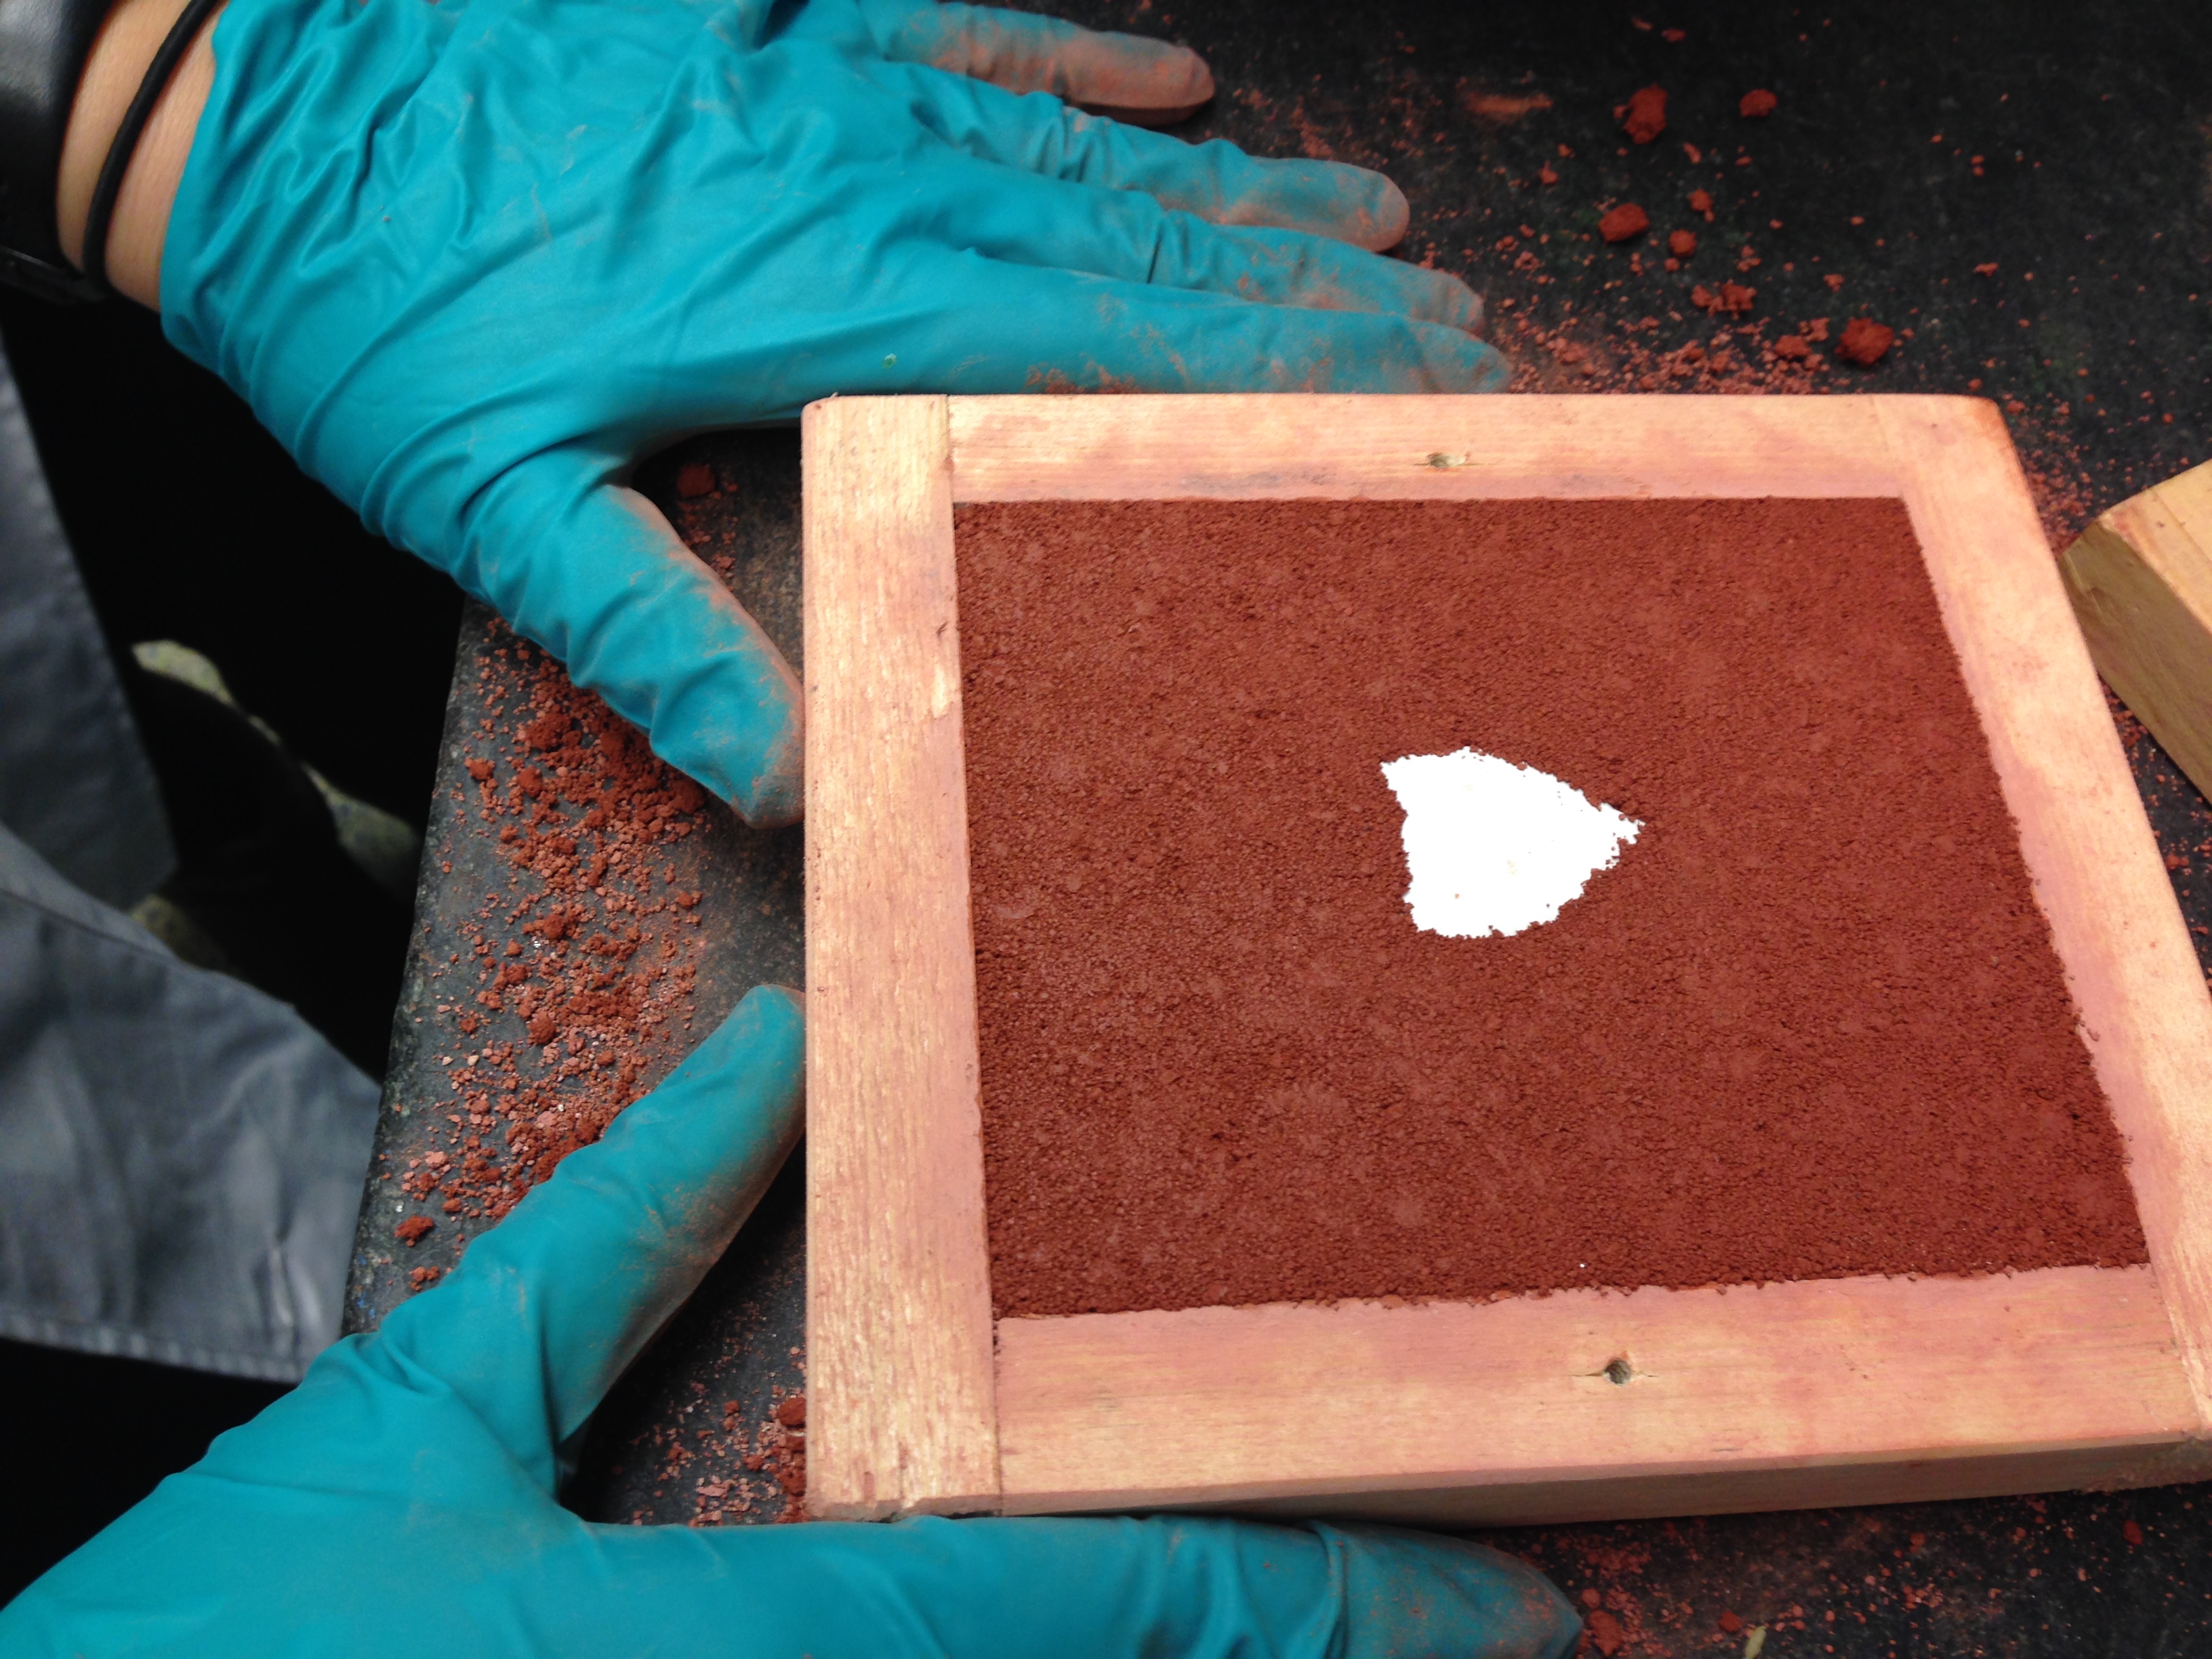
In more successful matters, we completed the sand molds with two different binders: egg white and the elm root wine infusion. We followed these steps:- Break up existing molds with mortar and pestle; sift sand through a sieve
- Measure out 2 cups of sand for each box frame (we did 2 box frames total)
- Separate the egg whites from the yolks, beat gently
- Take 2 cups of sand in a bowl and add about 1/2 cup of egg whites until the sand reaches the desired consistency (holds together when squeezed in your palm, but if pressed with a fingertip it dissolves)
- (It would be best to add charcoal as a release agent here; we did not use a release agent in one of the molds, and used egg white as a release agent in the other)
- Set the plaster pattern right side up; build sand around the pattern, pressing firmly around it
- Fill the mold up to the top with sand
- Let dry for several days
- (It would have been best to take out the patterns when the molds were still a bit damp, but we did not do this because of the timing of the Thanksgiving holiday)
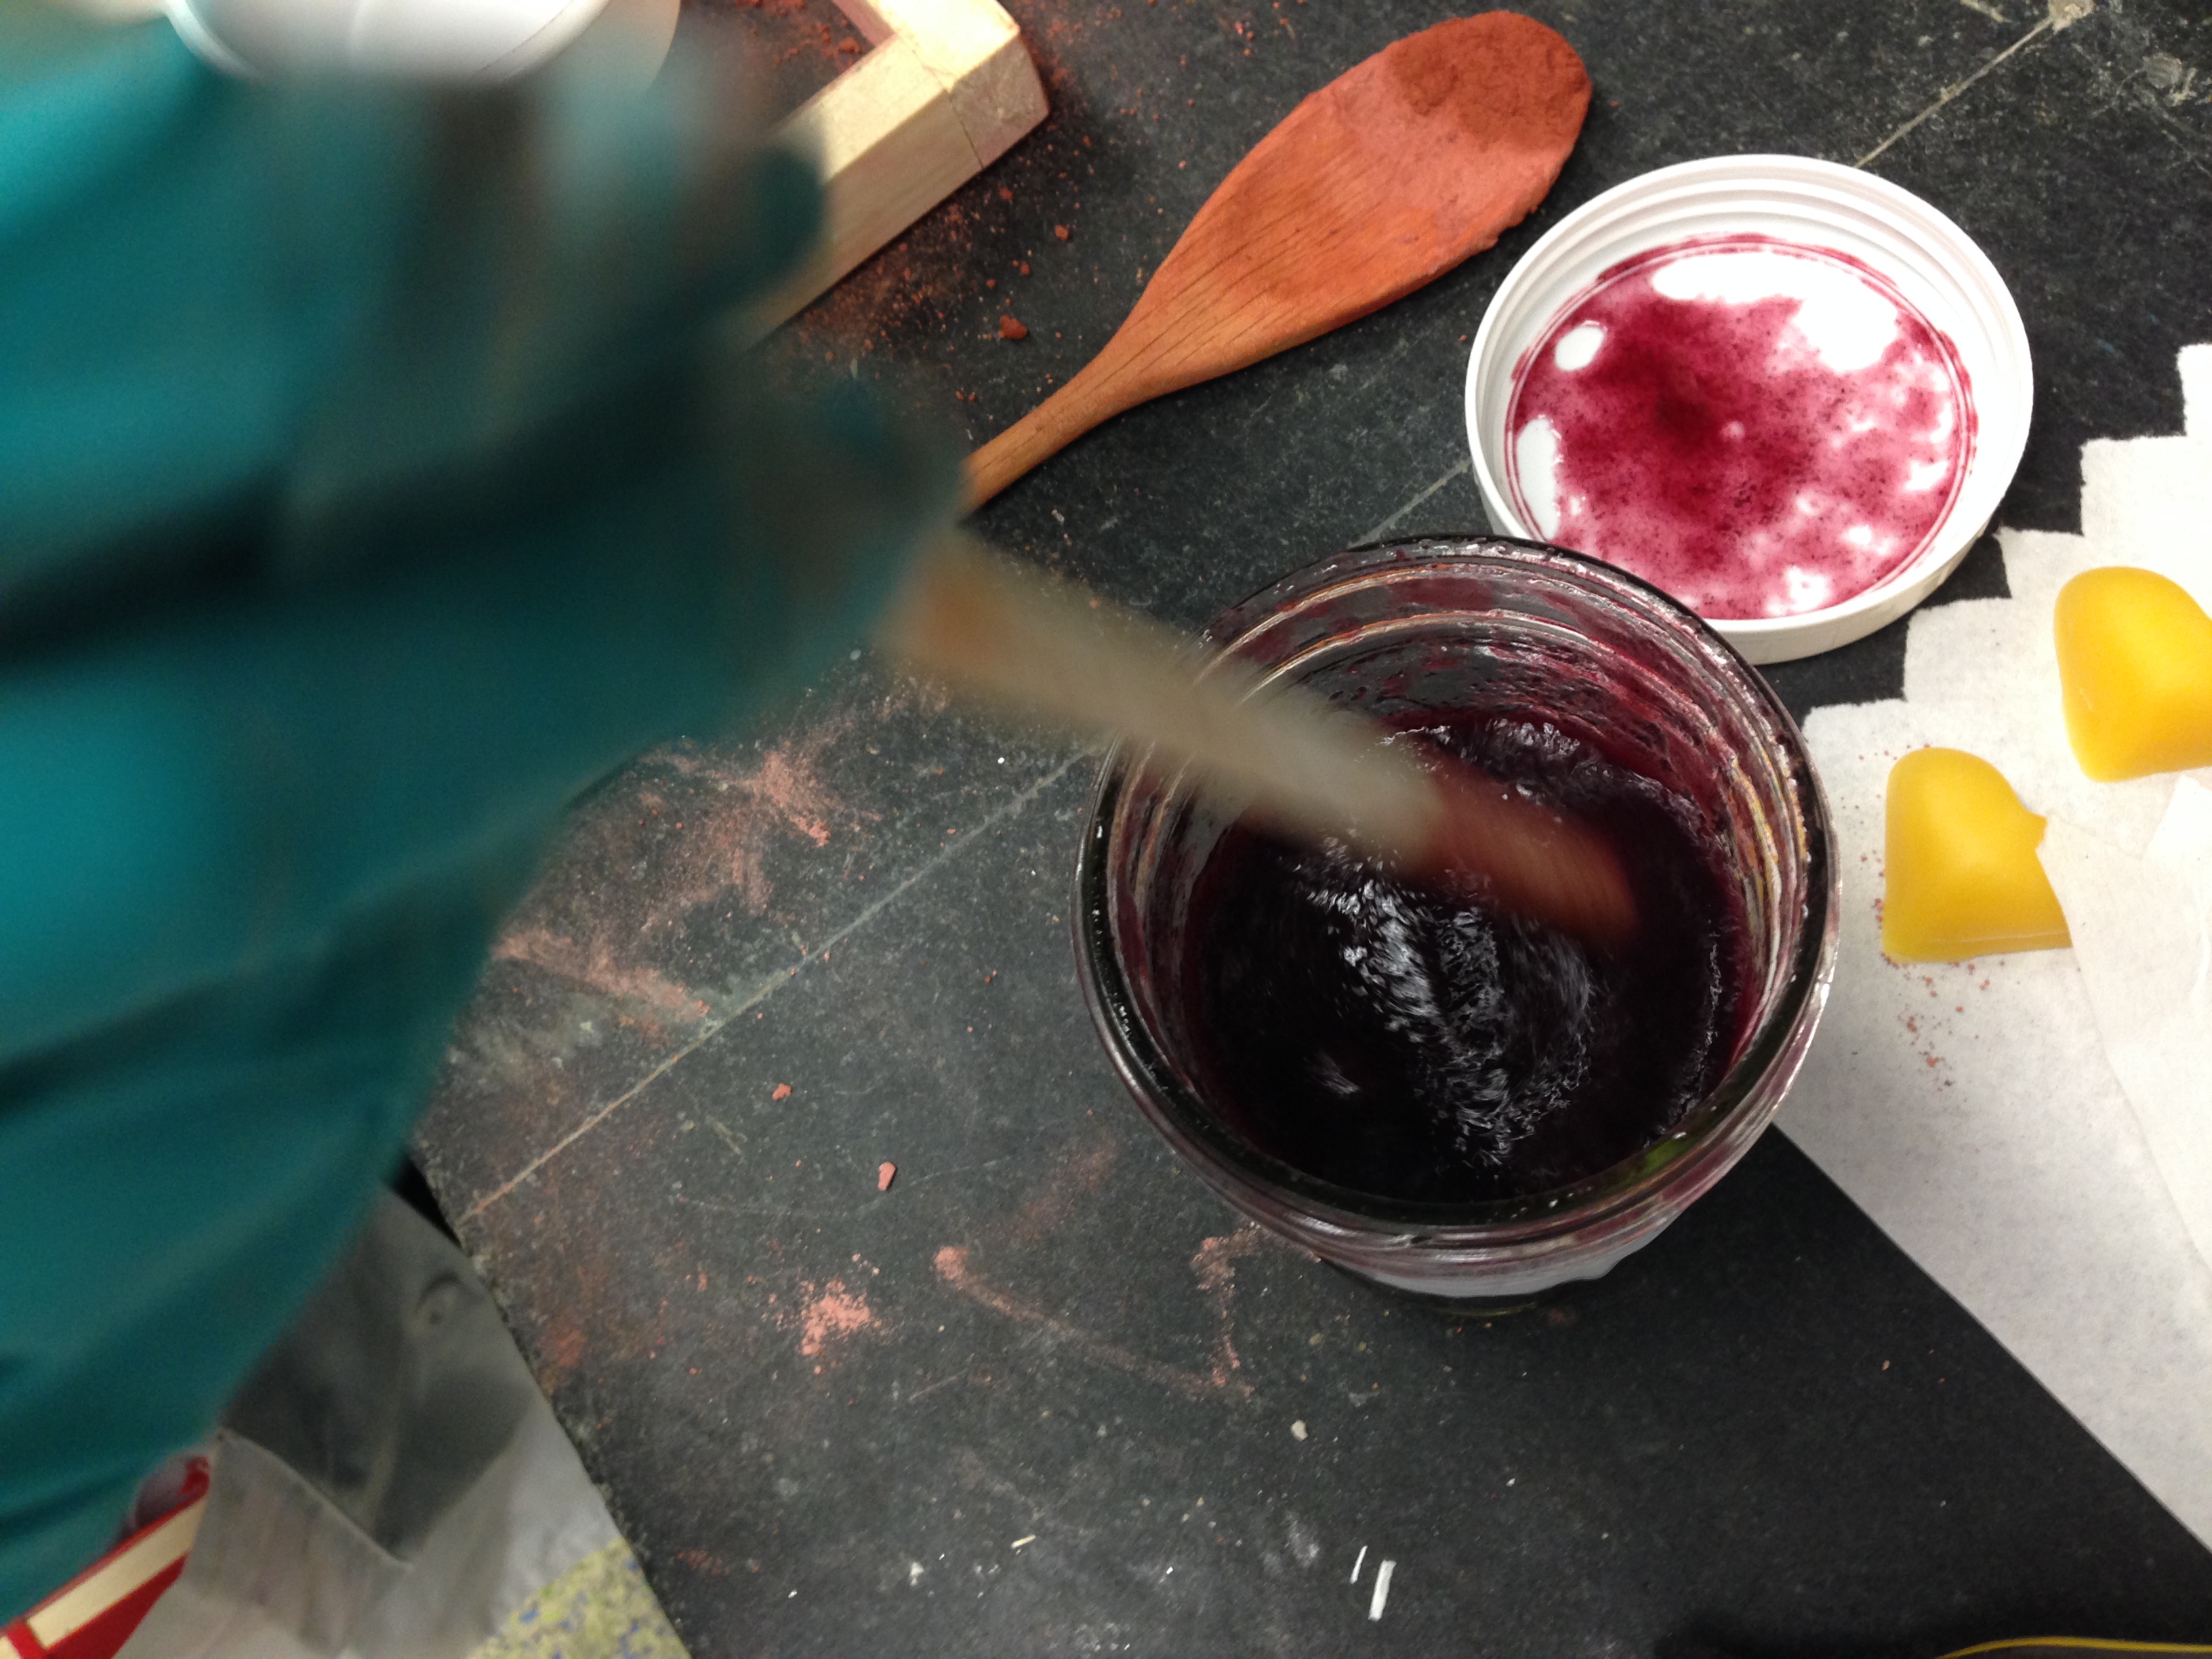
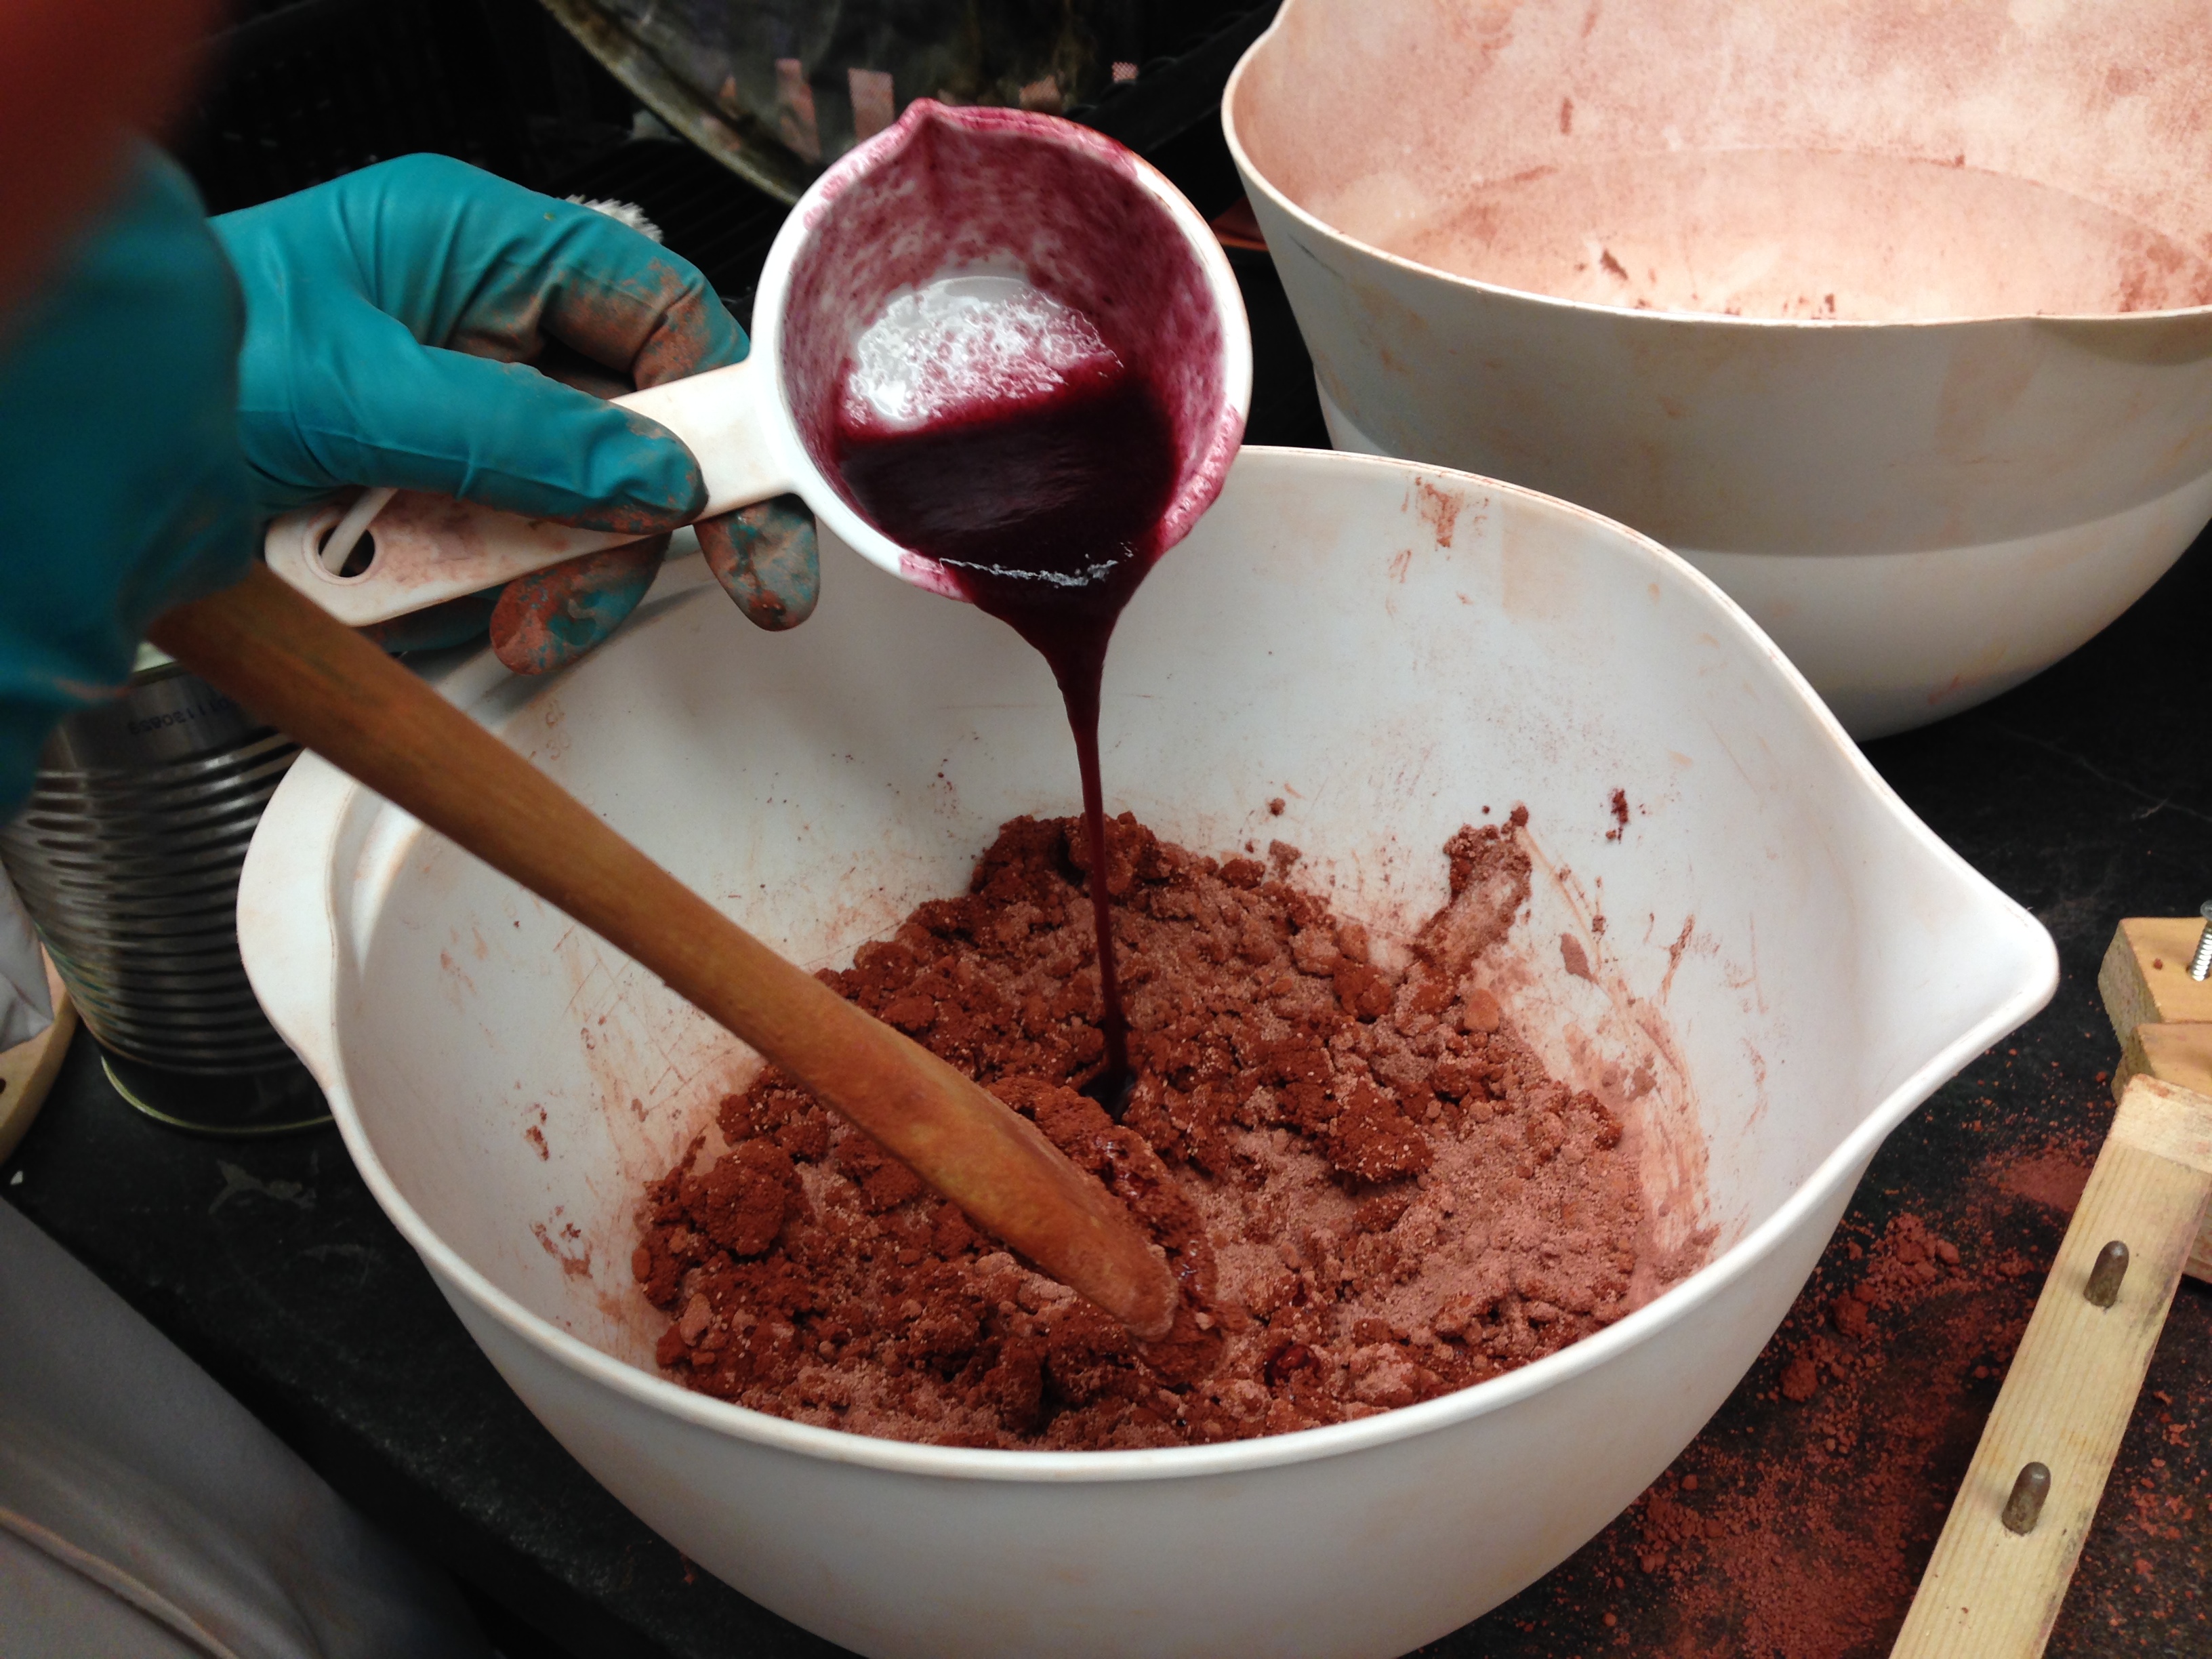
- Repeat process using elm root infusion
Some observations:
- It was much easier to get the sand to our desired consistency than it was our first time sandcasting. This is probably a mix of better binding materials and also the benefits of our experience and learning (we added the binder very slowly)
- With these binders, it was easy to tell when the sand was ready for the molds; the consistency was almost more oily than wet; one classmate mistook our sand for Delft clay
- When squeezed with the palm, both sands held up remarkably well
- Both binders had a mucus-like quality to them; the elm root infusion was nearly as gelatinous and slippery as the egg white
- The wine infusion had a lovely smell, especially when combined with the earthy smell of the sand
- Both sands seemed to pack very well when we built up the molds; we did not have any problems with unexpected moisture "squeezing" out of the mold, as we did with the ammonium chloride and brandy.
Next steps:
- Wait for the sand to dry!
- After talking with Pamela about our oyster experiments, we learned that we had been interpreting the oyster shell use differently. Thus we are going to do two oyster shell experiments: one using the calcinated oyster shells in the wine emulsion, and the other using the oyster shells as the sand. Stay tuned!
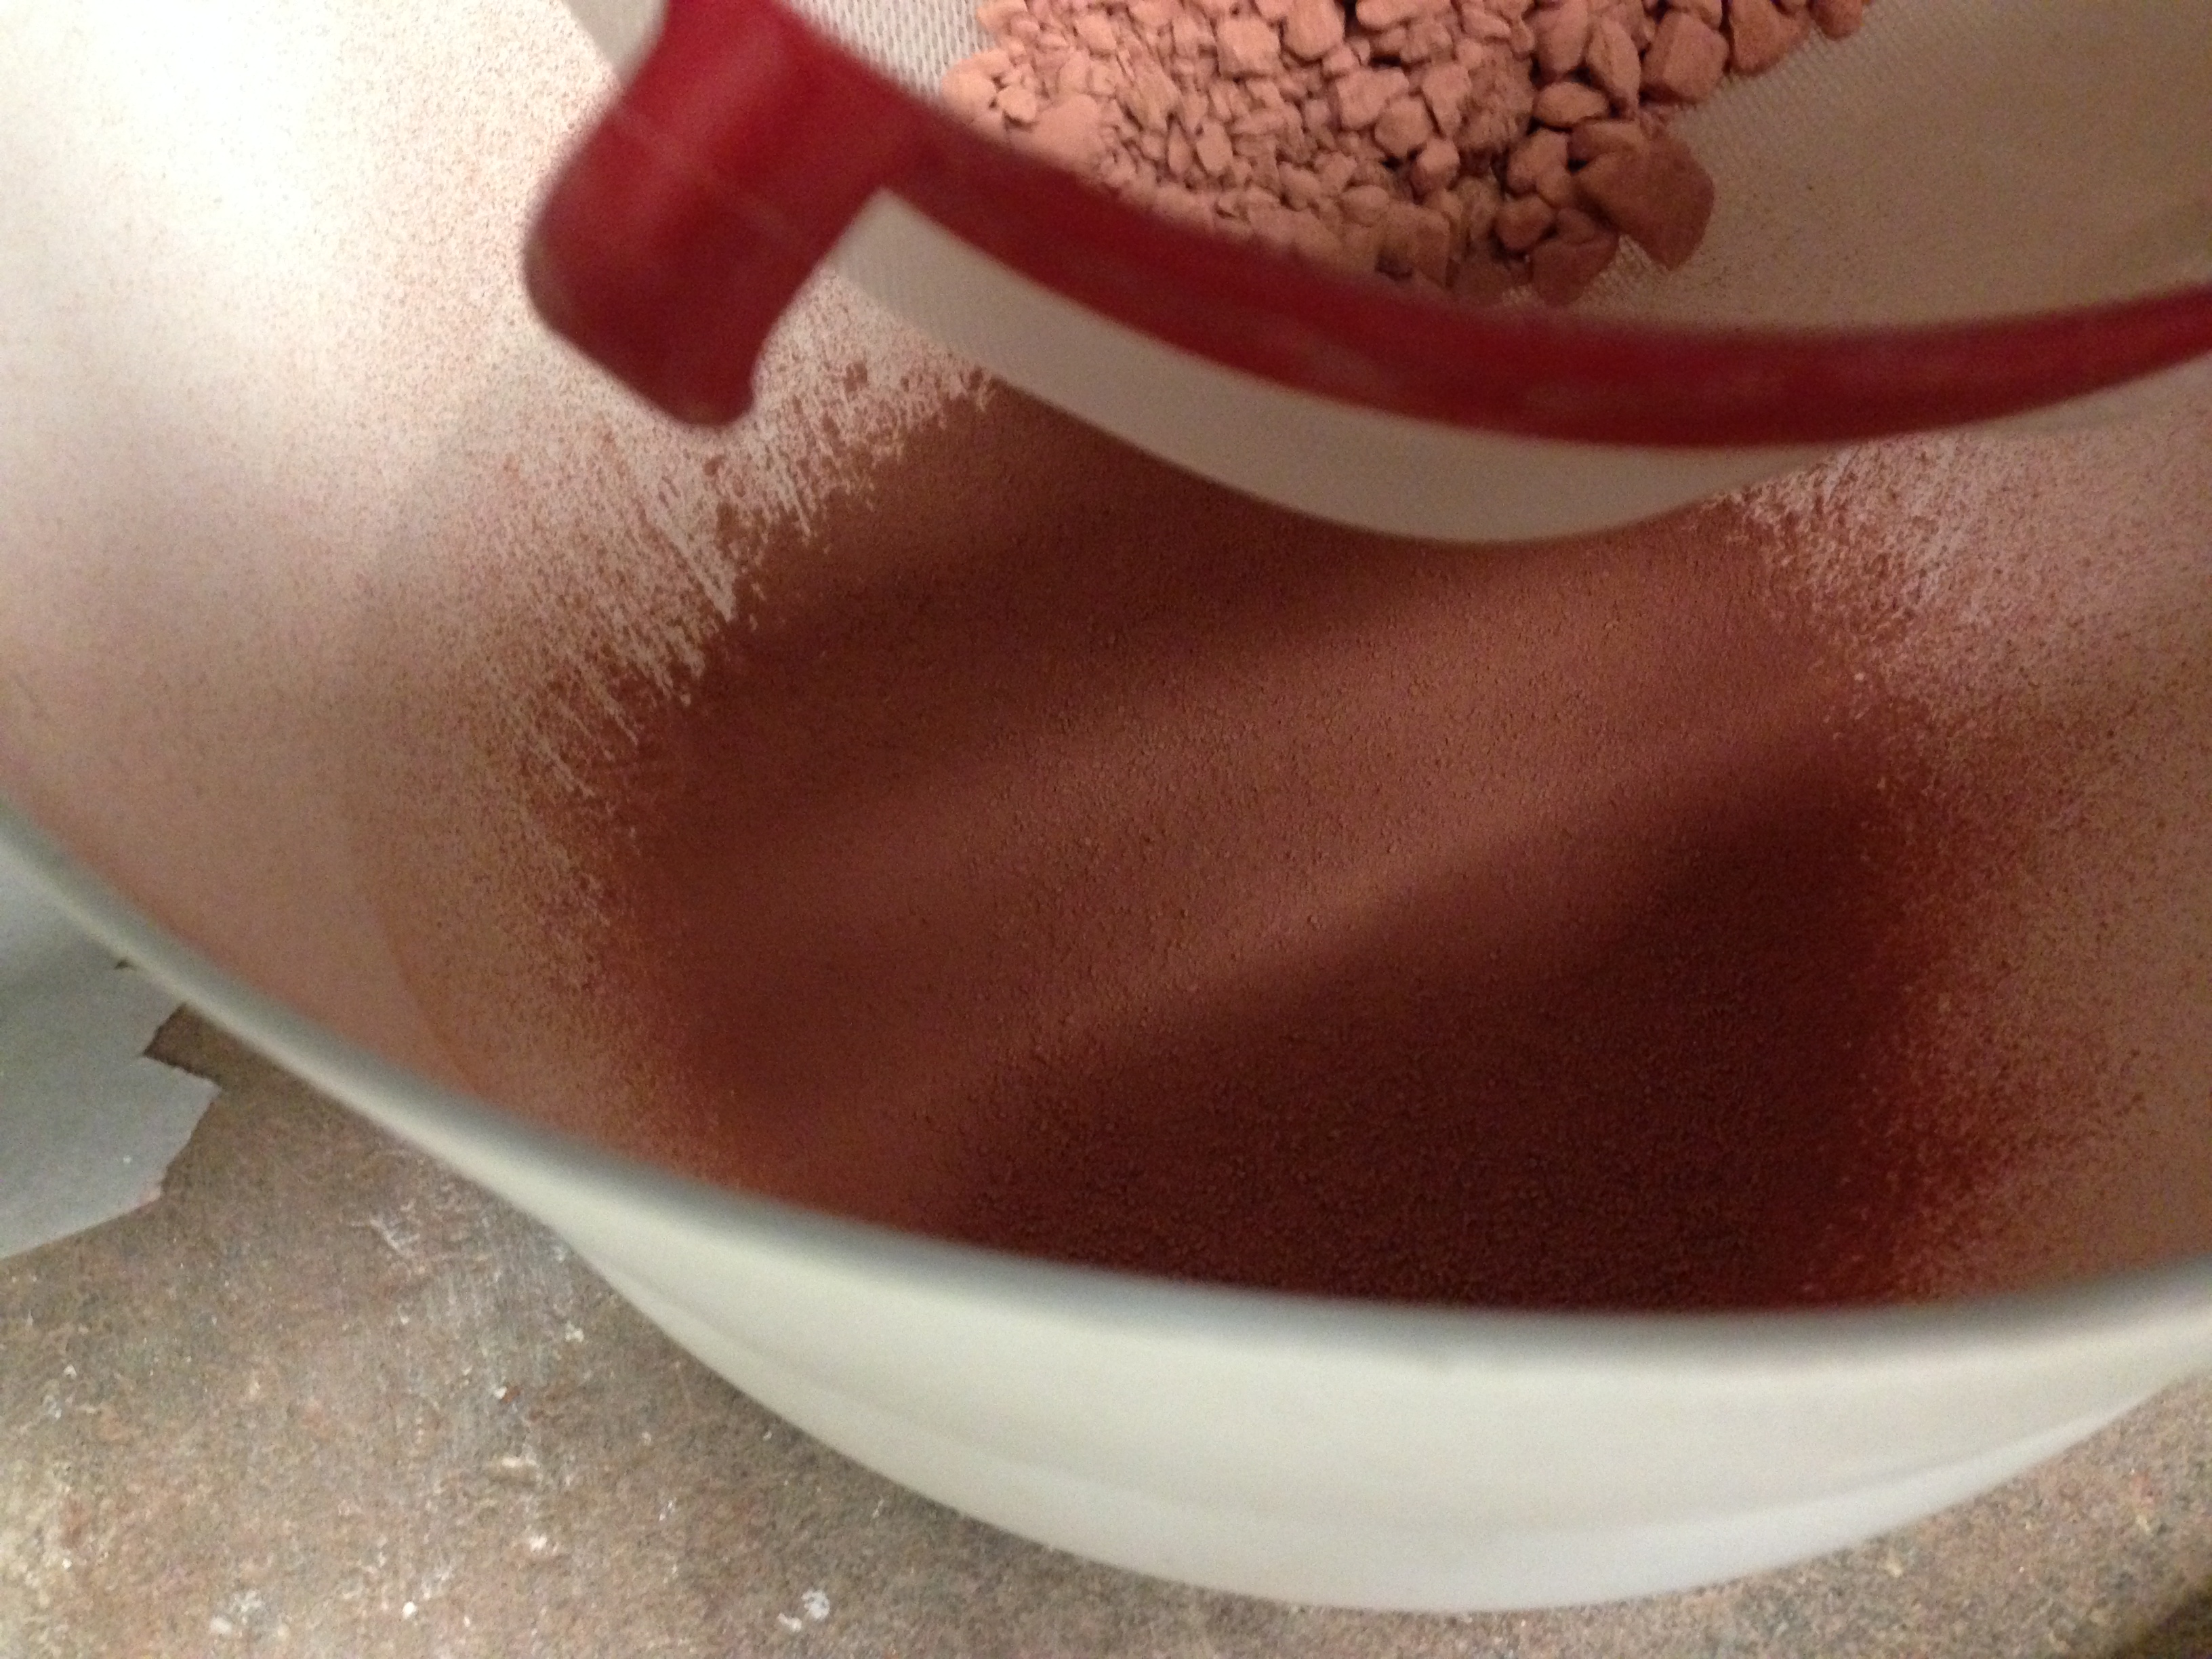
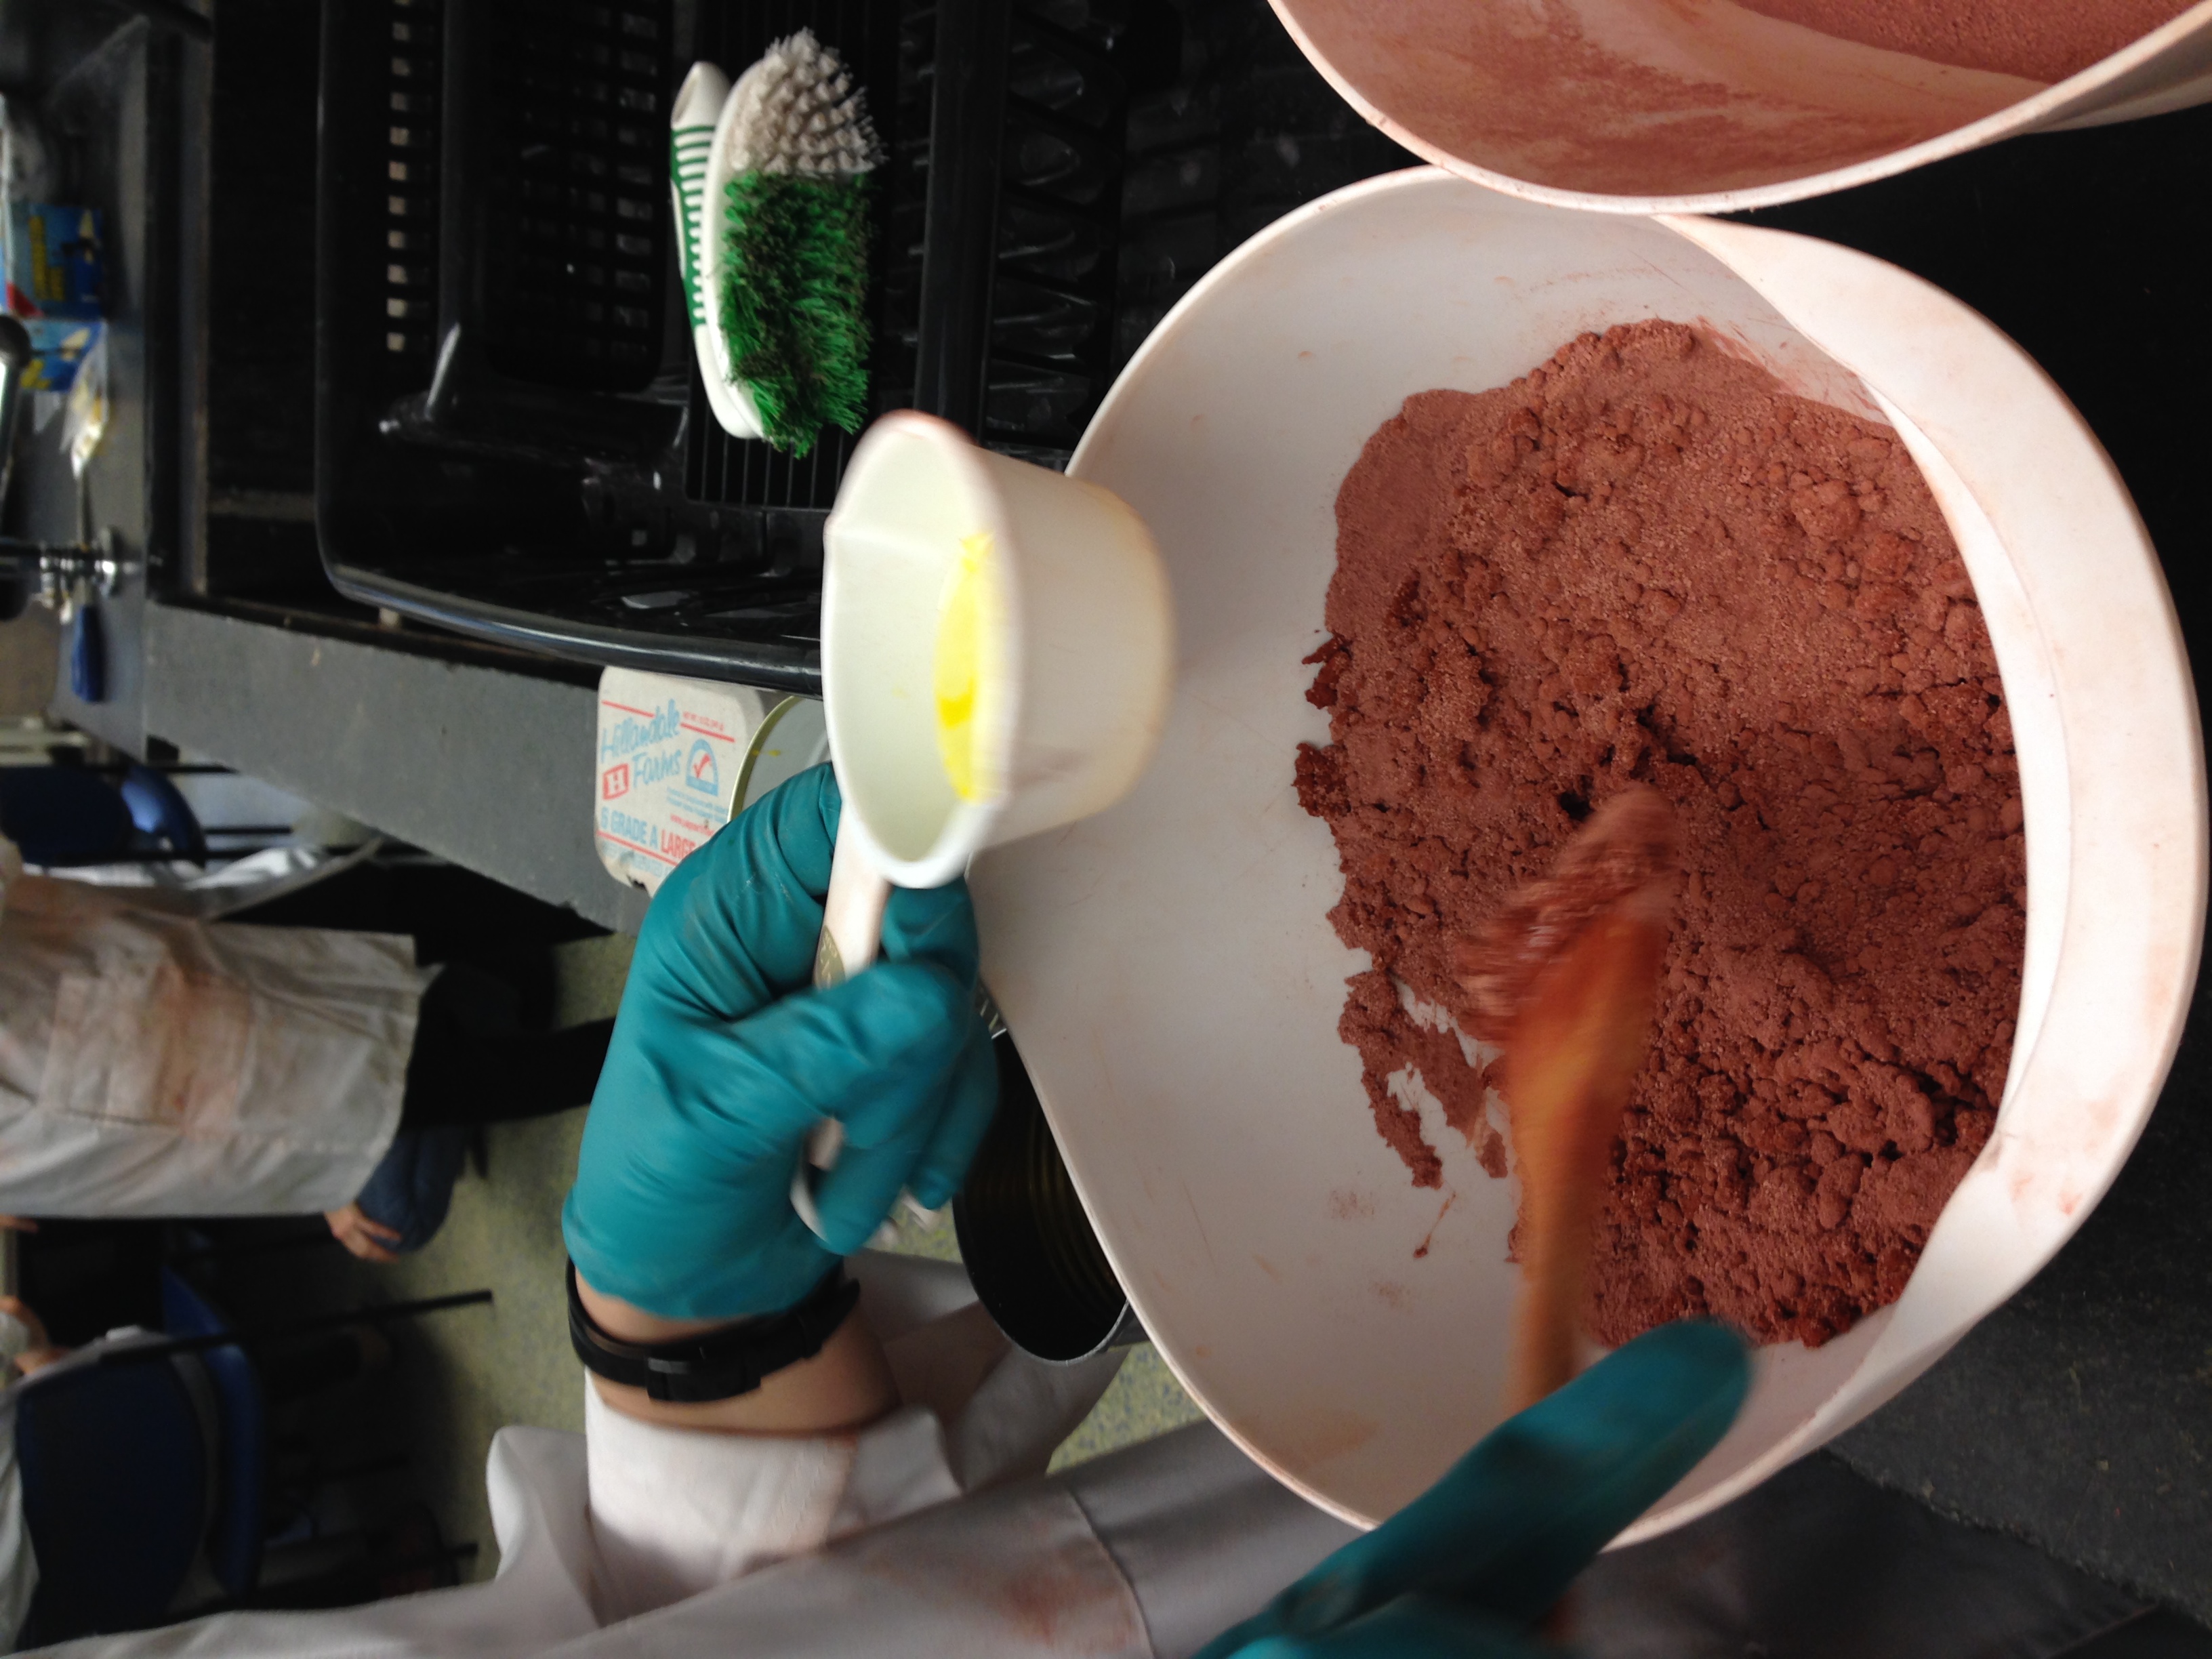
first mold is made with sand plus egg whites (whipped)
We used: 2 cups of sand, a little more than 1/2 cup of egg whites (4 eggs)
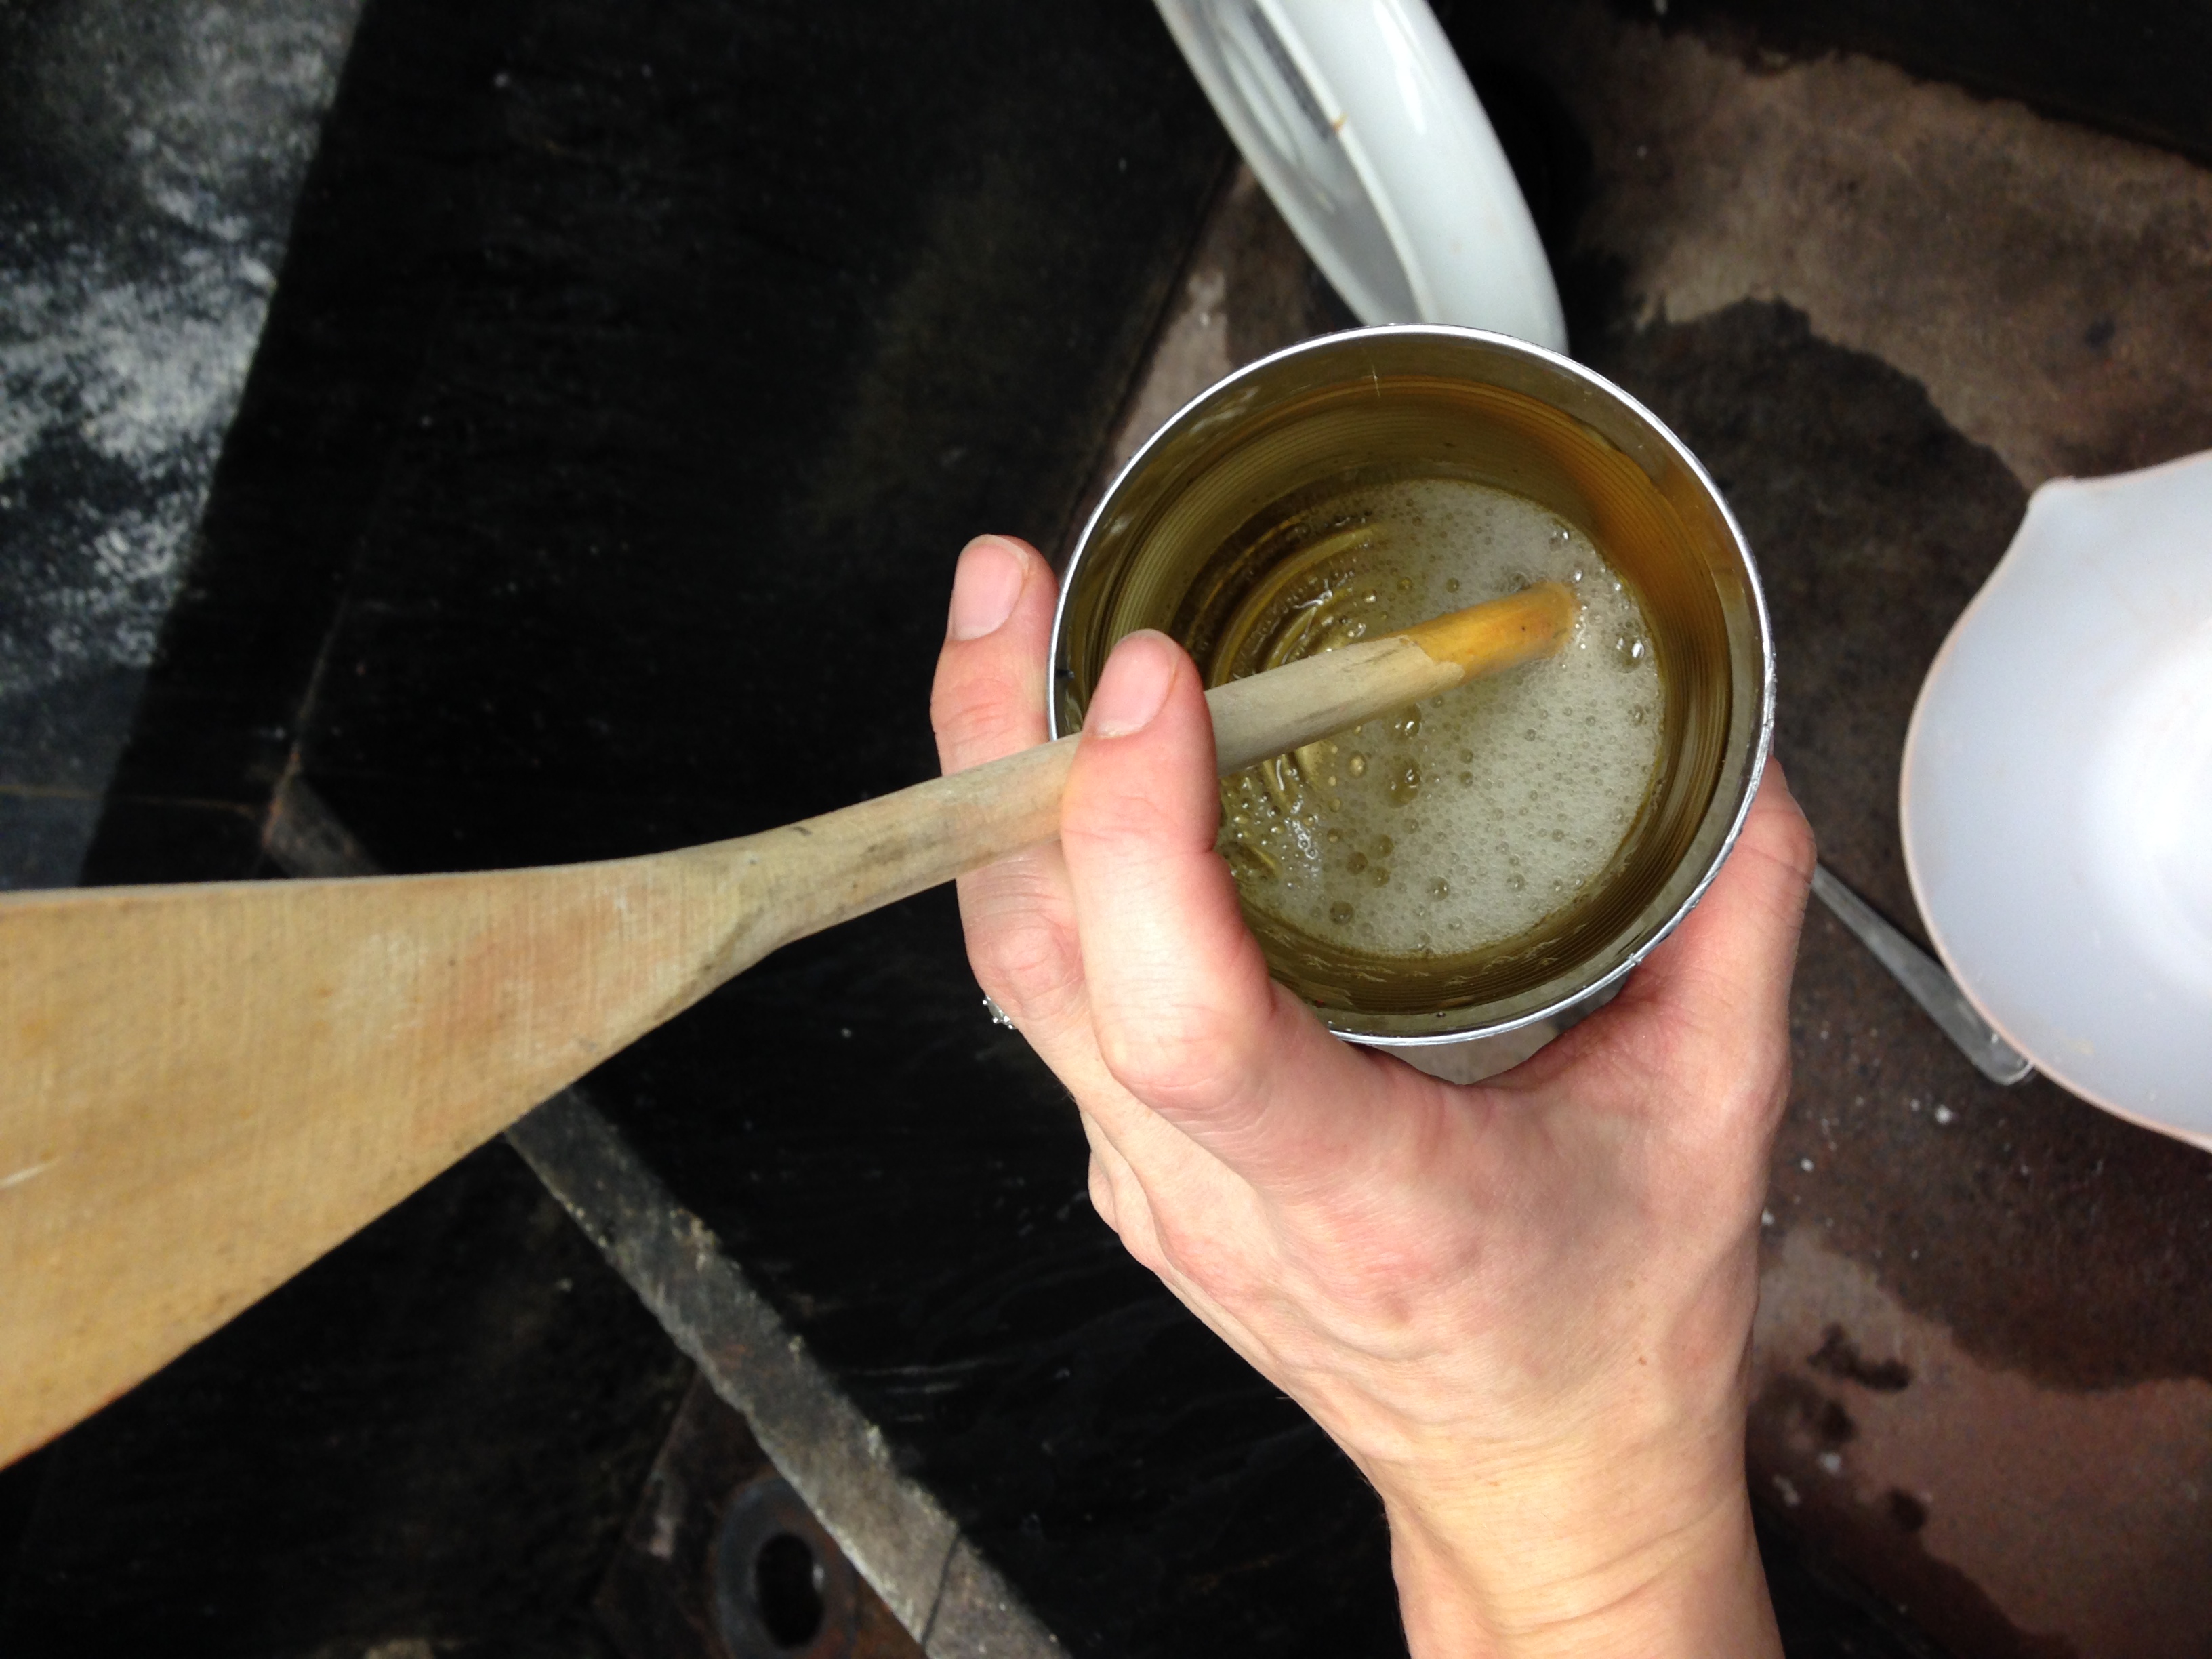
second mold is made with sand plus elm root emulsion (which has turned completely musilanginous)
We used again 2 cups of sand, roughly 1/2 cup of the emulsion
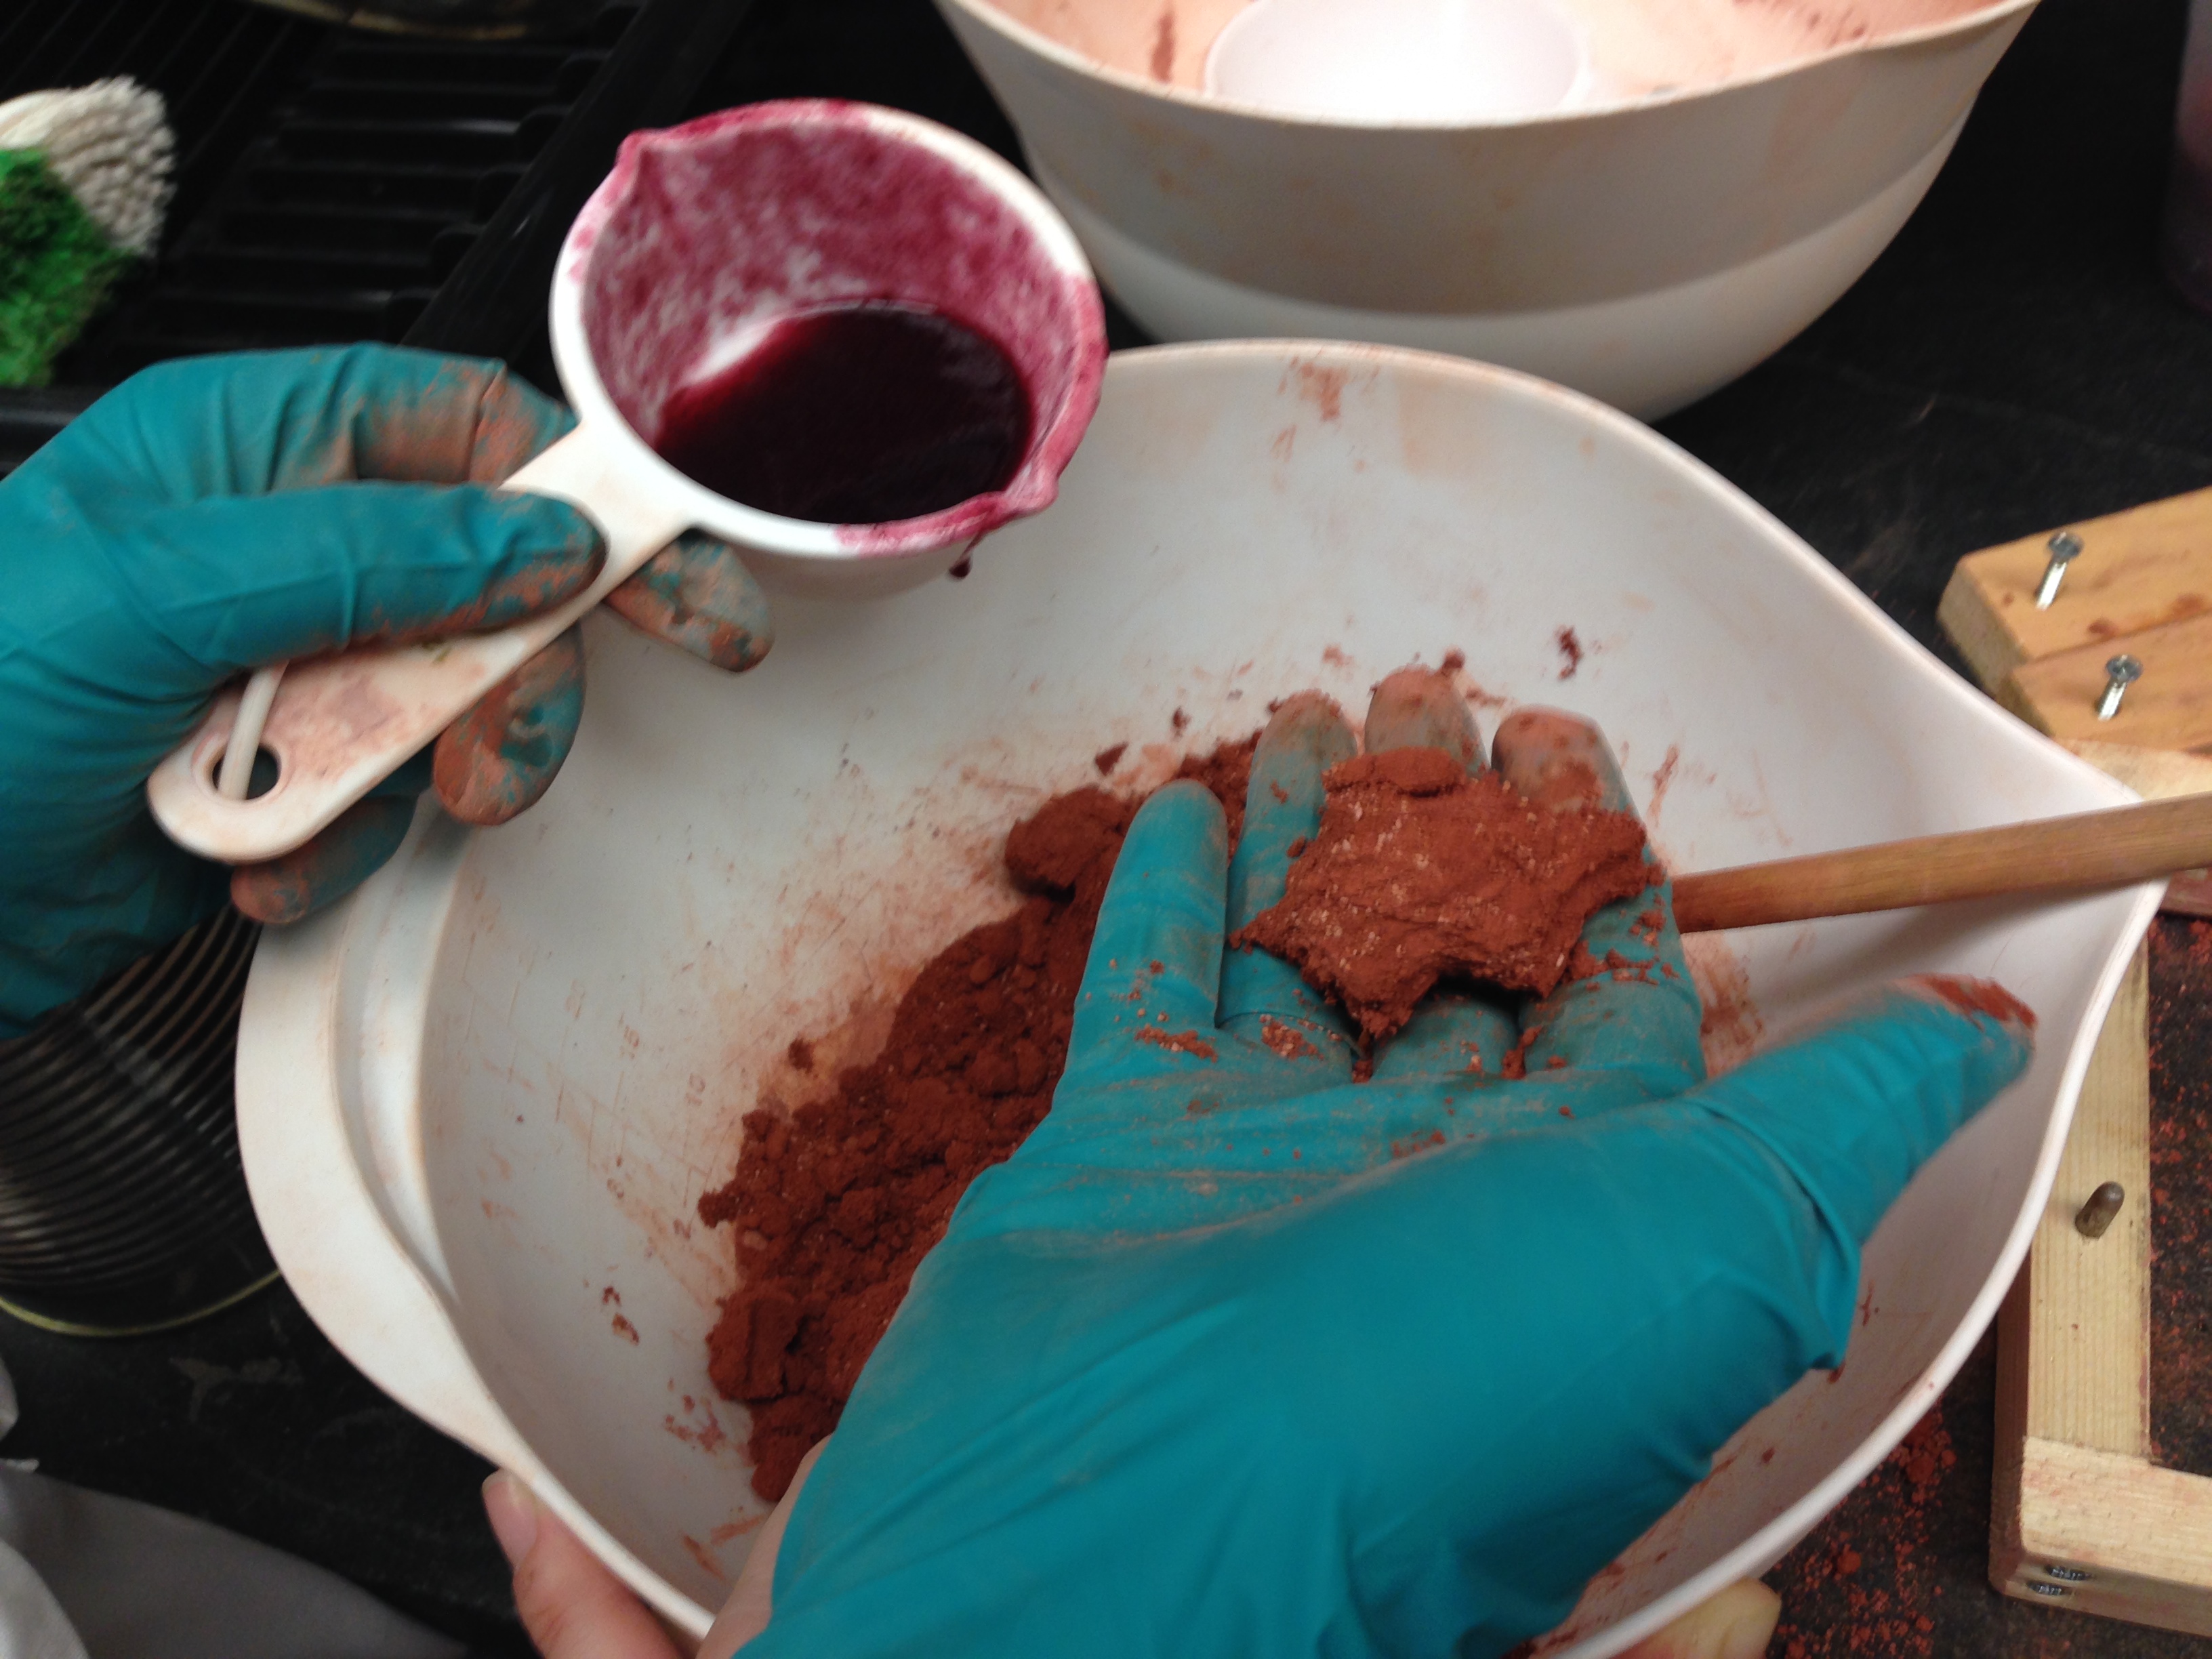 |
| Clumping the sand in the palm of the hand; when pressed with the tip of a finger, the form dissolves |
third mold will be made with sand plus calcined oysters two ways (one as part of emulsion/eau magistra and one as substitute for sand) -note two different interpretations of manuscript.
discussion with Pamela Smith about jammy/earthy smell of elm root infusion with sand
she draws our attention to this passage
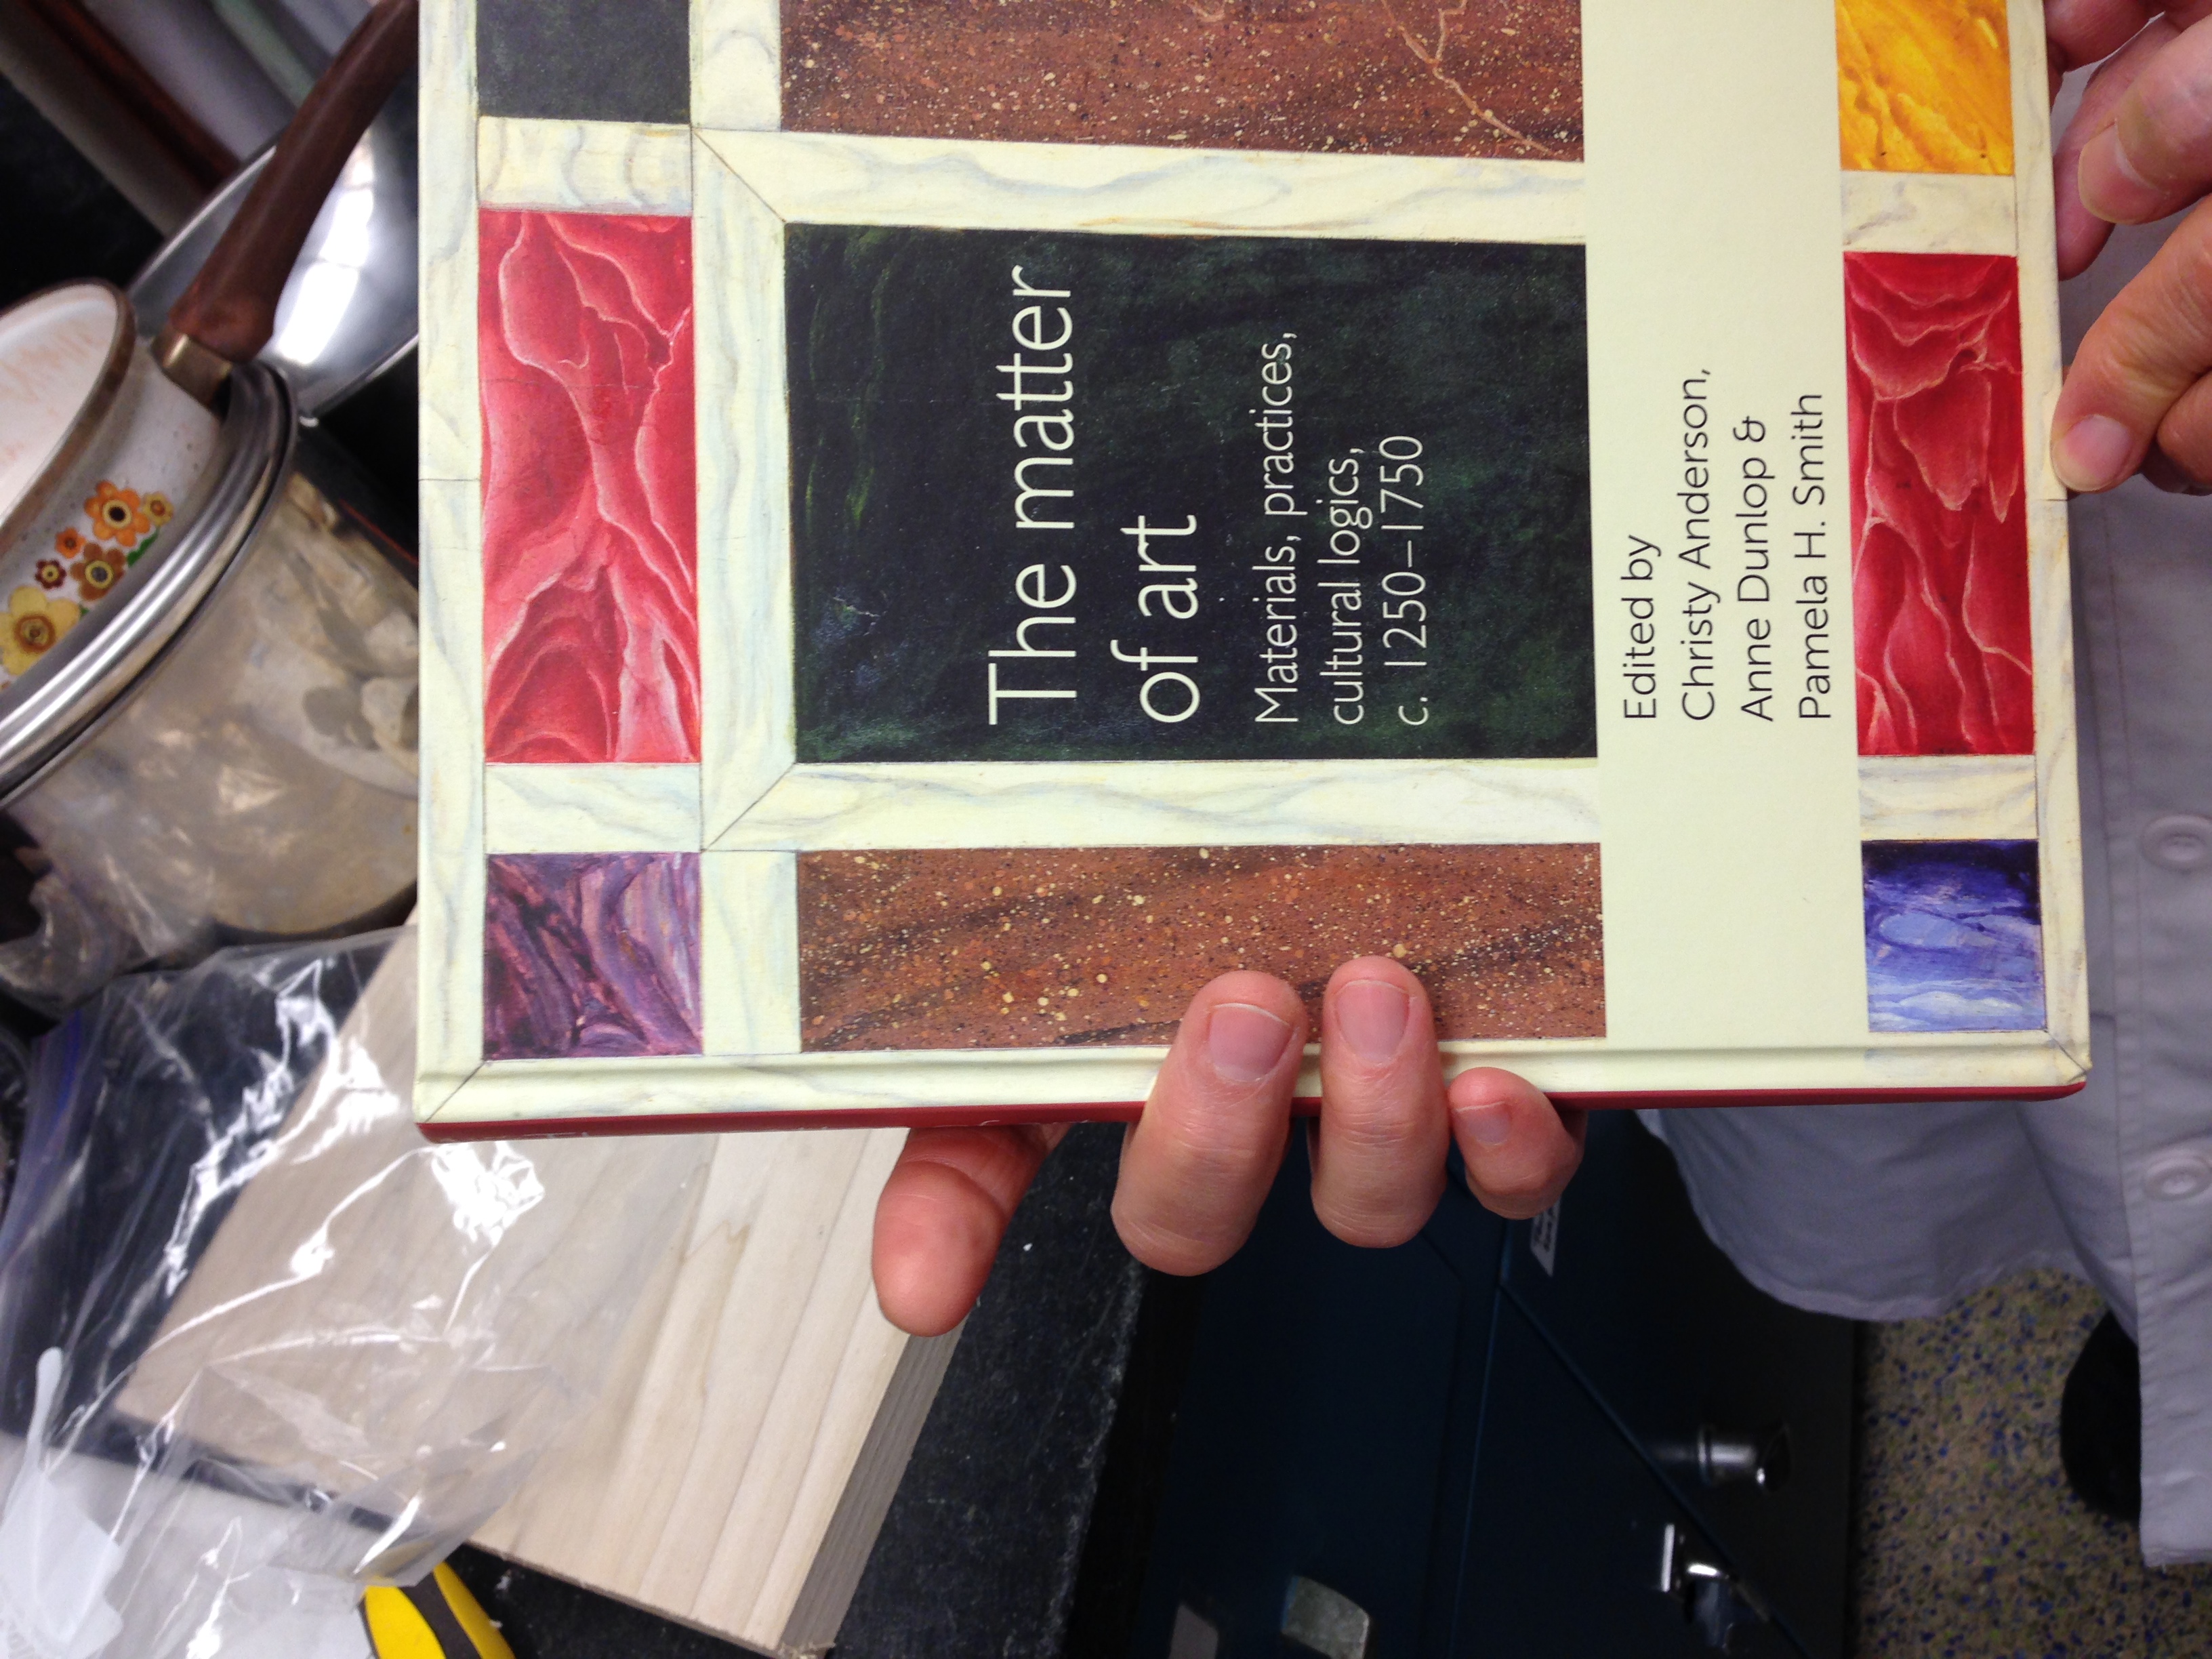
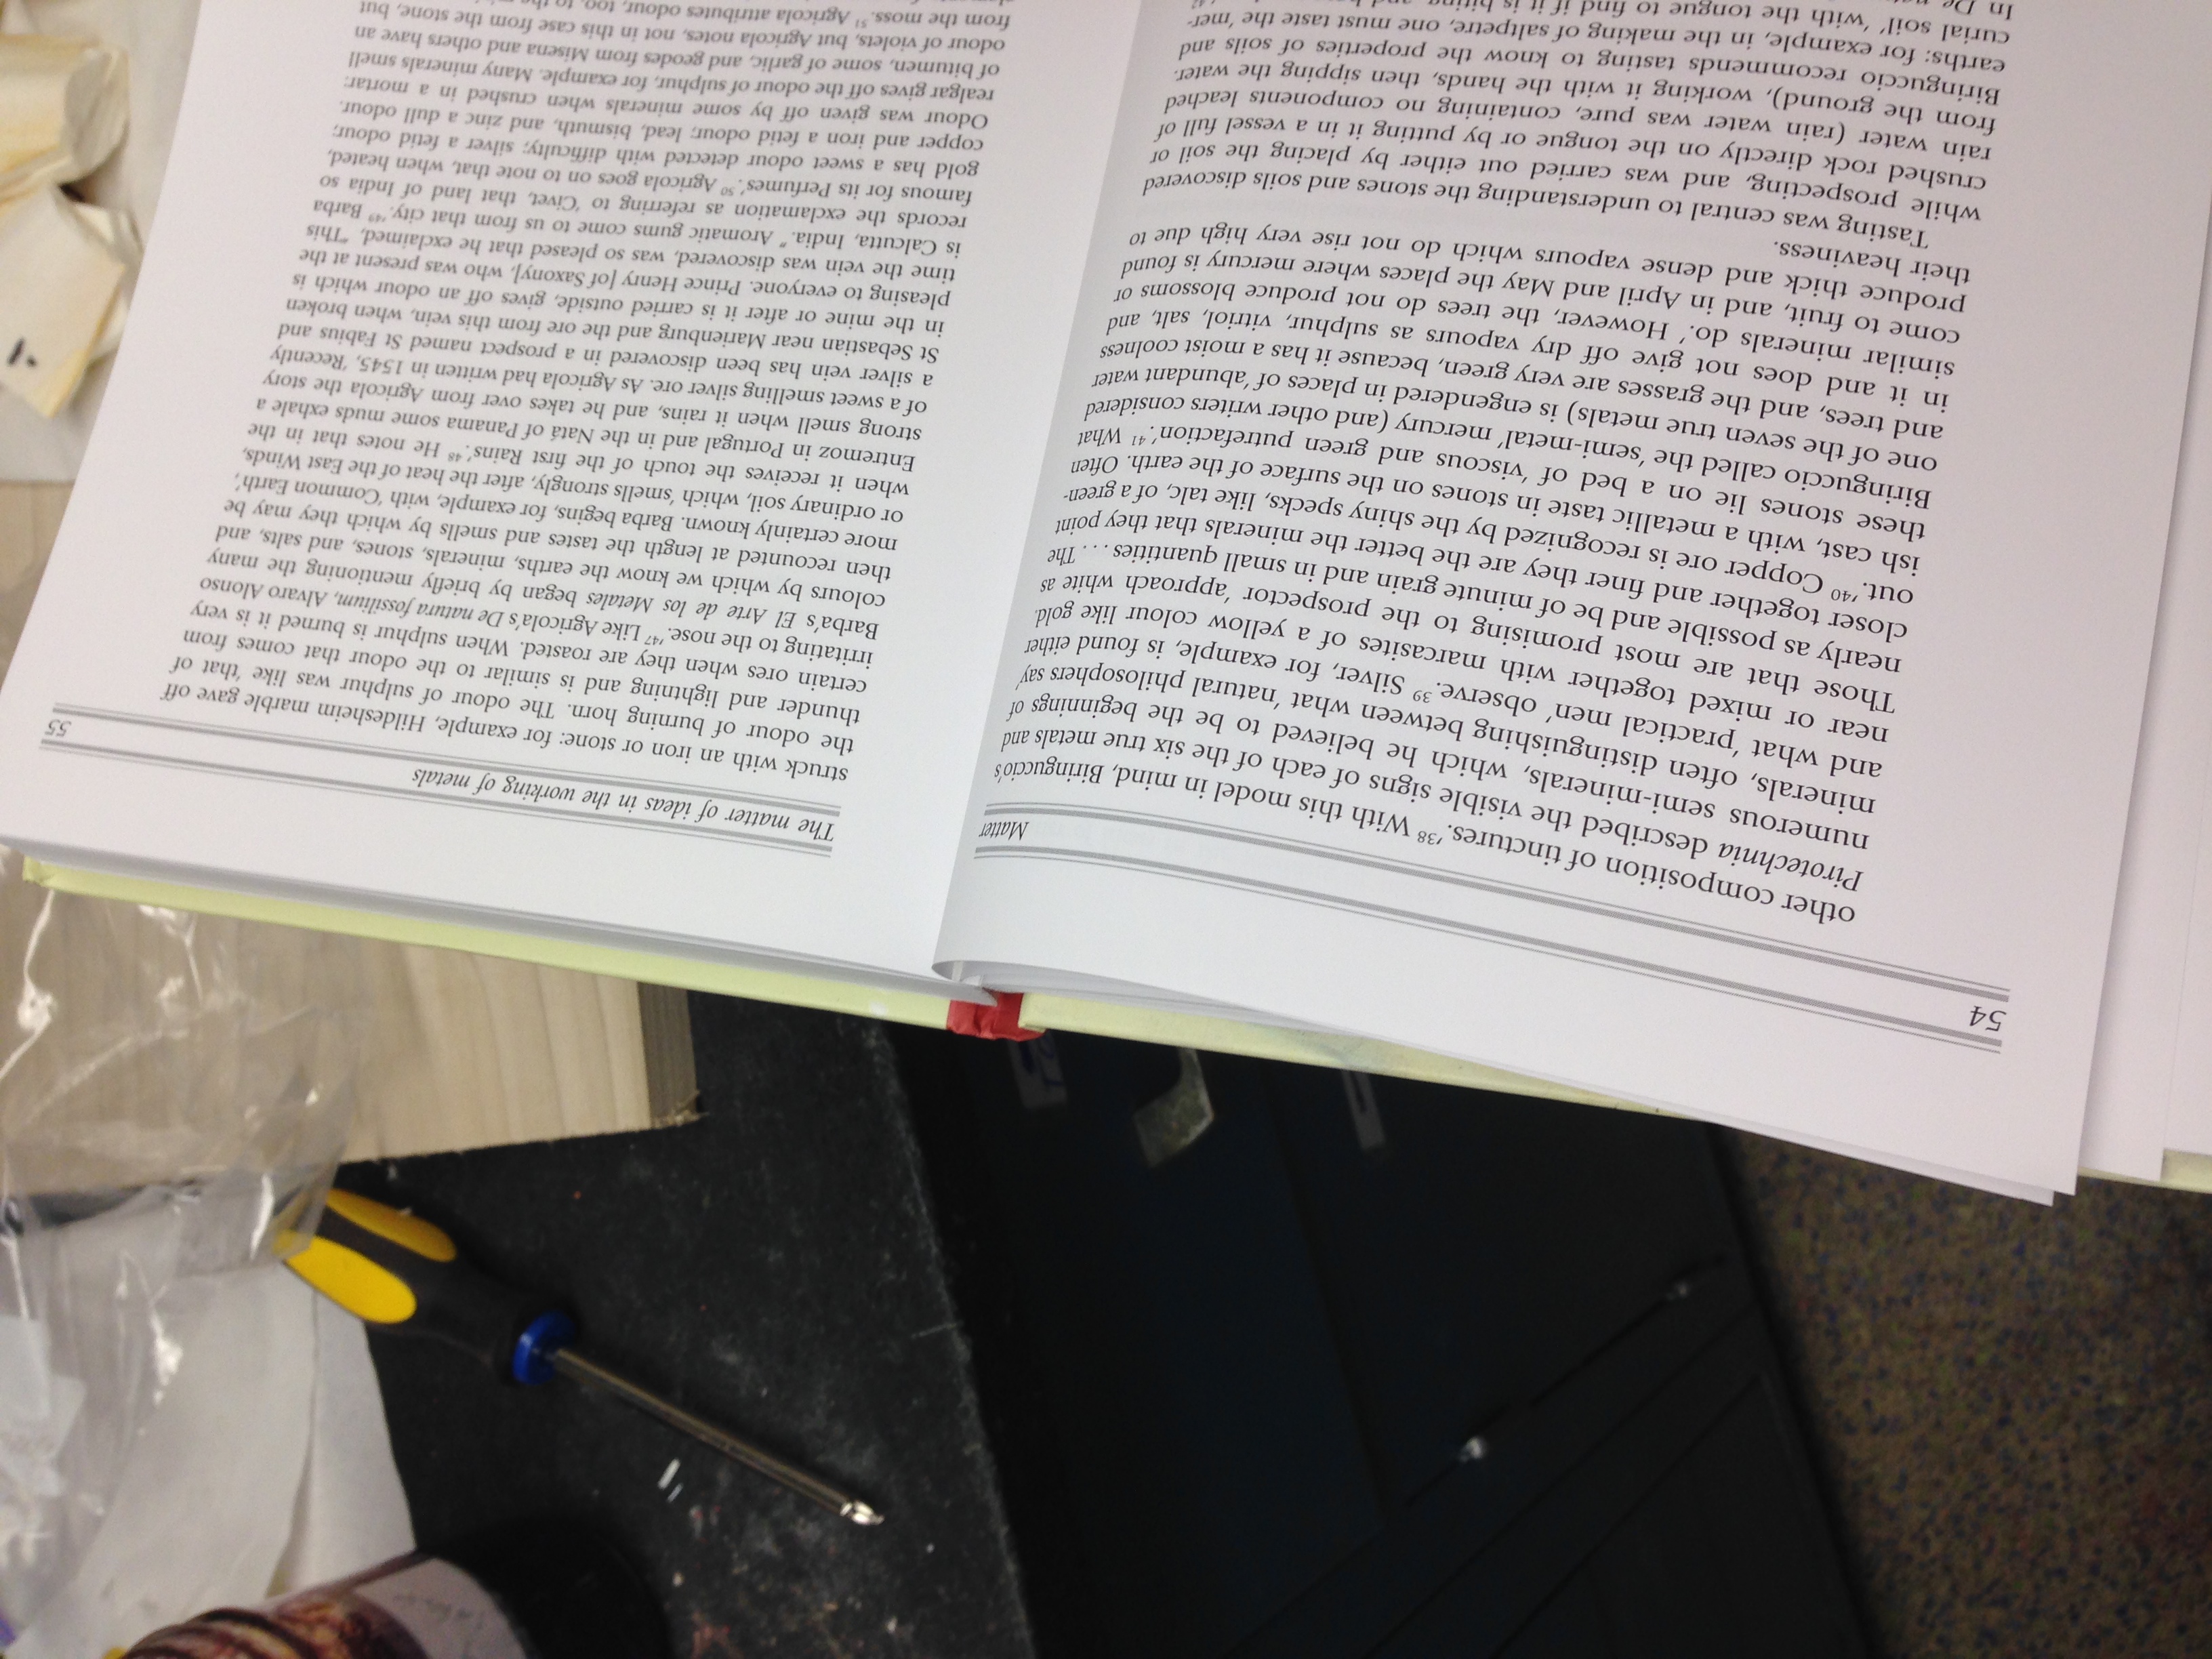
December 2: Dried sand molds
NAME: Emogene Cataldo & Julianna ViscoDATE AND TIME: 12/2/14 (updated 12/3/14)
LOCATION: Columbia Lab
SUBJECT: dried sand molds
Initial comments and observations:
- Our sand molds were completely dry and very, very hard (the binders worked!)
- It appeared that the wine emulsion mold had shrunk more than the egg white mold;
- also a distinct difference in color and smell; the scent of the wine emulsion was still very present. The wine emulsion mold also had more of a dull purple color, rather than the egg white mold, which was a deep dark red.
- The color of the wine emulsion stained the plaster mold purple
- We did not add a release agent to the egg white mold; this plaster model had to be "chiseled" out with a hammer and a nail
- Even though we had to chisel out our patterns, we still got an impression! Very exciting.
- We used egg white as a release agent in the wine mold; this was also difficult to get out, but it came out in (almost) one piece
- (Egg white is used as a release agent in plaster models/molds even today; Emogene used this in mold making in undergrad; though it works better when still wet)
Kiln update: Pamela will make another attempt with the kiln on 12/2/14 and 12/3/14, heating the kiln much more slowly
- The plan was to heat the oyster shells slowly on 12/2 up to 650 degrees (see image below for kiln plan), leave the shells in the kiln overnight (hoping they are very, very dry by then), and then do the full heat-up on 12/3 during the day, starting at 9:00am
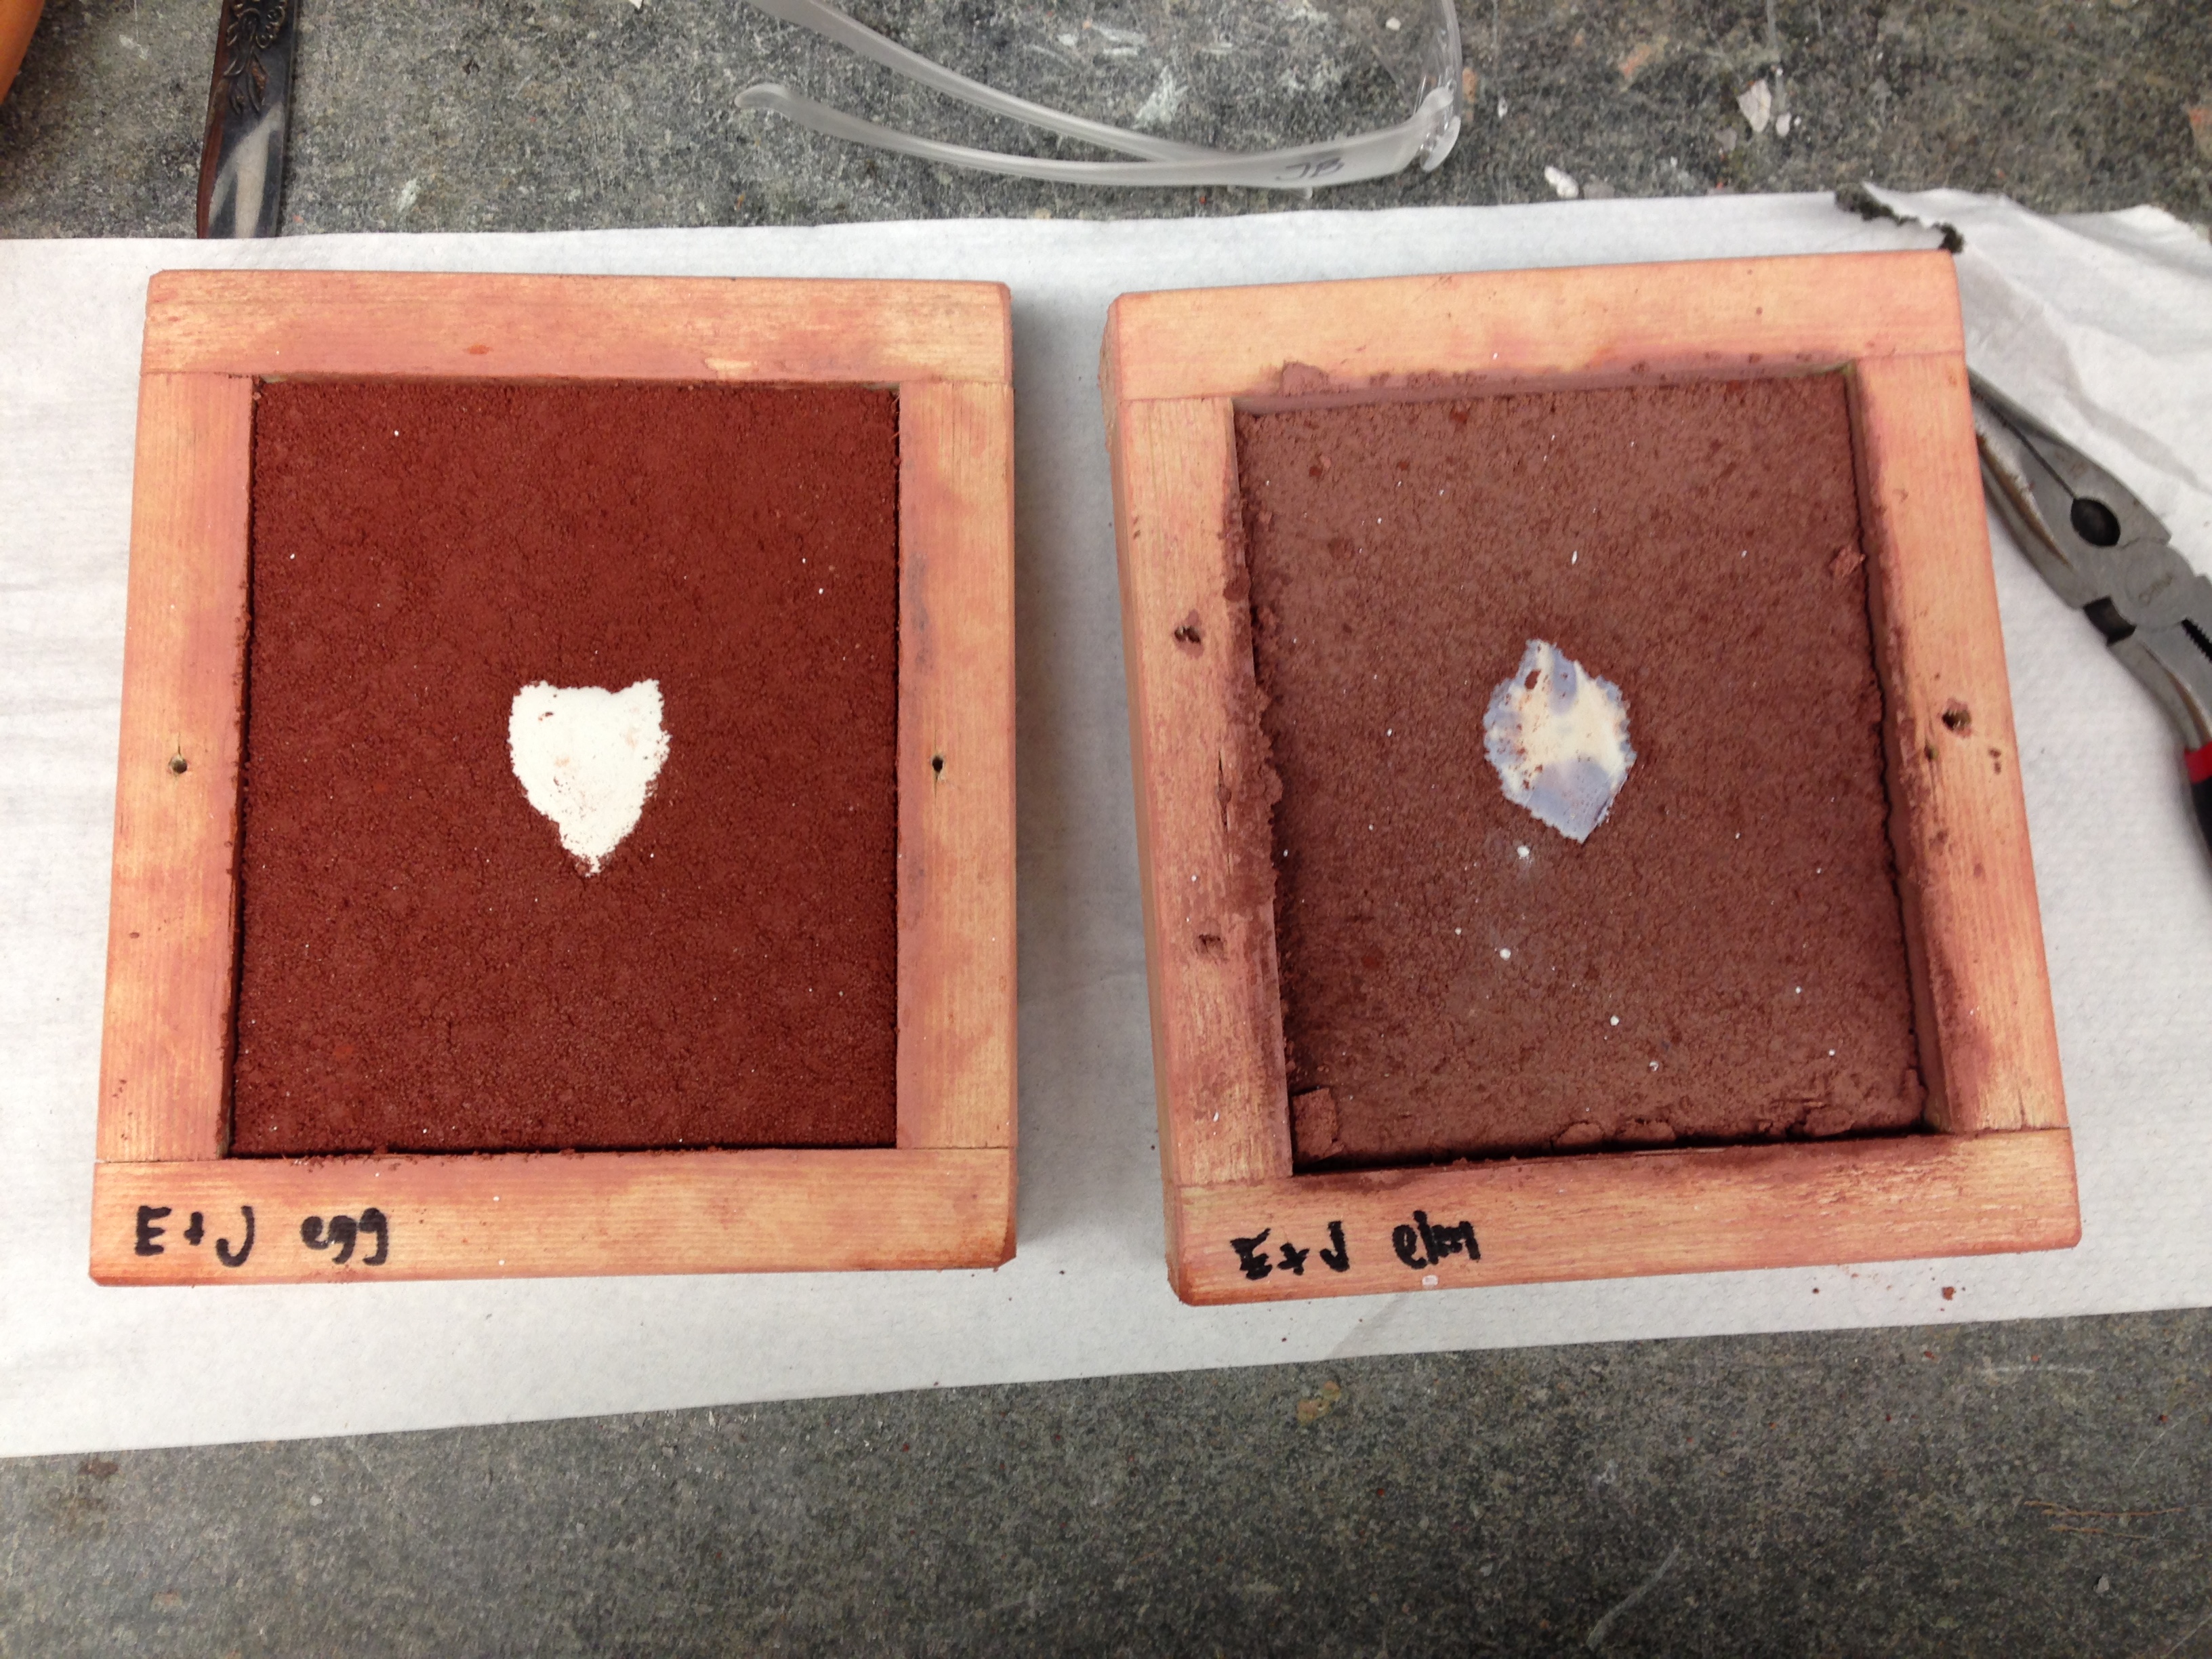 |
| Dried sand molds: sand is crushed up molds (brick dust, etc.), binder is (left) egg white and (right) elm root wine infusion |
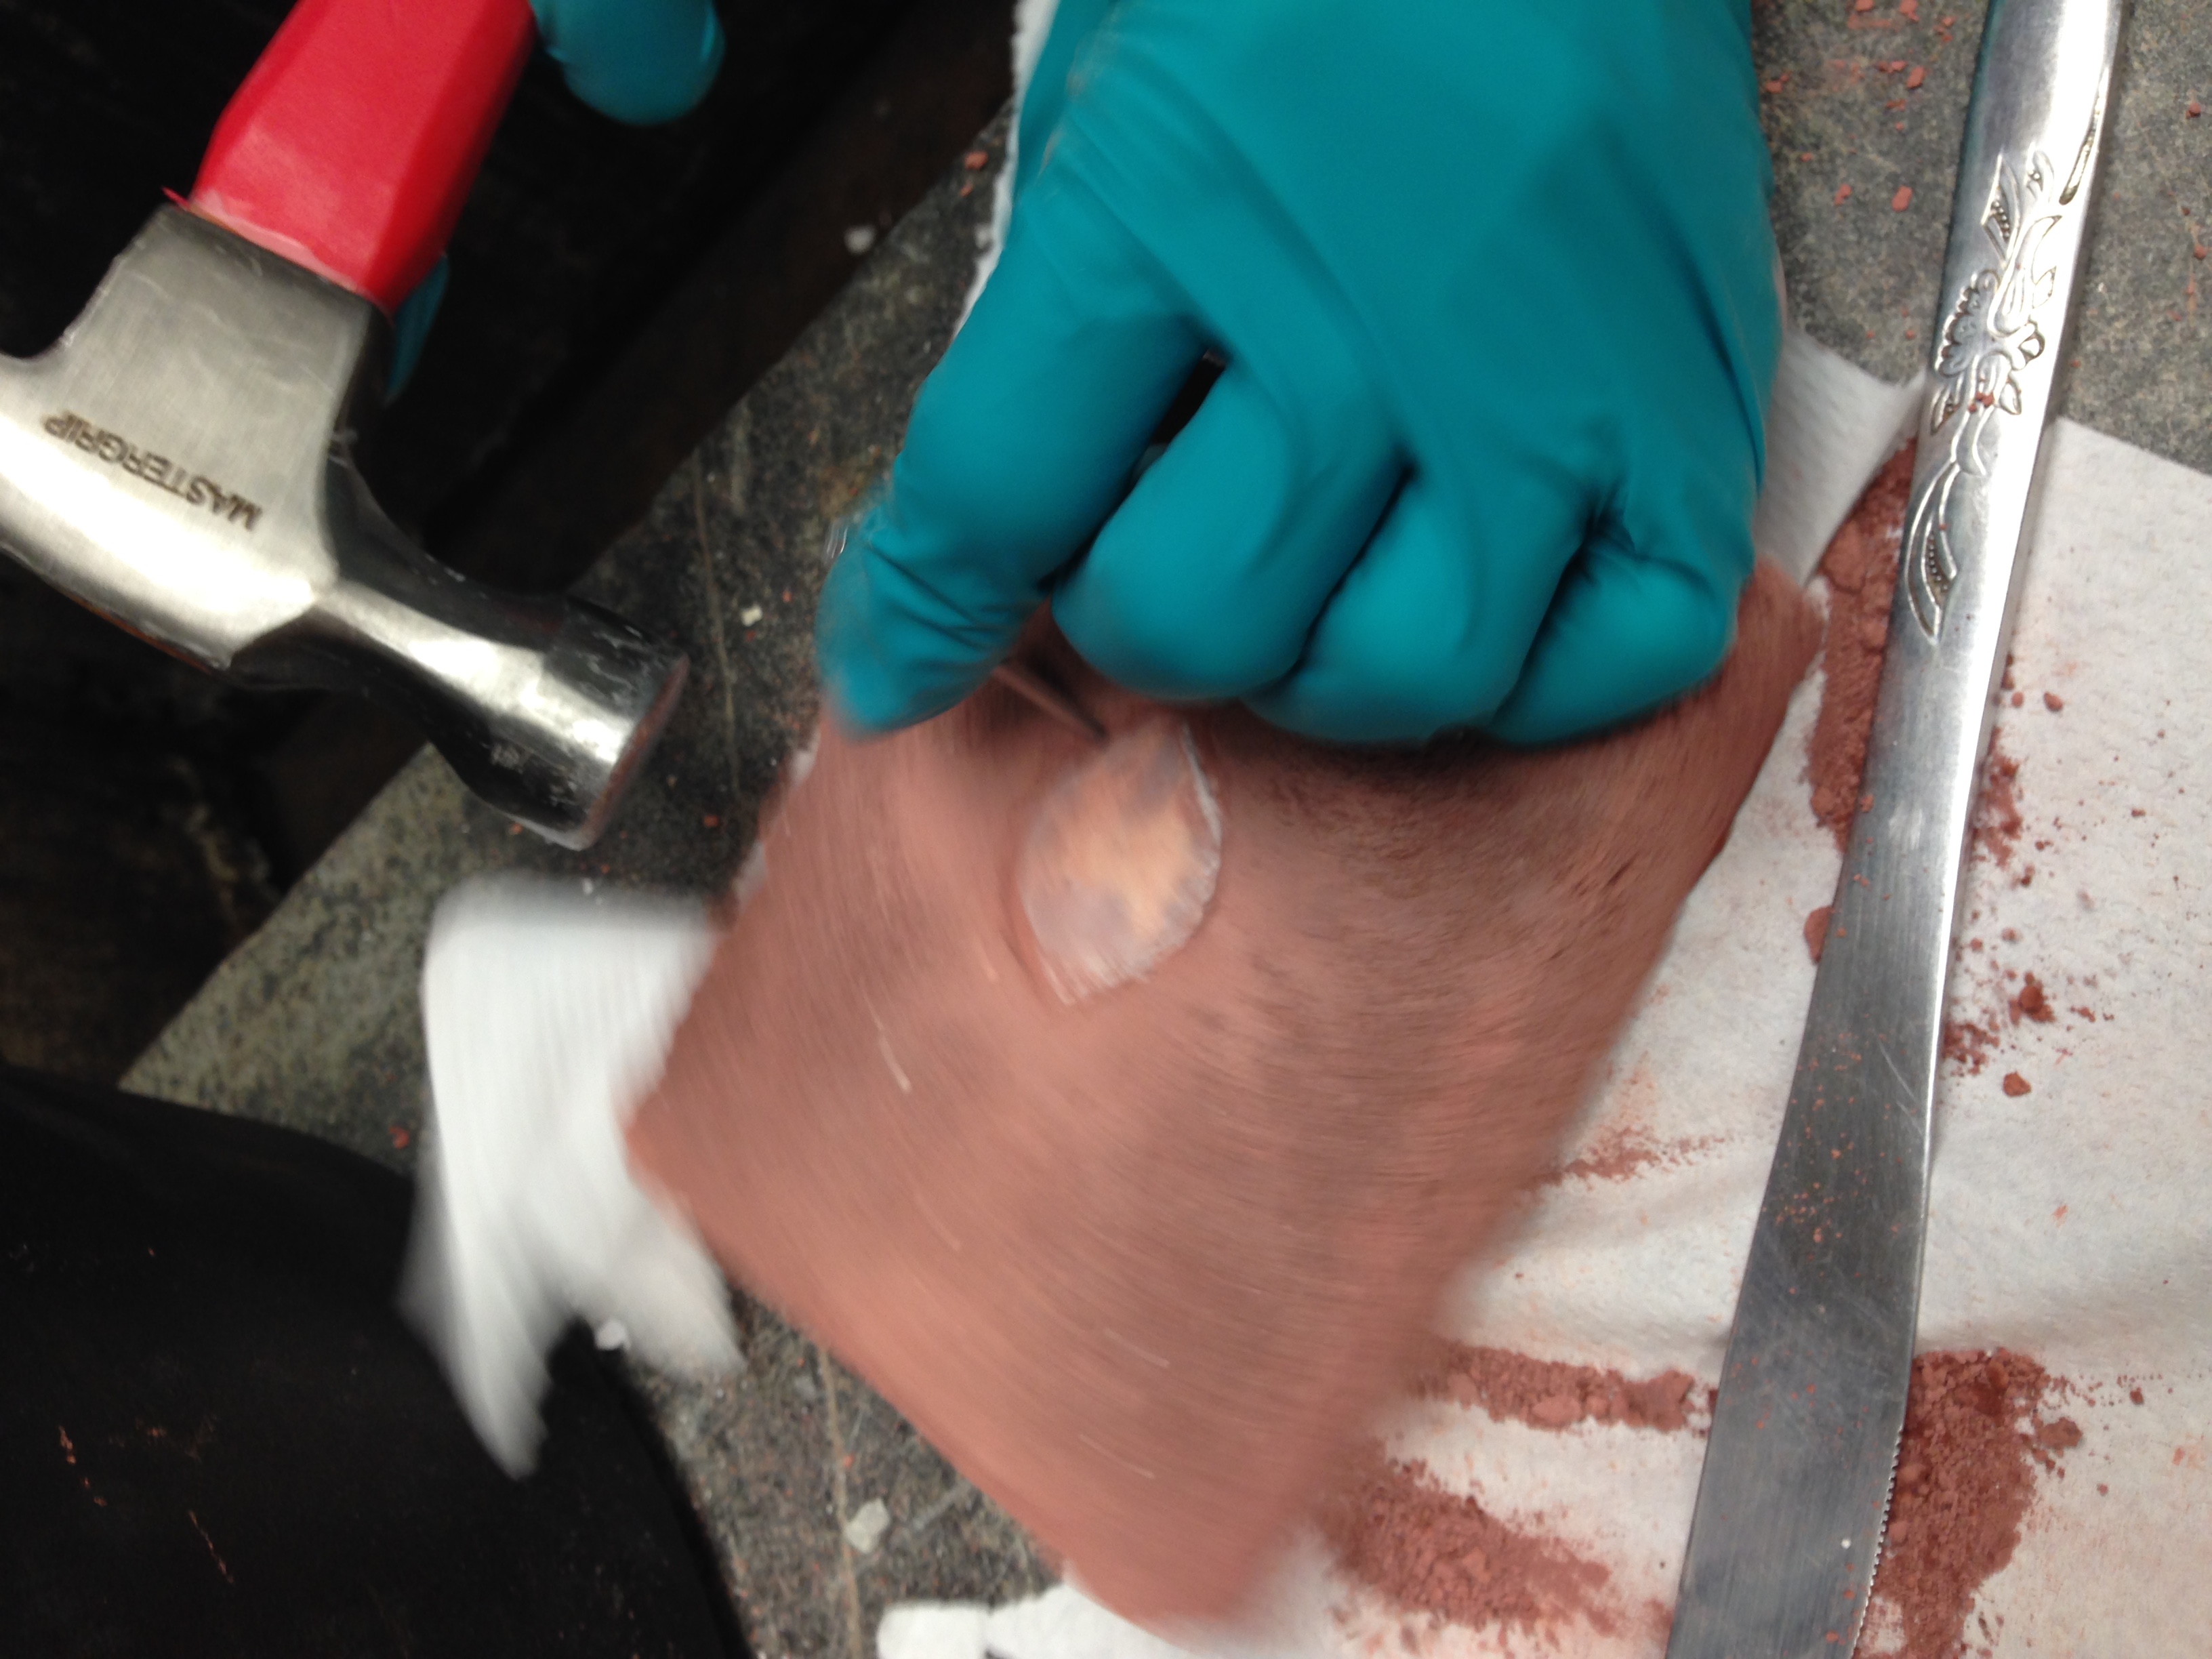 |
| Chiseling out the patterns. Remove it earlier next time! And use charcoal instead! |
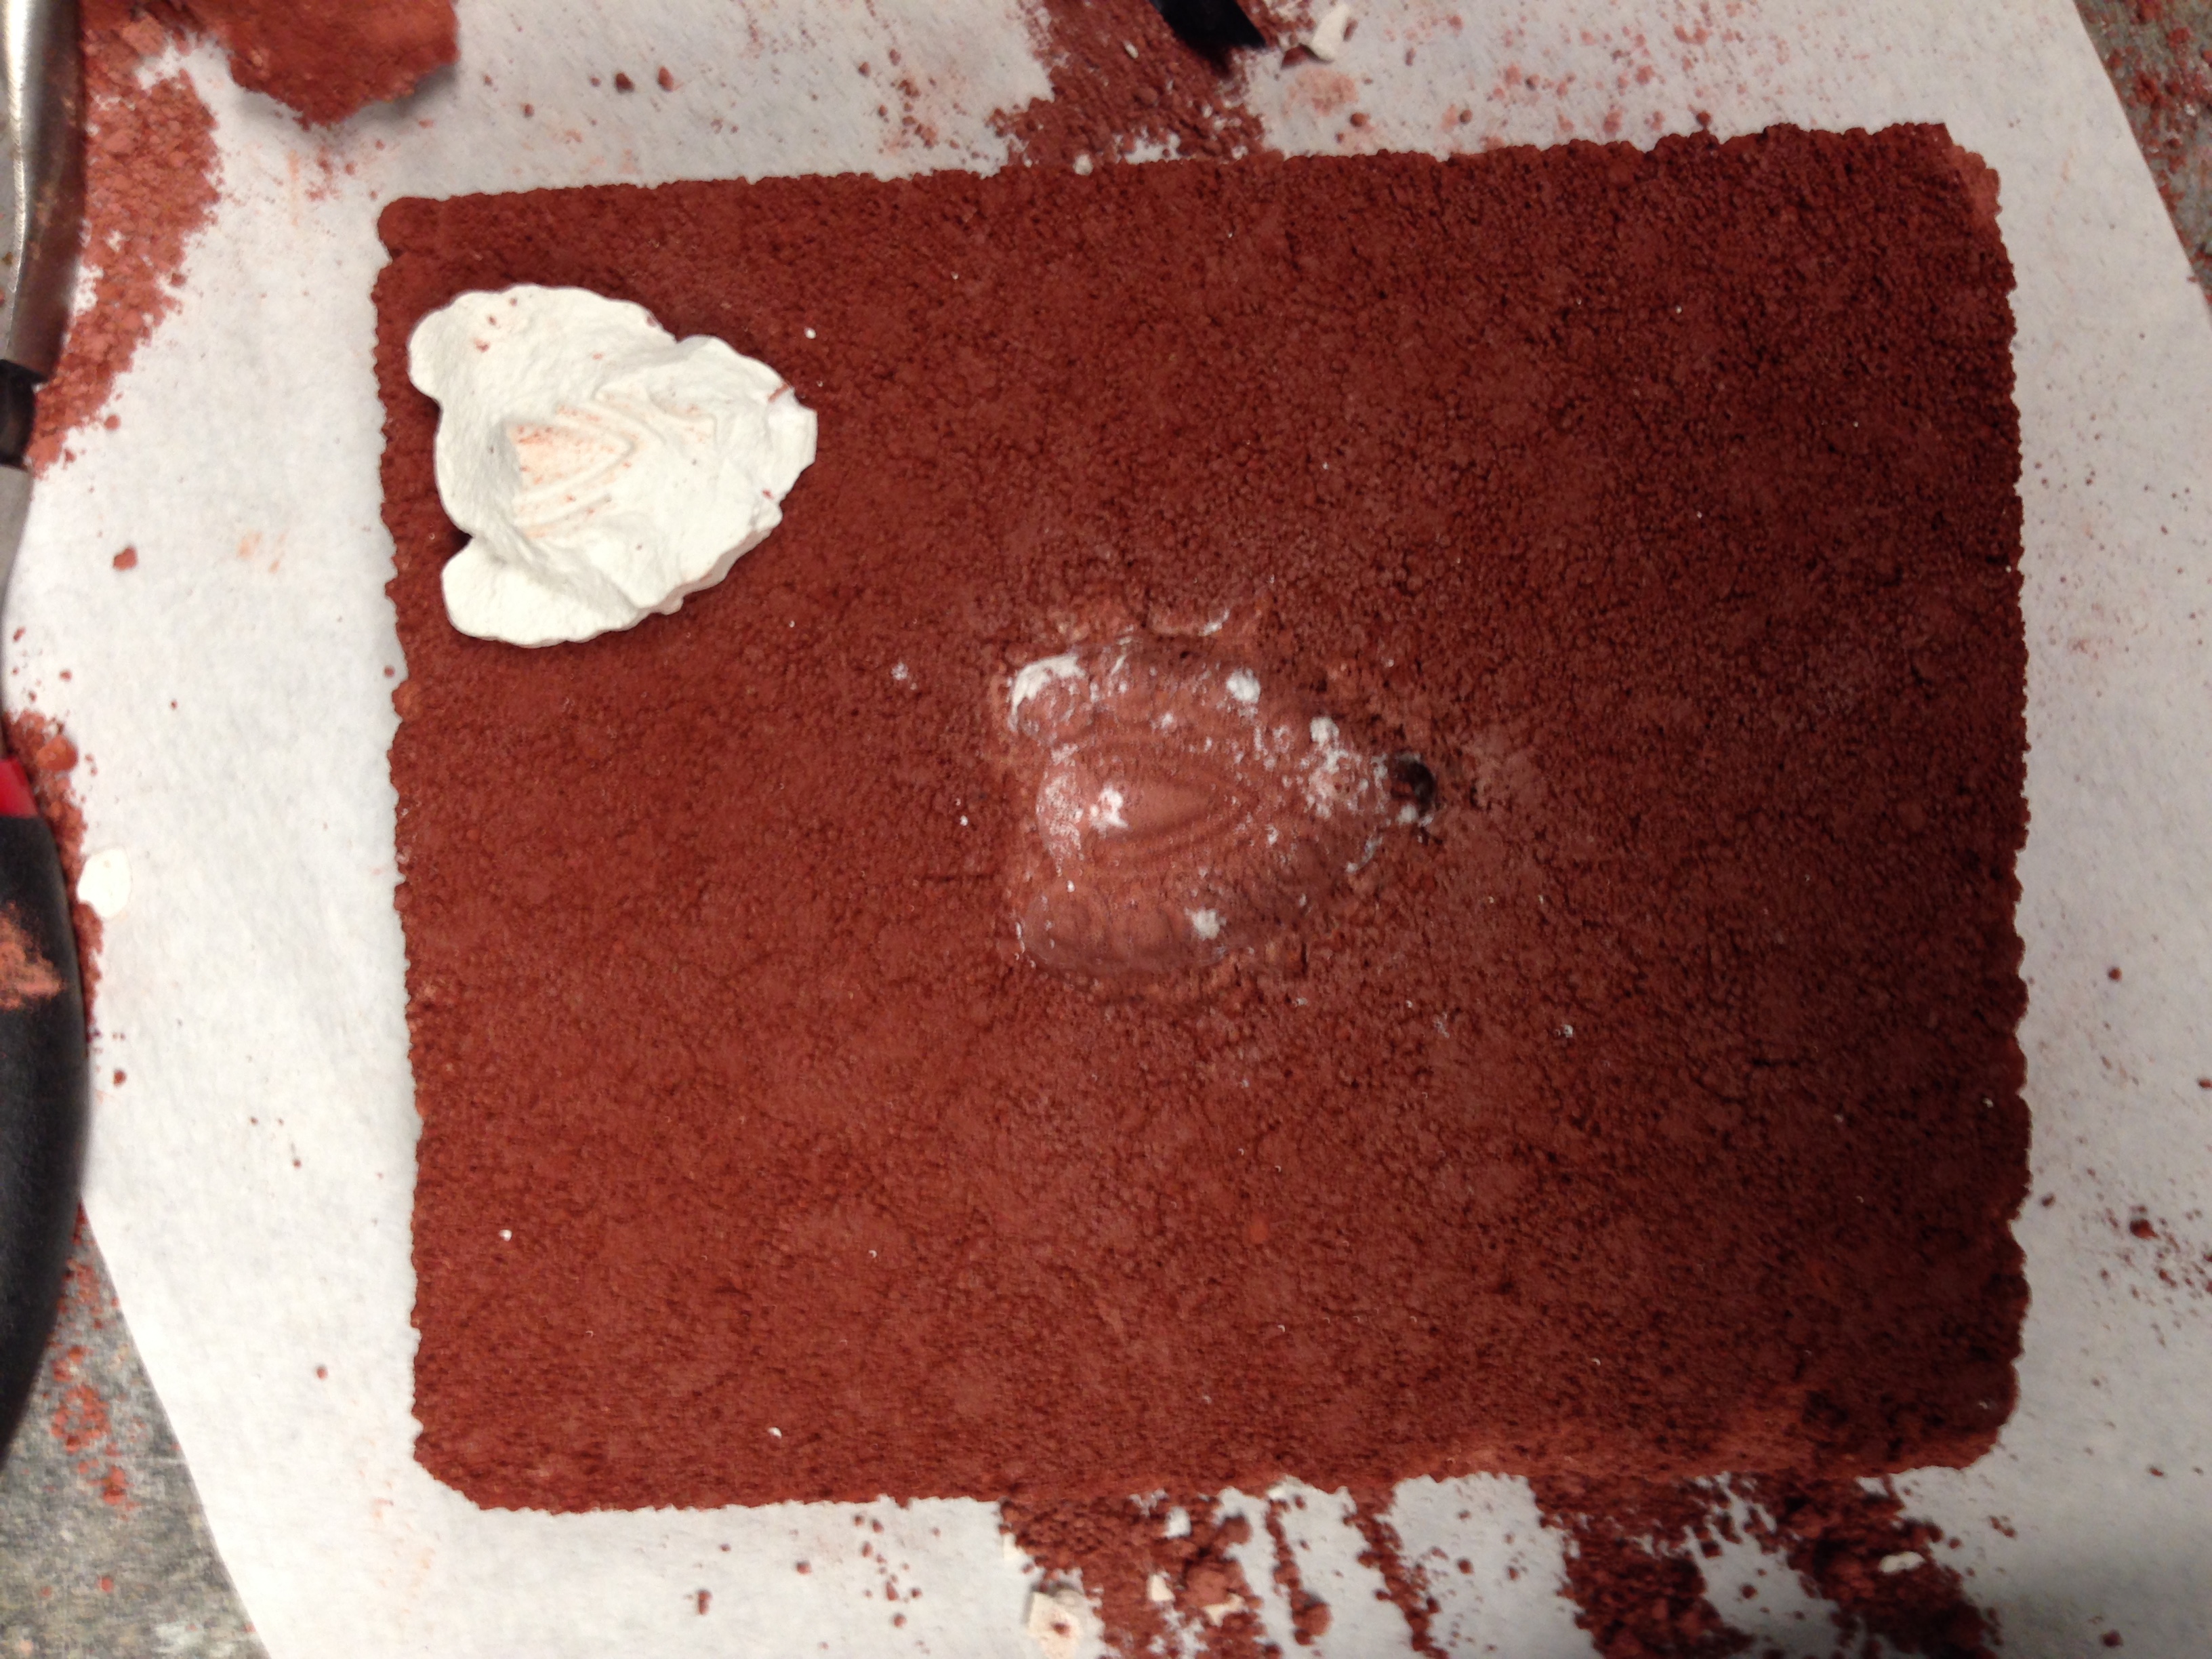 |
| We thought that the molds might not be salvageable, but we still got a nice impression (this is the egg white binder) |
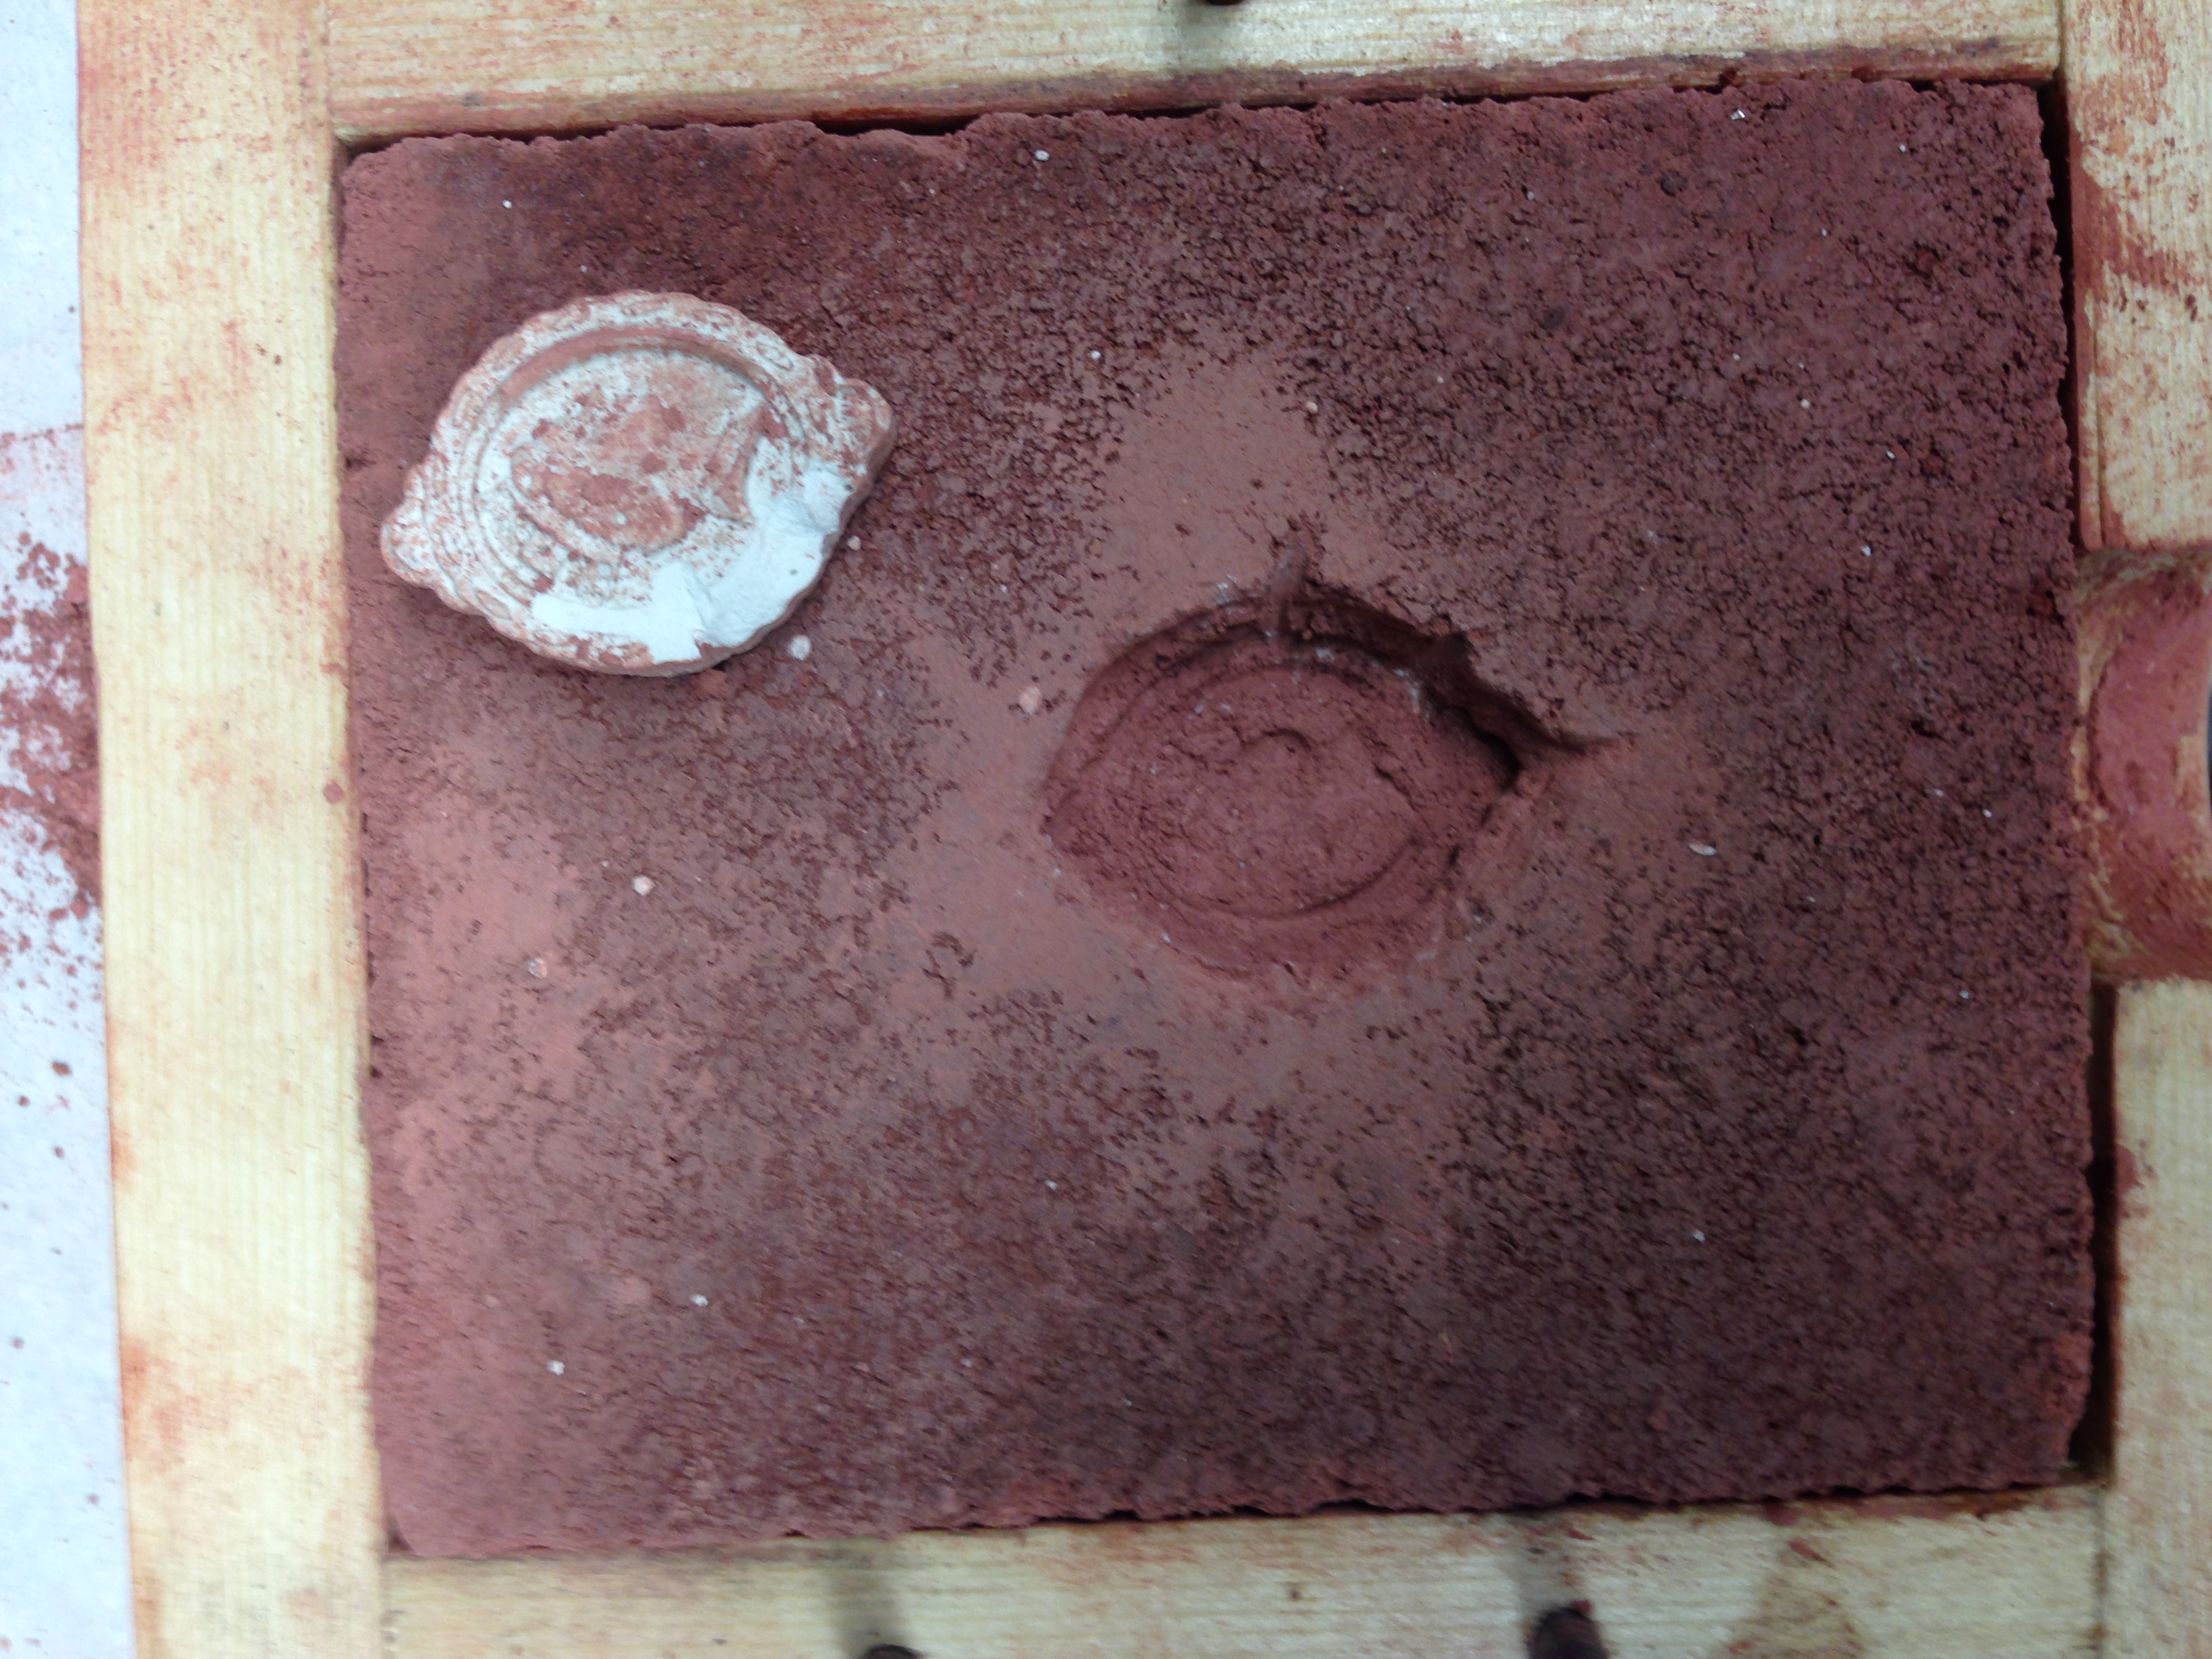 |
| Elm root infusion; impression |
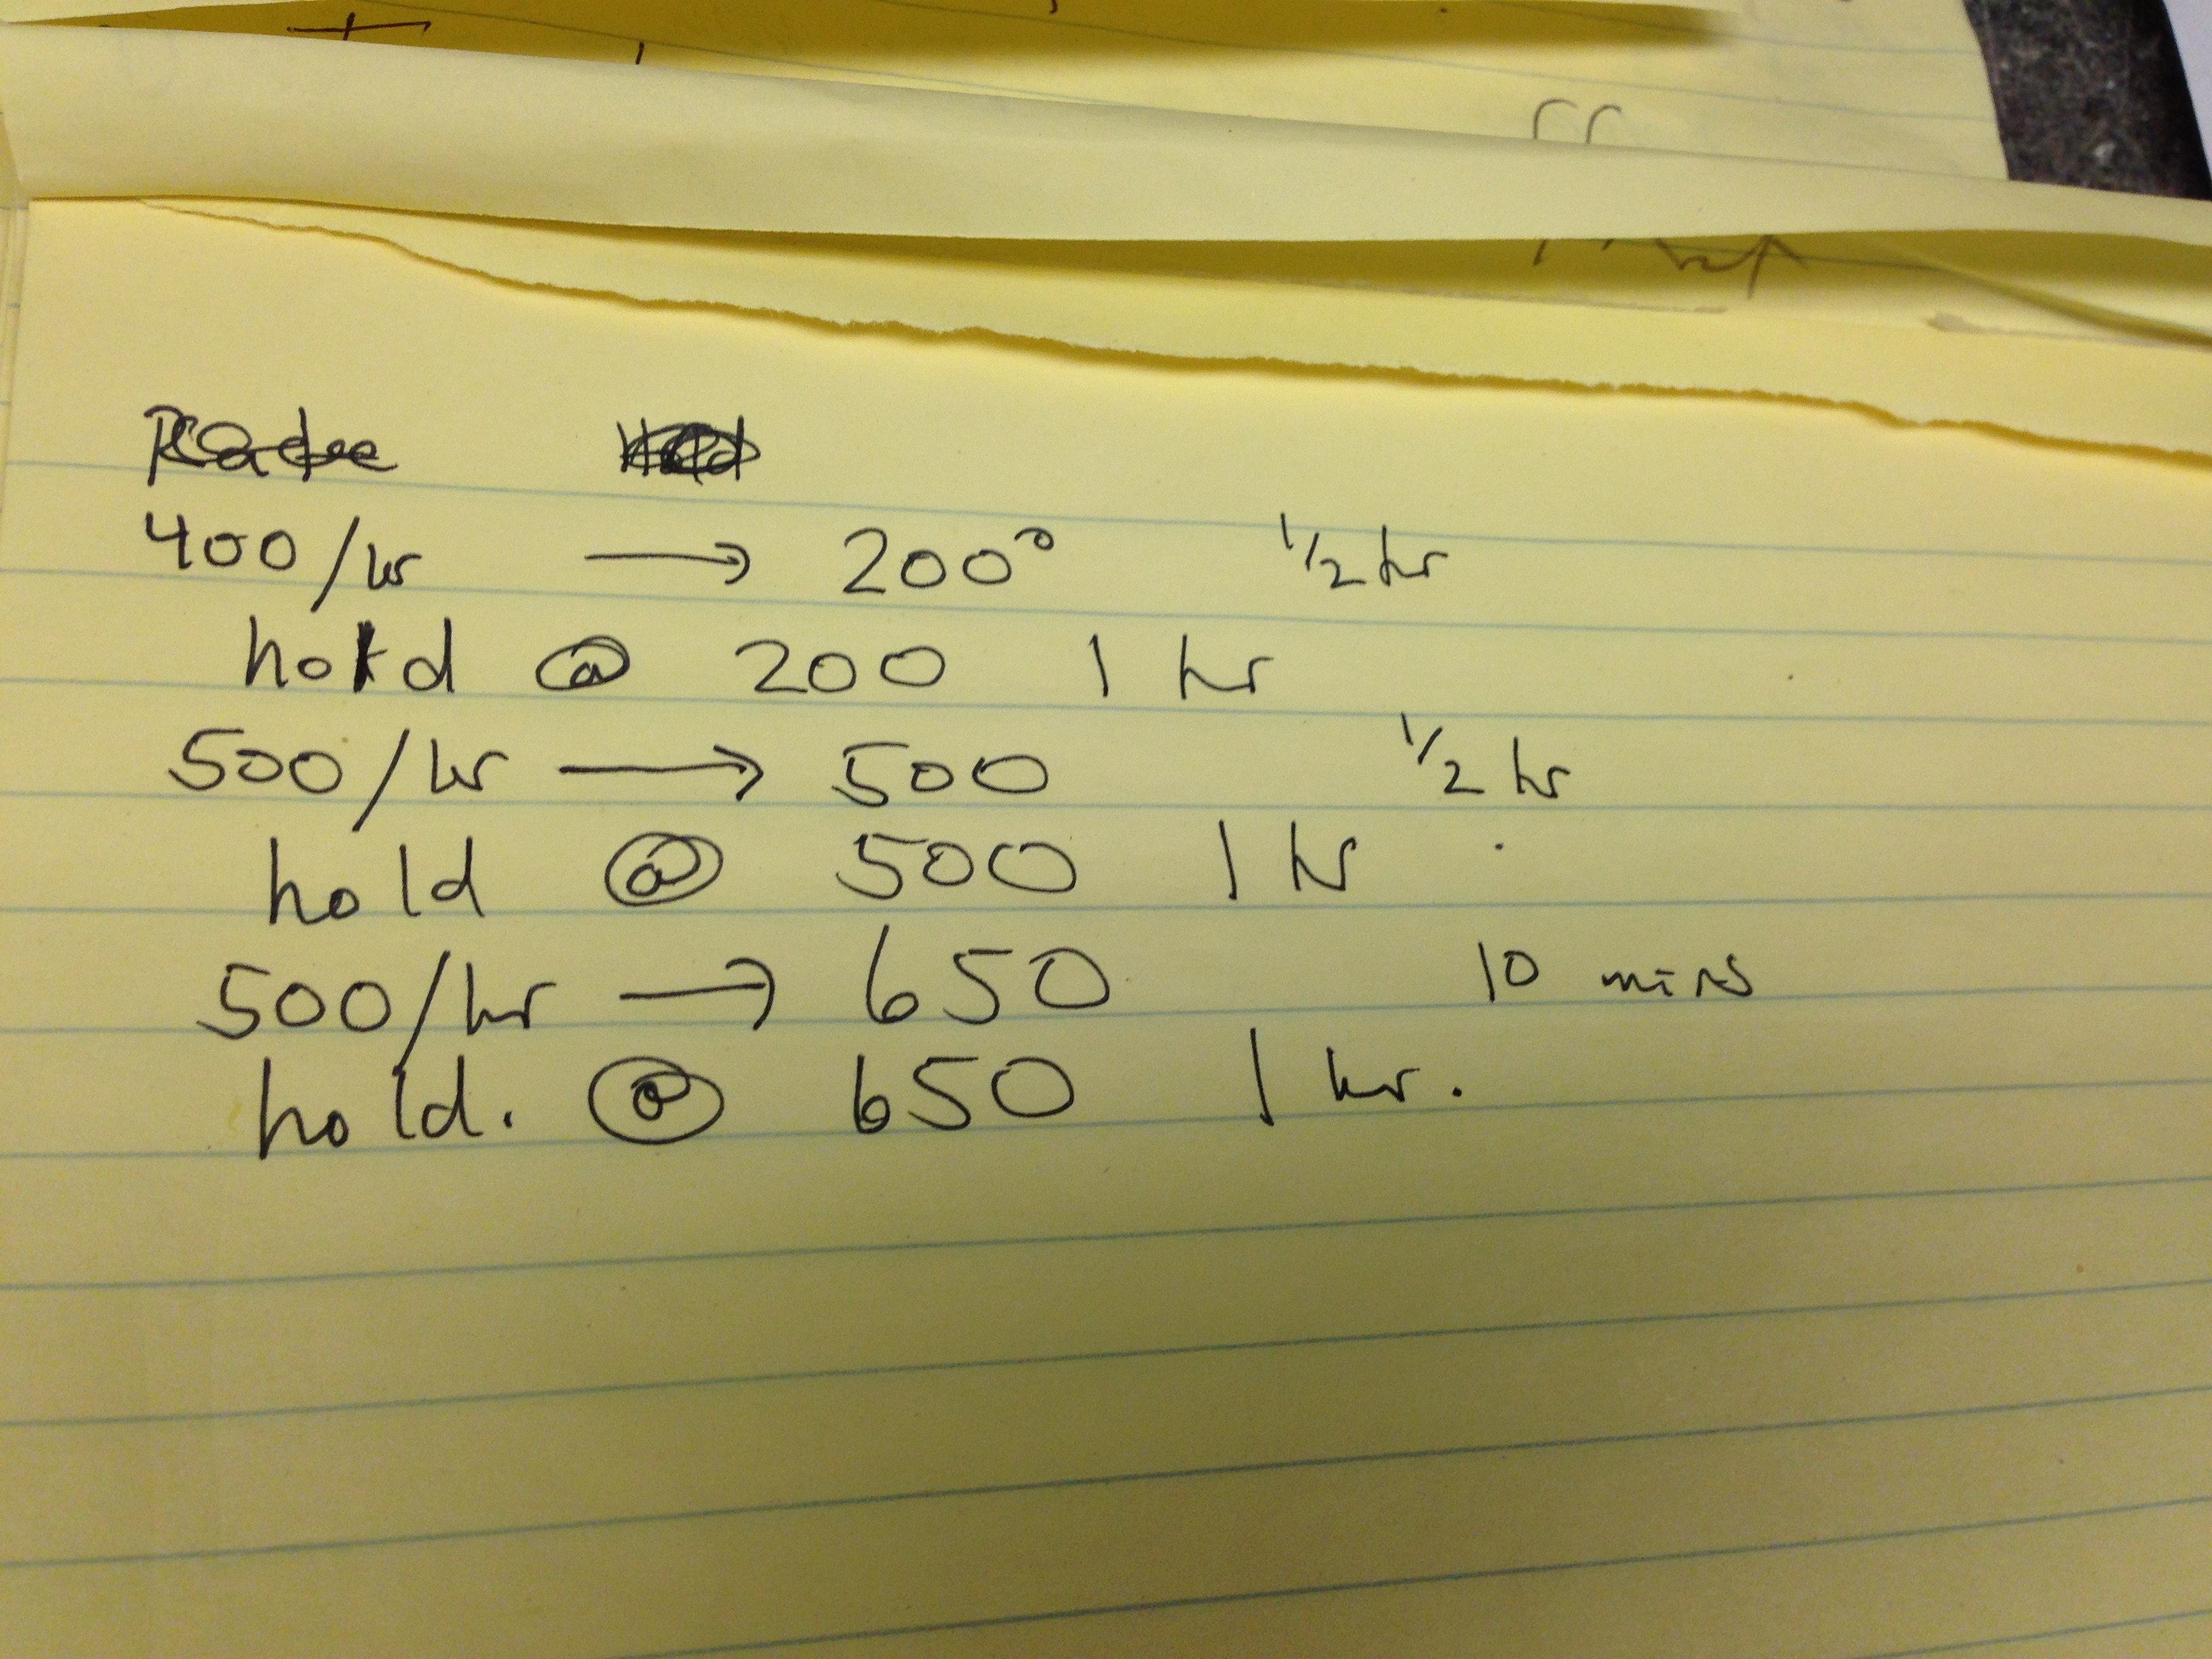 |
| Kiln plan for 12/2 |
December 5: Successful calcination, tin pour, oyster experiments
NAME: Emogene Cataldo & Julianna ViscoDATE AND TIME: 12/2/14 (updated 12/3/14)
LOCATION: Columbia Lab
SUBJECT: dried sand molds
Successful oyster calcination
After 9 hours in kiln (add Pamela's kiln data), the oysters were successfully calcinated.They were white, ashy, and talcum-powder-esque. We ground them up for our experiments---they were very easy to grind into a fine powder.
Oyster shell wine emulsion
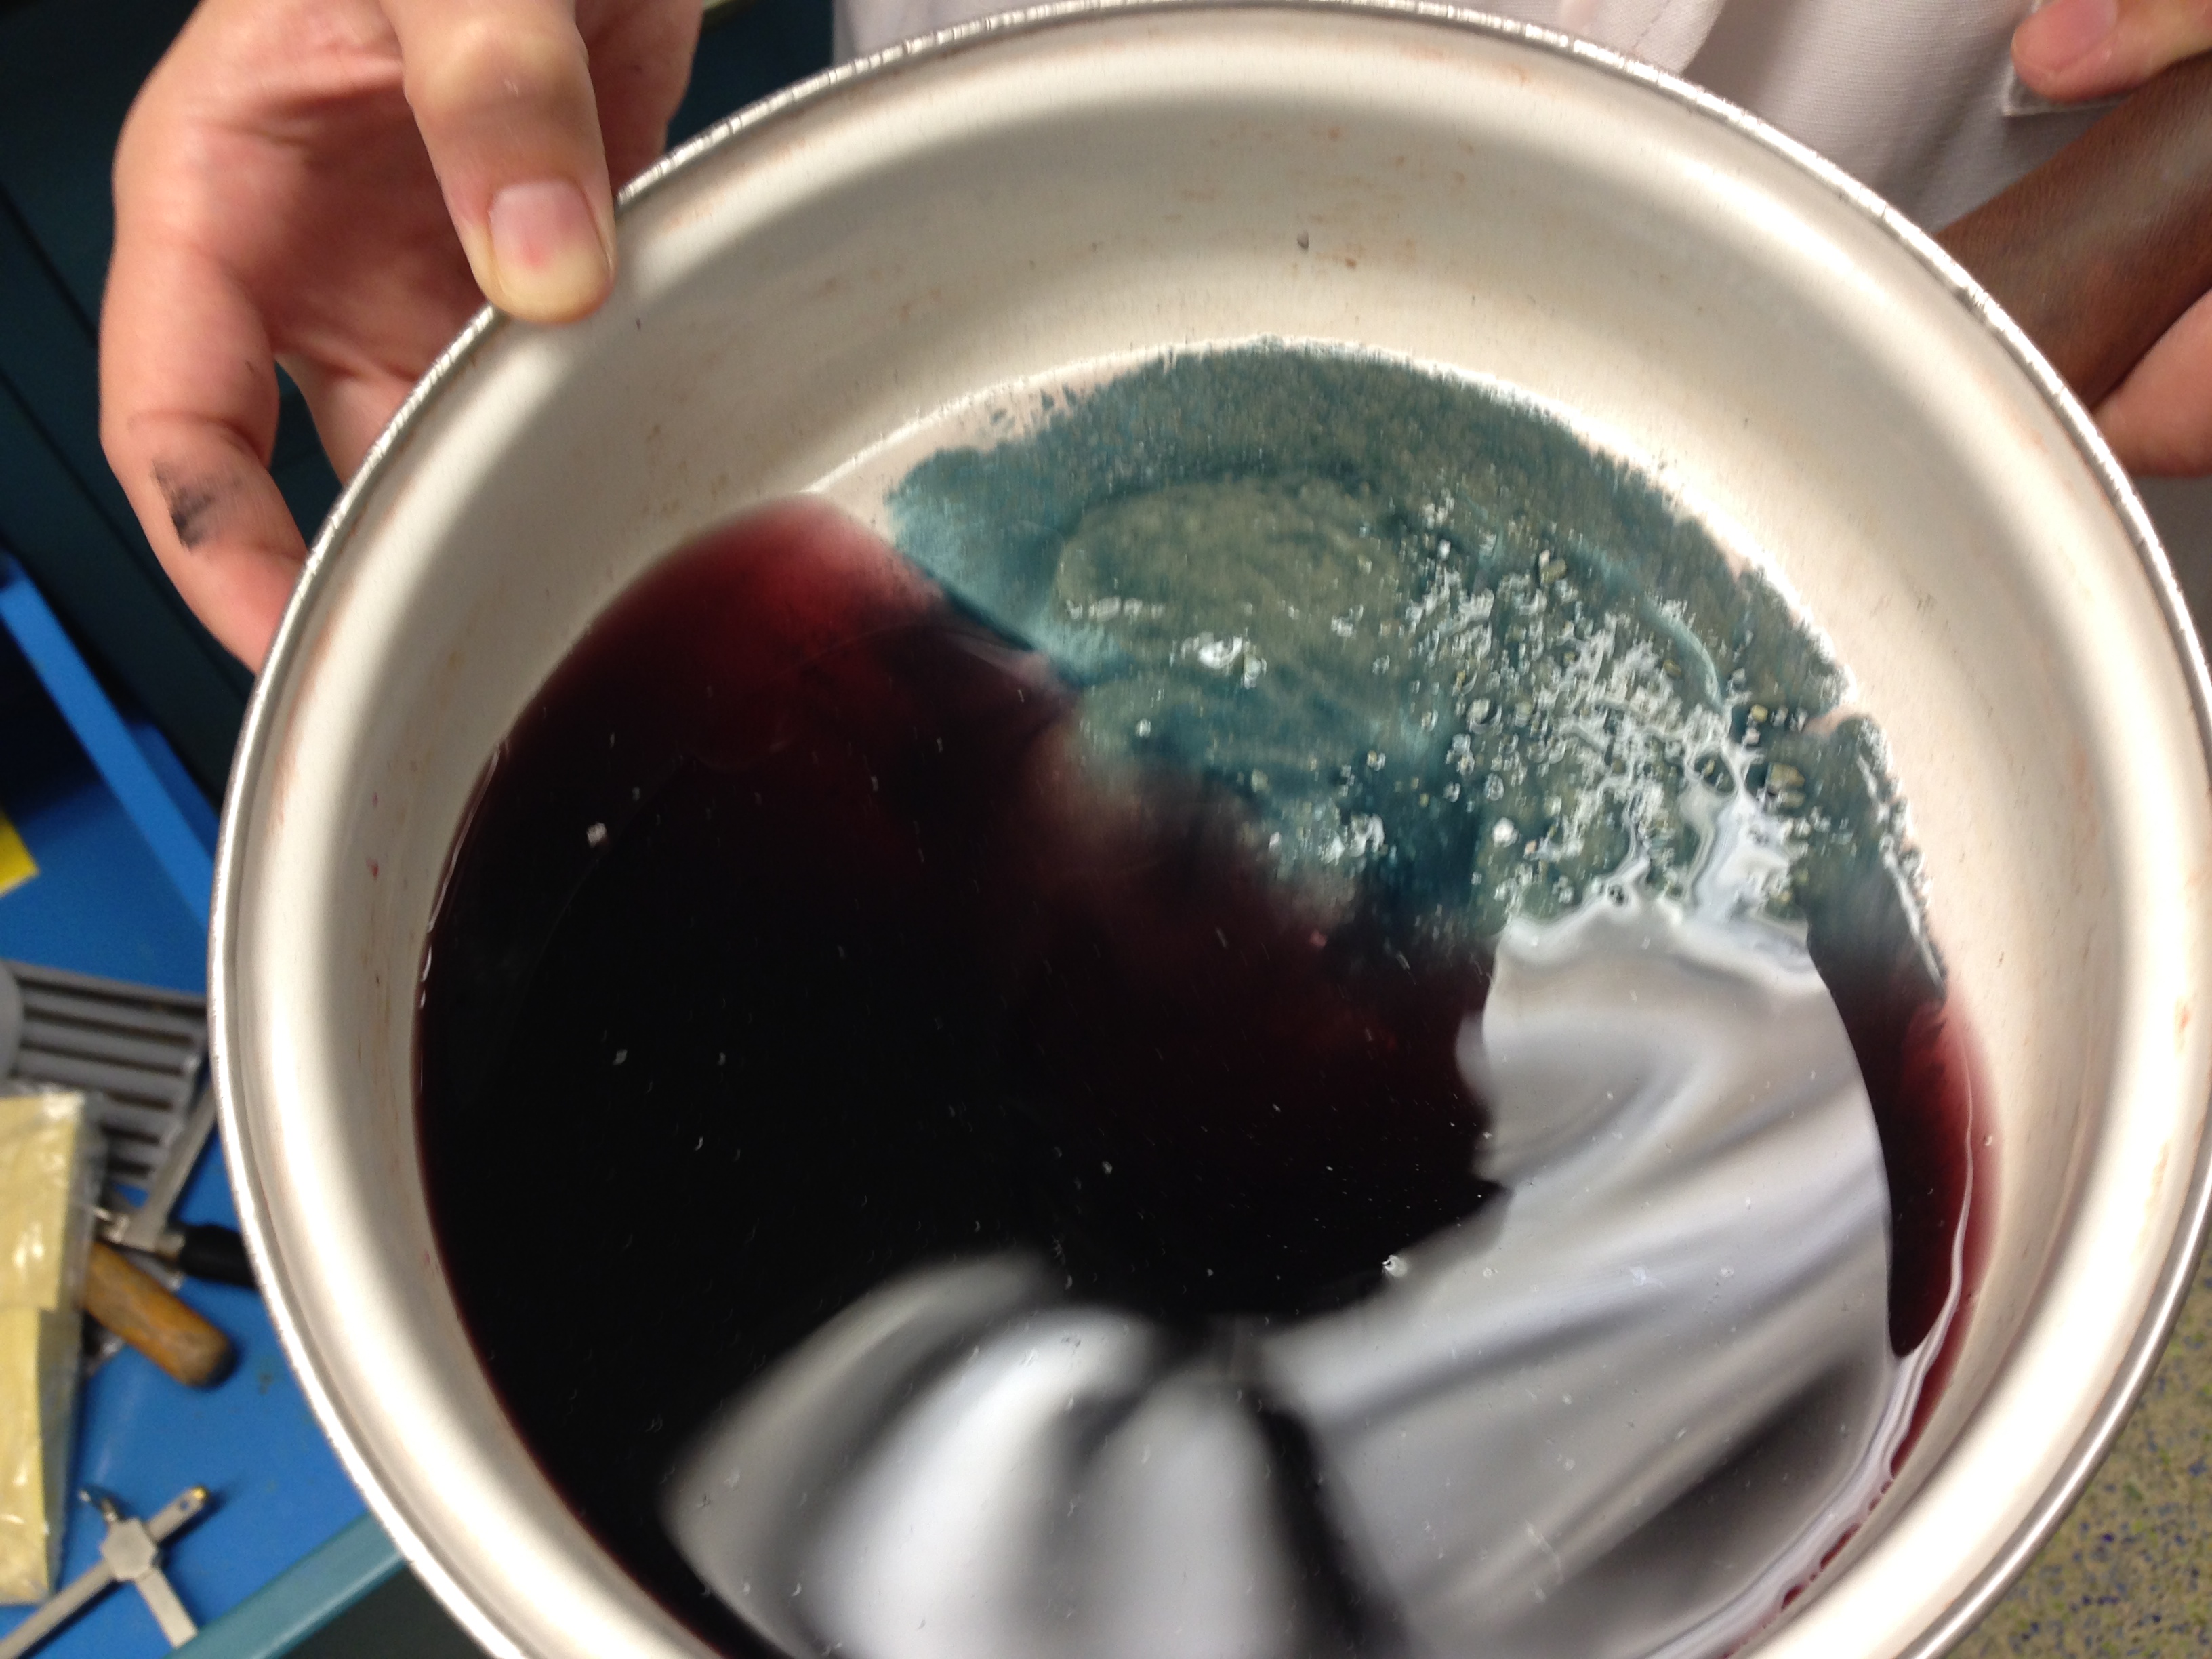
On the hot plate, we boiled two teaspoons of calcined oyster shells with 1 cup of Trader Joe's cabernet sauvignon. The powder upon contact with the wine immediately turned a teal green, then became briefly a clear emerald green, which then transitioned into a duller olive green (like pond water). We poured the mixture into an airtight glass container. After a few minutes, the mixture separated into a watery brown liquid on top and a muddy green mixture on the bottom. The green color, we think, was due to an oxidation reaction.Oyster shell molding
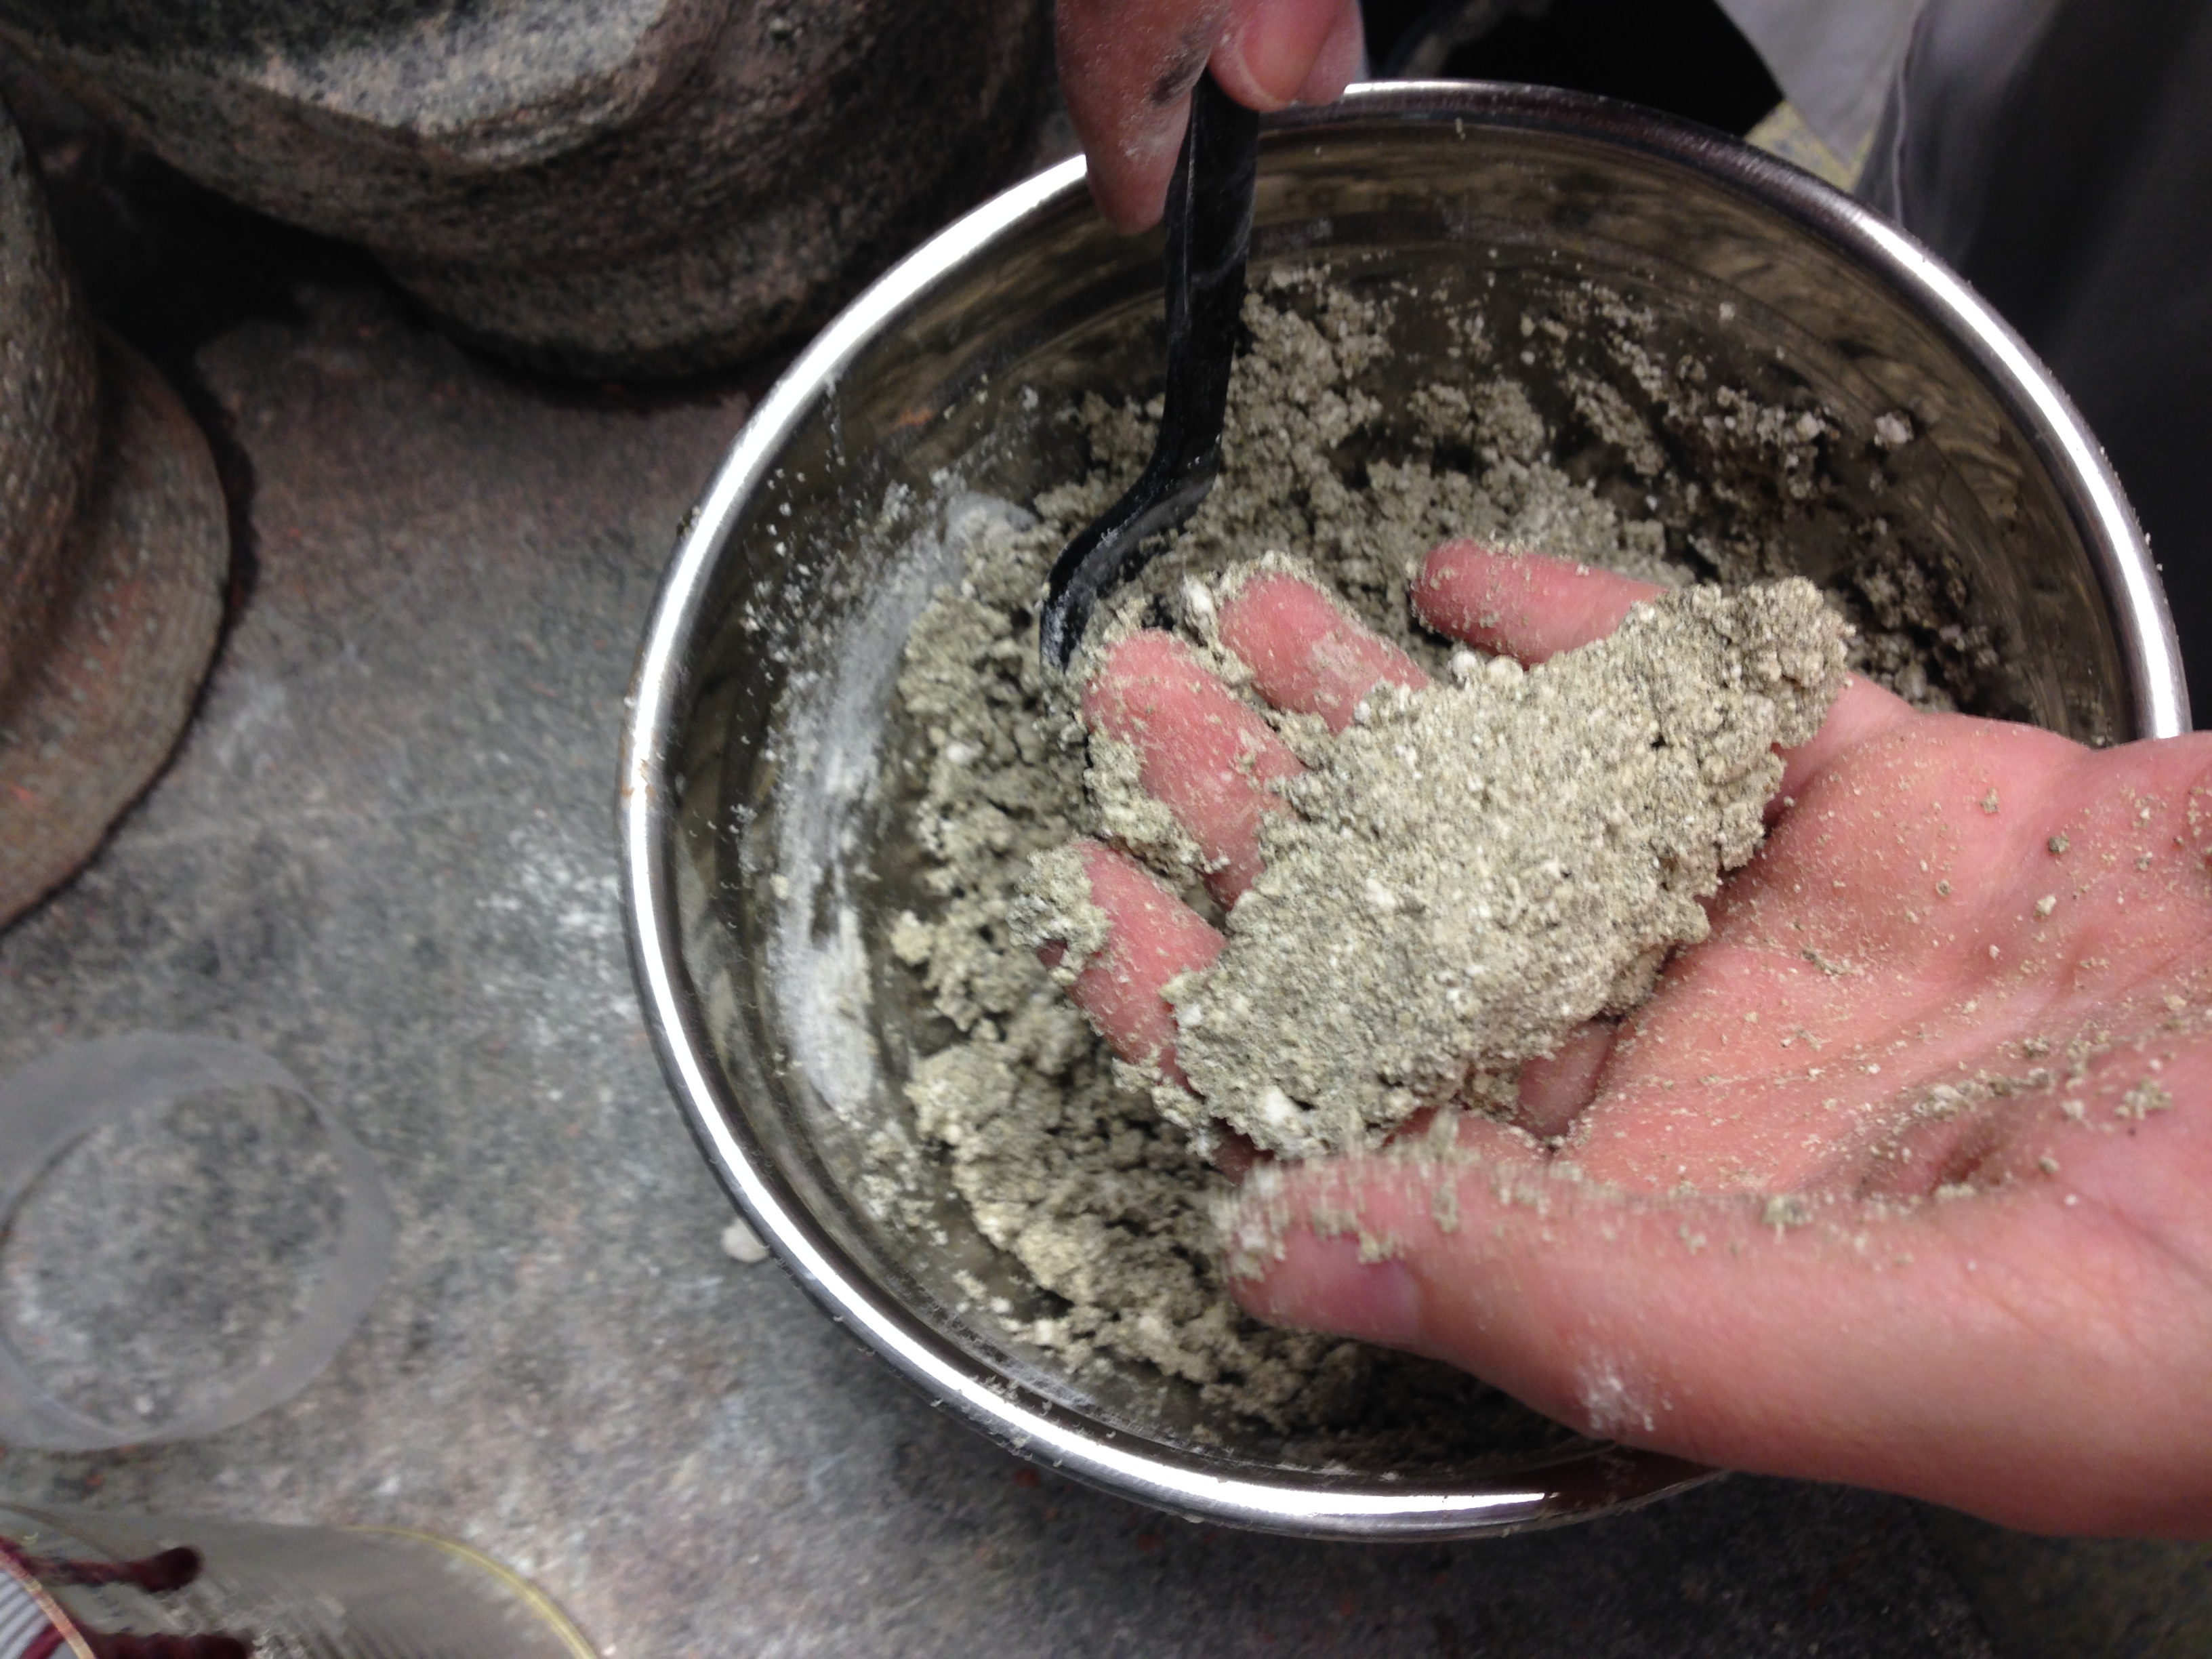
To make our molds with the oyster shells, we first used the egg whites of two eggs as a binder (whipped). This did not seem to moisten the oyster shell "sand" sufficiently. It seemed to absorb the moisture really quickly---it wouldn't "clump" enough to to be a useful packed mold material (we were relying on what we had learned from Tonny re: sand casting and moisture of molding materials). We were out of eggs in the lab, so we decided (in the spirit of the manuscript) to use some of the remaining elm root emulsion we had on hand. We kept adding this until the mixture would "clump", but then the mixture had the qualities of being wet and dry at the same time; the calcined oyster shells seemed "dry", but when squeezed, water would come out. It was like they were absorbing and repelling the water at the same time.We made our molds in the cut out plastic ring of a disposable cup because the quantity of oyster shells available was too small to fit into one of the regular box mold. We used the techniques we learned with Tonny, packing the sand around our plaster pattern. The extra oyster shell mix we put into a plastic cup and put that under a tin can.
Tin pour
Using the molds created with the "traditional" sand and the elm root infusion and egg whites, we poured molten tin into the impressions. We used a blow torch and a cast iron crucible under the fume hood. We cast in the elm root infusion once, and cast in the egg white mold twice. The results were spectacular.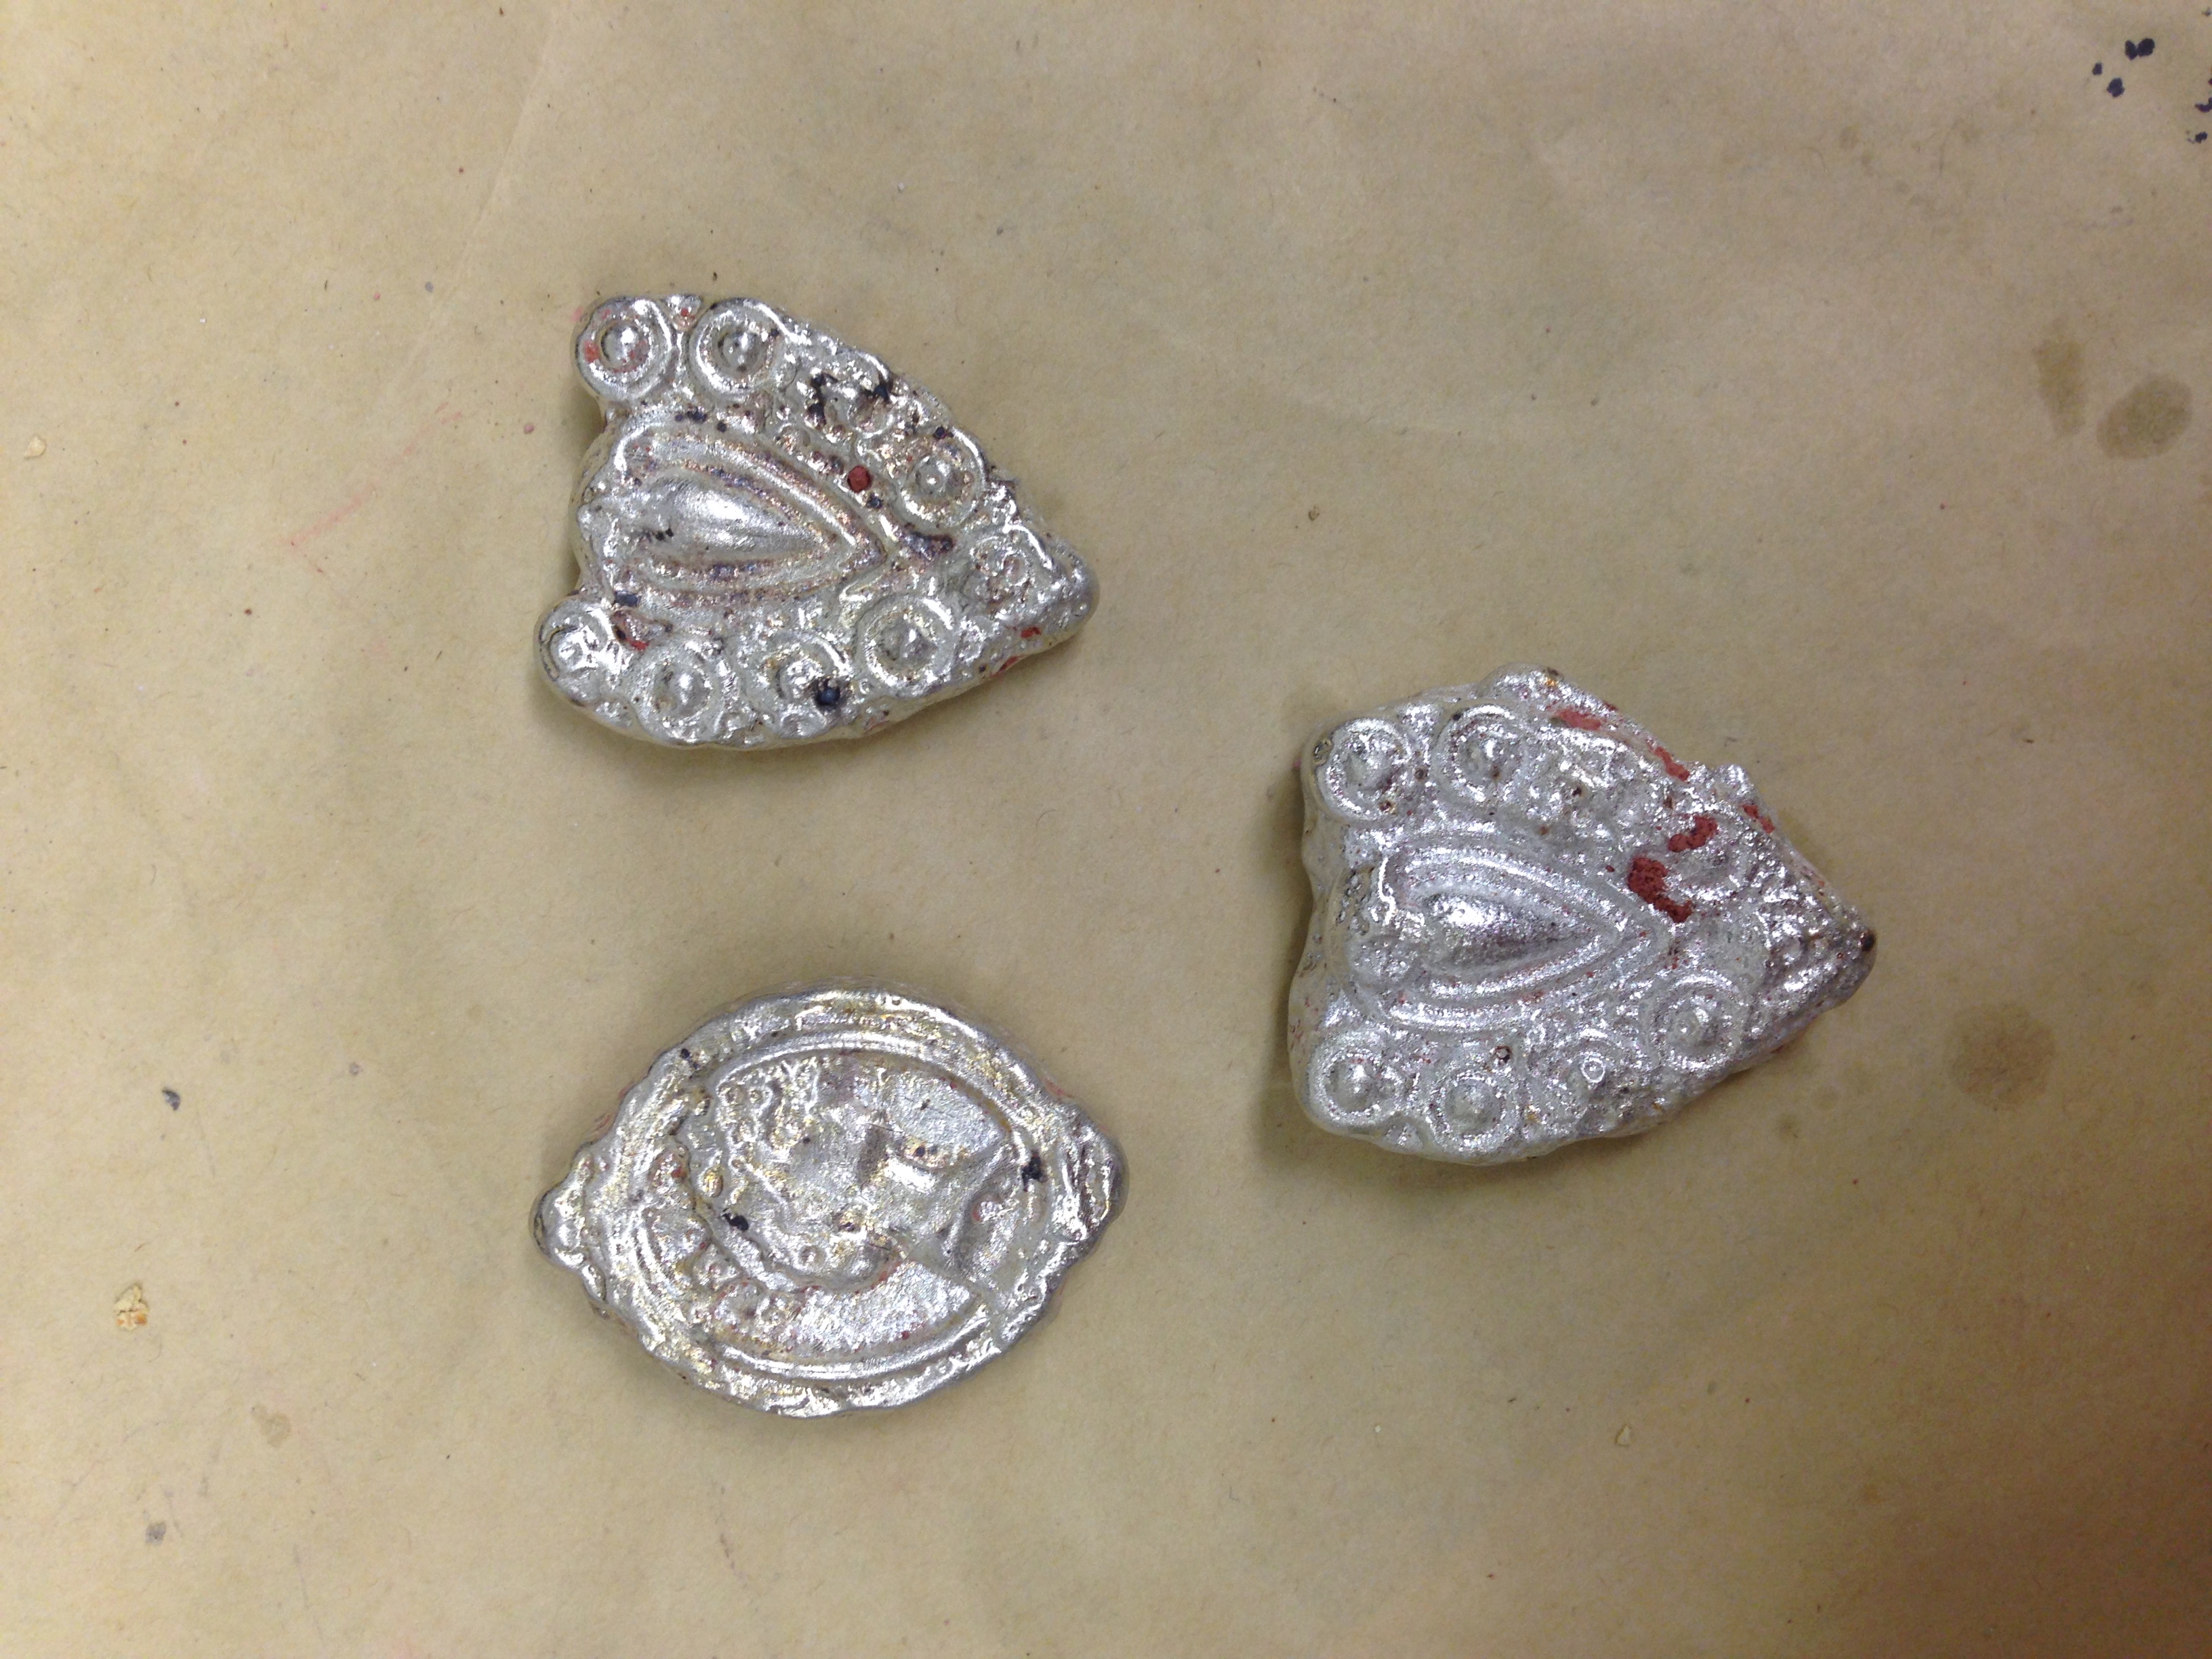
December 8 2014 Sandcasting with Oyster Shell Emulsion
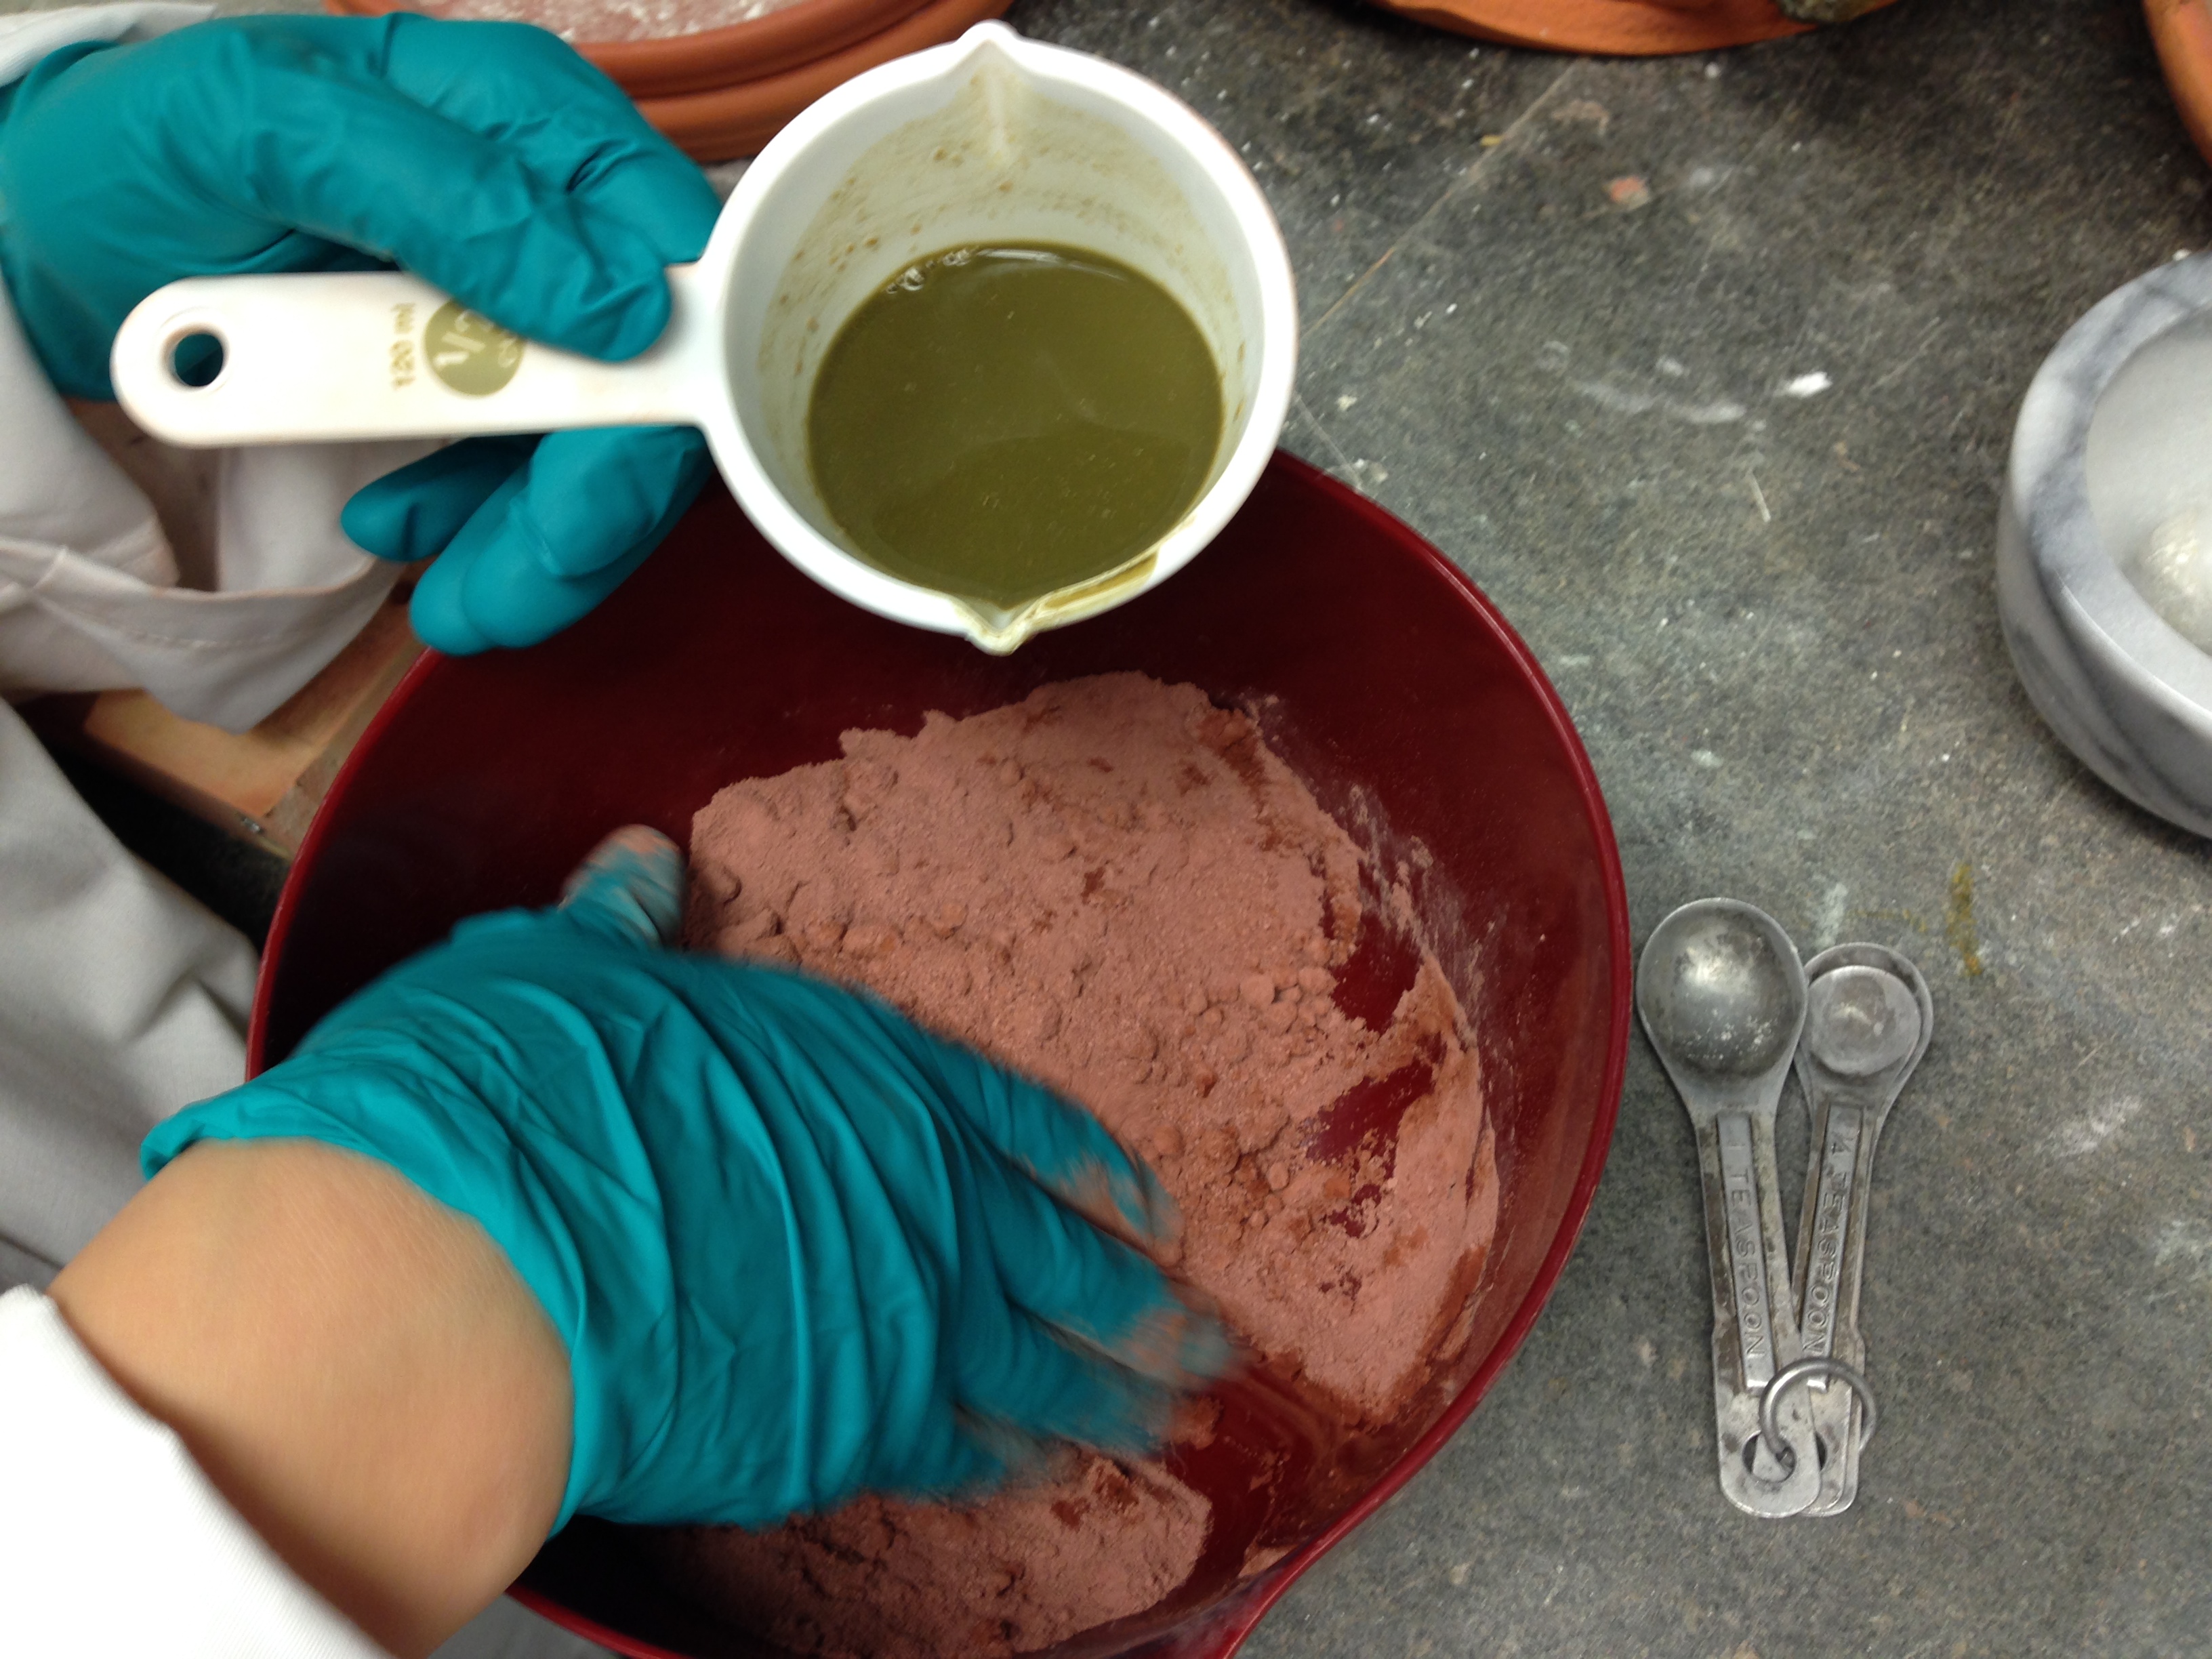
Observations: The calcined oyster infusion had separated and we re-mixed it with a spoon. After sifting sand in the style previously described we gradually added approximately 1/2 cup (total) of calcined oyster wine infusion to 2 cups of sifted sand.
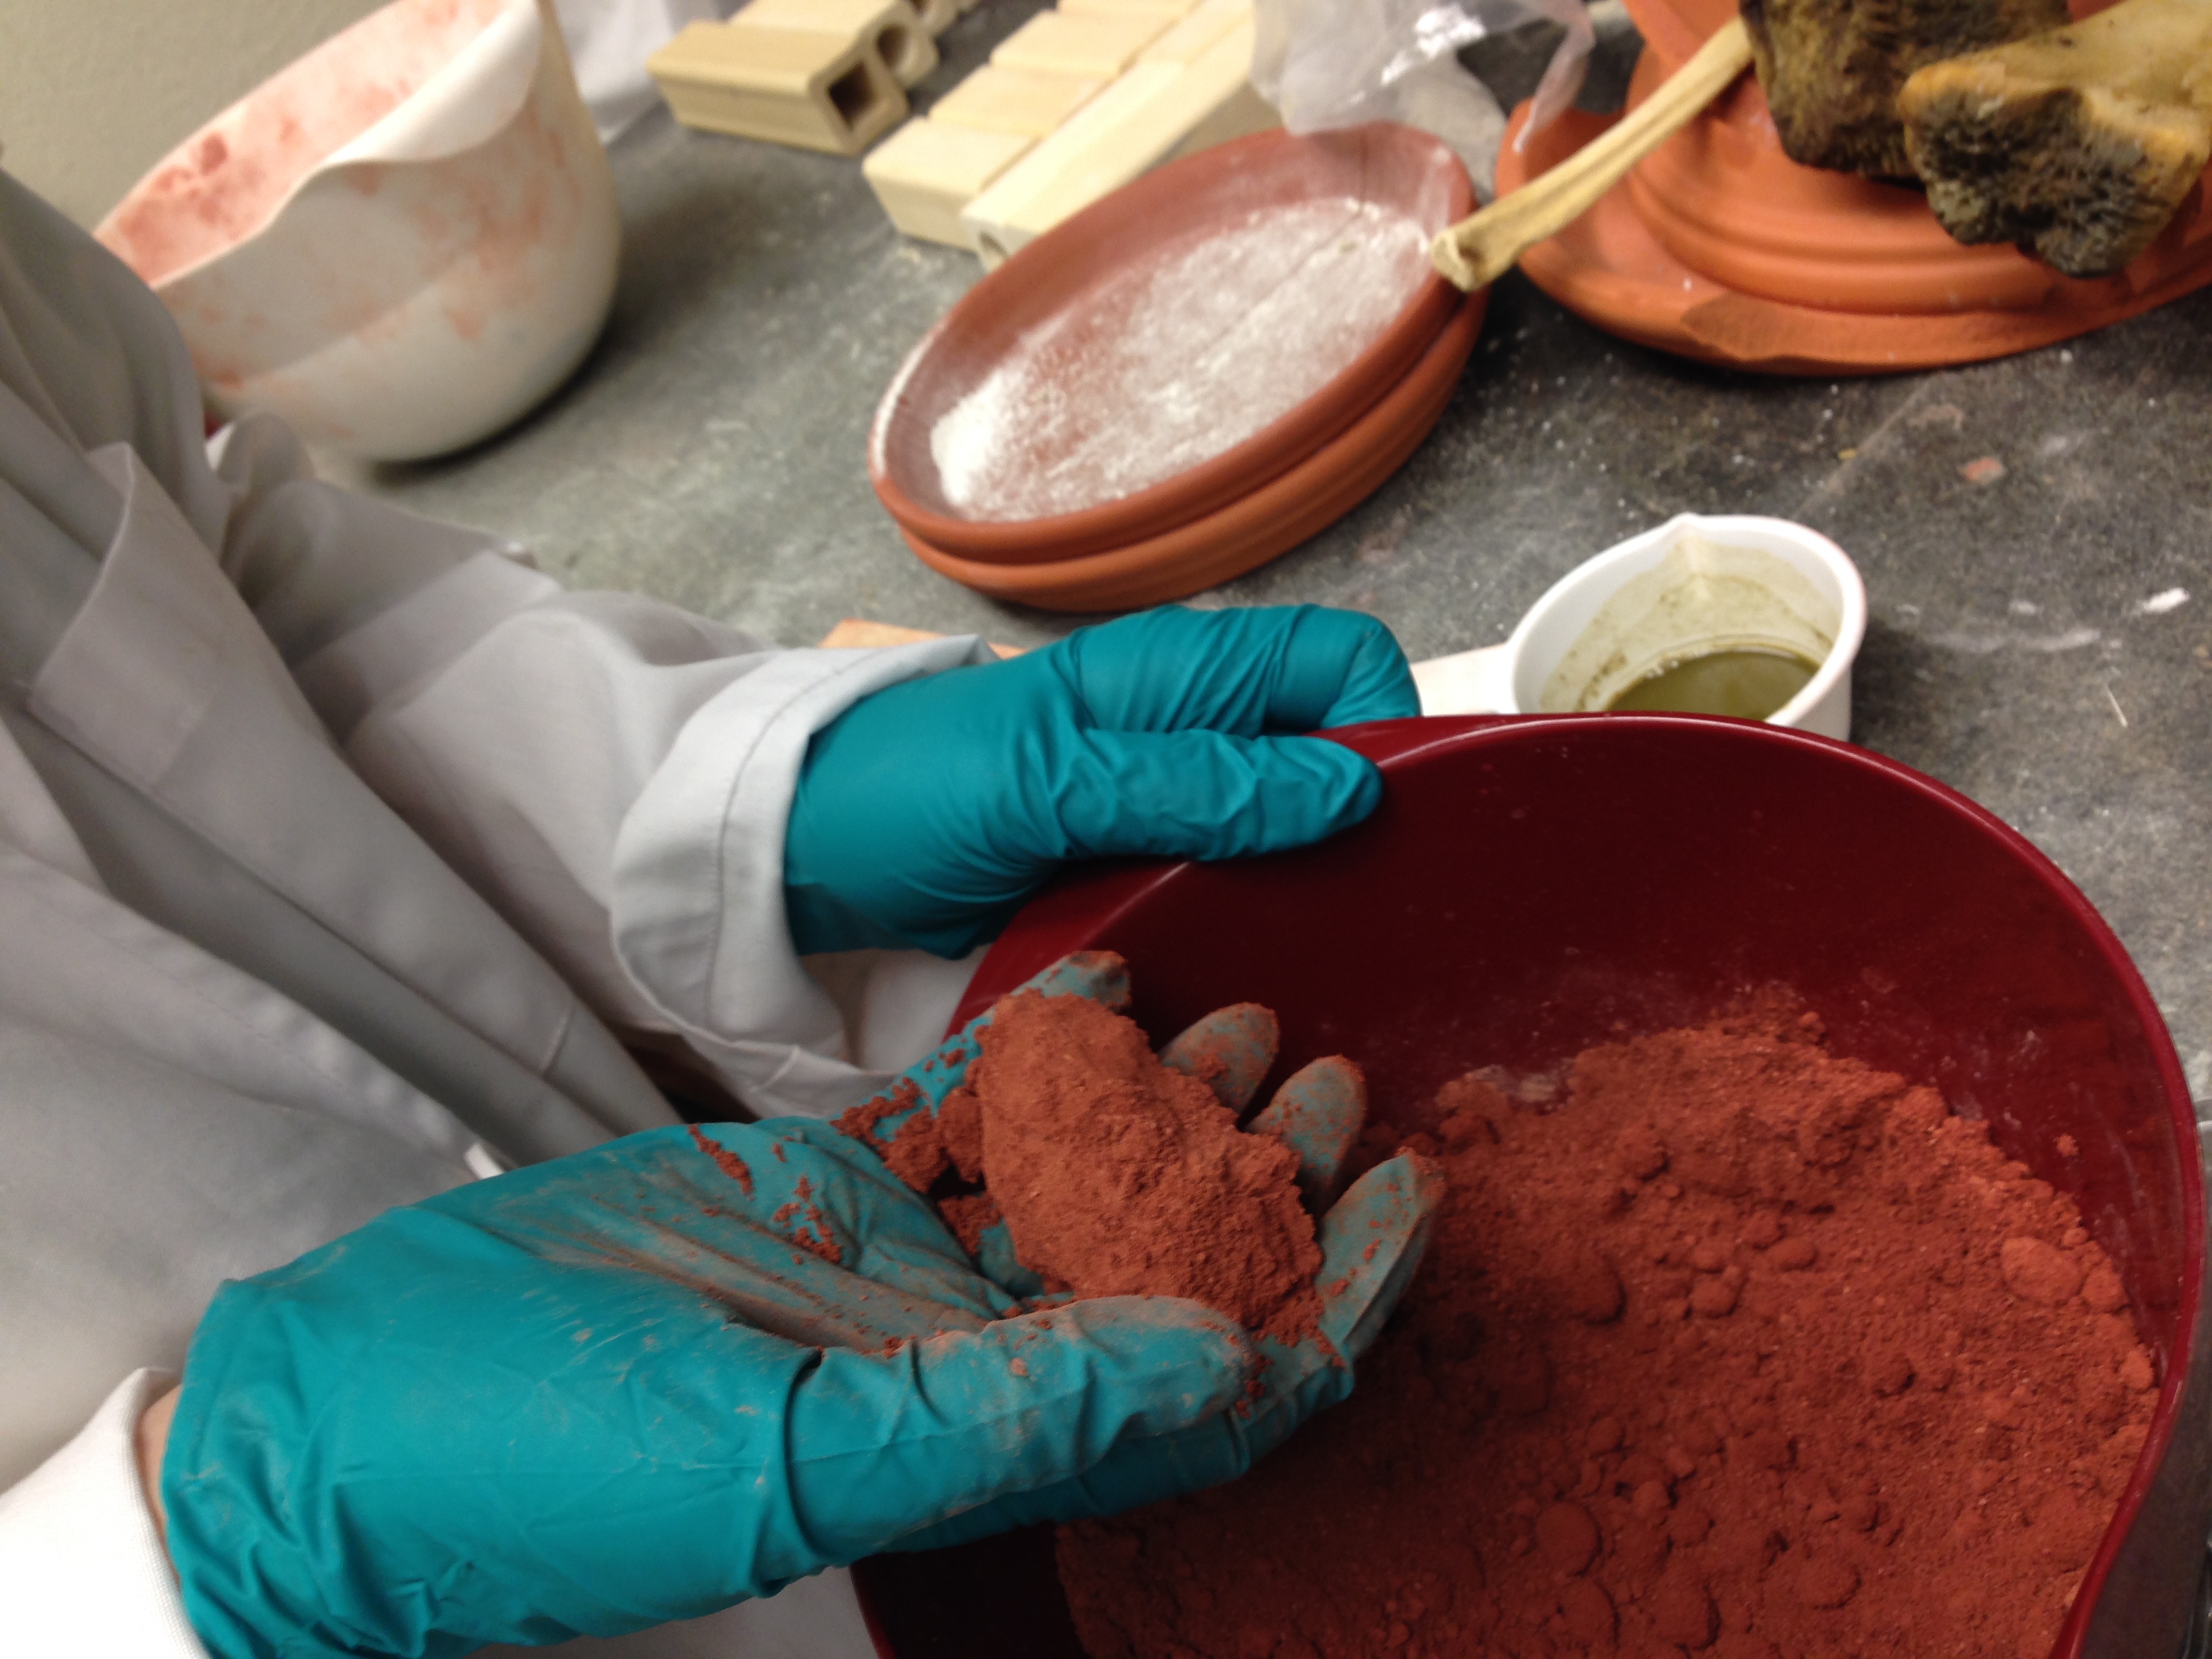
there was a very nice clumping texture achieved, not too wet, not too dry
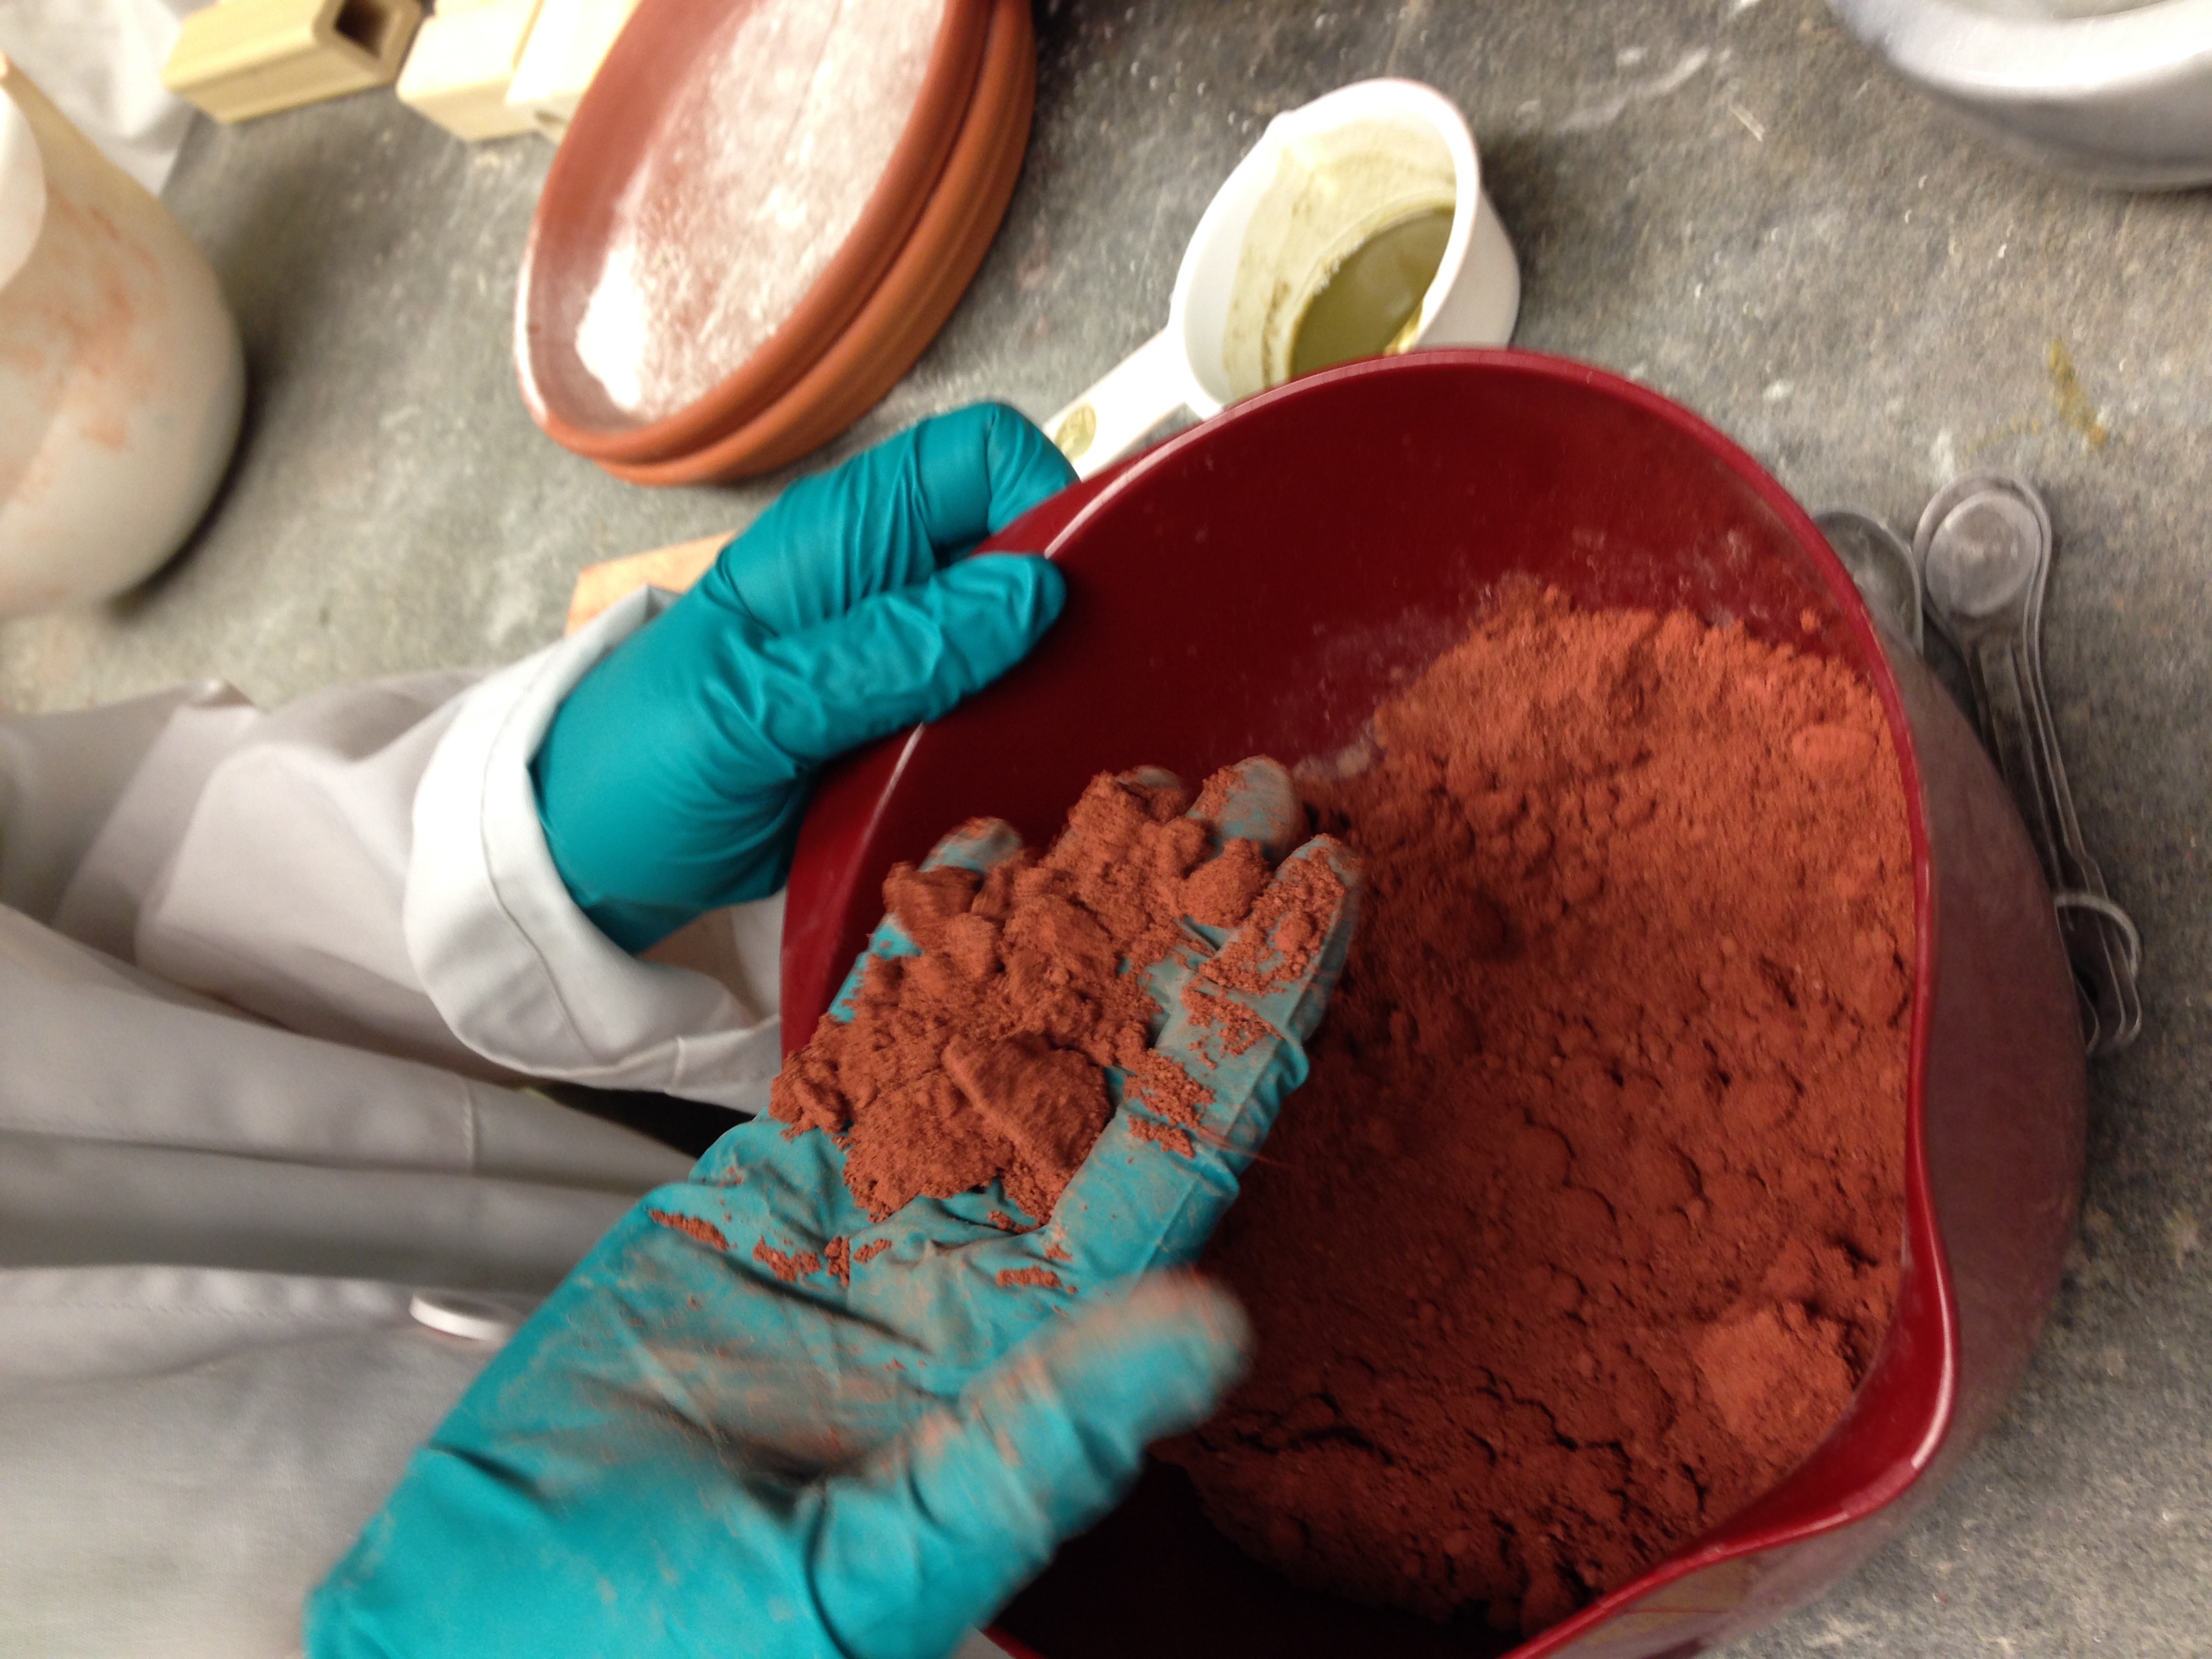
which crumbled (appropriately) upon manual manipulation
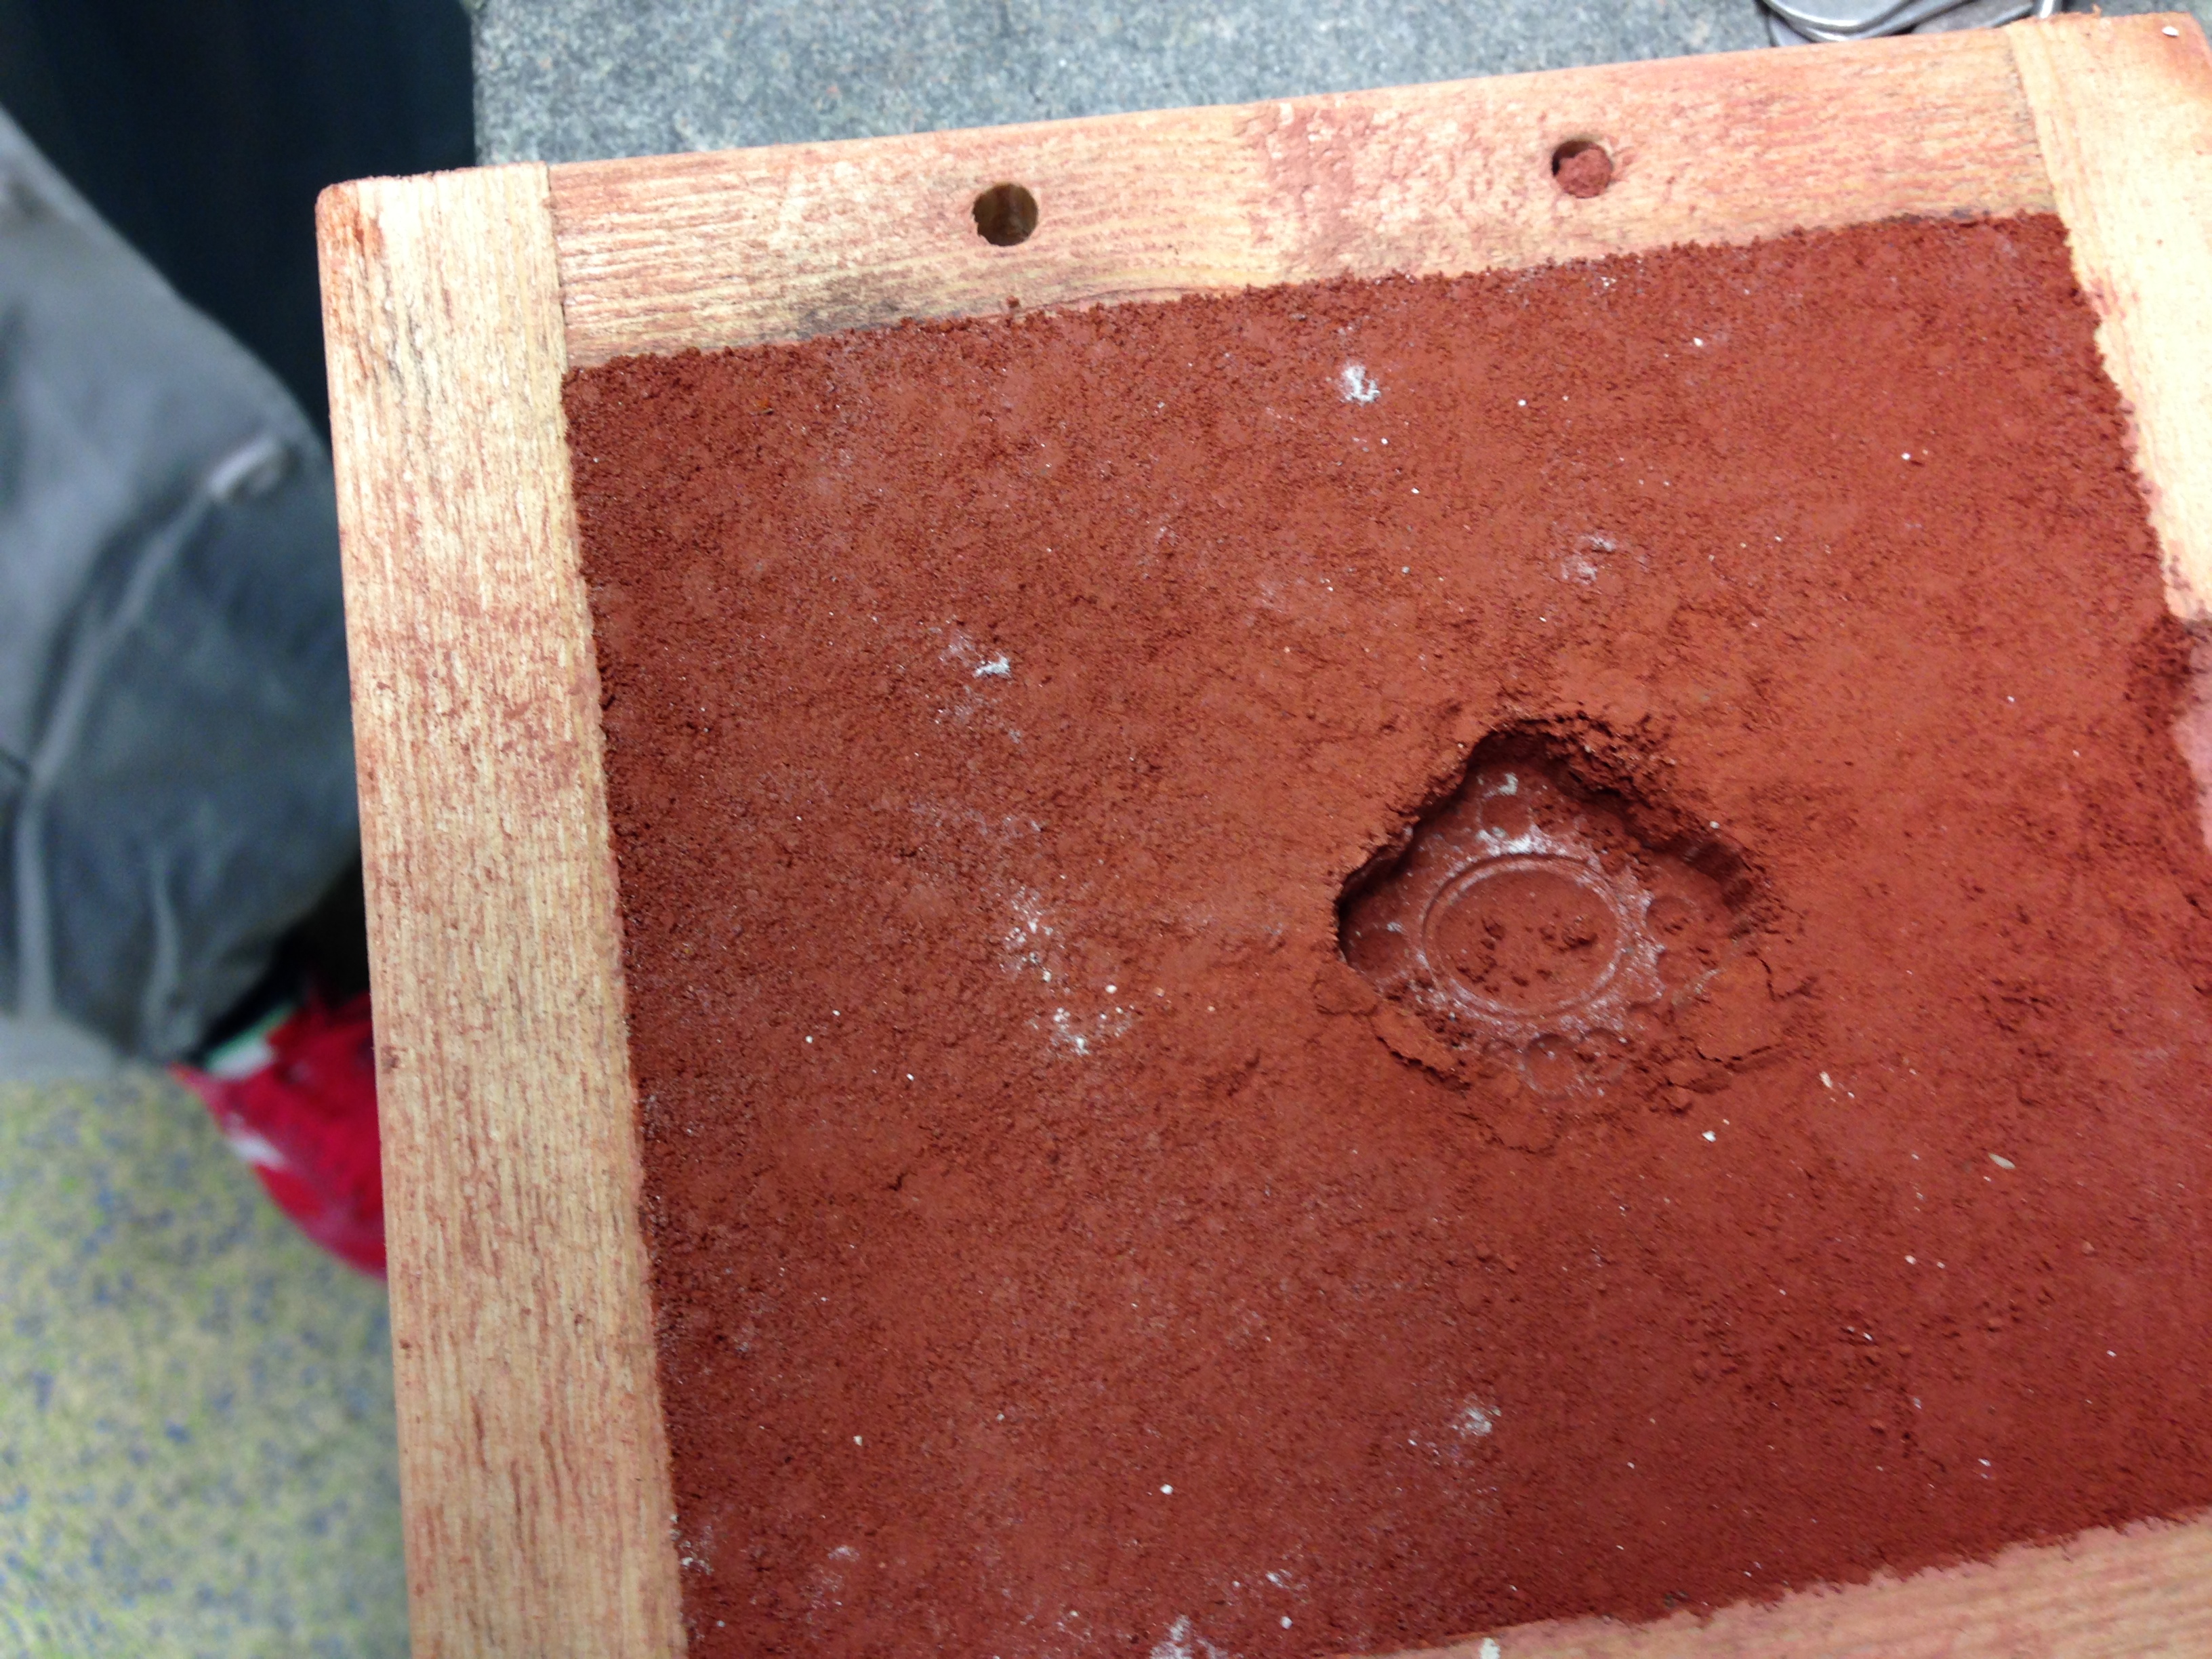
the resultant impression was extremely crisp and clear! there was some small breakage at the top (due to mold removal) but we removed the mold much more swiftly and easily this time using our learning from the last iteration. we did not let it dry we just popped it out right away.
